
To get a professional finish on kitchen cabinets, start with thorough prep: remove doors and hardware, sand surfaces to 180–220 grit, clean off grease, and fill imperfections. Prime with a bonding primer, then lightly sand the primer. Apply 2–3 thin coats of your chosen paint, using steady, even strokes and feathering edges to minimize ridges. Between coats, lightly sand for smoothness and let each coat dry fully. Finish with a durable topcoat and keep the area controlled—more details await.
What to Know Before Painting Kitchen Cabinets
Before you pick colors or start tearing cabinets apart, understand that painting kitchen cabinets is a multi-step project with long-lasting results. You’ll set a foundation by evaluating cabinet styles and current finishes, not just color choice.
Inspect doors, hardware, and box alignment for preparatory work, and identify any moisture or wear issues you must fix first. Confirm the room’s lighting and traffic patterns to prevent color surprises later.
Consider color trends, but prioritize timelessness that fits your space and sense of belonging. Plan a realistic timeline, gather tools, and practice proper surface preparation.
This approach keeps you focused, minimizes rework, and ensures a professional-looking outcome. Remember, intentional choices in style and finish determine long-term satisfaction.
How to Choose Kitchen Cabinet Paint and Finish
Choosing the right paint and finish for your kitchen cabinets starts with evaluating the cabinet material and existing surface. You’ll select a base that adheres well and resists moisture and heat.
For wood, consider a solid color for classic longevity or a tinted glaze to add depth. For laminates, pick a durable acrylic-latex or oil-based enamel with a strong bonding primer.
Your color schemes should reflect light your room needs, enhancing space and mood without overpowering architectural details.
Finish textures matter: a satin or semi-gloss provides wipeable surfaces and a modern feel, while a matte offers warmth with subtler reflections.
Test swatches in your kitchen’s lighting to confirm both coverage and cohesion with hardware and countertops.
Choose steadily, then apply with confidence.
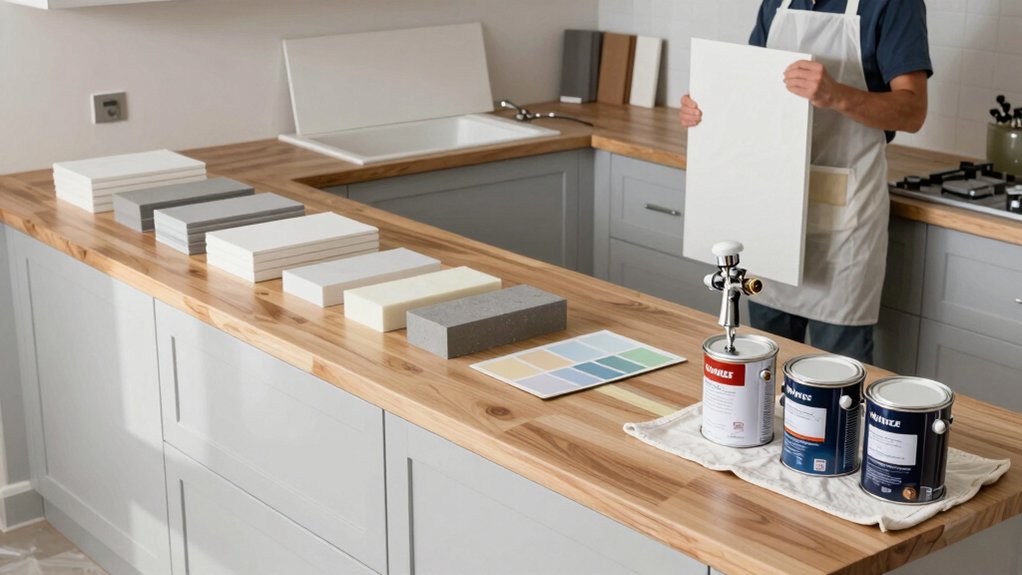
Tools, Safety Gear, and Materials for Cabinet Painting
To paint cabinets effectively, gather a focused set of tools, safety gear, and materials, then organize them for smooth workflow. You’ll want high-quality brushes, a compatible roller, a sanding block, microfiber cloths, painter’s tape, a sharp utility knife, caulk, and a reliable finish roller cover.
Add a respirator or mask, eye protection, nitrile gloves, and a dust mask for ventilation precision. Choose primers, paints, and a compatible topcoat suited to your cabinet material, with a proven cure time. Maintain brushes with clean water or solvent as appropriate.
Prepare your workstation with drop cloths and proper lighting. Brush techniques matter; test strokes on scrap panels, and plan color selection to ensure uniform coverage and depth. This setup supports confident, belonging-focused progress.
How to Remove Doors, Drawers, and Hardware Safely
First, gather the right tools and gloves, and plan how you’ll protect and label each part.
Next, detach doors and drawers carefully, noting hinge placement and keeping screws with their corresponding parts.
Finally, label and store all removed pieces and hardware so you can reassemble cleanly later.
Tools And Safety
Have you ever wondered where to start before you paint cabinets? Before you lift a brush, gather tools in a planable order: screwdrivers, a magnetic tray, painter’s tape, masking paper, a utility knife, and drop cloths.
Safely detach doors, drawers, and hardware only as far as your prior topic allowed, leaving the body intact. Inspect hinges and mounts for wear, replace if needed, and label parts to reassemble correctly.
Wear eye protection and gloves; keep a tidy work zone to avoid accidents. Choose brush techniques that suit your finish, and test a small area to confirm brush quality and paint sheen.
Maintain ventilation, follow manufacturer instructions, and clean brushes promptly to preserve their performance for consistent results.
Detach Doors Properly
Carefully detach the doors first to protect the panels and hinges. You’ll protect the cabinet face by supporting weight as you lift. Use a soft cloth under each door to prevent scratches, then unscrew hinges with the proper bit while keeping door alignment in mind.
Label each hinge and its match to the frame to avoid later confusion, but don’t overdo the labeling. Remove drawers separately, if needed, and set them aside in a labeled space.
Inspect hinges for wear and replace if loose before reattachment. When you rehang, start with upper hinges to balance weight, then adjust for equal door gaps.
Verify that each door sits plumb and flush, confirming hinge removal was precise and door alignment is true.
Label And Store Parts
Label and store each removed part in a labeled, dedicated space. You’ll prevent mixups by creating a simple labeling system for doors, drawers, hinges, and knobs. Use project-specific tags on bins or bags, noting part type, location, and orientation. Photograph each piece before removal, then check items against a parts list as you detach them.
Keep screws, washers, and mounting plates separate but grouped with their corresponding door or drawer. When you remove hinges, place screws in a labeled envelope alongside the hinge leaves. Store hardware in a secure, moisture-free area to avoid rust.
How to Prep Cabinet Doors and Frames for Painting
First, you’ll sand for adhesion to create a bite for the paint. Then, you’ll clean the doors and frames thoroughly to remove dust, grease, and residue.
Finally, you’ll prime the surface to guarantee even color and lasting adhesion.
Sanding For Adhesion
To make certain the paint bonds properly, start by sanding the cabinet doors and frames to create a smooth, slightly rough surface. Use a fine-grit paper (180–220) for a uniform tooth without gouges. Wipe away dust, then recheck for flatness and consistency.
Sand with a light touch, focusing on edges and panels to prevent chalky, inconsistent adhesion. If you encounter glossy finishes, apply a quick scuff with a non-slip pad or 150 grit, then move back to finer paper. This stage sets the texture options you’ll rely on for even coating.
Maintain control across all surfaces to ensure color coordination remains true after priming. When you’re finished, proceed with a tack cloth and a careful, dust-free primer workflow.
Cleaning Prior to Paint
Before painting, start with a thorough cleaning to remove dirt, grease, and residue from cabinet doors and frames. You’ll perform cabinet cleaning to ensure a uniform surface and reliable paint adhesion. Use a mild degreasing solution or a dedicated cabinet cleaner, following product directions. Wipe with a damp cloth, then rinse with clean water to remove any residue. Dry thoroughly to prevent moisture from penetrating edges.
Inspect for stubborn grime and wipe again as needed, focusing on knobs, hinges, and crevices that trap buildup. This step is essential for paint preparation and lasting results. Avoid harsh solvents that can damage finishes.
Once clean and dry, you’re ready to proceed to the next phase with confidence, knowing your cabinets will reflect a professional, durable finish.
Priming Surface Preparation
With the cabinet surfaces clean and dry, you’re ready to prime. Priming surface preparation lays a solid foundation for long-lasting color and even finish. Start by inspecting for imperfections, caulk gaps, and tiny dents; address these before primer application to prevent telegraphed flaws.
Lightly sand glossy areas to a dull, uniform sheen, then remove dust with a tack cloth. Choose a compatible primer suited to your cabinet material—wood, plywood, or MDF—and apply evenly in smooth, overlapping strokes. Use long, deliberate passes to minimize lap marks.
Guarantee edges and undersides aren’t missed, then allow proper drying time before sanding lightly for surface smoothing. Wipe again, then proceed to color coats.
Proper priming minimizes staining bleed, enhances adhesion, and delivers a cohesive, professional finish you can feel proud of.
Step-by-Step Priming and Sanding for a Durable Finish
Choosing the right primer and a thorough sanding plan are essential for a durable finish on kitchen cabinets. You’ll establish a solid base with precise steps that reduce texture, bleed, and chipping, while fostering a sense of confidence and belonging in your craft.
Follow these core actions:
1) Primer application: select a bonding primer, apply evenly, and allow proper cure.
2) Sanding techniques: use fine-grit paper, light passes, and a tack cloth between coats.
3) Inspection and touch-ups: examine for nibs or lap marks, address immediately before final coat.
This approach keeps your project clean, efficient, and aligned with professional standards. You’ll finish with a smooth, durable surface that’s ready for paint and supports long-lasting, showroom-worthy cabinets.
How to Apply Paint for a Flawless, Trap-Free Surface
Once you’ve established a smooth, properly cured base, apply paint in controlled, even coats to achieve a flawless, trap-free surface. Maintain steady, continuous strokes and avoid overloading the brush to prevent drips. Use light, overlapping passes along grain lines for uniform coverage, then feather edges to minimize ridges.
Choose compatible brush techniques for doors, panels, and corners, switching to a smaller brush for tight areas with precision. Prioritize color matching across all cabinets by blending adjacent panels and testing on a sacrificial area before full application.
Allow each coat to dry fully and inspect under raking light for traps or sags, correcting immediately. Finish with clean, deliberate strokes, ensuring a crisp, cohesive look that reinforces your professional, belonging-ready kitchen transformation.
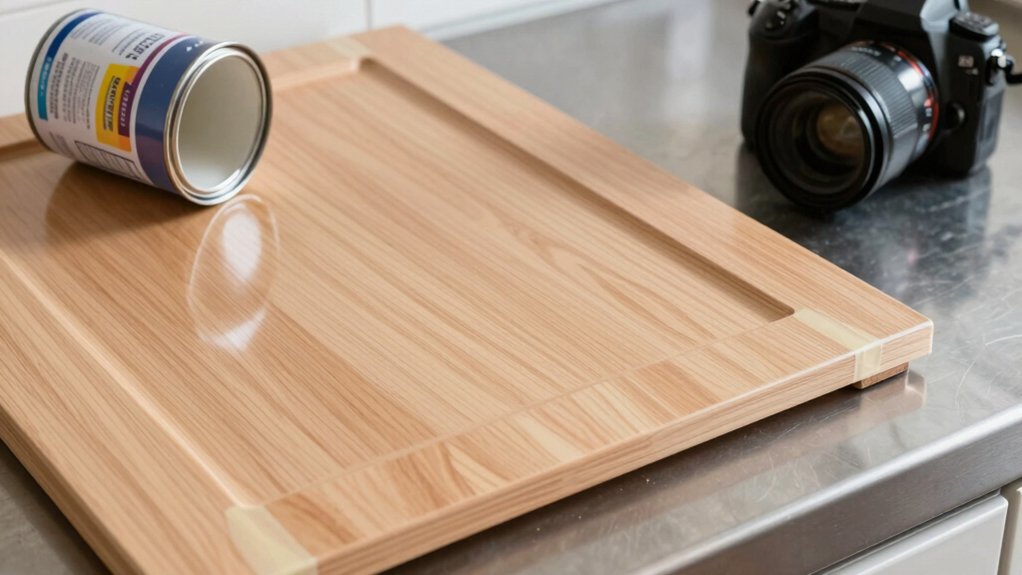
Topcoat Options and Application Tips for Longevity
What topcoat best protects your cabinet finish, and how do you apply it for lasting durability? Choose a compatible topcoat (polyurethane or polyacrylic) and apply thin, even coats for durability, clarity, and adhesion. For longevity, avoid over-brushing and maintain a steady pace to minimize marks. Glossy finishes reveal brush strokes, while Matte options hide them; select based on your preferred look and cleaning needs.
- Prepare the surface with light sanding and tack cloth, then apply a grain-matching, thin first coat.
- Allow proper drying, lightly sand between coats, and apply 2–3 coats for even protection.
- End with a final, light buff or wipe to enhance gloss or soften sheen, depending on your choice of Glossy finishes or Matte options.
Troubleshooting Common Cabinet-Painting Issues and Maintenance
After finishing the topcoat, you’ll confront common painting issues head-on and keep your cabinets looking factory-finished. First, recognize finish defects early: peeling, orange peel, or runs signal improper drying or incompatible coatings. Address them by sanding smooth, cleaning dust, and resealing with a compatible primer.
Next, monitor adhesion; if paint lifts, strip or abrade, then re-prime with a compatible system to restore cabinet durability. Temperature and humidity control prevent future problems, especially during cure.
For long-term upkeep, maintain cleanliness—avoid harsh cleaners that dull or strip finish. Regular touch-ups should blend with the original coat, not layer chaos. Verify paint compatibility before each project stage, and document product choices to sustain cabinet durability and consistent appearance for a professional, belonging-focused result.
Frequently Asked Questions
How Long Does Each Coat Cure Before Reassembly?
You’ll wait drying time for each coat, typically 4–6 hours, then apply a recoat interval of 24 hours before reassembly, ensuring surface readiness and durable adhesion. Follow manufacturer guidance for accurate results and long-lasting finish.
Can You Paint Over Stained or Veneered Cabinets?
Yes, you can paint over stained or veneered cabinets, but prep matters: remove old finish with paint removal, seal veneer seams, and apply primer before painting; you’ll avoid issues and keep your space feeling like belonging.
Do Cabinet Paint Colors Affect Resale Value?
Yes, cabinet color can influence resale value. Choose timeless neutrals and cohesive tones to appeal broadly; bold colors may appeal to niche buyers but risk narrowing market. Align color with style trends to maximize resale value.
Is Milk Paint or Chalk Paint Worth It?
Milk and chalk paint can work, but you’ll trade durability for eco-friendly options—consider a case-study kitchen that loved chalk paint for its look, yet still chose a durable topcoat. You’ll prioritize paint durability with trustworthy eco options.
What Budget Range Should I Expect for a Pro Finish?
You should budget roughly $2,000 to $6,500 for a pro finish, depending on cabinet size and detail. You’ll account for cost considerations and material expenses, ensuring quality workmanship, efficient timelines, and a polished, belonging-worthy result.