
Start with clear accessibility goals and map your space to spot barriers. Plan a phased renovation that blends universal design, compliant standards, and adaptable tech so every user can move safely, independently, and comfortably. Prioritize entrances, pathways, and reachable controls; widen doorways to about 32 inches where possible; install non-slip flooring, lever handles, and good lighting. Understand local codes and permits, then manage contractors with transparent comms and a dedicated accessibility lead. Want more practical steps as you proceed?
Identify Your Accessibility Goals for Renovation
To identify your accessibility goals, start by evaluating who’ll use the space and how they’ll move through it. You’ll map routes, turns, and clearances, then translate those findings into measurable targets.
Clarify priorities, such as door widths, floor passages, lighting, and acoustics, so you can weigh tradeoffs with confidence. Consider how garden aesthetics and interior decor influence comfort and usability—do you want visual cues, tactile surfaces, or color contrast that aid navigation?
Set time-bound milestones for testing with real users, and build flexibility into plans for evolving needs.
Document decisions in a single, accessible brief so contractors and designers share a common understanding. Your goals should foster belonging, ensuring everyone can move, engage, and feel valued in the renovated space.
Assess Current Barriers and Opportunities in Your Home
Evaluating barriers and opportunities starts with a clear, honest look at how you move through every part of your home. You’ll map everyday paths, note door widths, lighting, and floor textures, then identify friction points that slow you down. Look for steps, thresholds, and clutter that hinder progression between rooms.
Consider color schemes not just for aesthetics but for visibility and contrast, helping cues without overwhelming spaces. Assess maintenance routines: are rails sturdy, surfaces non-slip, and hardware reachable? Document storage locations, lighting quality, and acoustics to reduce stress and confusion.
Prioritize opportunities that improve safety, independence, and comfort while inviting collaboration with others in the household. This practical scan guides thoughtful changes, aligning accessibility with a welcoming, inclusive home that supports everyone’s confidence.
Set a Realistic, Prioritized Budget for Accessibility
Start by identifying what accessibility features truly matter for daily use, and rank them by impact and cost.
Set clear budget priorities and map them to phases, so you can address urgent needs first while planning long-term improvements.
Be practical about trade-offs, and allocate funds for each phase with a realistic timeline.
Define Budget Priorities
How should you approach funding for accessibility upgrades without overspending? Start by defining clear priorities based on daily needs, safety, and long-term value. Identify essential changes first—those that improve mobility, safety, and usability—and label them as your non-negotiables.
Then determine nice-to-have adjustments that enhance comfort but aren’t critical to access. Use budget planning to map costs against outcomes, and gather input from users who’ll live with the space.
Create a phased timeline that aligns with cash flow, not just wishes. Do rough cost estimation early, then refine as you confirm vendors and measurements. Maintain flexibility to reallocate funds if surprises arise.
Communicate decisions transparently to all stakeholders, so everyone feels seen and included in the process.
Phase Spending Strategically
To phase spending strategically, set a realistic, prioritized budget that aligns with daily needs, safety, and long-term value. You’ll allocate core accessibility upgrades first, then enhancements that boost convenience and resale worth, while leaving buffer for surprises.
Start with low-cost, high-impact changes—threshold ramps, door hardware, and non-slip surfaces—to build momentum and confidence. Use a clear scoring system: essential, desirable, optional.
Track costs in real time to prevent scope creep and protect your plan’s integrity. Integrate marketing strategies early: document updates, photos, and stories to demonstrate progress to buyers or renters, showing commitment to inclusive living.
Apply disciplined financial planning: review quarterly, adjust priorities, and maintain emergency funds. Your disciplined approach creates lasting accessibility, belonging, and value for every resident.
Universal Design From Day One: Core Moves
From day one, design for accessibility isn’t an afterthought but a core design decision that guides every choice. You build universal design into layouts, fixtures, and materials, so movement, sight, and hearing needs are met without friction.
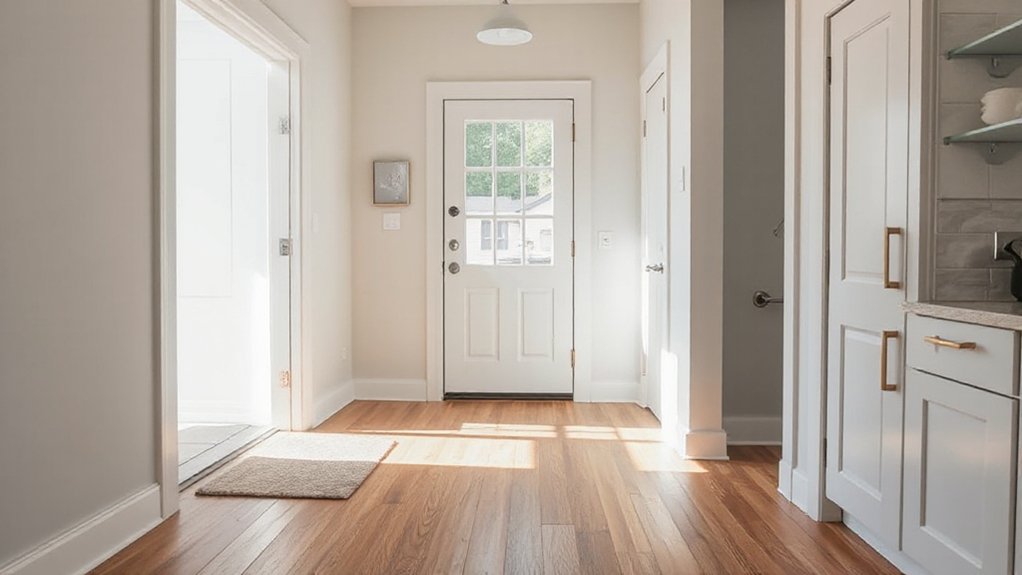
Start with entry points: doorway widths, threshold progressions, and an accessible path of travel that remains clear in all rooms.
Choose controls and interfaces that respond to varied abilities—lever handles, push-button lights, and low-effort switches—so everyone can participate in daily routines.
Plan for flexible spaces that adapt to changing needs, not just current ones.
Consider smart technology as a complement, not a replacement for thoughtful design, ensuring privacy and ease of use.
Prioritize aesthetic considerations that affirm belonging while supporting practical, inclusive living.
Design Accessible Entrances and Circulation
Designing accessible entrances and circulation starts at the threshold and flows through every doorway. You’ll create a coherent path that reduces effort and confusion, inviting everyone to move confidently through your space. Landscape integration and signage placement anchor entrances, guiding visibility and orientation from outside in.
- Assess approach paths and curb cuts, ensuring level progression and clear sightlines to doors.
- Align door hardware, pull/push zones, and automatic options with user needs for effortless access.
- Plan circulation with generous turning radii, minimum door widths, and clear floor markings.
- Integrate landscape features and signage so the entry is inviting, legible, and consistently oriented for all abilities.
Create Step-Free Routes and Threshold Solutions
You’ll start by ensuring clear entry thresholds and grade-level pathways that let anyone approach the space without stumbling.
Plan doorway clearance maneuvers that adapt to various door widths and swing directions so you can pass through smoothly.
Clear Entry Thresholds
Is it possible to move a home doorway from barrier to doorway accessible? You can, with careful planning and practical fixes that keep you and guests in mind.
Clear thresholds prevent trips and widen access, while still respecting style and function. Here are concrete steps you can take:
- Remove or lower the threshold to create a seamless floor line.
- Install a ramp or gradual slope, matching grade and door swing.
- Choose door hardware and frames that reduce resistance and improve sightlines.
- Integrate garden landscaping and interior decor cues to unify entry aesthetics and function.
Grade-Level Pathways
In landscape design, align pathways with logical sightlines, avoiding abrupt turns that confuse guests. Inside, select threshold solutions that seal gaps without creating step hazards, and keep door sills level or replace them with low-profile thresholds.
Consider furniture placement and traffic flow in interior decor to support accessibility without compromising style. This approach builds belonging through practical, precise choices that invite every visitor to move confidently.
Doorway Clearance Maneuvers
Doorway clearance sets the stage for a true step-free route by balancing door swing, threshold height, and maneuvering space. You’ll optimize entrances with practical tweaks that improve access while preserving aesthetics.
1) Assess door hardware: choose lever handles and low-profile hinges for easy grip and smooth transit.
2) Adjust thresholds: install seamless thresholds or ramps to minimize tripping and maintain a clean entrance aesthetic.
3) Reconfigure swing and space: widen clearances by relocating hinges or altering frame width to create confident turns.
4) test and document: simulate everyday routes, note tight spots, and iterate until motion feels natural.
This approach keeps you inclusive and aligned with entrance aesthetics, ensuring every doorway supports confident, independent use.
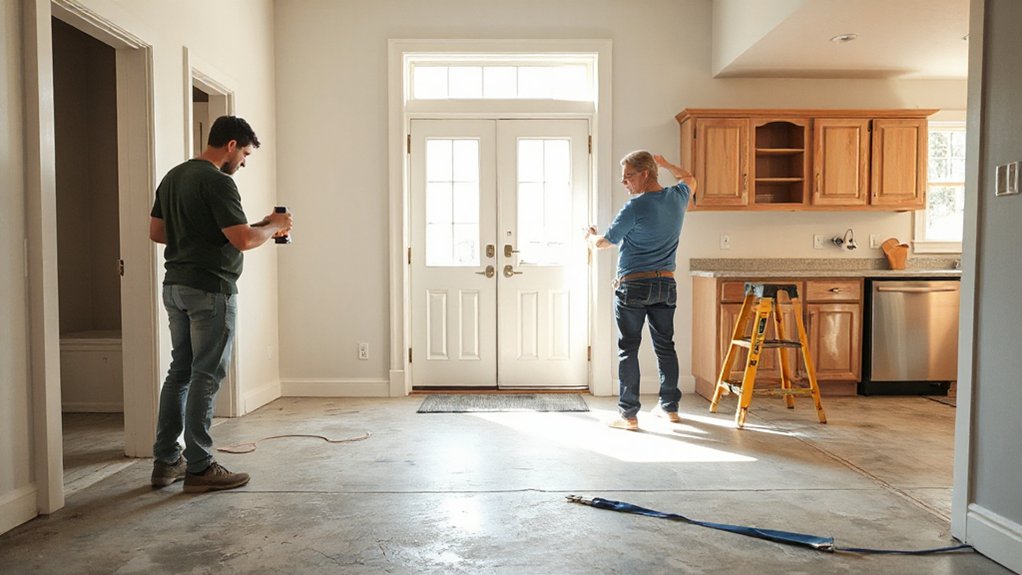
Choose Wide, Adaptable Doors and Openings
When choosing doors and openings, prioritize width and flexibility to accommodate wheelchairs, walkers, and evolving needs. Aim for at least 32 inches of clear passage width on interior doors, with lever handles and easy-access hardware to simplify every day use.
You’ll benefit from doorway width that supports smooth passage and from opening flexibility that adapts to furniture shifts and changing mobility, without making your space feel cramped.
Choose hollow-core doors or solid-core options with reinforced frames to balance weight and longevity. Favor pocket or barn-style doors only if you’re sure they don’t hinder clearance in adjacent spaces.
Confirm door hardware is mounted low enough for reach from a seated position, and test swing clearance in real living scenarios.
Prioritize reliability, comfort, and universal accessibility.
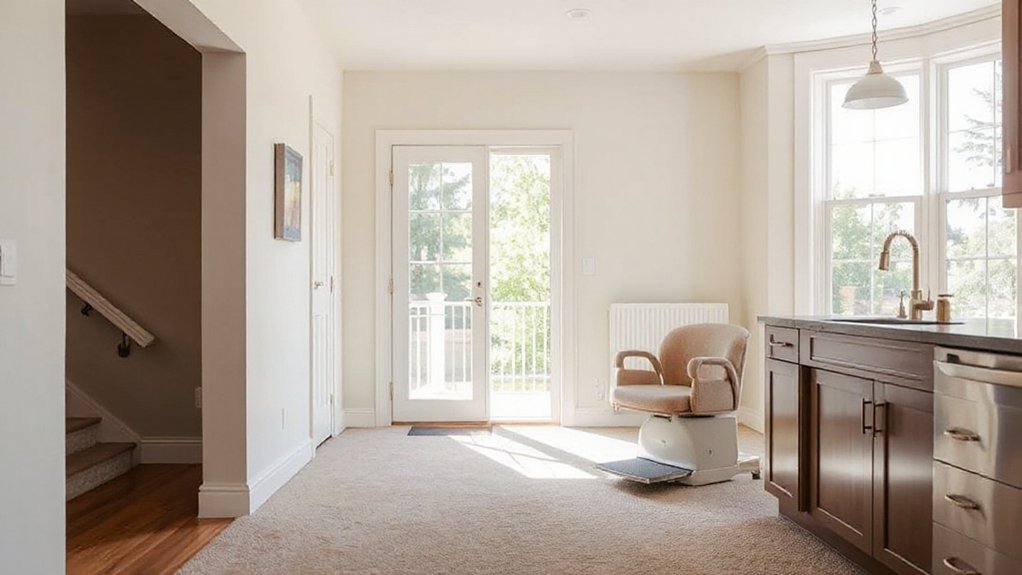
Level Changes: Ramps, Lifts, and Stairs Alternatives
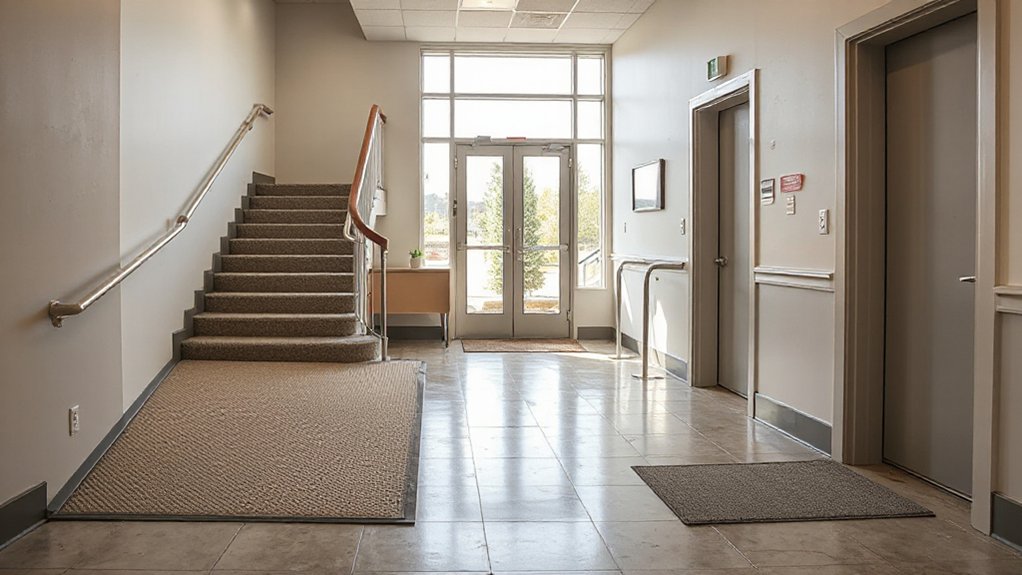
If there’s a change in level to contend with, ramps, lifts, and stairs alternatives offer practical ways to maintain access throughout the home, indoors and out. You tailor solutions to fit your footprint, budget, and daily routines, keeping safety and dignity at the forefront.
- Install a low-gradient ramp at primary entry, with non-slip surface and handrails for steady navigation.
- Choose a vertical platform lift where stairs are unavoidable, ensuring quiet operation and easy controls.
- Consider modular stairs alternatives (stair lifts or alternating tread devices) where space is tight.
- Integrate accessible garden landscaping and interior decor that guides movement with color, contrast, and intentional paths.
These choices keep you connected to both living areas and outdoor spaces, reinforcing belonging.
Improve Lighting, Acoustics, and Visual Contrast
To start, you’ll optimize lighting levels to reduce glare and shadows, making rooms brighter without straining the eyes.
Then, you’ll improve acoustic comfort by reducing echo and noise transmission, so conversations stay clear at all times.
Finally, you’ll strengthen visual contrast with textures, colors, and signage that are easy to distinguish for everyone, especially those with low vision.
Improve Lighting Levels
Improving lighting levels is essential for safety, usability, and comfort in any accessible renovation. You’ll create consistent, glare-controlled illumination that helps everyone move confidently, recognize cues, and feel welcome. Focus on practical choices that mix natural lighting with well-placed artificial options, balancing energy use and comfort.
Use light fixtures that offer dimming, warmth options, and wide coverage to avoid shadows in key pathways.
- Assess daylight: open sightlines, use translucent window coverings, and position tasks near windows.
- Choose fixtures: opt for high-CRI LEDs with adjustable brightness.
- Layer lighting: combine ambient, task, and accent for depth and safety.
- Control system: install simple, accessible switches and motion sensors.
Natural lighting and light fixtures work together to support belonging and clarity throughout your home.
Enhance Acoustic Comfort
Enhancing acoustic comfort naturally complements improved lighting and visual contrast by reducing noise distractions that affect safety and focus. You’ll choose soundproofing materials suited to your space, prioritizing dense absorbers and resilient channels where needed.
Assess rooms used for collaboration, rest, and instruction to tailor solutions without overbuilding. Acoustic paneling offers a practical, scalable option: install panels at mid-wall height to diffuse echoes, or place removable options for flexibility.
Consider flooring passages and door seals to minimize sound leakage between areas. Color and texture should feel welcoming, reinforcing belonging while remaining unobtrusive.
Test after installation with simple listening checks, inviting neighbors or colleagues to confirm clarity. Document materials, costs, and maintenance for ongoing accessibility and comfort.
Strengthen Visual Contrast
Strong visual contrast is essential for safe navigation and quick recognition of important cues, so start by pairing bright, uniform lighting with darker, well-defined edges. You’ll improve both visibility and confidence with deliberate color coordination and well-chosen lighting fixtures that guide, not glare.
- Align wall and floor tones to create clear boundaries, using matte, non-glare surfaces.
- Use high-contrast edge markings on stairs, doorways, and junctions to anchor movement.
- Select lighting fixtures that deliver even illumination, reducing shadows and hot spots.
- Integrate color cues in signage and fixtures to reinforce wayfinding without overwhelming the space.
Install Grab Bars, Supports, and Stable Grab Rail Layouts
Installing grab bars, supports, and stable grab rail layouts is a practical step you can take to improve safety and independence in daily routines. You’ll plan locations where you need balance help, such as near toilets, showers, and entryways, prioritizing transfers and rhythm of movement.
When you approach grab bar installation, choose corrosion-resistant materials and secure mounting into studs or solid backing. Confirm smooth, unobtrusive finishes that minimize snag risk.
For support placement, align bars at comfortable heights and angles for seated and standing use, and maintain consistent spacing to reduce reach strain. Verify load ratings and test each bar with steady pressure before regular use.
This thoughtful setup supports confidence, inclusion, and everyday autonomy for everyone in your home.
Select Accessible Kitchens and Bathrooms
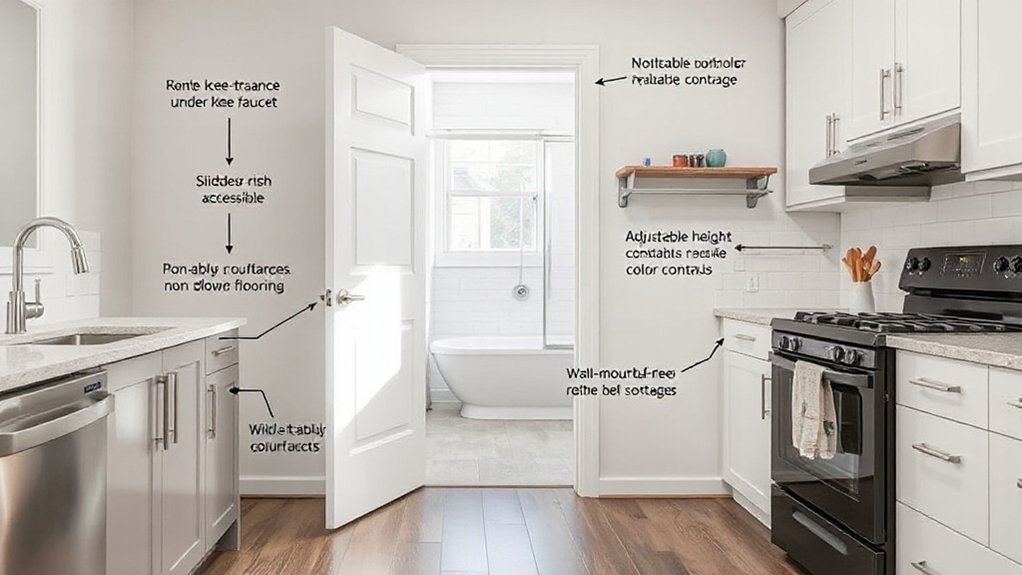
When you plan accessible kitchens and bathrooms, prioritize cabinet heights that you can reach comfortably from a seated or standing position.
Choose non-slip flooring and surface textures that reduce slips and support safe navigation, especially around wet areas.
Make certain wheelchair-accessible layouts that create clear pathways and easy reach to sinks, appliances, and storage.
Accessible Cabinet Heights
Have you considered how cabinet heights affect everyday use? Accessible cabinet heights help you reach essentials without bending or crouching, supporting safer, longer-lasting comfort in the kitchen and bath. When you plan, prioritize consistent clearance for legroom under sinks and lowers for frequently used drawers.
- Position upper cabinets within a comfortable eye level to ease visibility and reach.
- Use pull-out shelves and trays to maximize accessible cabinet heights and reduce fatigue.
- Combine open storage with closed options for inclusive kitchen storage, so all needs are met.
- Ensure adjustable or modular components to accommodate changing mobility and preferences.
These choices create an inviting, practical space where everyone belongs, and daily tasks feel doable. Accessible cabinet heights guide inclusive design without sacrificing style or function.
Non-Slip Flooring Options
Non-slip flooring is a practical safety upgrade that helps everyone move confidently through kitchens and bathrooms. You choose textures and finishes that reduce glare, resist moisture, and provide steady footing under wet or soapy conditions.
For kitchens, consider integral grip patterns and slip-resistant ceramic or vinyl with a slip rating of R11 or higher.
In bathrooms, apply tiles with bevelled edges to minimize tripping, and opt for wider grout lines that maintain traction.
Safety mats can be positioned at entry points or in front of sinks, but guarantee they’ve non-slip backing and easy-clean surfaces.
Select flooring that tolerates wheelchair use, is durable, and maintains warmth underfoot.
Non slip flooring supports independence, dignity, and everyday confidence for everyone.
Wheelchair-Accessible Layouts
Is your kitchen and bathroom layout ready to roll for a wheelchair user? You can design practical, accessible spaces that feel welcoming and independent. Focus on smooth traffic flow, reachable fixtures, and clear turning radii, so every move feels confident rather than compromised.
1) Position sinks, ranges, and appliances at reachable heights with knee clearance and open fronts.
2) Install pull-out shelves, lazy Susans, and adaptable storage to reduce reach-and-twist strain.
3) Choose lever handles, touchless options, and roll-under counters to support autonomy.
4) Integrate accessible lighting, color contrast, and non-slip surfaces that blend with landscaping aesthetics and interior decor.
This approach invites belonging, ensuring kitchens and bathrooms are both functional and stylish for all users.
Ensure Accessible Storage and Reach Zones
To make certain you can reach and store essentials without strain, plan storage zones that align with how you move through the space. Prioritize reachable shelves and drawers within comfortable heights, minimizing bending or stretching.
Group daily items near the most-used areas: kitchen, bathroom, entry, and workspace. Use clear containers, label fonts large enough to read, and keep frequently used tools at waist to shoulder height.
Design shelves with adjustable heights so you can adapt as needs change. Install pull-out organizers and accessible cabinetry to reduce reaching over obstacles.
Guarantee pathways are clear and lighting is bright enough around storage, preventing missteps. Storage solutions should feel intuitive, helping everyone locate items quickly and safely, reinforcing a sense of belonging and independence in daily routines.
Reach zones support confident routines.
Plan for Future Mobility and Aging in Place Scenarios
Planning for future mobility and aging in place means designing now for changing movement needs, so you can stay independent even as tasks become harder. You’ll build a flexible layout that supports evolving abilities and preserves dignity.
Consider how routines may shift and choose features that adapt without reconfiguring the whole home. Focus on safety, comfort, and easy access to essential areas, so you can maintain control and participation in daily life.
Plan around inclusive design that welcomes guests and neighbors with varied needs. Use the following steps to translate future mobility and aging scenarios into practical choices:
- Map current routes and future bottlenecks
- Prioritize non-slip surfaces and clear thresholds
- Choose adjustable, reachable heights and controls
- Invest in simple, scalable supports and tech
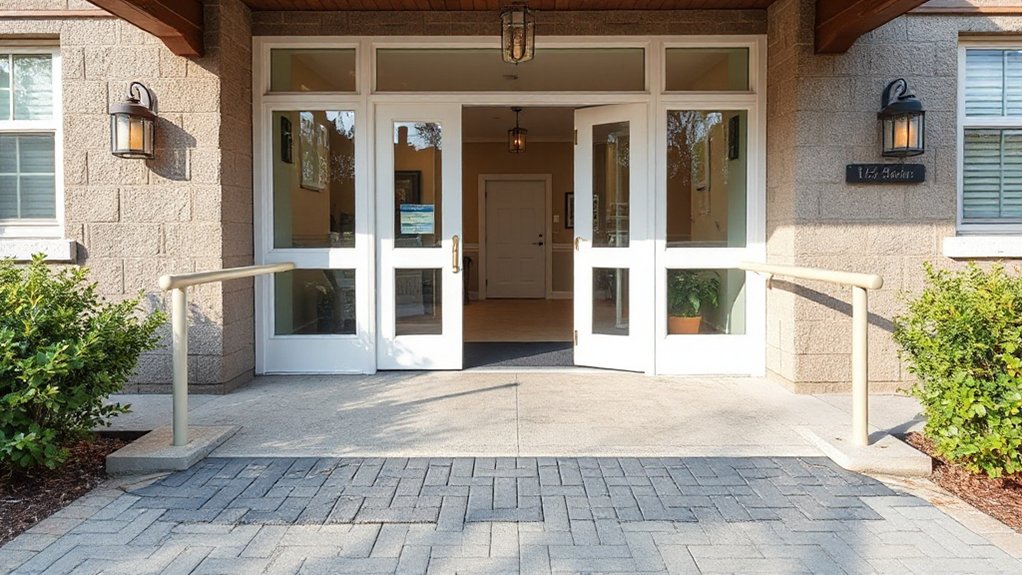
Address Exterior Accessibility and Outdoor Spaces
You’ll assess exterior accessibility by ensuring clear, level paths and sturdy ramps that fit your property’s layout.
Consider outdoor living and safety by planning slip-resistant surfaces, well-placed lighting, and easy-to-reach seating or rest areas.
This sets the foundation for inclusive use of outdoor spaces, accommodating varying mobility needs and outdoor activities.
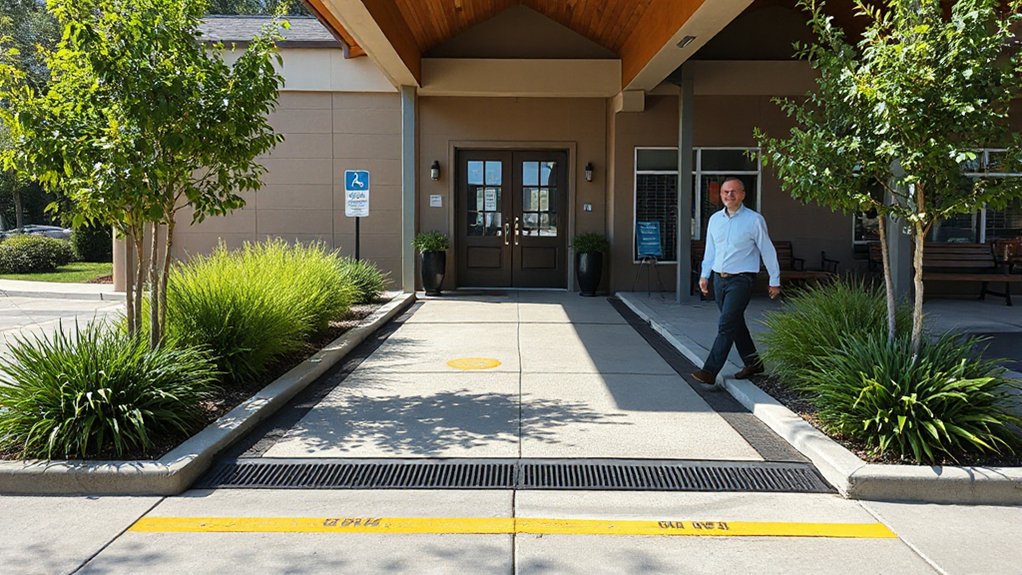
Accessible Pathways and Ramps
If you’re renovating for accessibility, start with exterior pathways and ramps that safely connect entry points to the street and usable outdoor spaces. You’ll design gentle slopes, non-slip surfaces, and even widths that accommodate wheelchairs and walkers, while aligning with landscaping aesthetics and interior decor sensibilities.
- Map routes to primary doors, outdoor seating, and accessible parking, marking crossings with visual cues.
- Choose ramp gradients under 1:12 and tactile indicators for guidance and safety.
- Select durable, low-maintenance materials that grip in wet weather and blend with the home’s exterior palette.
- Add lighting and handrails that feel welcoming, not clinical, to foster belonging and confidence.
Outdoor Living and Safety
What steps can you take to make outdoor spaces both welcoming and safe for everyone? You start with clear, level surfaces—wide paths, stable steps, and non-slip decking that accommodate mobility devices and strollers. Install firm, edge-marked boundaries to guide people with vision differences, and choose seating with armrests and varied heights for inclusive rest stops.
Prioritize low-maintenance landscaping that reduces trip hazards while preserving garden beauty. Garden privacy matters: use screens or hedges to create retreats without isolating neighbors, and position seating to encourage social interaction.
Plan outdoor lighting thoughtfully: even, glare-free pathways, illuminated entryways, and motion sensors for safety after dark. Ensure drainage prevents puddling, and keep tools stored to maintain a tidy, inviting space.
Choose Materials and Finishes That Are Safe and Durable

Choosing materials and finishes that are safe and durable starts with understanding how they’ll be used. You’ll balance safety, longevity, and comfort while honoring Historical preservation and aesthetic considerations.
- Assess slip resistance, edge profiles, and easy-clean surfaces for high-traffic areas.
- Choose durable, low-maintenance materials that won’t degrade with moisture or wear.
- Favor non-toxic, low-VOC finishes and compatible sealants to protect indoor air quality.
- Compare installation methods that minimize maintenance and future renovations.
Keep doors, thresholds, and transitions smooth, so wheelchairs and walkers glide with confidence.
Prioritize grout, caulk, and sealants that resist mold without harsh odors.
Align choices with the home’s character, ensuring aesthetic considerations support accessibility without compromising safety or heritage.
Involve family and neighbors early to foster belonging and practical collaboration.
Select Adaptable Fixtures, Controls, and Smart Tech
When selecting adaptable fixtures, controls, and smart tech, prioritize user-friendly design, easy reach, and reliable performance. You’ll choose fixtures that reduce strain, like lever taps, single-handle faucets, and install-height adjustments that welcome everyone.
Controls should be intuitive, tactile, and responsive, with large, high-contrast buttons and voice-assisted options as a reliable backup. Smart technology can streamline daily routines, but keep configurations simple and privacy-minded, avoiding overcomplex apps.
For fixture selection, favor universal dimensions and modular components that accommodate different needs over time. Consider reach zones, glare control, and audible cues to aid comprehension.
Test devices in real-life settings before purchase, and document setup steps for future occupants. Your goal is inclusive comfort, dependable usability, and a calm, confident home environment.
Understand Local Codes, Permits, and Accessibility Standards
Understanding local codes, permits, and accessibility standards is essential before you begin any renovation. You’ll align your project with real-world requirements, prevent delays, and protect everyone who lives there. Accessibility awareness helps you anticipate needs early, while legal compliance keeps you safe from fines and disputes.
- Identify relevant building codes, ADA/ABA standards, and local ordinances that affect entrances, corridors, and bathrooms.
- Confirm permit scope, approval timelines, and inspection milestones before breaking ground.
- Engage a knowledgeable professional to interpret codes and document compliance decisions.
- Plan for future changes by choosing adaptable methods that meet current standards without overdoing requirements.
Monitor Contractor Selection and On-Site Accessibility Management
You’ll monitor contractor selection and on-site accessibility management to guarantee every phase stays aligned with your needs and applicable standards.
You’ll prioritize contractor collaboration, ensuring open channels, clear expectations, and documented responsibilities from day one.
Evaluate bids not only on cost but on accessibility competence, past projects, and inclusive practices.
Verify material sourcing aligns with accessibility goals—look for supplier transparency, durable products, and consistent delivery timelines.
On site, assign a single point of contact for accessibility concerns, hold concise daily huddles, and address barriers promptly.
Track progress against a written accessibility plan, recording deviations and corrective actions.
Maintain respectful, inclusive communication with crew and neighbors, recognizing diverse needs.
Document decisions, share updates, and celebrate milestones that improve safety and usability for everyone involved.
Build a Phased Renovation Plan With a Fallback Strategy
To build a phased renovation plan with a fallback strategy, map out the sequence of work in clear, achievable stages, each with defined goals, timelines, and measurable criteria for success. You’ll reduce risk by aligning milestones with funding and permits, and you’ll keep energy efficiency and garden landscaping in view from day one.
- Define stages and gates with go/no-go criteria.
- Attach realistic timelines, budgets, and contingency buffers.
- Include parallel tracks for accessibility upgrades and energy efficiency wins.
- Establish a fallback plan that re-prioritizes tasks if supply or access changes.
This approach fosters belonging by inviting input from caregivers, neighbors, and occupants, ensuring practical, inclusive progress and durable improvements.
Frequently Asked Questions
How Long Does a Typical Accessibility Renovation Take?
Typical accessibility renovations take a few weeks to a couple of months, depending on scope. You’ll prioritize Home safety, plan with Design flexibility, coordinate trades, and stay flexible, inclusive, and practical as you progress through each achievable milestone together.
Which Renovations Yield the Best ROI for Accessibility?
“Think of ROI as equity in belonging: widening doorways and accessible controls yield the best returns.” You prioritize design considerations and safety compliance, choosing ramps, ADA-compliant fixtures, and reachable storage, maximizing usability for all occupants and guests.
Can Temporary Solutions Improve Accessibility Before Full Remodel?
Temporary adaptations can help now; you’ll gain safer access with short term modifications you can install quickly. You’ll feel included as you adapt, test, and adjust, while planning longer-term improvements for lasting, practical accessibility and comfort.
Do Insurance or Grants Cover Accessibility Renovations?
Only about 60% of eligible accessibility projects get funded, so you should check carefully. Insurance coverage may apply to certain adaptations; grant eligibility varies by program. You can pursue both, but verify limits, timelines, and required documentation.
What Are Common Hidden Costs in Accessibility Projects?
Hidden expenses in accessibility projects typically surface from permit delays, material surcharges, and scope changes. You should monitor every line item, forecast contingencies, and avoid budget overruns by documenting assumptions, communicating openly, and including inclusive stakeholders in decisions.
Conclusion
Renovating for accessibility isn’t rocket science, it’s common sense dressed up in tools and permits. You’ll finish with doors that actually open, thresholds you won’t trip over, and controls you don’t have to hunt down. Sure, you could pretend it’s optional, but you’ll thank yourself when guests move through your home with ease. Prioritize, plan, and phase it smartly. The irony? more comfort often costs less in stress than ignoring it and paying later.