
Make every inch count by auditing your kitchen first—find hidden clutter, gaps, and underutilized spaces. Prioritize high‑impact zones like backsplashes and prep shelves, and install tall pantries, wall racks, and lazy Susans to free counter space. Use adjustable drawer dividers, slim organizers, and magnetic strips for knives and measuring spoons. Rotate daily essentials to reduce clutter, and add under‑cabinet lighting and reflective finishes to feel bigger. With a clear plan, you’ll uncover even more storage options ahead.
Audit Your Kitchen: Find Hidden Clutter and Space Gaps
Start by taking a full inventory of your kitchen—doors, drawers, under-sink cabinets, and vertical spaces. You’ll uncover Hidden corners and clutter hotspots you’ve accepted as “normal.” Move deliberately: list what you use weekly, what’s rarely touched, and what’s missing for efficient flow.
Label shelves and bins so you can regroup later, rather than guessing next time you cook. Measure available depths, heights, and clearance for taller items and bulky appliances. Check for duplicated tools, empty containers, and expired supplies—these create friction and waste space.
Visualize your ideal workflow: prep near the sink, cook near the stove, clean near the disposal. With a clear map, you’ll feel connected to a kitchen that supports you, not competes with you. You belong here, organizing purposefully.
Prioritize High-Impact Storage Zones
To maximize your kitchen’s efficiency, focus on high-impact storage zones first: areas you use daily or rely on during peak cooking times. Prioritize the backsplash, prep counter sills, and the pull-down or corner shelves that keep your staples within reach.
Position lightweight, frequently used items at eye level for quick grab-and-go access, and tuck seldom-used tools higher up.
Integrate vintage decor accents sparingly to keep function clear while adding character—don’t let style obstruct access or safety.
For kitchen safety, install non-slip mats, secure cords, and store knives in dedicated blocks or magnetic strips to reduce clutter.
Cabinet Organizers That Maximize Drawer Depth
Use adjustable drawer dividers to create tailor-made sections for lids, gadgets, and measuring spoons, so tiny items stop rattling and getting lost. Drawer dividers keep bulkier tools from bunching together, improving accessibility and reducing search time.
Pair these with utensil trays that separate forks, knives, and spoons into clear zones, making daily tasks smoother and faster.
Consider slim, stackable solutions for shallow drawers and roll-out trays for deeper spaces, so you can see everything at a glance.
Involve family members in setup to foster belonging and consistent use.
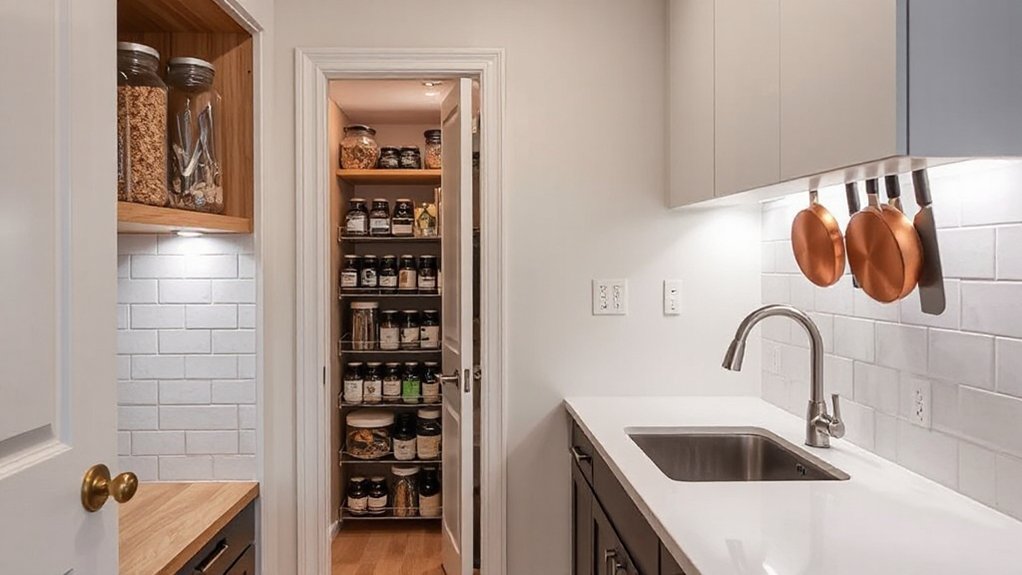
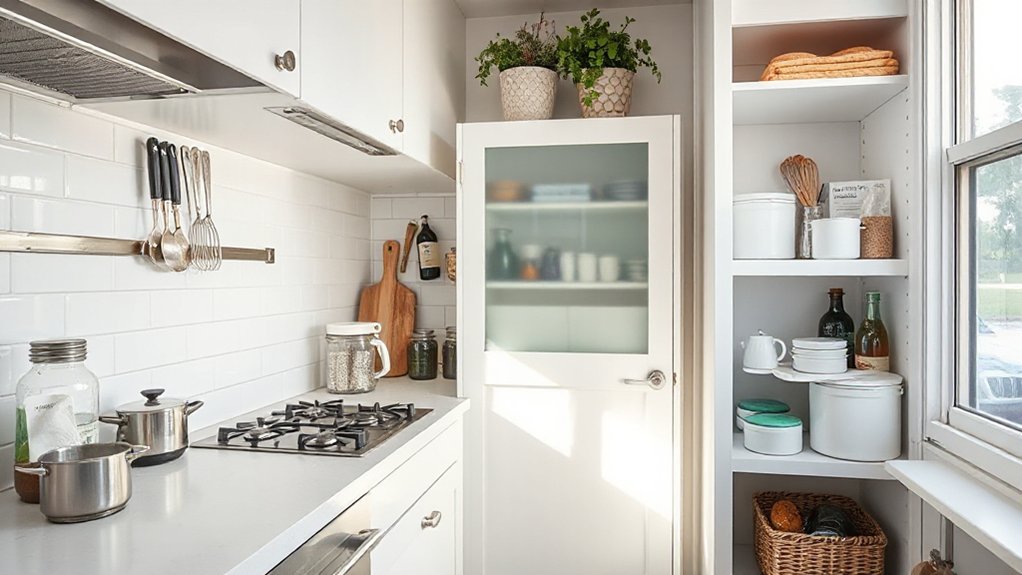
Tall Pantries: Vertical Solutions for Every Item
Tall pantries are your vertical storage solution, letting you stack items without widening cabinets. When you choose a tall pantry, you create vertical stacking that makes every inch count, ideal for spices, cans, and small appliances.
Look for adjustable shelves and pull-out baskets to keep storage compartments accessible, not buried in the back. Use slim doors with integrated organizers to keep the front visible and reachable.
Add labeled bins or clear containers to quickly identify contents and reduce rummaging. Consider a pantry with a lazy Susan or corner pullout for odd angles and hard-to-reach items.
Match the height to your ceiling and guarantee a stable base. This setup fosters belonging by simplifying meals and reducing clutter.
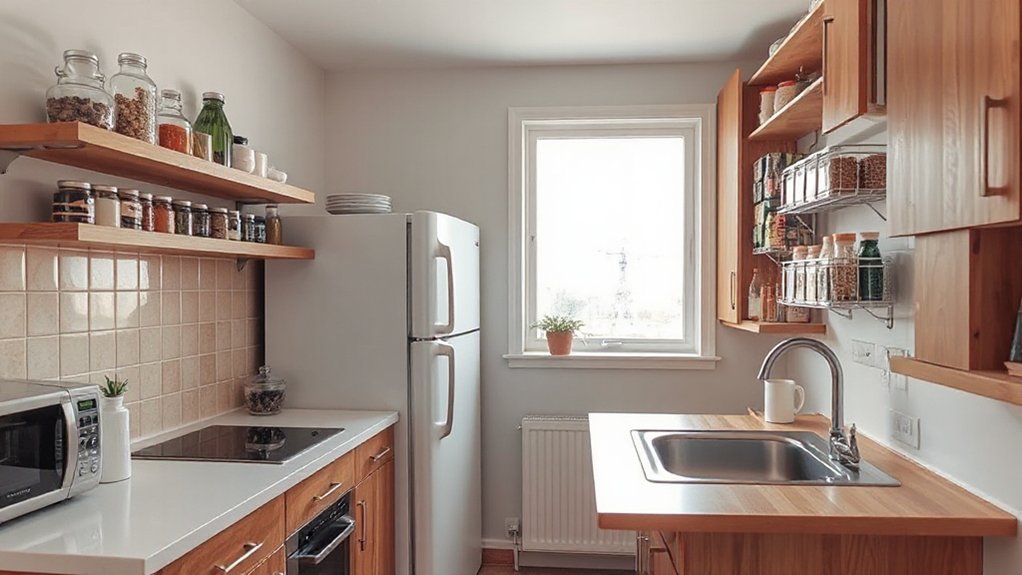
Wall Shelves and Racks That Actually Save Space
Wall shelves and racks can vault your kitchen storage without sacrificing floor space, making every inch count. You’ll spot slick options that keep countertops clear while adding function.
Install open shelves at eye level for quick access to daily items, and use rail racks for mugs, spices, and lids. Group items by weight and frequency, placing heavy jars lower and lighter pieces up top.
Choose sturdy brackets and anchored hardware to prevent wobble, then add decorative accents to blend with your style. Incorporate Wall art or a small framed reminder to keep the space inviting.
Use clear containers for visibility, label shelves, and rotate seasonal dishes to maintain order. With intentional placement, you feel supported and like you truly belong in a streamlined kitchen.
Multi-Purpose Furniture for Flexible Layouts
Multi-purpose furniture is your go-to for flexible layouts that adapt to a growing or changing kitchen. You build space without sacrificing style by choosing pieces that serve multiple functions.
Look for convertible furniture that can switch from seating to storage or work surface in seconds, keeping your workflow uninterrupted.
Modular units let you rearrange components as your needs shift, so you can expand storage where you cook or tuck away appliances after use.
Opt for surfaces that hide clutter with built-in drawers, shelves, or roll-out bins, and prioritize sturdy construction to keep confidence high during reconfigurations.
Keep it simple: select a cohesive color and finish so every change feels intentional, not cluttered.
Together, these choices create a welcoming, adaptable kitchen you’ll love.
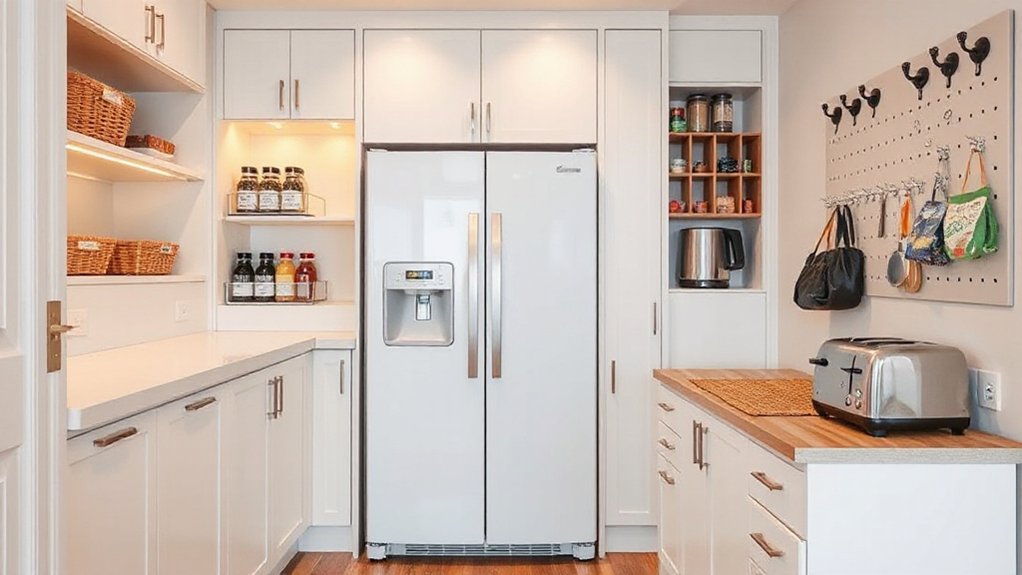
Compact Kitchen Appliances and Under-Counter Options
We’ll explore smart placements and storage-friendly configurations to keep daily routines smooth.
Compact Kitchen Appliances
Looking to maximize counter and storage space without sacrificing functionality? You’ll love choosing compact kitchen appliances that fit your flow. Opt for multifunction units to reduce clutter and keep countertop organization simple.
When you select appliances, prioritize appliance placement that minimizes reach and awkward corners. Choose slim, stackable models or built-ins that tuck neatly beside cabinets.
Think one-circuit layouts to simplify wiring and improve pathways. Use adjustable shelves inside for flexibility and easy access.
Favor energy-efficient options to lower heat and noise in small spaces. Finally, pair small appliances with labeled cords and trays to maintain a clean, cohesive look that invites belonging.
- Choose multifunction units to reduce clutter
- Prioritize appliance placement for easy reach
- Pick slim, stackable models
- Use adjustable shelves inside nearby cabinets
- Label cords and trays for a clean look
Under-Counter Storage Options
Plan appliance placement to create logical zones—prep, cooking, cleaning—so you never chase clutter. Install roll-out shelves and pull-out trash to hide messes yet stay efficient. Use hidden corners for specialized gear like a compact toaster oven or coffee station, without blocking core tasks.
Prioritize consistency in finishes and alignment to feel intentional and welcoming. With thoughtful layout, you’ll reclaim surface area and enjoy belonging in a tidy, functional kitchen.
Declutter Method: Rotate Essentials to Free Counter Space
To free counter space quickly, rotate the essentials you use daily and store the rest out of sight. You’ll reclaim workflow by prioritizing items you reach for most, while keeping infrequently used tools tucked away.
Group supplies by task, not by size, so you can see what matters at a glance. Use color contrast to distinguish daily items from backup goods, making quick decisions easier.
When you rotate, consider shelf installation that places everyday items at eye level for fast access. Keep a small, rotating tray for grab-and-go items to avoid clutter buildup.
This method creates belonging through shared, simple routines.
- Choose daily must-haves and rotate weekly
- Group by task, not just by size
- Use color contrast for quick recognition
- Opt for functional shelf installation
- Maintain a calm, open counter by regular reviews
DIY Hacks to Add Storage Without Expanding Footprint
If you’re short on space, smart DIY hacks can add storage without expanding your footprint. Start by hanging pots, pans, and utensils from a pegboard or ceiling rack to free drawer space and keep essentials visible.
Use shallow wall shelves above counters for seasonal storage, rotating items as needed so you always know what’s on hand. Integrate vintage decor elements, like a small shiplap cubby or metal bins, to create character while organizing.
Add under-sink or above-cabinet risers to maximize vertical space without crowding. Use magnet strips for knives or measuring spoons, and repurpose a rolling cart as a narrow pantry in tight spots.
Think modulars you can rearrange; this approach reinforces belonging and eases daily cooking. Seasonal storage stays tidy, stylish, and accessible.
Lighting and Color Strategies to Make Small Kitchens Feel Bigger
Good lighting and a bright color palette can make a small kitchen feel bigger without adding square footage. You’ll harness color psychology and smart lighting design to create openness, coherence, and welcome.
Use cool neutrals with a touch of warm accents to balance mood and perceived space. Reflective surfaces and under-cabinet lighting brighten work zones, while task lighting keeps tasks crisp.
Keep ceilings light and consistent to avoid a boxed-in feel. Incorporate subtle, practical color cues that tie storage to daily routines, so you feel at home.
- Choose airy neutrals with a single accent hue
- Install under-cabinet LED strips for contour and brightness
- Use reflective backsplashes and cabinetry finishes
- Opt for daylight-mimicking bulbs (Color Temperature 5000K)
- Align decor with a calming, cohesive palette
Budget and Planning Checklist to Get It Done
Set a clear budget for what you’ll spend on storage and installation, and track every dollar as you go.
Map out a practical planning timeline with milestones—finish measurements, decide on solutions, and schedule procurement and installation.
Focus on cost-effective options that maximize space, and adjust the plan if you hit a surprise cost.
Budget-Friendly Estimate Basics
To set a realistic budget, start with a clear scope of what you want to add and the time frame for the project, then list every item you’ll need from cabinets to hardware.
- Custom shelving
- Appliance upgrades
- Soft-close hinges
- Drawer organizers
- Lighting under cabinets
You’ll estimate by item, not category, so you avoid surprises and keep decisions actionable. Compare basic materials versus upgraded finishes, then pick the option that fits your current kitchen cadence and long-term use.
Include delivery and install for a complete view, and leave a small contingency for unplanned needs. Track prices in a simple shared note or spreadsheet to stay aligned with your teammates.
This approach ensures you move forward confidently, feeling supported and connected as you upgrade storage.
Planning Timeline Milestones
With your budget laid out and items itemized, map a practical planning timeline that keeps you on track and within scope. Start by setting a 4‑to‑6 week milestone for sourcing storage solutions, comparing prices, and confirming measurements.
Week 1: finalize design choices, like kitchen decor accents and space-saving concepts; lock in priorities.
Week 2–3: order essentials, coordinate delivery windows, and prep the area to minimize disruption.
Week 4: install or assemble components, test accessibility, and adjust layouts for smooth cooking techniques.
Week 5–6: finalize details, add final touches, and evaluate functionality.
Build in buffer days for potential delays. This approach reinforces belonging, keeps decisions practical, and guarantees every step aligns with your cooking techniques and style.
Frequently Asked Questions
How Can I Measure Cabinet Interiors Accurately for Organizers?
Measure interior height, width, depth precisely with a metal tape, then subtract clearance for doors and organizers. Note adjustable shelves. Try cabinet customization and compare organizer types to fit varied items; this builds belonging through tailored, practical solutions.
What’s the Best Lighting to Make Storage Feel Larger?
Brighten with ambient lighting to widen the space, then layer task lighting for focused tasks. You’ll notice drawers look deeper, shelves feel larger, and you belong in a well-lit, efficient kitchen that works for you.
Which Materials Resist Humidity in Small Kitchens?
Humidity resistant materials and moisture proof finishes best withstand kitchen dampness; choose fiberboard with sealing, stainless steel, glass, tile, or high-pressure laminates. You’ll feel confident; these options keep cabinets sturdy, resist warping, and foster lasting, moisture-smart storage.
How Can I Protect Fragile Items in Tight Spaces?
You protect fragile items by adding padded storage pockets and non-slip liners, keeping them near the center where vibrations are minimal. Use labeled, dedicated bins for fragile item safety and storage protection, so you feel secure organizing your space.
How Do I Budget for a Storage-Focused Remodel?
Budget planning guides your approach; start with a clear ceiling and priorities. You’ll identify cost effective upgrades, track expenses, and stay flexible. You’ll feel confident, practical, and supported as you optimize storage within your budget.
Conclusion
You’ve got a clear path: audit, declutter, and optimize every inch with smart organizers, vertical storage, and wall-friendly racks. Prioritize high-impact zones, rotate essentials to free counters, and try DIY tweaks that fit your footprint. Use lighting and color to visually expand the space, then lock in a budget and plan so changes actually stick. Remember: storage isn’t just added space, it’s regained flow—every item in its right place, making your kitchen feel bigger, calmer, and ready. Metaphor: clarity is the secret shelf.