
You might notice your window fogging up after a hot shower, a telltale sign that moisture isn’t escaping fast enough. Condensation happens when warm, humid air hits cold surfaces, and small changes can stop it: better ventilation, steady temps, and fewer drafts. You’ll find practical steps here that fit into a busy routine, from quick fixes tonight to longer-term tweaks. Keep going to learn how these habits add up and what to watch for as you test them.
Understanding Why Bedroom Condensation Happens
Condensation in bedrooms happens when warm, moist air meets cool surfaces, like walls or windows, and turns into droplets. You’ll notice it most in mornings or after showers and cooking.
The core cause is moisture buildup coupled with cold surfaces, which lets water condense. Factors include ventilation gaps, humidity levels, and indoor temperature swings.
When your room traps humidity, you create a microclimate where air can’t circulate, and droplets form on colder spots. Materials like plaster, wallpaper, or metal trims can collect that moisture.
Practical symptoms to watch: damp patches, musty smells, and frequent misted windows.
Evidence shows that reducing moisture input, improving air exchange, and stabilizing temperature cut condensation risks. So, aim for steady humidity around 40–60% and better airflow.
Quick Fixes You Can Try Tonight
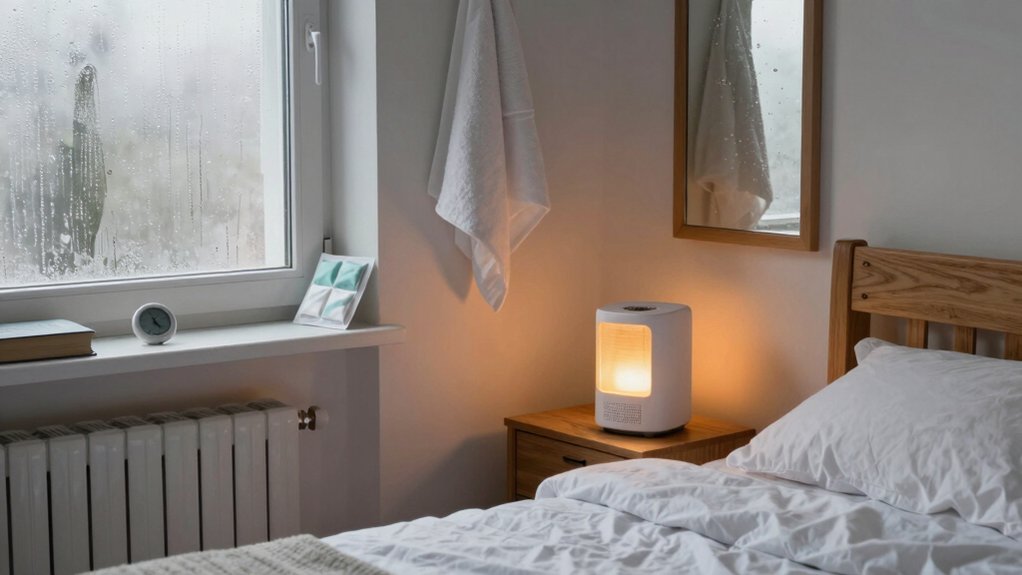
If you’re dealing with bedroom condensation, you don’t need to wait for a full repair plan to take action tonight. Start with moisture control basics: open a window briefly, or use a low-ventilation exhaust fan to move humid air out. Wipe down any visible droplets on windows and walls to prevent mold exposure.
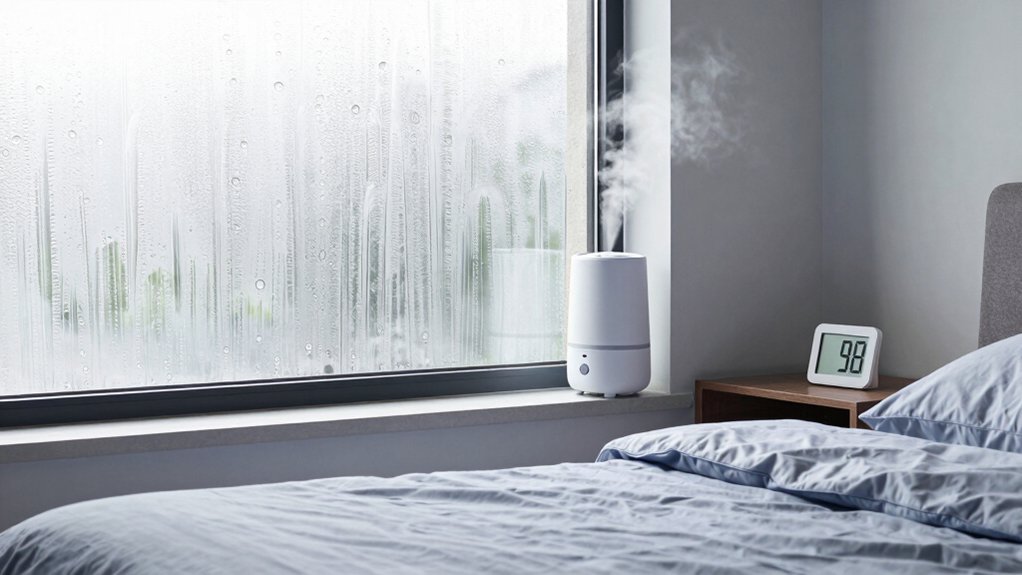
Use a dehumidifier or simple moisture absorber in problem corners to lower relative humidity fast. Check for overnight sources of moisture, like a steamy shower in an adjacent room, and if possible, delay it. Run a space heater only if you’re sure you won’t overheat the room or dry the air excessively.
Seal obvious drafts around doors or windows to reduce new moisture entering.
Everyday Habits to Reduce Moisture
Among everyday habits, small, consistent actions can prevent excess moisture from building up in your bedroom. You can reduce condensation by keeping windows slightly ajar or using a 5–10 minute daily vent after showers, cooking, or humid activities. Use exhaust fans when available and run them for a few minutes after use. Wipe down surfaces that fog or drip, and dry towels promptly to avoid damp corners.
Control indoor humidity by balancing sources: limit boiling water with lids on, and favor quick, energy-efficient cooking methods. Maintain a stable room temperature, avoiding extreme swings that create condensation. Choose breathable bedding and rotate fabrics to promote air flow.
Regularly check for leaks and address them promptly to prevent hidden moisture buildup.
Smart Ventilation Practices for Better Airflow
Smart ventilation uses sensors, timers, and smart controls to regulate airflow without overdoing it. You’ll enjoy steadier air exchange, reducing peak humidity after showers or cooking.
Place vents or exhausts where moisture builds most, and guarantee fresh air intake isn’t blocked by furniture or curtains. Use timers to boost ventilation during damp periods and back off when rooms are dry, saving energy.
A humidity or VOC sensor helps you fine‑tune the balance, since thresholds vary by season and occupancy. Run intermittent bursts rather than constant, low airflow to avoid drafts and heat loss.
Regularly clean or replace filters so airflow stays strong. Pair ventilation with consistent window opening when practical, but don’t rely on it alone in extreme weather.
Simple Insulation and Sealing Improvements
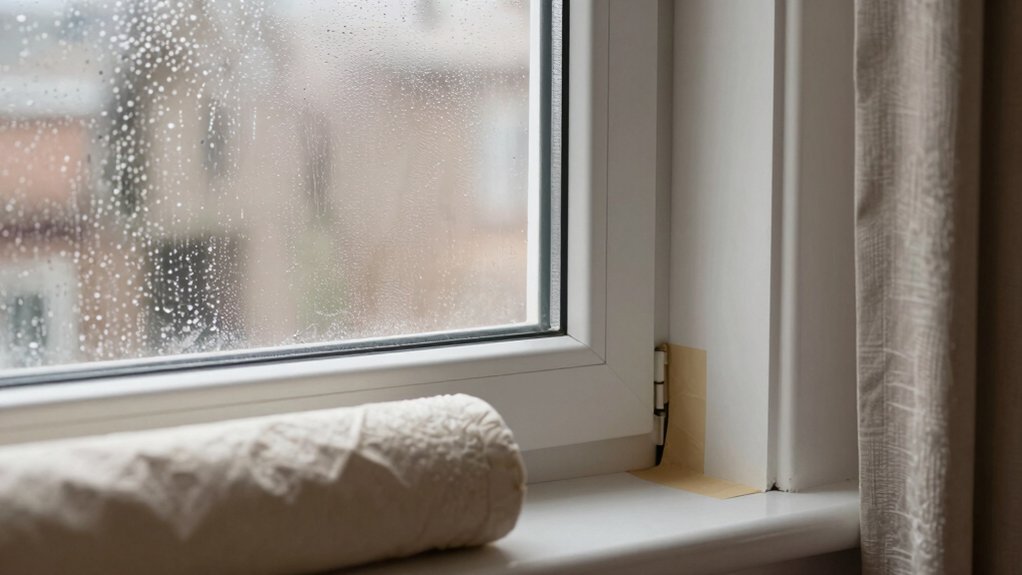
You can start by sealing obvious air leaks around doors, windows, and electrical outlets to stop warm, moist air from hitting cold surfaces.
Add or upgrade insulation where you notice drafts or frost, focusing on walls, ceilings, and attic access.
These steps reduce condensation risk and support more consistent indoor temperatures.
Seal Air Leaks
Sealing air leaks is a simple, effective way to cut condensation in bedrooms by reducing cold drafts and indoor moisture inconsistently entering or escaping. Start by locating gaps around windows, doors, electrical outlets, and attic access. Use weatherstripping on moving frames, caulk on stationary cracks, and door sweeps to seal thresholds.
Inspect electrical boxes and plumbing penetrations behind walls; seal with backer rod and foam where appropriate. In older homes, prioritize gaps near soffits, rooflines, and chimney conduits, since warm, moist air rises.
After sealing, recheck for drafts by holding a lighted candle near suspected zones or using incense. Maintain venting during routine activities to prevent moisture buildup. Remember, the goal is to minimize unintended air exchange without trapping humidity.
Boost Insulation
To boost insulation, start with simple, cost-effective improvements that reduce heat loss and trim condensation. You’ll feel steadier temperatures and drier air when you seal gaps around doors and windows, add or upgrade door sweeps, and weatherstrip frames.
Insulate exposed pipes and the loft hatch to minimize heat escape that fuels condensation. Swap single for double glazing where possible, or install secondary glazing and draft-proof curtains to cut drafts.
Use dense-pack or blanket insulation in accessible cavities, and foam or mineral wool in gaps behind outlets. Keep attic insulation thick enough to meet local guidance, and ensure proper ventilation balance to avoid stale air.
Regularly inspect damp spots; good insulation works best with consistent airflow.
Moisture-Absorbing Tools That Work
You’ll find that effective moisture absorbers, like calcium chloride-based products or desiccant packs, can reduce humidity in small, closed spaces.
Follow silica gel guidance for reusing or replacing packs, and choose products with clearly rated capacity for the room size.
Keep humidity in check with practical tips: measure RH, ventilate after showers, and use absorbers as a supplement to airflow and insulation.
Effective Moisture Absorbers
Effective moisture absorbers can cut dampness quickly without major remodeling. You’ll notice rapid reductions when you place them in hotspots like corners, closets, or near windows where condensation collects. Desiccant-filled packs and granules work by pulling moisture from the air, lowering relative humidity to safer levels.
Choose products with clear humidity ratings and avoid overloading a single space. Position absorbers away from heat sources and ensure good airflow to maximize effectiveness. Reassess weekly; replace or recharge as the product’s capacity nears saturation.
Pair absorption with ongoing ventilation and temperature control to prevent re-accumulation. If you detect persistent mildew or musty smells, consult professional guidance, since moisture problems can indicate underlying issues beyond surface condensation.
Silica Gel Guidance
Silica gel is a simple, effective moisture-absorbing tool you can use to curb dampness in bedrooms. Place silica gel packs or sachets in areas prone to condensation, such as near windows, doorframes, and closets.
Replace or recharge packs when they change color or lose fragrance, following product instructions. For best results, pair silica gel with good airflow: keep a small fan running intermittently and avoid blocking vents.
Don’t rely on it as your sole strategy; it complements ventilation and dehumidification efforts. Store excess packs in sealed containers to preserve effectiveness.
Monitor humidity with a reliable gauge; target readings around 40–60% depending on comfort and seasonal needs. Dispose of spent packs per label guidance and keep out of reach of children and pets.
Humidity Control Tips
In practice, using moisture-absorbing tools alongside ventilation and dehumidification helps keep bedroom humidity steady. You’ll spot effectiveness when granular, solid, or pouch-based absorbers capture damp air without constant swapping.
Silica gel, activated charcoal, and calcium chloride products work best when placed where humidity hotspots form, like near windows, wardrobes, or under sinks. For best results, pair absorbers with continuous airflow: keep doors open briefly during the day and run a quiet exhaust fan or dehumidifier at night.
Check and replace or recharge materials as advised by labels; this prevents saturation and odor buildup. Avoid overloading rooms with multiple devices; balance humidity to about 40–60 percent.
Document readings to track progress and adjust placement as needed.
Temperature Control Tips for a Dryer Space
If you’re dealing with a dryer space, regulating temperature is your first line of defense against condensation. Keep the room slightly warmer than outdoor temperatures to reduce moisture condensing on walls and surfaces. Aim for a steady range around 18–22°C (64–72°F) and avoid wide swings that trigger condensation cycles.
Use a thermostat or a smart controller to maintain consistency, especially during drying, heating, or ventilation events. Pair temperature control with targeted airflow—pull moist air out with a vent or exhaust fan while circulating drier air with a small fan.
Insulate cold surfaces, like exterior walls or windows, to minimize surface condensation. Monitor humidity, keep doors closed, and schedule drying when humidity dips, based on local weather data.
Measuring Improvement: When to See Progress
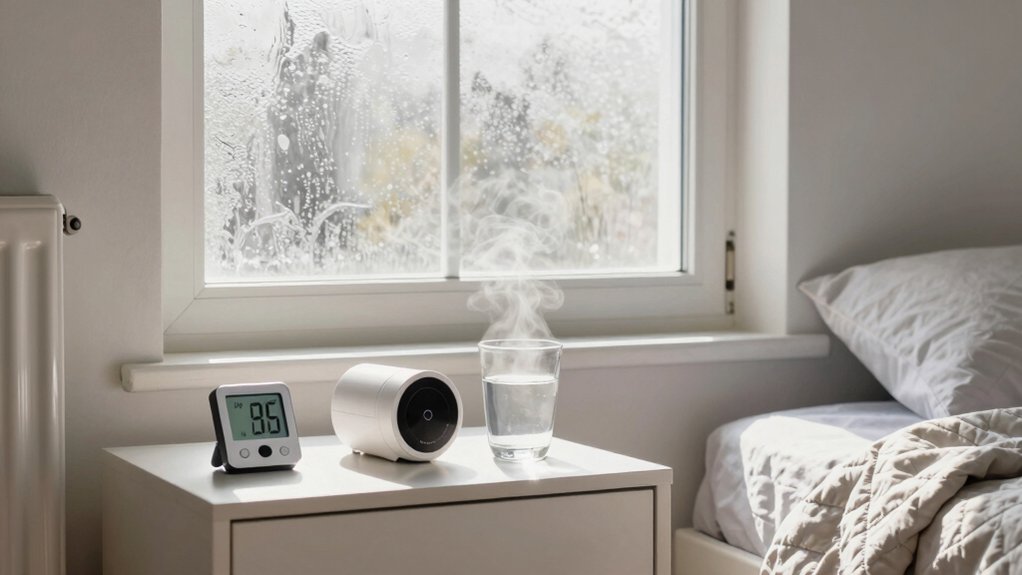
Measuring improvement starts with clear benchmarks from your previous steps. You’ll compare humidity readings, condensation frequency, and surface moisture over consistent intervals. Use a digital hygrometer to track daily averages, then note changes after 7, 14, and 28 days.
If you consistently see lower dew points on windows and fewer damp patches, that signals progress. Pair objective data with practical checks: fewer morning damp spots, drier towels, and less musty odor indoors.
Avoid overinterpreting single-day swings caused by weather or laundry loads. Document criteria you’ll treat as success, such as a stable relative humidity around 40–60% and no active drips.
If targets aren’t met after a reasonable period, reassess ventilation, insulation, or moisture sources without assuming failure.
When to Seek Professional Help
If persistent condensation or mold returns despite improved ventilation and insulation, it’s time to seek professional help. A qualified tradesperson can assess structural causes, such as leaks, poor insulation gaps, or inadequate moisture-retaining systems.
They’ll identify hidden sources of damp, check for mold growth beyond visible patches, and determine if remediation requires containment, cleaning, or replacement of affected materials. Seek certified mold assessors or damp specialists when mold covers larger areas or shows up repeatedly.
Before hiring, document your symptoms, dates, and any previous fixes, and ask for a written plan with timelines and costs. If you have asthma or allergies, or if occupants experience sore throats, headaches, or fatigue, consult a clinician and share findings.
Trust licensed professionals for safe, lasting improvements.
Frequently Asked Questions
Can Plants Worsen Bedroom Condensation, and Which Are Safe?
Plants don’t inherently worsen condensation; they can, if overwatered or placed to trap humidity. Choose low‑humidity plants, avoid waterlogged pots, vent rooms, and monitor moisture. Safe options include sansevieria, pothos, ZZ plant, with proper watering.
Do Ceiling Fans Help if Walls Stay Damp?
Yes, ceiling fans help by improving air circulation and delaying moisture buildup, but they don’t dry damp walls on their own; pair with dehumidification, sealing, and ventilation to reduce condensation effectively. Stay consistent with maintenance and monitor humidity.
Is a Dehumidifier Effective for Single-Room Condensation?
A dehumidifier can reduce single-room condensation. You’ll remove excess moisture, prevent damp, and improve comfort. You’ll choose a unit sized for the room, run it regularly, and pair it with ventilation, sealing leaks, and moisture-aware habits.
How Often Should I Vent a Clothes Dryer to Prevent Moisture?
Vent your clothes dryer after every load or at least daily in high-humidity spaces. Use a properly vented, unobstructed exhaust to outdoors, check for leaks, and keep the duct smooth to prevent moisture buildup and mold.
Are There Starter DIY Repairs That Won’T Reduce Mold Risk?
Yes, start with simple fixes: seal leaks, improve drainage, clean gutters, and fix obvious mold sources. But these won’t cut mold risk alone; pair them with moisture control, ventilation, and regular inspection to truly reduce growth.