
You might think a tight budget means you can’t refresh your space, but smart swaps can transform rooms without breaking the bank. Start with a fresh coat of neutral or bold paint, then layer affordable updates like peel-and-stick flooring and new hardware. Smart storage, layered lighting, and small textures finish the look. Curious how to stack these ideas for real improvements without a big cost? Keep going to see practical steps you can take this weekend.
Fresh Paint Palettes That Do More With Less
Choosing a fresh palette doesn’t have to break the bank; start with three versatile colors—one for walls, one for trim, and a punchy accent—that work together across rooms. You’ll maximize impact with a cohesive trio: a soft wall tone, a crisp trim shade, and a bold accent that draws attention without overpowering.
Consider color psychology to guide mood—calm neutrals for relaxation, or energizing hues for social areas—then test samples in natural light at different times of day. For durability, pick high-quality paints with good coverage and a satin or eggshell finish on walls, plus a durable matte for ceilings where appropriate.
Apply primer where needed to improve longevity, and use consistent color codes across rooms to maintain flow. With careful selection, your color scheme resists fading and stays cohesive through traffic.
DIY Laminate Upgrades for a Fresh Look
A quick laminate makeover can transform dated spaces, so start by choosing budget-friendly plank options that mimic real wood or stone for the look you want.
Plan your layout to install like a pro, focusing on alignment, seam tightness, and proper underlayment to prevent gaps and squeaks.
Keep the process efficient with precise measurements and cut accuracy, plus simple finishing touches that maximize impact without breaking the bank.
Quick Laminate Makeover
Want a fresh kitchen or bath without a full remodel? A quick laminate makeover lets you refresh surfaces fast and affordably. Begin with clean, dry countertops and replace only the top layer where seams and edges show wear. Choose high-contrast edges or a subtle solid color to mask wear and create the illusion of depth.
Use painter’s tape to protect adjacent areas, then sand the existing laminate lightly to improve adhesion. Wipe away dust, apply a primer designed for laminate, and let it dry thoroughly.
Install a new laminate sheet, aligning patterns carefully, and seal edges with matching trim. For long-term results, prioritize laminate durability and moisture resistance of your chosen material, and avoid exposing the surface to standing water or heat leaks.
Budget-Friendly Plank Choices
When you’re upgrading your laminate on a budget, plank choices matter as much as the sheet itself. Start with thickness and wear layer: aim for at least 12mm with a 2–4 mil wear layer for durability in high-traffic rooms.
Consider plank width and length to mimic real flooring and reduce seams; longer, wider planks can visually enlarge small spaces. For texture, choose embossed-in-register finishes or micro-beveled edges to hide joints without looking busy.
Budget options include wall paneling-inspired designs and reclaimed wood motifs that disguise repetition. Pair with water-resistant core for kitchens and baths, and look for easy-click installations to save time.
Finally, inspect underlayment compatibility; a sound underlay minimizes hollow spots and enhances feel underfoot.
Install Like a Pro
Installing laminate like a pro starts with a solid plan and the right basics in place. You’ll measure rooms carefully, accounting for doorways, closets, and progressions to avoid waste. Pick boards with a good wear layer and a visible texture that hides scratches, then lay out a full sheet map to minimize cuts.
Prepare the subfloor—ensure it’s clean, dry, and level, using a self-leveling compound if needed. Use underlayment for sound dampening and moisture protection, especially in kitchens or baths. Install with tight seams and staggered joints for strength.
Cut angles precisely with a powered saw, and tap planks gently into place. Consider eco friendly materials and smart home prep, like cable routing for future home automation upgrades. Finish with trim that blends seamlessly.
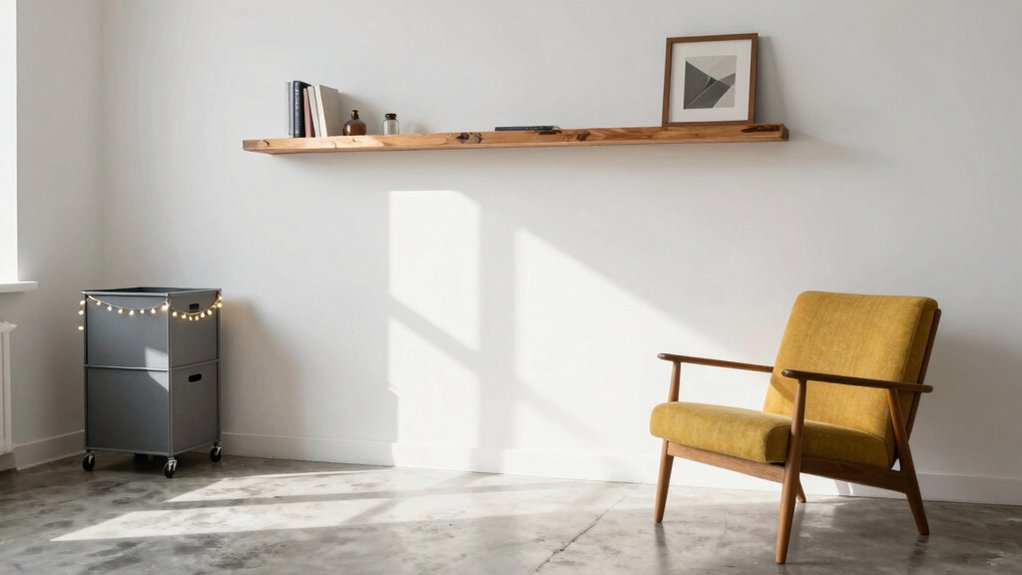
Smart Storage Hacks to Maximize Small Spaces
Hidden wall nooks let you tuck away everyday essentials without crowding. Pair under-shelf rails with modular bins to keep items accessible and off the counter, using the rails for mugs, spices, or tools.
Start by profiling high-traffic zones and marking where slim, reachable pockets will fit, then install discreet channels to maximize every inch.
Hidden Wall Nooks
Hidden wall nooks turn dead space into smart storage without bulky furniture or visible brackets. You can transform corners and alcoves into practical storage by pairing slim cabinetry with shallow pullouts.
Start with a plan: map traffic flow, measure depths, and choose materials that blend with existing finishes. Hidden wall nooks work best when you create cozy alcoves with recessed lighting, so items are accessible yet unobtrusive.
Install discreet shelving at varied heights to accommodate books, jars, or small decor, and add soft-close doors to conceal clutter. Use pull-out organizers inside doors for spices, tools, or cleaning supplies.
Label bins for quick retrieval, and keep rarely used items higher up. This approach delivers secret storage that feels integrated, not added, preserving a clean, functional living space.
Under-Shelf Rails
Under-shelf rails slide in as a simple, efficient way to gain quick access to small items without crowding your counters. You slip rails beneath existing shelves, letting mugs, spices, or tools hang just at hand. Install is gentle: a low-profile track, screws, and a couple minutes of alignment can transform a cluttered cabinet into organized, reachable storage.
Use them for frequently used items and keep seasonal or bulk supplies elsewhere to avoid overloading the system. Because the rails live hidden under the shelf, you preserve a clean look while adding functional capacity. This setup doubles as hidden storage, reducing visual clutter without sacrificing accessibility.
Pair with decorative accents—colorful mugs or labeled jars—to personalize and streamline daily routines.
Budget-Conscious Hardware Swaps That Make a Difference
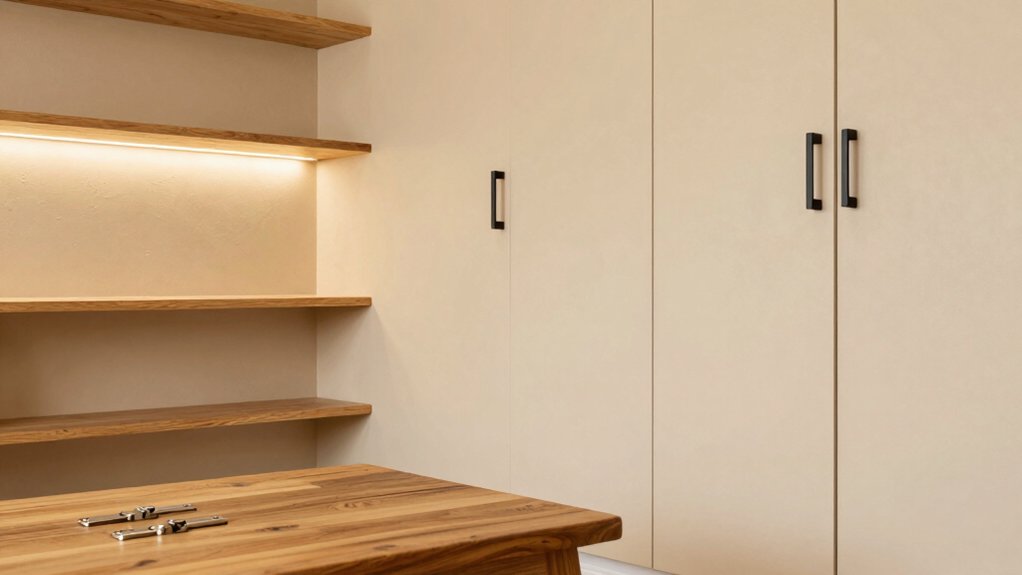
Upgrading inexpensive, everyday equipment can dramatically improve a room without breaking the budget. You’ll focus on small, strategic swaps that feel substantial.
Begin with cabinet knobs and drawer pulls; choose brushed nickel or matte black for a cohesive look, and select sizes that balance door fronts.
Replace door hinges and pivot hardware to reduce squeaks and align gaps, improving perceived quality without costly replacements.
When updating fixtures, swap out towel bars, robe hooks, and toilet paper holders for durable, corrosion-resistant finishes that echo your faucet choices.
Upgrade faucet hardware and pop-out stops where feasible to prevent leaks and boost longevity.
Track hardware life cycles and compare warranties to ensure long-term value.
These hardware upgrades and fixture enhancements collectively elevate space with minimal disruption and cost.
Lighting Solutions That Brighten Rooms on a Budget
Lighting can transform a room quickly and affordably by maximizing brightness with smart choices and placement. You’ll gain impact by layering light: ambient, task, and accent.
Start with a brighter baseline using efficient LED fixtures and dimmable drivers to control mood. Swap old bulbs for cooler temps in work zones and warmer tones in living areas. Use lampshades and reflective surfaces to amplify glow without adding heavy fixtures.
Consider solar panels for outdoor lighting persistence, reducing energy draw while extending usable outdoor hours. Install wall sconces at eye level to eliminate shadows, and place under-cabinet LEDs for kitchen tasks.
Recessed fixtures centered in ceilings optimize coverage. For entrances and pathways, opt for low-profile outdoor lighting with voltage control to balance safety and energy use.
Quick Wall Texture and Tile Ideas Without Breaking the Bank

If you’re aiming to refresh walls and floors without a big budget, simple texture tricks and affordable tile options can make a dramatic difference. Start with textured wall finishes that you can DIY in a weekend: faux stucco, skip-trowel, or combed patterns add depth without expensive materials.
For ceilings and accent walls, use plaster tape textures or lightweight molding to create subtle shadows. On floors, try tile peel and stick for a fast, clean update; choose large formats to minimize grout, or mix with coordinating vinyl planks for durability.
Combine matte neutrals with a single glossy tile accent to keep costs down while maintaining visual interest. Seal textured surfaces properly and use underlayment when needed to prevent moisture issues and ensure longevity.
Affordable Window Treatments With Big Impact
Even with a tight budget, you can transform a room’s mood and function with window treatments that feel high-end. Start by choosing window coverings that balance light control and privacy, like layered options that pair sheer sheers with opaque panels.
Opt for neutral tones to maintain cohesion, then add a subtle pattern through a textured fabric or a slim rod with decorative end caps. If you want maximal impact, install blackout lining behind lightweight curtain styles to improve sleep and glare reduction without bulk.
Keep installation simple: hang rods above the frame to create the illusion of taller ceilings, and use large panels to drape softly. Finish with hardware in a finish that matches other metal accents for a polished, cohesive look.
Creative Flooring Fixes and Replacements on a Budget
Transforming worn floors on a budget is all about smart, practical fixes that maximize impact with minimal expense. Start with a quick assessment: identify high-traffic zones and damage level, then prioritize fixes that give the most visual lift.
Refresh with area rugs layered over existing surfaces to define zones, add color, and hide wear without full replacement. Choose durable, affordable options in low-pile textures for easy cleaning.
If your subfloor shows unevenness, consider peel-and-stick vinyl plank patches that snap together, offering a refreshed look at a fraction of full installation.
For walls you’ll notice near floors, apply wall decals to create patterns or borders that draw attention upward and distract from minor flaws.
Seal edges, maintain moisture control, and measure precisely before buying materials.
Before-and-After Transformations for Inspiration
Before-and-after transformations can spark real ideas, giving you a clear sense of what’s possible with thoughtful tweaks. You’ll see how small changes add up: swap out dated finishes, add clean lines, and spotlight focal points with contrasting textures.
Start with a room you use daily and define a practical goal—function, mood, or storage. Use Before shots to map issues like clutter, poor lighting, or awkward layouts, then plan a tight sequence: de-clutter, refresh, and upgrade only what truly matters.
Incorporate luxury materials where you’ll notice impact, such as a durable countertop or textured tile accent. Consider high end appliances for efficiency and long-term value.
Document progress, compare, and adjust; the payoff is a cohesive look that stays within budget.