
Sometimes you’ll notice damp patches and a coincidence: the same wall seems damp after a cold snap. You might blame bad luck, but cavity wall insulation can cause mold, cold spots, and higher bills if it’s poorly installed or deteriorating. You’ll want to spot signs early, weigh removal costs, and decide whether to keep or remove it. Curious what concrete steps to take next, and what a professional will check? Find out more below.
Recognizing Damp Patches Behind the Walls
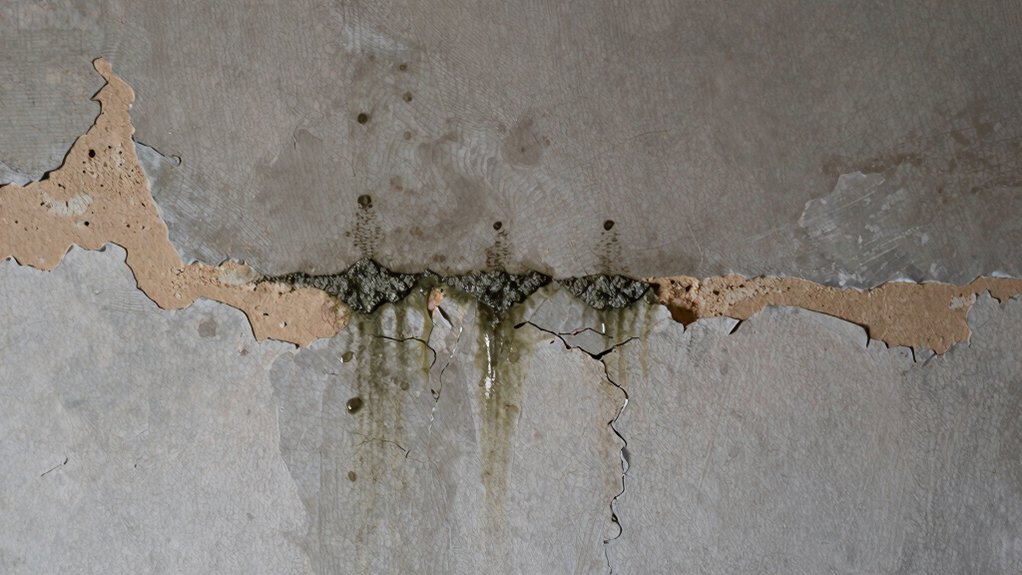
Hidden damp patches behind walls aren’t rare in older homes, and spotting them early is key. You’ll likely notice damp on plaster, paint bubbling, or wallpaper peeling near suspect walls. Start with a visual scan across rooms, focusing on exterior walls and any corners where cold spots form. Look for temperature contrasts on chilly days—thermal bridging often reveals itself as cooler patches that invite moisture.
If you suspect damp, don’t ignore it: moisture barriers should block rising moisture, but gaps or breaches can render them useless. Use a moisture meter to confirm high readings and trace damp to its source, whether plumbing, leaks, or salt efflorescence. Treat suspected, hidden damp seriously; improper remediation worsens damage and raises future costs.
Unusual Musty Smells and Air Quality Clues
You might notice a musty odor lingering near insulation, and that smell can point to moisture or mold sources you’ll want to verify.
Use simple air checks—keep rooms ventilated, test for lingering humidity, and look for damp spots or discolored patches that don’t dry quickly.
Treat any odor or air quality clue as a warning, not a guess, and address the source before it spreads.
Musty Odor Sources
Musty odors in a cavity-walled home usually point to moisture problems behind the wall or in the attic, not a mysterious scent in the living space. You should approach mustiness skeptically: odors aren’t proof of “hidden mold”—they signal transfer paths and conditions.
Focus on practical clues: damp spots, staining, seasonally stronger smells after rain, or humidity spikes. In terms of sources, moisture intrusion often travels through vulnerable points—around plumbing, roof lines, and where insulation gaps exist.
Check for gaps around electrical boxes and rim joists; these can carry damp air into cavities. If you detect odors, don’t assume ventilation fixes it. Identify the root cause, seal insulation gaps, and address moisture intrusion with proper barriers.
Then reassess smells after remediation rather than guessing at unseen mold.
Air Quality Clues
Air quality clues matter when you’re dealing with a cavity wall. Unusual musty smells aren’t random signals; they hint at moisture, mold, or stagnating air. Before you panic, check for obvious sources: damp patches, leaks, or recent weather changes.
If odor persists, examine ventilation issues and air circulation in adjacent rooms—poor flow can trap contaminants and amplify smells. Keep windows open briefly to test odor changes, then look for hidden air gaps around electrical boxes or plumbing entries.
Use a simple moisture meter to verify humidity levels; elevated readings suggest dehydration or condensation rather than a failed insulation install. Don’t rely on scent alone—combine airflow checks with visible moisture signs to assess real risk and prioritize necessary remediation.
Condensation Inside Your Rooms and Windows
Condensation shows up as misty windows or damp patches, so you’ll want to spot Signs Explained early. We’ll weigh how effective simple Mitigation Strategies are, not just promise big fixes.
Don’t assume insulation alone solves temperate moisture—check humidity, ventilation, and everyday habits before you decide what works.
Condensation Signs Explained
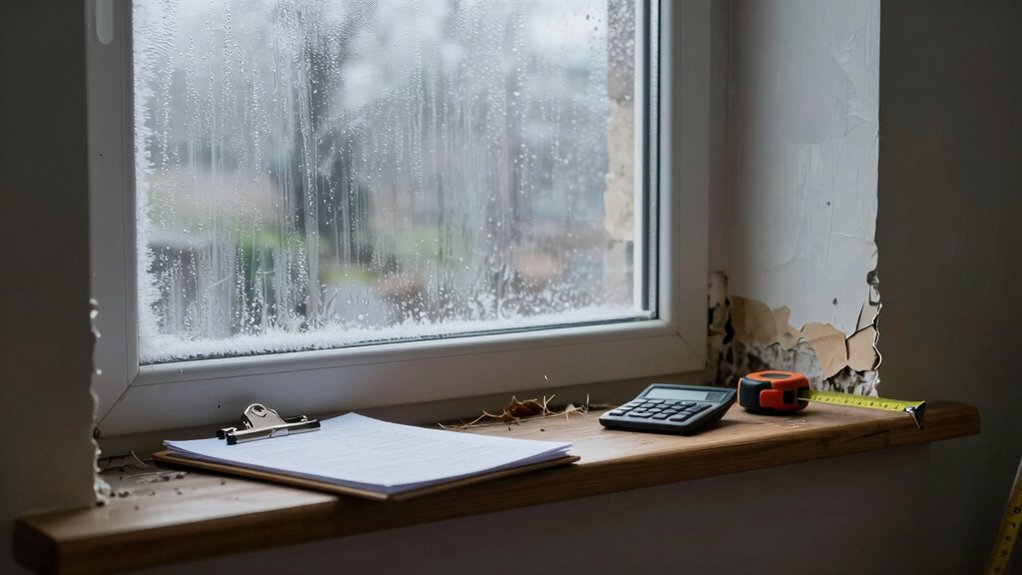
Even if you don’t notice it at first, condensation can form where warm, moist air meets cold surfaces, like windows or exterior walls. You’ll see droplets, foggy panes, or damp patches on sills. It isn’t always a sign you’ve got a leak—often it’s a ventilation issue or thermal bridging at walls and around frames.
Check your routine: drying clothes indoors, long showers, and cooking without venting can raise humidity fast. Improve airflow with vents, extract fans, or a simple window opening. Keep internal temps steady to reduce cold spots; don’t rely on dehumidifiers alone.
If condensation recurs, look for patterns: higher on exterior walls or near poorly insulated edges. Persistent signs warrant professional assessment, since faulty insulation can worsen thermal bridging and moisture buildup.
Mitigation Strategies Effectiveness
Mitigation strategies for condensation inside rooms and windows work best when you target what’s actually driving moisture, not just the symptom. You shouldn’t assume higher loft insulation fixes the problem; you must assess underlying causes like thermal bridging and insulation effectiveness.
Start by sealing leaks around windows and doors to reduce cold surfaces that attract mist. Improve ventilation only where humidity builds, not blindly, and use extractor fans in kitchens and baths. Control indoor plants and drying sources, since they add moisture without solving the root issue.
Consider upgrading insulation in problem spots to minimize temperature differentials, but verify you’re addressing gaps, not just adding mass. For real reductions, pair moisture control with targeted insulation improvements and monitor results over several weeks.
Signs of Poor Insulation Installation
If you notice gaps, drafts, or visibly misaligned panels after the installation, those are strong signs that the insulation was installed poorly. You should also watch for uneven thickness, compressed batt, or gaps around outlets and corners.
Poor workmanship often creates thermal bridging, where heat travels through studs and gaps, undermining performance. Inspect whether the chosen insulation materials were suited to your climate and wall structure; mismatch hints at sloppy job.
Another red flag is inconsistent density, leading to air pockets that reduce effectiveness. Beware persistent cold spots near external walls, and listen for rattling or settling sounds behind walls.
Ask for documentation on installation methods, material types, and density specs. If concerns persist, consider a third-party assessment before deciding on removal or reinstallation.
Water Ingress and Mould Growth Indicators
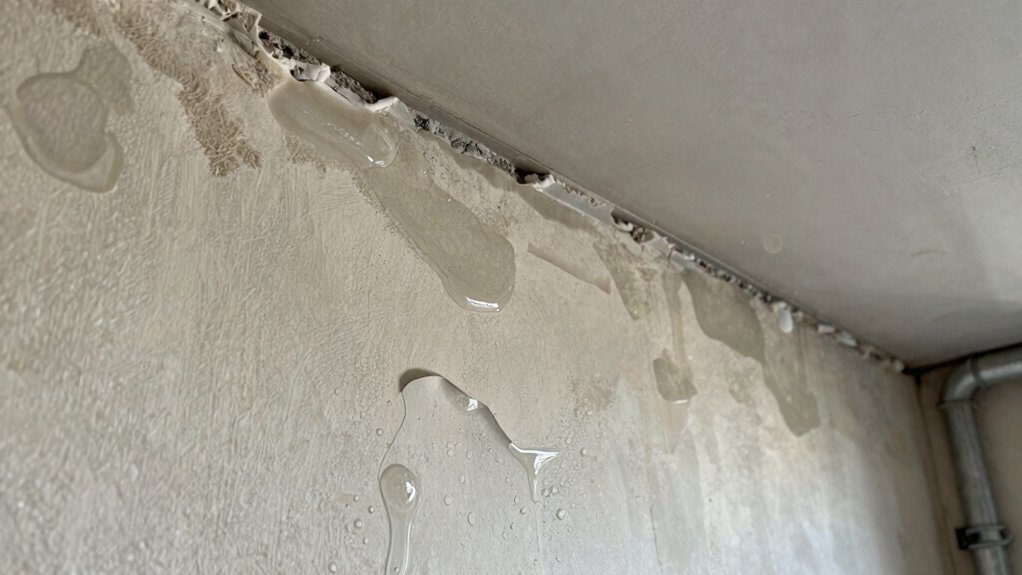
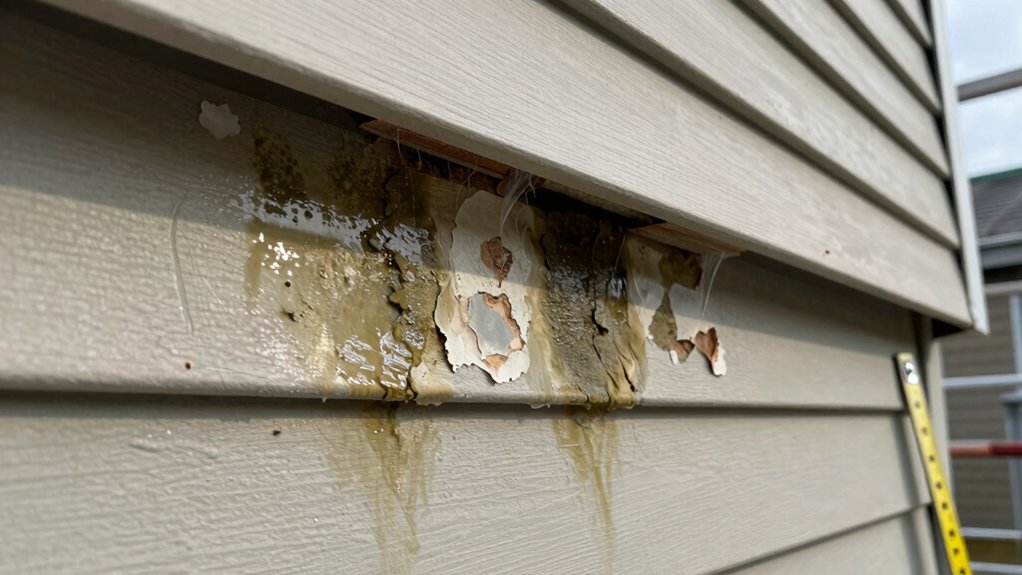
Water ingress and mould grow where moisture meets cold surfaces or gaps in the insulation. You’ll notice damp patches on internal walls, paint blistering, or peeling wallpaper near external walls. Look for higher humidity, condensation on windows, or a musty smell that won’t quit.
Moisture intrusion often follows gaps, cracks, or defective seals around the cavity, so inspect for poor plaster, failed render, or loose bricks that invite air leaks. If you see dark stains or recurring damp after rainfall, treat it as a warning sign rather than a cosmetic issue.
Mold development can occur even without visible water, so monitor for consistent moisture levels. Don’t assume ventilation alone fixes the problem; verify the cavity integrity and consider a professional assessment if symptoms persist.
Assessing Structural and Thermal Impact
Evaluating Structural and Thermal Impact requires a disciplined check: determine where insulation gaps let heat escape and how that affects the building’s frame. You’ll want to map likely cold spots, then test with a simple infrared or thermographic approach if available, but don’t rely on gadgets alone.
Look for signs of thermal bridging where studs, ties, or masonry run heat across cavities, undermining the wall’s efficiency. Assess insulation degradation by noting settled material, moisture exposure, or compression near fixings.
Consider how gaps align with structural elements; heat loss here can stress joints or encourage condensation. Document findings with photos and notes, then prioritize remediation that restores continuous insulation and eliminates bridges, rather than patching symptoms.
Don’t overlook moisture-driven risks or long‑term performance impacts.
When to Consider Removal: Early Warning Signals
If you notice cracking, damp patches, or musty smells near insulated walls, these are early warning signals you can’t ignore. These inspection triggers should prompt you to check for moisture intrusion, failed vents, or gaps that could justify removal or replacement.
Stay skeptical: document signs, seek a professional assessment, and weigh removal only if the risks to insulation performance and structure exceed the costs.
Early Warning Signals
Early warning signals indicate when cavity wall insulation might need removal or replacement. You’ll notice rising heating bills without bigger rooms getting warmer, or cold spots that stubbornly persist.
Cracks around outlets, window frames, or corners can hint at shifts in the cavity or moisture intrusion, not just poor drafts. You may see damp patches on plaster or repaint failures, which aren’t cosmetic quirks if insulation materials aren’t performing.
If your walls feel hollow when tapped, that could signal material settling or displacement, potentially creating thermal bridging. Off-gassing smells or mustiness deserve attention, even if they seem minor.
Don’t chase every fluttering indicator; verify with a simple test or professional check, focusing on performance over aesthetics.
Inspection Triggers Prompting Action
Even with normal heating, you should act when you notice clear triggers: persistent cold spots, rising bills, or walls that feel hollow or damp. Those signals aren’t bed-time stories—they hint at deeper flaws.
Your goal is to assess if insulation failure, thermal bridging, or damaged moisture barriers are at play, not to panic. Inspect for inconsistent wall temperatures, mold in corners, or damp patches that won’t dry.
If you detect gaps around outlets or inconsistent plaster, expect heat loss to travel through cavities. Ask a pro to verify thermal bridging patterns and whether moisture barriers are compromised.
Early removal may prevent costly fixes later, but weigh fit-for-purpose insulation against return on investment and disruption. Document findings, compare quotes, and don’t rush a decision.
Warning Signs in Walls
Watch for clear warning signs in walls that tell you it’s time to contemplate removal. You’ll notice cold spots that persist after adjusting heating, plus damp patches or musty odors rising from studs. Cracks or bulging plaster can indicate moisture behind the cavity, not just settling.
If you see stained ceilings or uneven paint, don’t assume aging walls—check for hidden moisture concerns. Thermal bridging worsens heat loss near masonry joints, while insulation gaps leave cold pockets that disguise real conditions.
You may also observe higher bills without obvious cause, or pest activity where insulation collapsed. Don’t ignore reusable evidence; act when signs cluster. Removal decisions should consider moisture history, allergen risk, and the implications of compromised insulation performance.
Prioritize targeted investigations before wide-scale remediation.
Cost Breakdown: Removal, Replacement, and Repairs
Removing, replacing, or repairing cavity wall insulation isn’t optional if you’re dealing with moisture, drafts, or energy waste—it’s a cost you’ll face, so understand each part.
You’ll start with a cost analysis that separates removal, disposal, and any necessary damp-proofing or re-sealing.
Expect higher labor costs if walls are hard to access or you need multiservice work (plumbers, electricians).
Replacement costs hinge on material choice and whether retrofit gaps require additional insulation or vapor barriers.
Repairs, when present, can be modest or substantial—patches, seals, and rewiring checks add up quickly.
Get contractor estimates that itemize labor, materials, and debris removal.
Don’t assume a single price; compare quotes, ask about hidden fees, and verify warranties to avoid surprises later.
Weighing the Pros and Cons of Cavity Wall Insulation
Cavity wall insulation can cut heat loss and lower bills, but it isn’t a guaranteed win. You weigh the pros and cons by checking if your home’s climate, wall structure, and existing moisture conditions suit the choice.
Pros: improved energy efficiency, better temperature stability, potential noise reduction.
Cons: installation risks, possible moisture problems if water ingress isn’t managed, and limited benefit in already well-insulated or small spaces. It can increase the chance of condensation if ventilation isn’t adequate, so moisture control becomes critical.
Consider your living patterns, retrofit options, and cost payback timeline. Don’t assume bigger is better; in some homes, partial or no installation may be the smarter route.
Gather data, compare costs, and test for drafts before deciding.
How to Choose a Reputable Installer and Check Eligibility
Choosing a reputable installer starts with simple checks: verify credentials, confirm eligibility for incentives, and demand clear, itemized quotes. You don’t want vague promises or hidden costs.
Start by checking installer reputation through independent reviews and referrals; look for consistent, long-term track records, not one-off miracles.
Next, pursue eligibility verification for any government or energy-saving incentives—confirm the installer can actually access them and that you qualify.
Demand detailed, fixed-price estimates, including installation, materials, access, and potential damage repairs.
Ask for proof of insurance, trade certifications, and building warranties.
Avoid high-pressure sales tactics and vague timelines.
Get everything in writing, including post-installation support.
If something feels off, pause and compare with another option.
Trust your due diligence over cheerleading claims.