

Damp proofing starts with spotting the signs and identifying the source. Look for stains, peeling paint, mold, musty odors, and damp patches that feel cool to the touch. Determine whether it’s rising damp from the ground, penetrating damp from exterior damage, or condensation from inside. Choose treatments accordingly: moisture barriers and external waterproofing for intrusion, vents and dehumidifiers for condensation, and improved drainage plus gutter maintenance for rising damp. If you keep exploring, you’ll discover proven solutions and prevention steps.
Recognizing Signs of Damp in Your Home
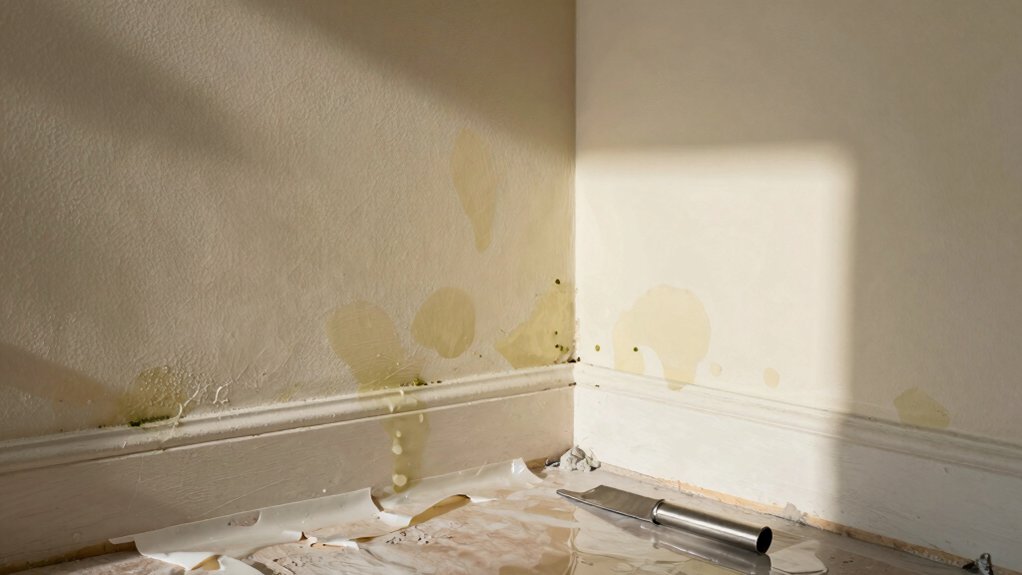
Damp can creep into your home in quiet, obvious ways. You’ll notice stains on walls, peeling paint, or wallpaper that won’t lay flat. A musty smell signals hidden moisture, especially in basements or tucked-away corners.
Check for condensation on windows, damp patches behind furniture, or warped trim. If you feel air temp changes near floors or ceilings after rain, you may be seeing subtle indicators.
Look for mold growth in corners, along shelves, or under sinks. Pay attention to persistent damp patches that don’t dry out after cleaning.
When you identify damp, start by improving airflow and reducing humidity. Consider upgrading wall insulation and installing moisture barriers to prevent ongoing moisture intrusion and maintain a healthier, drier living space.
What Causes Damp: Key Moisture Sources
Moisture in homes mostly comes from three sources: outside water that infiltrates through walls and foundations, indoor humidity from daily activities, and condensation that forms when warm air meets cold surfaces. You’ll often see damp trace back to how your space manages moisture.
First, consider wall insulation; proper insulation reduces temperature differences that drive condensation on chilly surfaces.
Second, check moisture barriers in crawlspaces and basements to block ground moisture from seeping upward.
Third, improve ventilation in kitchens, baths, and laundry areas to keep humidity at reasonable levels.
Address leaks promptly, and seal gaps where water can enter.
By optimizing wall insulation and installing effective moisture barriers, you reduce damp risk without costly, invasive work.
Regular checks prevent recurring moisture issues.
Rising Damp Explained: How It Develops
Rising damp develops when moisture from the ground travels upward through porous building materials, leaving a damp trace on walls and floors. You’ll notice higher moisture near the base of walls, sometimes with a damp, musty smell. This happens as capillary action pulls water through brick, concrete, and plaster.
As water rises, it brings salts to the surface, creating wall efflorescence that looks like white powder or crust on masonry. You may also see peeling paint and damp patches that extend several inches above floor level.
Addressing rising damp starts with accurate diagnosis—check drainage, soil grade, and plumbing leaks. Reducing basement moisture requires proper ventilation and a moisture barrier or timely repairs. Quick action prevents structural damage and costly remediation later.
Penetrating Damp: External Factors That Wet Your Walls
External factors can wet your walls from the outside, so start by checking how rain, wind-driven spray, and ground moisture reach the exterior surfaces. You’ll assess exterior features and drainage patterns that channel moisture toward walls. Look for cracked stucco, damaged siding, missing seals, and gutters that overflow.
Identify where water leaks run down interfaces between walls and foundations after rain. Improve wall insulation to reduce heat-related condensation risk on exterior surfaces and to slow moisture ingress during wet periods.
Confirm exterior waterproofing is intact around foundations and low-lying brickwork, with flashing sealed and waterproof barriers properly installed. Seal gaps at windows and door frames, and redirect runoff away from the structure.
Regularly inspect for new damp spots after storms.
Condensation: A Common Indoor Moisture Issue
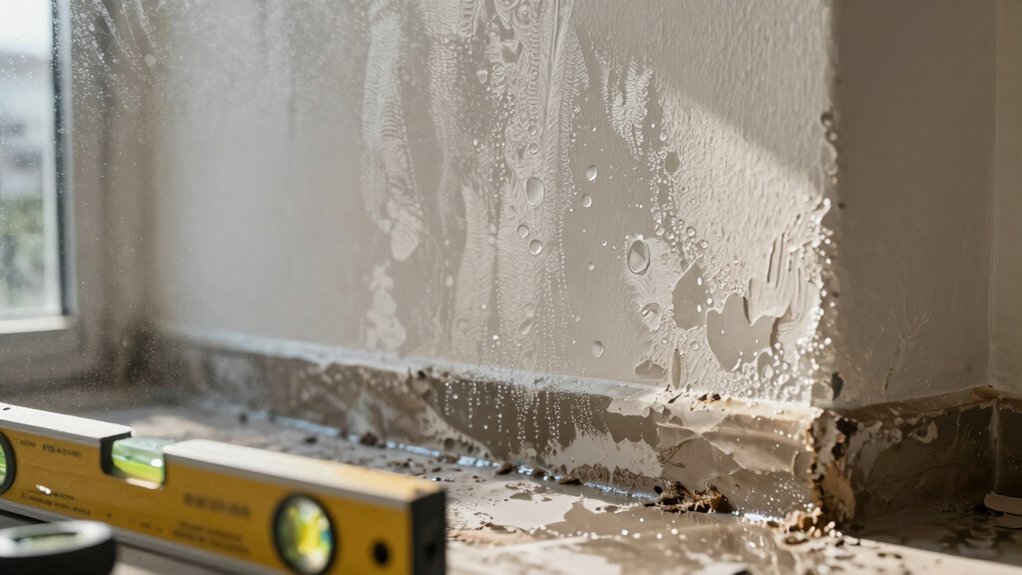
Condensation happens when warm, moist air meets cooler surfaces, so you’ll notice moisture buildup on windows, walls, and fixtures. It’s driven by factors like temperature differences, humidity levels, and everyday activities.
Recognizing these causes helps you target the right fixes. We’ll cover what causes condensation, how temperature and humidity interact, and practical ways to reduce it.
Causes of Condensation
Humidity in your home often creates condensation when warm, moist air meets cooler surfaces. Condensation happens when moist air touches walls, windows, or pipes that are cooler than the air, causing water to deposit as droplets or mist.
You generate moisture from cooking, showering, drying clothes, and even breathing. Poor ventilation lets this moisture linger, raising relative humidity and increasing condensation risk.
Air circulation helps; it moves warm, moist air away from surfaces and replaces it with drier air. Home insulation reduces heat loss and cold spots that invite condensation, especially on exterior walls or ceilings.
Identify sources of moisture and control them: vent bathrooms, use exhaust fans, and keep rooms evenly warmed. Consistent airflow and proper insulation are key to preventing recurring damp issues.
Temperature and Humidity
Consider how temperature and humidity interact: warm air holds more moisture, so as temps rise, relative humidity can fall, and as temps fall, it rises. You’ll notice condensation where cold surfaces meet moist air, especially on windows and walls.
To manage this, monitor indoor humidity levels and aim for a comfortable range, typically 40–60%. Improve thermal insulation to reduce temperature differences between indoors and outdoors, which helps limit surface condensation.
Ensure proper ventilation in kitchens, baths, and laundry areas to dilute moisture before it reaches surfaces. Use extractor fans or dehumidifiers when needed, but avoid over-drying the space.
Better indoor air quality comes from balanced humidity, a solid insulation plan, and routine checks for damp spots that signal ongoing issues.
Mitigation Strategies
Are you ready to tackle condensation before it damages walls and furnishings? Mitigation starts with reducing moisture sources and improving air balance.
In living spaces, run exhaust fans during showers, cook meals with lids, and avoid drying clothes indoors.
Increase ventilation by opening windows briefly or using a balanced ventilation system to exchange moist air for drier air.
Maintain indoor humidity around 40–60% and address cold surfaces that invite condensation by improving insulation.
For persistent issues, inspect windows and insulation in the basement and crawlspace, since moisture can travel from there.
If mold appears, pursue mold remediation promptly and consider basement waterproofing measures to stop recurring dampness.
Tackle leaks and water intrusion promptly to protect structural integrity.
Assessing Damage: From Stains to Structural Concerns
When evaluating damage, start by distinguishing visible stains from systemic issues. You survey walls, floors, and ceilings, noting color, spread, and texture. Stains can signal past leaks, condensation, or moisture infiltration; structural concerns may reveal cracks, bowing drywall, or efflorescence.
Assess whether staining is isolated or recurring with weather changes. Observe for peeling paint, rust, or warped finishes, which hint at ongoing moisture exposure.
Next, consider underlying causes: inadequate basement drainage, poor wall insulation, or compromised vapor barriers. Track moisture sources to prioritize repairs, not just aesthetics.
Document findings with photos and measurements for timelines and cost estimates. Before interventions, confirm that drainage and insulation improvements are integrated into the plan to prevent reoccurrence and safeguard long‑term stability.
Quick At-Home Checks to Identify Damp
Look for visual moisture clues like gray patches on walls, peeling paint, or powdery texture in corners.
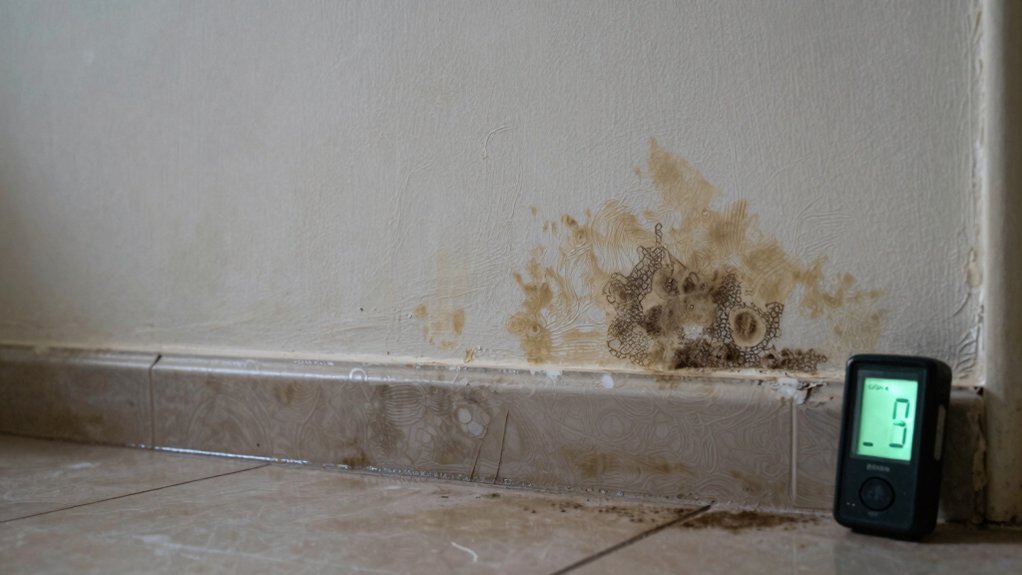
Monitor humidity levels with a simple gauge and note musty odors that linger after cleaning.
Do quick surface checks for damp patches, condensation on windows, and any persistent damp spots to guide further assessment.
Visual Moisture Clues
Visible moisture clues you can spot at a glance help you determine damp conditions quickly. You’ll notice staining on walls or ceilings, peeling paint, and wallpaper coming loose in corners.
Look for musty or sour odors that hint at moisture behind surfaces, even if it’s not visibly obvious. Condensation on windows, silvering on mirrors, or water beads on cold surfaces signal elevated humidity.
Check for damp patches that feel cool to the touch and note any soft, crumbly, or mold-prone textures. If you’re unsure, use thermal imaging to reveal hidden cold spots where moisture concentrates.
For a professional assessment, consider mold testing to confirm presence and type, guiding targeted treatment without overreacting to minor signs.
Quick visual checks save time and prevent escalation.
Humidity and Odor Signs
High humidity and lingering odors often signal damp behind walls or floors. You can spot this quickly by feeling consistently damp air in rooms, especially after showers or cooking, and noting musty smells that linger even when you vent the space.
Look for foggy windows, sticky surfaces, or wallpaper that peels without an obvious cause. In closets and basements, check for moisture residues on concrete or masonry, which often accompany hidden leaks.
Use a hygrometer to gauge relative humidity, aiming for 30–50% in most spaces. If readings stay high or odors persist, consider moisture barriers in vulnerable areas and focus on mold prevention by promoting airflow and addressing sources promptly.
Regular checks help prevent structural damage and health risks.
Quick Surface Checks
Quick Surface Checks are your first line of defense for spotting damp without tools. You’ll inspect walls, ceilings, and baseboards for discolored patches, peeling paint, or peeling wallpaper, noting any odd texture changes.
Run your hand along surfaces to detect soft spots or powdery textures that hint at moisture behind them. Look for damp odors and mold growth in corners, windows, and adjacent rooms.
Check for condensation on colder surfaces and verify if prior repairs underperform after rain or humidity spikes. If you find issues, consider paint protection strategies that seal minor leaks and reduce surface breathability.
For long-term resilience, plan structural reinforcement where you see repeated damp in the same area, and coordinate those fixes with appropriate waterproofing and ventilation upgrades.
Choosing the Right Treatment: When to Treat Each Issue
When deciding which treatment to use, assess the root cause and severity of each issue before acting, so you choose the most effective method the first time. You’ll determine whether dampness results from moisture intrusion, condensation, or structural leakage, and then match the approach accordingly.
For structural water ingress, consider waterproof membranes as a long‑term barrier, installed behind walls or under slabs to halt further penetration. If mold growth accompanies damp surfaces, apply mold inhibitors to minimize recurrence while you address the moisture source.
In indoor condensation scenarios, improve ventilation and insulation first, reserving sealants for minor gaps. Always document findings, plan staged interventions, and monitor results, adjusting tactics if moisture persists.
Prioritize durable, preventive solutions over quick fixes wherever possible.
Proven Solutions for Rising Damp
Rising damp requires a practical, staged approach: identify the source, remove moisture, and protect walls to prevent recurrence. Proven solutions focus on stopping moisture ingress and restoring wall performance.
Begin with diagnostic steps that pinpoint active moisture paths, capillary rise, and any compromised brickwork. Install a physical or chemical barrier below the damp line, choosing options compatible with the building’s fabric and historic architecture.
Where appropriate, inject hygroscopic salts or damp-proof creams to reduce rising moisture, ensuring proper surface preparation and cure times.
Improve ventilation and airflow to aid drying, but avoid over-drying, which can cause cracking.
Use eco-friendly materials for repair mortars and plasters to preserve the structure’s character while maintaining breathability and long-term durability.
Practical Preventive Measures to Keep Walls Dry
To keep walls dry, you’ll want steady ventilation and smart moisture habits. Improve airflow by opening windows or using exhaust fans, especially in kitchens and bathrooms.
Build in simple routines like drying surfaces after showers and wiping down damp spots to prevent buildup.
Ventilation Practices
Could you be sure your home stays dry by improving ventilation? Start with a simple assessment: identify rooms prone to moisture and note any stuffiness.
Use cross-ventilation where possible—open opposing windows or doors during mild weather to let air move.
Run exhaust fans in kitchens and bathrooms during cooking and showering, and replace them if they’re weak or noisy.
Keep air circulating by periodically opening interior doors to prevent stagnant pockets.
Maintain unobstructed air paths; don’t block vents with furniture or curtains.
Use dehumidifiers in damp spaces if moisture persists, and monitor humidity with a hygrometer to target around 40–60%.
Regularly clean filters to sustain ventilation practices and protect indoor air quality for healthier, drier walls.
Moisture Control Habits
Maintaining dry walls starts with simple, repeatable habits you can use every day. Start by wiping down surfaces after showers and cooking to remove condensation and steam. Open doors or run exhaust fans during humidity peaks, and keep humidity below about 50%.
Check for leaks after rain and promptly address any drips you find. Use moisture meters or simple visual checks to track damp areas, and fix cracks before they widen.
Declutter exterior walls; ensure proper grading and gutter drainage to prevent water pooling near foundations. Replace old windows or seals that fog up or leak.
These moisture control habits support lasting damp prevention strategies, reducing mold risk and preserving wall integrity over time.