

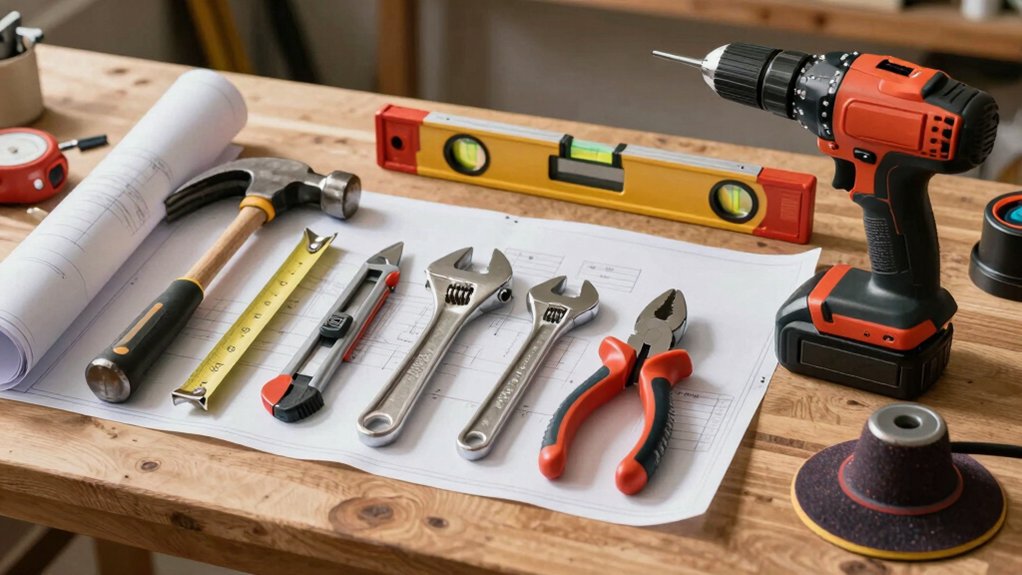
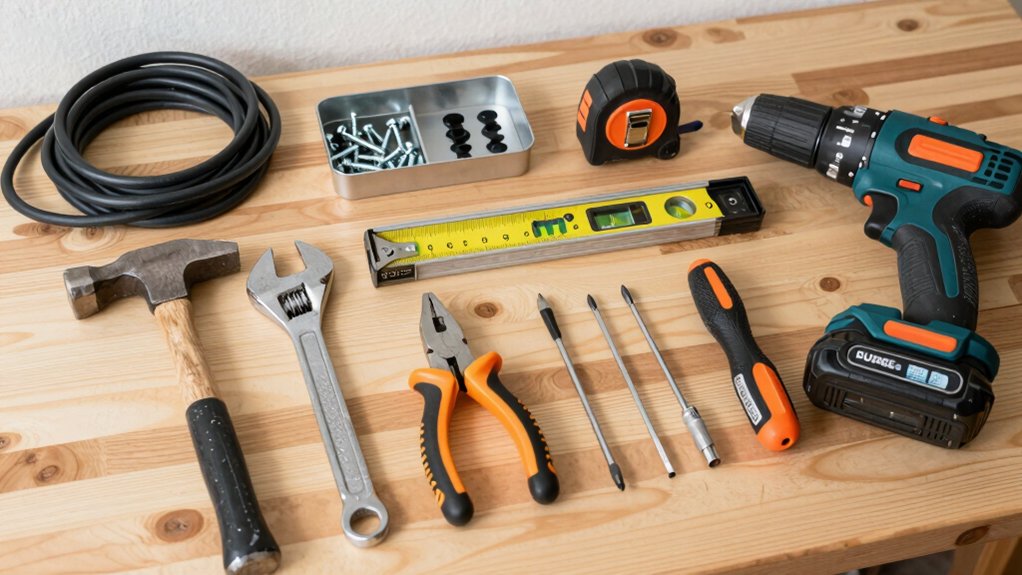
A solid starter kit covers the basics: a versatile drill, bits, quality hammer, screwdrivers, pliers, tape measure, utility knife, and a level. Add a true measuring setup with a sharp pencil, steel rule, and laser measure for accuracy. Include saws, saw blades, and sharp fastening bits, plus PPE like safety glasses and hearing protection. Keep tools clean, dry, and well-lubricated, and store them securely. With these, you’ll tackle most projects—and you’ll discover more tips as you go.
Start Here: The Essential DIY Tool Starter Kit

A solid DIY toolkit starts with a few essential pieces you can rely on for most small projects around the house. You’ll want a versatile drill and bits, a quality hammer, a set of screwdrivers, pliers, a tape measure, a utility knife, and a level. Choose dependable brands, and keep grips comfortable for extended use.
Maintain your tools by cleaning blades, oiling moving parts, and storing them dry. Tool maintenance pays off in precision and speed. Practice DIY safety: wear eye protection, use clamps, and unplug power tools before changing bits.
Keep a small hardware bin for screws, nails, and anchors, so you’re never rifling through clutter. With this starter kit, you’ll tackle tasks efficiently, with power and assurance.
Measure It Right: Essential Measuring and Marking Tools
Because accurate measuring starts with the right tools, you’ll want dependable rulers, tapes, and marking devices that you can trust. Start with a sharp, corrosion-resistant pencil, a steel rule, and a flexible tape measure that reads clearly and doesn’t droop.
Use a true square and a center finder to lock in straight lines and precise centers. Align edges carefully, mark with steady pressure, and avoid parallax mistakes by eyeing the markings straight on.
For recurring tasks, invest in a laser measure for quick, repeatable distances and a marking knife for clean lines. Prioritize measuring accuracy and marking precision so cuts and fixtures align first time.
Keep tools clean, calibrated, and ready—your results will reflect your discipline.
Cut With Confidence: Cutting and Sawing Must-Haves
You’ll set up precise cuts with clean guide placements and steady hands, using a sharp saw and marked lines for accuracy.
Practice safe sawing techniques by securing workpieces, wearing protection, and maintaining steady pressure to avoid wandering cuts.
We’ll cover precision guide cuts and essential safety steps to keep your projects clean, fast, and confident.
Precision Guide Cuts
When you need straight, repeatable cuts, precision guide cuts give you dependable results with less saw drift. You’ll lock your workpiece into a stable guide and align the blade with exact angles and measurements, delivering power with control.
Precision measurements become instantly reproducible as you set fences, stops, and rulers near the blade path. Use a quality guide system to keep edges true, reducing kickback and misalignment in demanding projects.
Keep your setup tight: snug clamps, clean surfaces, and a crisp line to follow. With practice, you’ll trust each cut to meet your dimensional goals, saving material and time.
For accurate cuts, combine careful layout, sharp blades, and a solid guide to maximize efficiency and results.
Safe Sawing Techniques
Safe sawing starts with a solid setup. You position the workpiece, secure it, and choose the right blade for the material. Before you pull, measure twice and clamp firmly to prevent kickback. Maintain a steady pace; aggressive cuts waste energy and raise risks. Check your blade teeth for burrs or chips, then replace dulls to preserve accuracy.
Keep hands clear of the cutting path and wear eye protection for every cut. Maintain control with a firm stance, wrists loose, and elbows tucked. Sawing safety relies on clean cuts, straight guides, and consistent pressure.
When you finish, unplug the tool and inspect the blade for damage. Practice blade handling with deliberate, controlled motions to maximize precision and performance.
Fasten It Up: Hammers, Drivers, and Fastening Bits
You’ll learn how to handle a hammer safely, picking up basic grip and strike techniques that keep nails straight and percussive work clean. We’ll cover driver bit selection and how to match bits to fasteners for dependable holds.
Plus, there are tips on avoiding cam-out and bit wear. With these fastening techniques, you’ll build a solid foundation for reliable, precise projects.
Hammer Handling Basics
Having the right hammer grip and driving technique makes fast work and fewer misses. You’ll control impact, precision, and fatigue by adopting a solid hammer grip and steady wrist movement.
Choose a claw or ball-peen that fits the job, then align your body with the target. Keep your elbow tucked, grip firmly yet relaxed, and let the tool do the work, not your forearm muscles.
For driving nails, start with a square, shallow tap to set the point, then drive straight with controlled blows.
Use hammer safety: wear eye protection, check the head for cracks, and avoid overstrikes that bend fasteners or loosen joints.
Maintain a clean work line, pause to reassess, and proceed with purpose.
Driver Bits Selection
Choosing the right driver bit is as important as picking the right hammer. You control the outcome by selecting the correct driver bits for each screw type and material.
Start with bit selection that matches your fastener: use Phillips for Phillips heads, square for high torque, torx for slotted security, and hex for hex screws. Check shank size and length to ensure a snug fit and full engagement.
When driving, keep the bit perpendicular to the surface to prevent cam-out and stripping. Use magnetic bits for quick setups and to reduce slips.
Consider material compatibility—steel bits for wood, high-speed steel for metal, carbide for tough jobs. Maintain bits by cleaning debris, avoiding overheating, and labeling sets for fast, confident choices on site.
Drive precision, finish strong.
Fastening Techniques Tips
Mastering fastening starts with the right setup and steady technique. You’ll maximize control by choosing the proper hammer, driver, and bits, then align fasteners with the work surface.
Start with clean, dry materials and correct bit size to avoid cam-out or stripped heads. When driving screws, apply steady pressure without over-torquing; let the bit seat before full-depth turns.
For nails, drive straight and maintain a firm wrist—don’t twist. Use a magnetic bit holder for accuracy and to keep bits ready.
Tackle stubborn fasteners with penetrating oil, flexible shanks, or a quick tap to seat the head. Maintain your tools: sharp bits, clean chucks, and snug driver bits reduce slips.
Incorporate fastening techniques and fastening tips into every project for cleaner joints and stronger holds.
Power Up: Tools You’ll Reach for on Most Projects
Whether you’re tackling a quick fix or a full remodel, the tools you reach for first should be versatile, reliable, and easy to handle. Power Up: on most projects, you’ll focus on core power tools that deliver consistent performance: a drill/driver for holes and fasteners, a circular saw for straight cuts, and a jigsaw for curved work.
Pair each with sharp blades and fresh bits, and keep extra batteries charged. Prioritize ergonomics and balance so you don’t tire mid-task. Safety equipment stays front and center: safety glasses, hearing protection, and a dust mask to protect your lungs.
Practice proper operation, secure workpieces, and follow manufacturer guidelines. With the right combination, you’ll accelerate progress and achieve cleaner results.
Hand Tools That Last: Core Tools for Daily Tasks
You’ll rely on durable core tools that stand up to daily tasks, from pressure in the workshop to steady, repeated use at home. These long-lasting hand tools cover the essentials you reach for every day, helping you tackle projects with confidence.
Prioritize quality, practicality, and comfort, so your toolkit stays reliable for years to come.
Durable Core Tools
Durable core tools are the backbone of any reliable toolbox, built to handle daily tasks without fail. You want performance you can trust, so choose cores designed for constant use and honest bite.
Prioritize tool durability by selecting high-grade steels, reinforced handles, and precise fits that resist wear. In daily tasks, a solid hammer, dependable pliers, and a sharp-set screwdriver stay accurate and secure, even after repeated strikes or torque.
Brand reliability matters—invest in established names with proven field records and lifecycle warranties. Maintain torque, alignment, and grip by regular checks, cleaning, and proper storage.
With durable core tools, your projects stay efficient, predictable, and under control, empowering you to push through challenges without hesitation.
Daily Task Essentials
From sturdy cores to daily tasks, your hand tools should stay dependable from the moment you pick them up. You’ll reach for core pieces that keep pace with routine jobs, so choose grips that feel solid and balanced.
Daily task essentials include a reliable screwdriver set, adjustable pliers, a utility knife, and a tape measure that reads clearly. Keep power drills ready for tougher outlets, drilling, and quick fastening—but don’t neglect hand speed and control.
For finishing touches, stock paint brushes that deliver even coverage and clean lines. Maintain tool health with a light oiling schedule and a designated workspace.
When you work with purpose, your toolbox becomes a trusted partner, accelerating projects without compromising control or safety.
Long-Lasting Hand Tools
Long-lasting hand tools matter most when reliability meets daily use, so choose pieces built to endure. You’ll grab core tools that survive heavy sessions and frequent worksite demands.
Prioritize ergonomic handles for comfort during long tasks, reducing fatigue while you maintain precision. Choose blades, bits, and hammers with rust resistance to combat moisture and sweat, ensuring performance after years of use.
Look for solid forging, balanced weight, and secure fastenings that won’t loosen under pressure. Maintenance matters: wipe down surfaces, sharpen edges, and store properly to extend life.
When you invest in durable tools, you empower every project—from quick fixes to complex renovations. Your toolkit should feel confident in your grip and deliver consistent, reliable results every time.
Layout Like a Pro: Leveling, Alignment, and Marking Essentials
To lay out your project like a pro, start with solid references and predictable measurements. You’ll level surfaces, align edges, and mark critical points before any cut. Use a laser or a sturdy spirit level to verify horizontals and plumb at every corner. Snap chalk lines or use a marking knife for clean, precise guides that won’t slip.
When planning wall framing, measure twice, transfer marks accurately, and double-check diagonals to ensure square. For drywall installation, establish a consistent starting line and reference studs to guide sheets, minimizing gaps and misfits. Align panels, fasten along marked lines, and verify flush edges as you go.
Keep tools sharp, measurements tight, and your setup rigid to avoid rework and drive professional results.
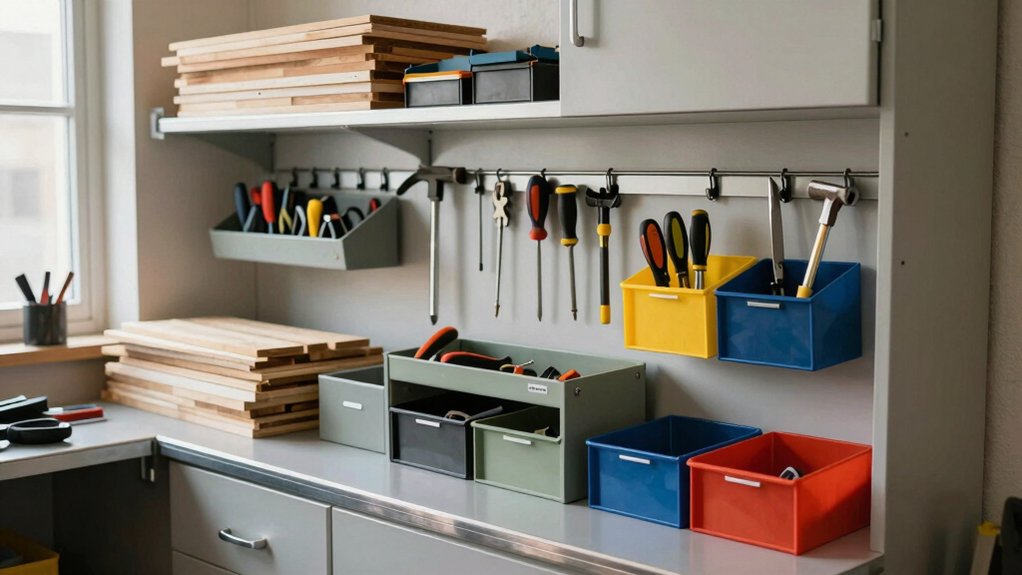
Safe Storage Solutions: Cabinets, Racks, and Drawer Organization
Want to keep tools organized and safe in a busy workshop? Start with solid cabinet organization and intelligent rack installation.
Choose cabinets that fit your space, support heavy loads, and keep frequently used tools at eye level. Use adjustable shelves to accommodate variable bin sizes, and incorporate labeled drawers for small parts.
Secure cabinets to walls or studs to prevent tipping, and align them with your workflow to minimize reach time.
For racks, mount pegboards or open slat systems at ideal heights, enabling quick access and visual inventory. Group by function: fasteners, cutting tools, measuring devices, and power bits.
Use consistent labeling and color codes.
Regularly reassess layout after major projects to preserve efficient, high-impact performance.
Maintenance for Longevity: Cleaning, Sharpening, and Care
Regular maintenance keeps tools reliable and safe to use. You’ll protect your investment by cleaning after every project, drying surfaces, and wiping away grime that dulls edges.
For tool maintenance, remove rust with a light brush and a rust inhibitor, then store in a dry, organized space.
Sharpen edges as needed with proper technique and a suitable honing stone or file, keeping angles consistent for clean cuts and faster work.
Lubricate moving parts moderately to reduce resistance and wear, avoiding over-oiling that attracts dust.
Inspect fasteners, blades, and cords, tightening or replacing components before use.
This disciplined routine enhances tool longevity, minimizes downtime, and guarantees peak performance for tough DIY tasks.
Durable Brands You Can Trust: Choosing Tools That Endure
Choosing tools that endure starts with the brands you trust. You want power tools that deliver when it matters, so start by evaluating build quality, materials, and warranty.
Prioritize tool durability by selecting machines with reinforced housings, metal gears, and vibration dampening. Look for brands that publish real-world performance data, not hype, and check user reviews for consistency under heavy use.
Invest in a core set of proven favorites and don’t chase every new gimmick. Favor parts accessibility and readily available service networks, so repairs don’t stall your project.
Consider your typical tasks, then match tools to those demands rather than price alone. With durable brands, you gain reliability, faster progress, and lasting value for every project.
Budgeting Your Starter DIY Tool Set
When you’re budgeting a starter DIY tool set, start by listing the core tasks you’ll tackle first and the projects you’re most likely to tackle in the next few months.
You’ll prioritize tool organization and essential basics, then map a practical budget plan around must-haves, not fancy luxuries.
Identify a core toolkit: hammer, screwdriver set, tape measure, utility knife, adjustable wrench, pliers, a cordless drill, and a few bits.
Allocate funds for quality where it counts, and defer specialty items until you gain clarity on your most frequent tasks.
Track purchases against a simple plan, total cost, and expected use.
Use a focused budget planning approach, buying reliable tools that empower decisive action and long-term value.
Expanding Your Kit as Skills Grow
As your confidence grows, you’ll want to broaden your kit to match the tasks you’re actually taking on. Start by prioritizing versatile tools that facilitate multiple jobs, not just single fixes. Invest in a quality drill/driver, a reliable square, a level, and a set of basic hand tools that cover fasteners, measurement, and cutting.
As skill development progresses, add specialty items that align with your projects, like a stud finder, a compact multi-tool, or a versatile saw. Maintain tool organization with labeled drawers or a portable pouch so you can locate what you need without wasted time.
Expand gradually; avoid clutter. Regularly reassess needs after each project, ensuring your kit remains lean yet capable, empowering you to tackle tougher tasks with confidence.
DIY Safety Gear and Best Practices for Home Projects
Safety should come first on every project, so start with the basics: wear eye protection, hearing protection, and a dust mask or respirator when needed, and keep a clean, well-lit work area. You control your outcome when you gear up and clear the space.
Choose protective eyewear that fits securely and resists impact; never skip it for quick cuts or grinding. Select respirator masks appropriate to the task, and fit-test them if required—a proper seal matters.
Use hearing protection for noisy tools, and take frequent breaks to avoid fatigue.
Establish a routine: inspect guards, unplug before adjustments, and store tools safely post-use.
Maintain ventilation, keep a first-aid kit handy, and document hazards to reduce risk and boost efficiency.
Frequently Asked Questions
How Do I Prioritize Tool Purchases on a Tight Budget?
Prioritize tool necessity and budget planning by listing must-haves, then allocate funds accordingly. Start with core, versatile items, delay specialty purchases, and assess resale value. You’ll maximize impact, minimize waste, and build confidence while staying under budget.
Which Tools Require Basic Safety Gear Every Time?
Yes, you must wear personal protective equipment every time you work, and follow a safety checklist to stay protected. Inspect gear beforehand, stay aware, and don’t skip gloves, goggles, ear protection, and a sturdy respirator when required.
What Maintenance Routine Extends Tool Life the Most?
Did you know 80% of tool failures come from poor maintenance? You extend life fastest with a simple routine: clean, inspect, lubricate per manufacturer, store properly, and log lubrication practices; prioritize tool storage and proactive parts checks.
How Often Should I Replace Drill Bits and Blades?
You should replace drill bits and blades when their performance drops or shows wear. Track drill bit lifespan and blade replacement frequency, inspecting for dullness, chipping, or heat damage regularly, and align replacements to maintain ideal power and precision.
What Beginner Projects Best Test a New Tool Set?
You start with a simple shelf or small frame project to test your tool set. Embrace power tool safety and hand tool ergonomics, then iterate: measure twice, cut once, tighten firmly, and learn through steady, deliberate practice.
Conclusion
You’ve got the basics, now wield them like a well-oiled Swiss Army knife. Picture your home project as a comedy of errors—until you pause, measure, and drive with purpose, avoiding the dramatic creak, spill, and curse-loud finale. With the starter kit, trusted brands, and safety habits, you’ll finish on target, not in splinters. Stay curious, upgrade thoughtfully, and never skip the safety gear—because mischief loves a distracted DIYer, but you won’t.