
To fix a sagging gate, start by inspecting the pins, hinges, and frame for wear or misalignment. Tighten loose screws, replace worn pins, and lubricate pivot points. If the frame isn’t square, reset the hinges and add shims behind them to lift the gate and restore balance. Re-check latch alignment and use longer screws or backing plates if needed. Once you align and secure the hardware, your gate should swing smoothly—more tips await if you keep going.
Diagnose Sagging Gates: Check Pins, Hinges, and Frame
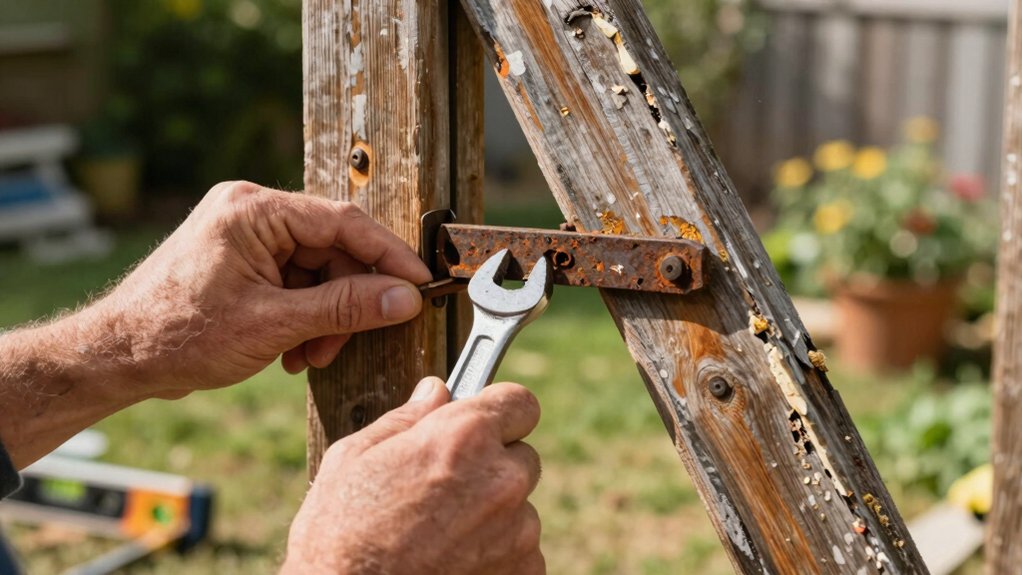
Start by inspecting the gate’s hardware. You’ll quickly spot where sagging starts: worn pins, loose hinges, or a misaligned frame.
Check the pins first; if they wiggle or aren’t seated, replace or tighten them to restore alignment.
Next, test each hinge for looseness or binding—tighten screws, lubricate pivot points, and look for bent barrels that need replacing.
A bent hinge or a cracked hinge arm can pull the gate down over time, so address these before moving on.
Examine the frame for out-of-square errors; a shifted, twisted, or warped frame will render any adjustment ineffective.
When you rehang, confirm the latch aligns consistently with the strike plate.
If the gate latch doesn’t engage smoothly, re-seat or replace components until operation is clean and reliable.
Identify Root Causes: Worn Pins, Loose Hinges, and Out-of-Square Frames
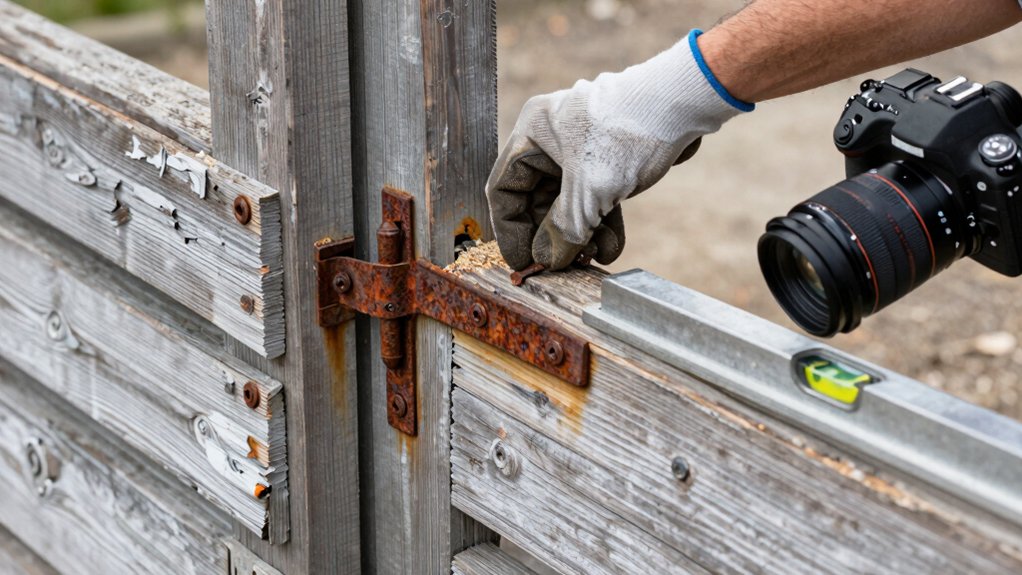
Worn pins, loose hinges, and an out-of-square frame are the core culprits behind a sagging gate. You’ll want to pinpoint which element fails before you plan fixes.
Worn pins let the gate pivot off-center, creating misalignment that compounds over time. Loose hinges shed support and tilt, inviting further sag. An out-of-square frame signals structural shift, often from ground movement or poor installation, demanding corrective realignment.
In this step, don’t overlook related components like decorative hardware, which can mask or exaggerate root issues. Inspect hinge screws for stripping, check for bent hinge plates, and verify the frame is square with the gate; if not, address frame geometry first.
Address root causes promptly to preserve aesthetic enhancements and ensure durable operation.
Quick Fixes You Can Try Today: Shim, Tighten, and Align
You’ll shim your gate correctly to lift the sag without stressing the frame. Next, you’ll tighten hinges properly so the gate sits true and swings evenly.
Finally, you’ll align the gate post now, ensuring smooth operation and lasting alignment.
Shim Your Gate Correctly
If your gate drags or sticks, shimming it correctly can restore a smooth swing in minutes. Start by identifying gaps at the hinge side, latch side, and bottom.
Use thin, durable shims made for outdoor use, or cut plastic shims to fit snugly without forcing a gap that could crack framing. Place shims behind hinges first, then test swing; add or trim for even clearance.
Keep the hinge pins aligned and avoid overtightening screws, which can warp the frame or pinch the door. Check that the gap remains uniform along the bottom and top, ensuring quiet operation.
Proper shimming improves gate aesthetics and enhances outdoor security by preventing misalignment that invites wear or leverage. Finish with a light lubricant on moving parts.
Tighten Hinges Properly
Tighten the hinges first to stop sagging and improve door alignment. You’ll start by checking each hinge screw or bolt for looseness. Use a driver that fits snugly to avoid stripping. If a screw won’t bite, replace it with a longer wood screw or add a backing plate.
After tightening, test the gate’s swing and raise or lower as needed with shims behind the hinge if the door still drags. For smoother operation, apply hinge lubrication to the pivot points, then wipe away excess. This reduces friction and resistance that contribute to sag.
While you work, inspect for binding or misalignment caused by weather or settled posts. Final touch: ensure gate weatherproofing remains intact around the hinges to prevent future binding.
Align Gate Post Now
To fix a sagging gate fast, start by aligning the post itself rather than chasing the hinge alignment. You’ll gain immediate control by evaluating foundation stability first, since a shifted post undermines every hinge.
If the post leans, push or gently pry it back upright, then brace it with shims at the base to hold the correct angle. Check the surrounding footing for cracks or erosion; repair as needed to prevent future movement.
Tighten mounting hardware once the post sits true, and recheck plumb with a level. For wood posts, treat exposed surfaces to deter moisture damage that can compromise alignment.
Reinstall the latch and test the swing, ensuring a smooth, consistent seal. Gate post alignment restores reliable operation and lasting foundation stability.
When to Replace Hardware: Choosing Hinges, Screws, and Latches
When deciding whether to replace hardware, consider if the hinges, screws, or latches show wear, looseness, rust, or difficulty aligning the gate.
If any item isn’t performing, replacement is smarter than repeated repairs. Focus on hinges first: choose heavy-duty pins and adjustable templates that tolerate minor misalignment.
Choosing hinges that match your gate weight and opening width saves future adjustments. For fasteners, select screws long enough to bite into solid framing without protruding behind the hinge leaf. Avoid cheap coatings that corrode; opt for stainless or coated steel if exposure is high.
Latches should engage smoothly without forcing the gate. If alignment is off after swapping parts, reassess mounting surfaces and hinge placement. Prioritize reliability over cost to preserve sag-free operation.
Re-Square and Align the Gate for Smooth Operation
If the gate still drifts or binds after replacing hardware, start by re-squaring the frame and hinges.
Begin with the hinge repair by checking each hinge’s alignment, then loosen and reposition as needed. Use a spirit level to confirm the gate sits plumb and square relative to the frame and post.
If the gap at the latch side is uneven, adjust strike plates or shims behind the hinge mounting to restore equal clearance.
Tighten screws firmly without overdriving, then reopen, close, and test several cycles.
When the hinge is true, verify the gate latch engages smoothly without binding.
Finish with a final recheck of level and plumb, correcting any minor tilt. Consistency here prevents future sag and improves overall operation.
Maintenance Tips to Prevent Future Sag: Lubrication and Weatherproofing
Regular lubrication and smart weatherproofing keep a sag-prone gate functioning smoothly and reduce future drift. You’ll minimize wobble and extend life by keeping moving parts clean and protected from moisture. Focus on consistent care rather than drastic fixes.
- Use weatherproofing tips to seal exposed hardware, preventing rust and binding.
- Apply lubrication techniques to hinges, pivots, and latches, wiping excess for clean operation.
- Choose weather-resistant coatings on wooden components to deter moisture intrusion.
- Schedule periodic checks after seasons to catch creeping sag or binding early.
Tools and Materials Checklist: What You’ll Need Before You Start
Before you start, gather the essentials: a clean workspace, protective gear, and the right hardware for your sagging gate project. You’ll need a tape measure, pencil, square, and a LEVEL to verify alignment. Have a drill, screwdriver bits, and a hex wrench set ready for quick fastener work.
Stock corrosion-resistant hinges, longer screws, and reinforcement plates suited to your gate’s material. Include shims, a wood adhesive if needed, and rust remover or penetrating oil for seized hardware. Don’t overlook safety gloves, eye protection, and a momentary brace or clamps to hold parts during fastening.
Consider hardware upgrades that improve reliability, and aesthetic enhancements that keep the gate looking deliberate. Prepare optional weatherproof sealant to extend life and prevent future sag.
Conclusion
You’ve got the tools, you’ve got the plan, and you can fix that sag today. Start with the simplest fixes—tighten hinges, shim where needed, and re-square the frame. If the pins or screws are worn, swap them out and align the gate properly for smooth operation. Objection: “I’m not handy.” You can do this—step by step—without fancy gear. Stay patient, test often, and enjoy a gate that opens true and stays that way.