
When your pipes freeze, you first identify vulnerable sections near exterior walls or unheated spaces, noting signs like frost, reduced pressure, or visible gaps. Safety comes first: avoid flames, kerosene heaters, or improvised heat; don’t rush thawing. Use controlled heat sources like a hair dryer or heat lamp, and insulate pipes as you work. Check for leaks and test water flow gradually. After thaw, inspect joints and insulation, then implement preventive measures; more guidance awaits if you continue.
Identify Early Signs and When to Act
Early signs of a frozen pipe include unusual cold spots, frost on exterior walls, and an abnormal lack of water pressure. You should inspect for cracks in exposed plumbing and listen for a hum or crack at joints, which signals constriction.
Track temperature exposure near unheated areas, attics, basements, crawl spaces, and exterior walls where pipe insulation is absent or inadequate. If you notice these early signs, proceed with risk evaluation by locating the main shutoff and gauging surrounding insulation.
Document affected zones, noting which pipes are most exposed. Initiate preventative measures, such as improving pipe insulation and sealing drafts, to reduce further heat loss.
When conditions persist, prepare for controlled thawing with proper safety protocols and avoid heat sources that can damage pipes.
Safety First: What Not To Do When Pipes Freeze
Avoid using heat sources that can damage pipes, and never temp-increase a frozen line with open flames or a fuel-powered device. You shouldn’t apply direct heat to any suspected pipe until you’ve confirmed the path of the blockage and reduced risk of bursting.
Don’t assume water will slowly thaw; rushing thermal methods can injure joints or cause rupture. Refrain from using torches, kerosene heaters, or improvised heating devices in enclosed spaces.
Don’t ignore signs of leakage after thaw attempts, or operate systems with compromised valves. Prioritize passive measures only: maintain dry surroundings, shut off the main supply if a leak appears, and inspect for corrosion.
Use pipe insulation and weatherproofing techniques to minimize future exposure. Plan professional assessment for sustained integrity, avoiding risky, unverified DIY missteps.
Step-by-Step Quick Thaw Tactics You Can Do Now
Begin by gathering essential tools, such as a hair dryer, heat lamp, towels, a bucket, and an insulated wrap, so you’re prepared for swift action.
Next, locate frozen areas along accessible pipes and prioritize those sections for safe warming, avoiding direct flame.
Finally, apply safe warmer methods—steady heat from a dryer or heat lamp, wrap exposed pipes, and monitor progress to prevent overheating or damage.
Gather Essential Tools
To prepare for fast, effective thawing, assemble a focused set of tools: a flashlight, a bucket or pan, towels or rags, a hair dryer or heat gun on low, a space heater or infrared heater if available, a drying device like a portable heater, cold-water source, and, if needed, an adjustable wrench or pliers to access shutoff valves.
This kit supports controlled heat delivery and containment while inspecting the pipe and surroundings. Include pipe insulation components and a compact emergency kit so you can seal minor gaps after thawing.
Organize tools for rapid reach and minimize heat exposure to nearby materials. Verify valves are accessible, and maintain a clear work area to prevent accidental spills or overheating during the thaw.
Locate Frozen Areas
Start by locating the frozen sections quickly and methodically. You’ll scan exposed plumbing routes, basements, crawl spaces, and exterior walls for numbness or pressure drops. Check pipes that run through unheated spaces, then confirm with a simple warmth test—gentle touch near suspected blocks should feel cold but solid.
Note that insulation gaps, damaged pipe insulation, or missing exterior faucets can create cold zones. Mark every frozen segment for targeted thawing, focusing on joints and bends where ice tends to consolidate. Prioritize areas near exterior faucets and any plumbing without proper pipe insulation, since these are high-risk.
Avoid overinterpretation; use visual cues—frosty outlines, condensation, and frost buildup—to validate locations before applying warm methods in the next step.
Apply Safe Warmer Methods
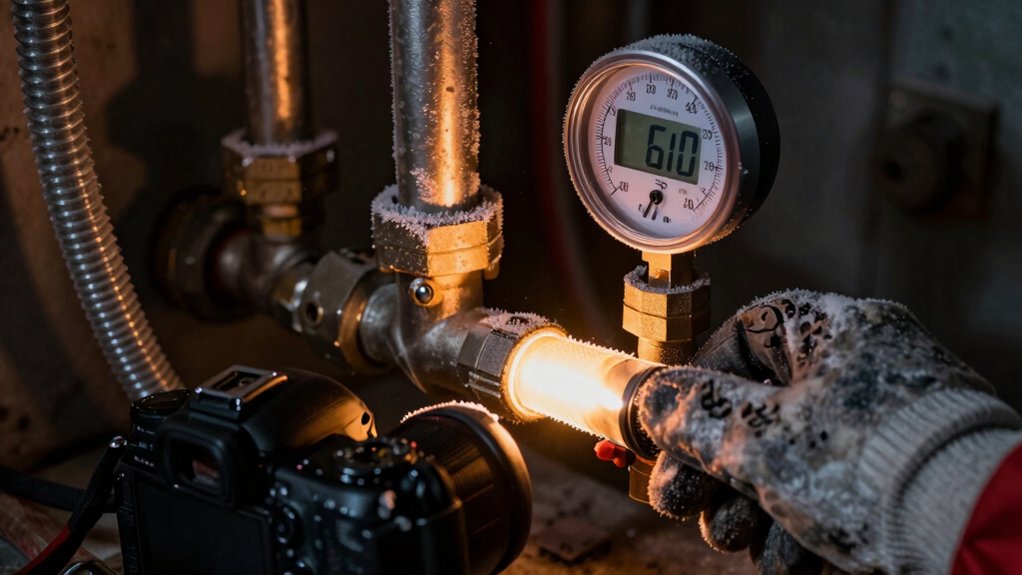
Apply safe warmer methods promptly, focusing on controlled, gradual thawing to minimize pipe stress and prevent leaks. You’ll begin by locating the obstruction and monitoring temperature change with a thermometer or heat gun at the pipe surface.
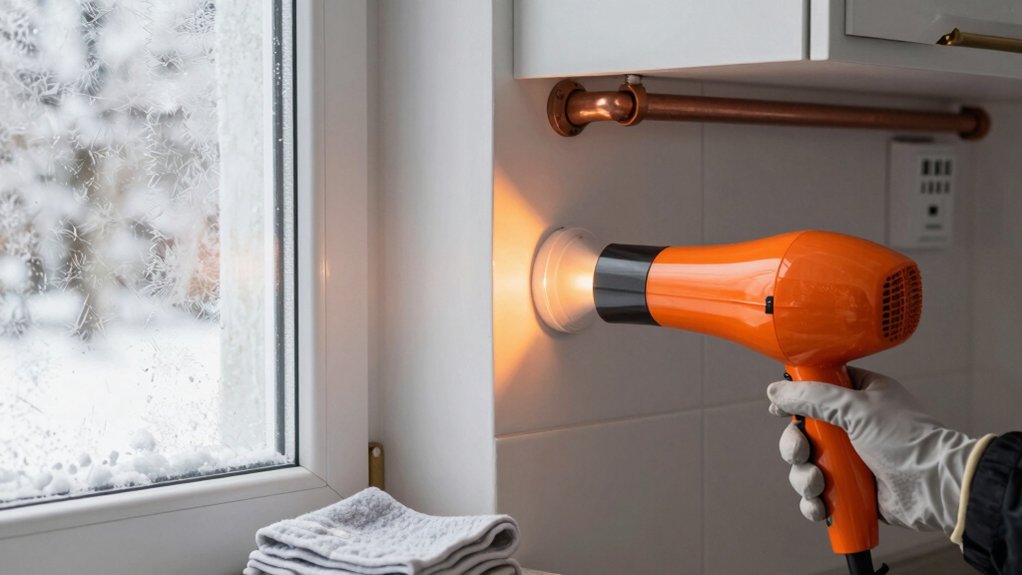
Use a handheld hair dryer on low to moderate heat, keeping it moving to avoid hotspots; never apply direct flame. If available, wrap the affected area with pipe insulation to preserve warmth and reduce heat loss.
For exterior lines, start at the faucet and work inward, avoiding drastic temperature shifts. Open outdoor faucets slightly to relieve pressure as sections thaw.
Don’t use kerosene heaters or space heaters in enclosed spaces. After thaw, verify all joints and connections, then restore full insulation coverage.
Safe Heat Options to Thaw Pipes Without Fire Risk
You should choose safe heat methods that minimize fire risk when thawing pipes. Use non-torch options such as electrical heat cables, heat wraps, or warm air from a hair dryer at low, constant settings.
Keep power cords and outlets clear of moisture. This approach focuses on precision, avoids flames, and targets controlled warming to prevent pipe damage.
Safe Heat Methods
What safe heat options can you use to thaw frozen pipes without introducing fire risk? You should apply controlled heat sources to minimize flame exposure and thermal shock. Use an electric heat source with adjustable output, such as a hair dryer on low or a space heater kept at a distance, directing heat along the pipe exterior.
Don’t apply direct flame or high-heat devices. Maintain steady, gradual warming to avoid pipe damage. For optimal efficiency, reposition heat evenly along the length, focusing on the section frozen or near joints.
Monitor water pressure and flow to gauge thaw progression; once liquid is observed, reduce heat and let pressure normalize. Ensure pipe insulation remains intact to preserve the thaw and reduce re-freeze risk.
Avoid Fire Risks
To avoid fire risks, opt for controlled heat sources that deliver steady, low-intensity warmth along the exterior of the pipe. You should select methods that maintain uniform exposure without concentrated hotspots, reducing fire hazards and heat buildup.
Use a low-wattage, exterior-safe heating pad or insulated wrap set to a gentle setting, and monitor temperature with a basic thermometer to stay within safe limits.
Avoid open flames, kerosene heaters, and high-output devices that can ignite surrounding materials.
Electrical safety is critical: keep cords dry, elevate equipment off surfaces, and disconnect at the main power source if you notice melting or overheating.
Don’t apply direct heat to metal fittings, and never leave thawing pipes unattended to mitigate fire hazards and protect structural integrity.
Non-Torch Thawing
Non-torch thawing relies on safe, controlled heat sources that warm the pipe without flames or high heat spikes. You implement this by applying gradual, evenly distributed warmth to the affected area, avoiding localized hotspots.
Use a low, steady heat source such as a heat cable or wrap, or place warm (not boiling) towels around exterior pipe sections, and monitor temperature with a thermostat or thermometer. Maintain constant heat until water flow returns, then reduce exposure to prevent overheating plastic components.
Prioritize pipe insulation to minimize heat loss and protect previously frozen sections. Check for leaks once thawing completes, then restore full water flow gradually.
Document duration and temperatures for future reference, and ensure accessibility to shutoff valves in case of overflow or re-freeze.
Check for Hidden Damage and Prevent Bursts
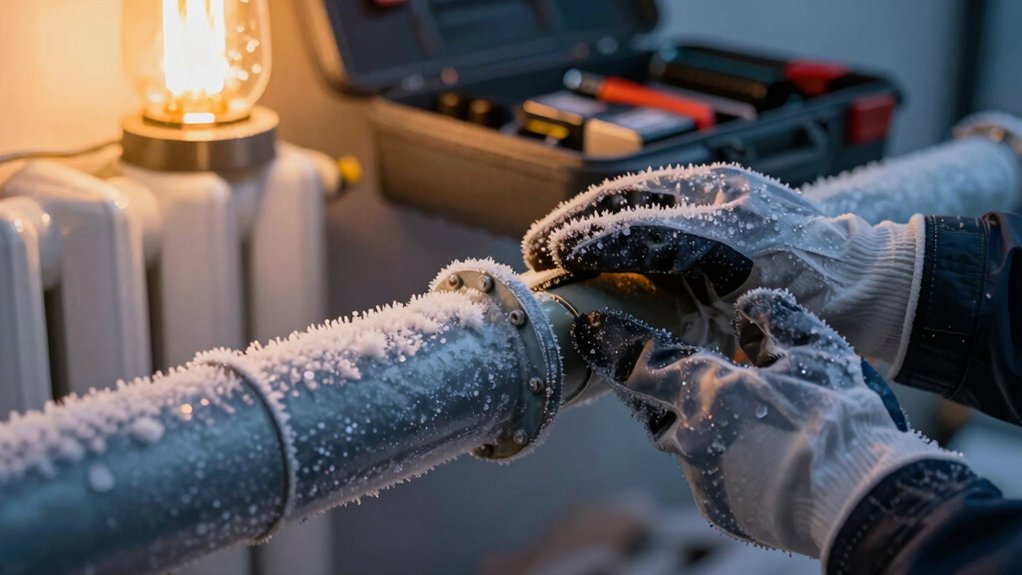
Hidden damage after a freeze may not be obvious, so inspect pipes and surrounding components carefully for cracks, leaks, or softened seams that could fail when heat returns. You should assess both supply and return lines, joints, fittings, and insulation interfaces for signs of stress or displacement.
Look for minor rust, pale discoloration, or mineral buildup that indicates prior moisture movement. If you detect any quivering, hissing, or moisture accumulation, isolate the affected segment and avoid applying heat to the entire system until a repair plan is confirmed.
Prioritize burst prevention by maintaining steady thaw rates, temporarily reducing water pressure, and supporting exposed runs to prevent movement. Document findings, label at-risk sections, and prepare for targeted repairs conducted by a qualified professional.
Aftercare and Preventive Steps to Avoid Future Freezes
Even after thawing, implement targeted aftercare and proactive measures to prevent future freezes. You’ll assess seal integrity at joints, verify heat trace functionality, and monitor ambient temps to adjust strategies promptly.
To minimize risk, focus on pipe insulation and protect outdoor faucets during cold snaps. Confirm insulation covers exposed runs fully and avoid gaps near elbows or access points.
For outdoor faucets, install frost-proof models where feasible, and shut them off inside before freezes to reduce supply pressure. Maintain a steady indoor temperature, especially in unheated spaces, and drain exterior lines after use to prevent residual water from freezing.
Periodically inspect insulation for wear, re-seal gaps, and test thaw methods on a small section before full application.
- Check joints and heat trace efficacy
- Upgrade pipe insulation where needed
- Fit frost-proof outdoor faucets and drain lines
- Regularly inspect and reseal gaps
Conclusion
When you thaw pipes, you’ll want precision, not panic. Identify early signs, act promptly, and avoid torch, open flame, or propane shortcuts that risk bursts. Use safe heat sources, monitor temperatures, and check for hidden damage before fully restoring water. Aftercare matters: insulate, seal gaps, and maintain steady heating to prevent future freezes. If a burst occurs, shut off supply, drain, and call a licensed plumber. Time is money—like a steam engine’s coal, keep warmth deliberate, or catastrophe follows.
Anachronism: a dial-up modem hums softly as you work, reminding you that slow, cautious progress outlives flashy shortcuts.