
You may not realize that a top-over pour can fail if the surface isn’t properly prepared. You’ll need to verify structural soundness, clean and roughen the existing slab, and control moisture before applying bonding methods. If any step is skipped, delamination or cracking can occur, jeopardizing the new layer. This discussion walks through surface prep, bonding options, and curing considerations to help you decide whether an overlay will perform as intended. Continue to learn the critical steps.
Assessing the Existing Concrete Surface
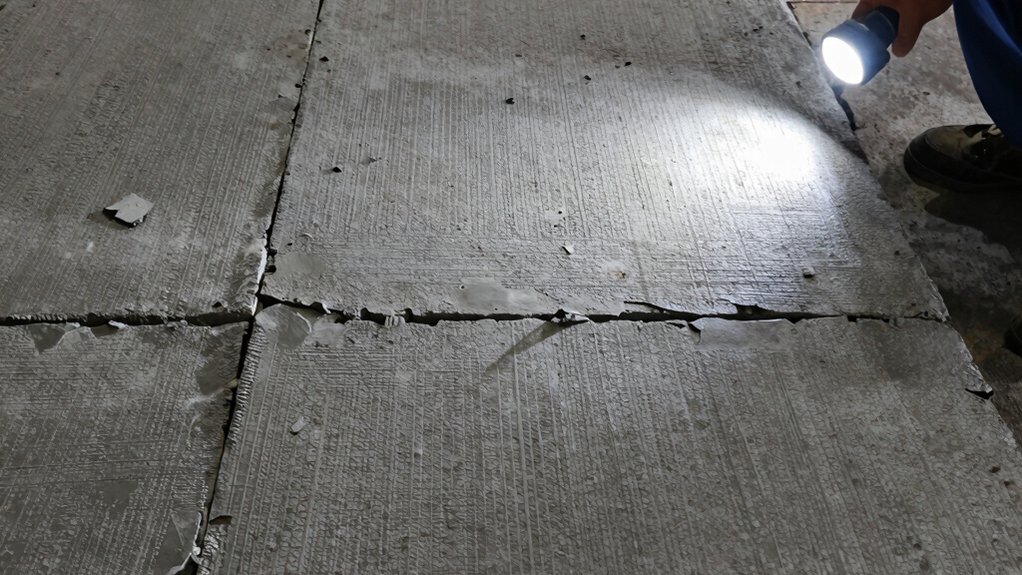
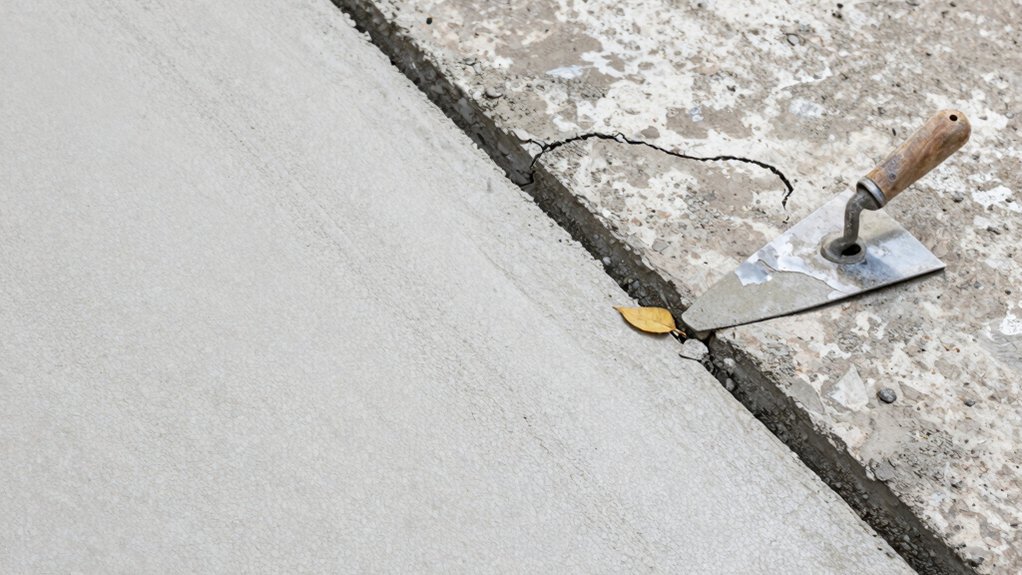
Evaluating the existing concrete surface is the first essential step before pouring new concrete. You inspect the substrate for wear, cracks, and delamination, documenting findings with measurements.
Begin with cleaning: remove debris, laitance, and loose material to reveal the true surface condition.
Check for moisture: perform a plastic or ASTM slump test as applicable, and observe dampness that could affect adhesion.
Assess flatness and levelness using a straightedge and a 1/4-inch per 10 feet tolerance; record high and low spots.
Evaluate porosity by applying a water test or surface moisture meter, noting absorption rates.
Identify movement indicators such as map cracking, scaled edges, or spalling; flag areas requiring remediation.
Compile a concise report detailing defects, severity, and recommended surface preparation or repair actions before any pour.
When Patching Is Necessary Before Overpour
You assess the existing slab for patching needs and determine if patching or grinding is required before the overpour.
Follow surface prep steps to create a clean, flat bonding surface, and specify patch materials and grind depth accordingly.
Consider bonding requirements to guarantee adhesion between the old concrete and the new overlay.
Patch or Grind Needed
If the existing surface deviates beyond the project’s tolerance, patching is required before overpour. Grinding alone won’t correct large high or low spots. You determine tolerance from design specs and contract documents, quantify deviations with a straightedge and level, and identify spots exceeding limits.
Patch material must match the concrete system, cure-compatible, and applied in lifts to achieve uniform final elevation. Remove loose material and clean interfaces to ensure bonding. Dampen the substrate as recommended to prevent premature drying.
For shallow imperfections, use feathered patches to avoid abrupt transition. For deeper voids, fill in lifts, allowing cure between applications. Verify patch thickness with a gauge, then recheck level and flatness.
Proceed to overpour only after patches achieve the required profile and surface readiness.
Surface Prep Steps
Before applying the overpour, complete the surface prep by addressing all patching requirements: remove loose material, clean and roughen the substrate as specified, and make certain patch materials are properly bonded and cured.
You identify all delaminated or hollow patches, cut back to sound concrete, and verify depth per patching product data. You seal penetrations and joints to prevent migration of moisture or fines into the overpour, using compatible fillers where required.
You profile the surface to achieve the documented adhesive key, typically a roughened or scored finish without leaving high spots. You remove curing compounds, contaminants, and loose dust with approved methods, then recheck substrate flatness and continuity.
You document cure times and substrate readiness before placement, ensuring environmental conditions meet product tolerances.
Bonding Considerations
Bonding considerations focus on ensuring a sound bond between the overpour and patched areas. You assess substrate condition before any patching to prevent weak interfaces. If you must patch, select a compatible material with anchor strength and adequate bonding properties for the overpour mix.
Follow manufacturer’s guidelines for surface preparation, curing, and activation, and verify surface profile and cleanliness. Remove contaminants, laitance, and loose particles, then etch or roughen as required to achieve the specified pull-off strength.
Prime if indicated, and apply patch material in a controlled thickness, avoiding air voids. Allow patch cure to meet minimum strength before overpour placement.
Test bond with a small representative sample or inspection method. If bonding criteria aren’t met, delay overpour until you restore adequate adhesion.
Bonding Classic Methods: Slurry vs. Bonding Agents
When choosing how to bond concrete to existing surfaces, you’ll compare slurry methods with bonding agents to determine the best fit for your project. Slurries mix cementitious material with water to create a bonding bridge that can be applied to accept a fresh pour. They’re simple, quick-setting, and rely on chemical adhesion plus slight mechanical interlock via roughened profiles.
Bonding agents, including epoxy or polyurethane systems, provide superior early strength and moisture resistance but require precise mixing, substrate compatibility, and curing control.
Implement slurry with a clean substrate, proper consistency, and even coverage. For bonding agents, follow manufacturer instructions, ensure compatible aggregates, and confirm cure times before loading.
Select based on load requirements, ambient conditions, and long-term performance expectations, avoiding overreliance on either method where substrate variability exists.
Surface Preparation Steps for a Strong Bond
Surface preparation is the foundation of a strong bond; start by inspecting the substrate for cracks, loose material, and contaminants. Then remove debris and any coatings that could impede adhesion.
You’ll abrade the surface to create a uniform profile, using mechanical means specified for the substrate type. Control dust with a vacuum and wipe with a clean, damp cloth to remove fine particles.
If oils, grease, or curing compounds exist, apply an appropriate cleaner and rinse thoroughly; allow complete drying before proceeding.
Roughen concrete by light mechanical abrasion to expose fresh matrix, avoiding over-etching that could weaken the surface. Remove efflorescence and laitance, ensuring a sound, clean base.
Test for cleanliness and surface profile with standardized methods; repeat treatment if criteria aren’t met. Proceed only after achieving consistent adhesion-ready conditions.
Evaluating Subgrade and Load Requirements
Assess the subgrade’s bearing capacity and how it informs your allowable concrete thickness and reinforcement layout.
Evaluate load transfer paths to guarantee the existing subbase and any bridging layers can safely distribute service loads without excessive settlement.
Document target bearing values, safety factors, and any required adjustments to mix design or joint spacing to meet project specifications.
Subgrade Bearing Capacity
Subgrade bearing capacity is the substrate’s ability to support loads without excessive settlement or failure. You evaluate subgrade strength by determining the soil’s modulus, bearing capacity factors, and moisture state, then compare these to anticipated loads.
Start with soil classification and in-situ tests, such as standard penetration or cone penetration tests, to establish rock- or soil-supported capacity ranges. Document assumed footing widths, load duration, and foundation type, because these influence allowable stresses.
Use empirical and code-based criteria to convert test results into a safe design bearing capacity, applying a suitable safety factor. Assess variability by sampling representative zones and consider seasonal moisture changes.
If measured capacity is marginal, plan remedial actions like recompaction, grading, drainage, or stabilization before concrete placement. Conclude with a clear recommendation and next steps.
Load Transfer Considerations
Load transfer considerations require aligning subgrade capacity with applied structural loads and determining how stress moves from slabs or footings into the underlying soil. You assess existing subgrade condition, moisture, compaction, and density to estimate allowable bearing pressure.
Specify load paths, including edge reactions, column or wall loads, and distribution through the slab thickness. Evaluate contact areas, joint spacing, and potential stress concentrations that could affect settlement.
Use standard design procedures to verify bearing capacity, modulus of subgrade reaction, and potential differential settlement under anticipated live and dead loads. Compare subgrade support to structural demands, incorporating factor of safety and redundancy where needed.
Document testing results, test methods, and acceptance criteria, then integrate findings into concrete topping or slab-on-grade specifications. Guarantee compliance with local codes and project-specific tolerances.
Moisture and Temperature Considerations for Overpour
Moisture and temperature conditions directly affect the success of an overpour. You must verify substrate moisture before placement, using a calibrated method and specifying acceptable moisture thresholds for the existing concrete. Record ambient and surface temperatures for the pour window, ensuring they meet the project’s temperature range.
Confirm the substrate is clean, dry, and free of curing compounds that interfere with bonding. Control ambient humidity to prevent rapid evaporation and possible plastic shrinkage cracking. Use moisture barriers or mats if needed to stabilize surface temperature and reduce temperature differentials.
Schedule pours during favorable periods, avoiding extreme heat, cold, or rapid temperature swings. Monitor formwork and joints for movement that could alter hydraulic pressure during placement.
Document all readings, timings, and deviations for quality control.
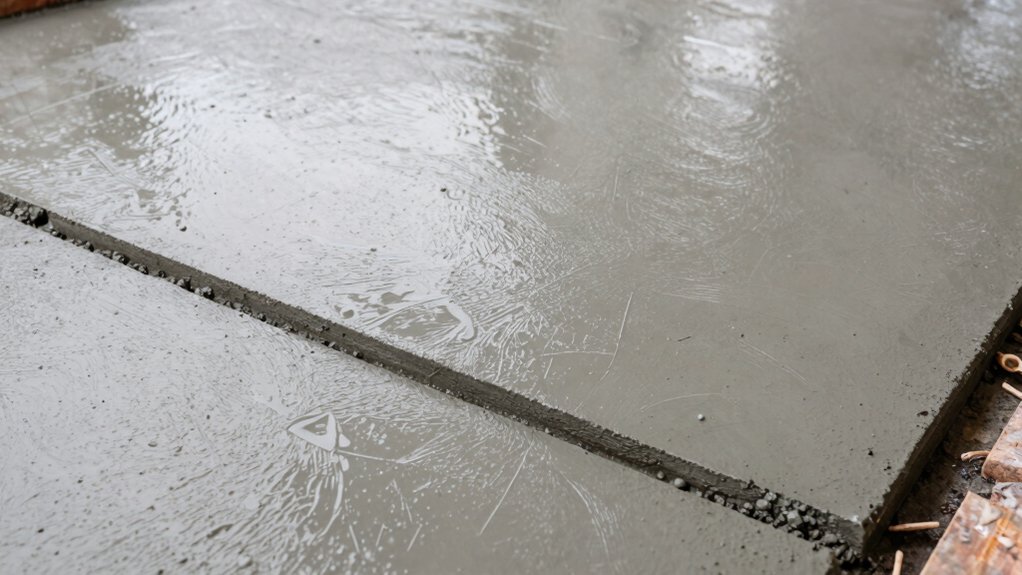
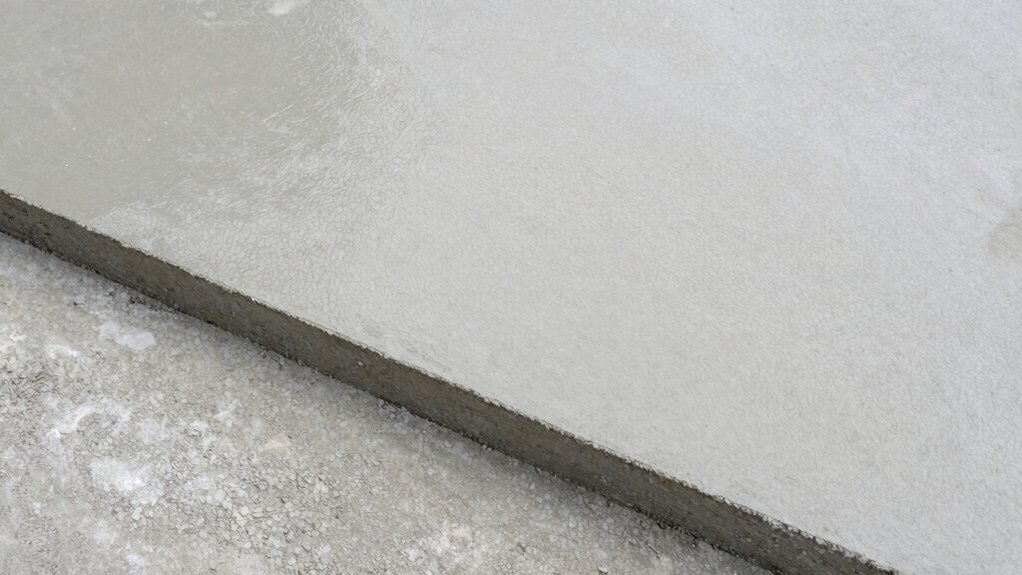
Mixing Ratios and Additives for New Concrete on Top
When placing new concrete on top of existing slabs, you must set precise mixing ratios and select appropriate additives to guarantee bonding, durability, and performance.
Start with a target cement-to-aggregate ratio specified by the project, then adjust water content to achieve workable consistency without sacrificing compressive strength. Incorpor incorporate a compatible bonding agent or primer according to manufacturer guidance, ensuring uniform distribution over the substrate.
Use a supplementary cementitious material (SCM) only if specified, and maintain a slump within the designated range to promote cohesive placement. Additives should be limited to approved types—accelerators, retarders, or air-entraining agents—applied per dosage instructions.
Verify fresh-concrete temperature, hydration control, and proper consolidation, then perform an immediate finish to minimize cold joints and ensure load transfer.
Curing and Longevity: Tips to Prevent Delamination
Proper curing is essential for adhesion and long-term performance when pouring concrete over an existing slab. Inadequate curing accelerates moisture loss, leading to shrinkage cracking and delamination.
To maximize longevity, steady moisture control must be maintained during the initial 7 days, with supplemental curing for up to 14 days when ambient conditions are harsh. Use a compatible curing method, such as plastic sheeting or膜-forming curing compounds, that minimizes evaporation without trapping excess moisture.
Apply surface moisture consistently before finishing, and avoid rapid drying by shielding from wind and sun. Monitor temperature and humidity, adjusting curing duration as needed to meet paste hydration requirements.
Verify bond integrity with substrate preparation, ensuring dust-free, properly profiled surfaces. Document curing events and observe for signs of early distress.
Common Pitfalls and Warning Signs to Watch For
Despite careful planning, several pitfalls can undermine bonding and long-term performance when pouring concrete over an existing slab. You must verify surface condition first: remove loose material, repair spalls, and test for moisture after abrasion.
Avoid applying to damp or hydrostatic slabs; use a reliable moisture barrier and appropriate primers. Improper surface preparation, such as thin or inconsistent bond coats, creates weak interfaces that delaminate under load.
Check for curing compounds or sealers that resist adhesion, and remove them as needed. Control joints and overlay thickness must align with design; excessive thickness increases shrinkage and cracking risk.
Monitor weather and ambient temperature to prevent flash-set conditions. Inspect for non-uniform compaction, voids, or misaligned edges during finishing.
Perform a final pull-off test to confirm bond integrity before loading.
Frequently Asked Questions
How Thick Should a Concrete Overpour Be for Safety?
The overpour should be at least 2 inches thick for small slabs and 3 inches for structural elements, ensuring de-bonding joints, bonding agents, and proper surface preparation. You must verify with project specs and local codes before proceeding.
Can You Pour Over Epoxy-Coated Slabs Successfully?
Yes, you can pour over epoxy-coated slabs, but prep thoroughly. You’ll roughen, clean, and prime the surface, apply a compatible bonding agent, and cure carefully; otherwise adhesion failure risks voids, pops, and delamination. Think of it as disciplined adhesion.
Is Roller-Compacted Concrete Suitable for Overpour?
Roller-compacted concrete is not suitable for overpour without adhesion-enhancing prep. You must remove laitance, apply a bonding agent, roughen surface, and verify load transfer; otherwise, delamination or cracking will likely occur during service.
Do Environmental Conditions Impact Overpour Bonding Differently?
Yes, environmental conditions impact overpour bonding differently. You must consider temperature, humidity, wind, and surface moisture; adjust cure times, surface preparation, and adhesive priming accordingly. Do you verify coatings, moisture tests, and schedule changes before pouring? Follow precision protocol.
Can You Retrofit a Heated Slab With an Overpour?
Yes, you can retrofit a heated slab with an overpour, but you must plan precise joint alignment, confirm compatibility of materials, use proper bonding agents, maintain thermal continuity, and verify slab moisture and cure conditions before pouring.