

To restore a weather-beaten deck, start with a thorough inspection for loose boards, rot, warped joists, and rusted fasteners. Clean thoroughly, then strip and sand the surface, paying attention to mill glaze. Replace damaged boards and secure fasteners flush. Choose a durable, moisture-resistant finish, and apply with even coats. Improve drainage and slope away from the house, and seal edges to prevent splinters. Maintain yearly with inspections and recoats to keep it looking new and resilient—more tips await.
Assess Your Weathered Deck: What Needs Repair

Assess what’s truly damaged, not just what looks tired. You inspect structural integrity first: boards with deep cracks, soft spots, or excessive flex need replacing. Check joists for rot, rusted fasteners, and sagging spans, then address any framing issues before finishing. Verify fastener patterns, spacing, and edge lift; soft edges signal moisture intrusion that compromises safety. Look for warped decking, splinters, and loose rails that could fail under load.
After repair decisions, plan practical upgrades: deck lighting to improve visibility at night and seating options to extend usability. Prioritize moisture control with proper sealing and ventilation to prevent recurrence. Document repairs for future maintenance.
With repairs prioritized, you can proceed confidently to upgrades that blend safety with functional appeal.
Gather Materials for Your Deck Type
To start, assemble a reliable tool kit you’ll actually use, so nothing slows you down mid-project.
Then pick material types that suit your deck’s climate and traffic—think durability, maintenance, and cost.
Keep your plan simple: match tools to materials, and choose options you can source quickly.
Gather Tool Kit
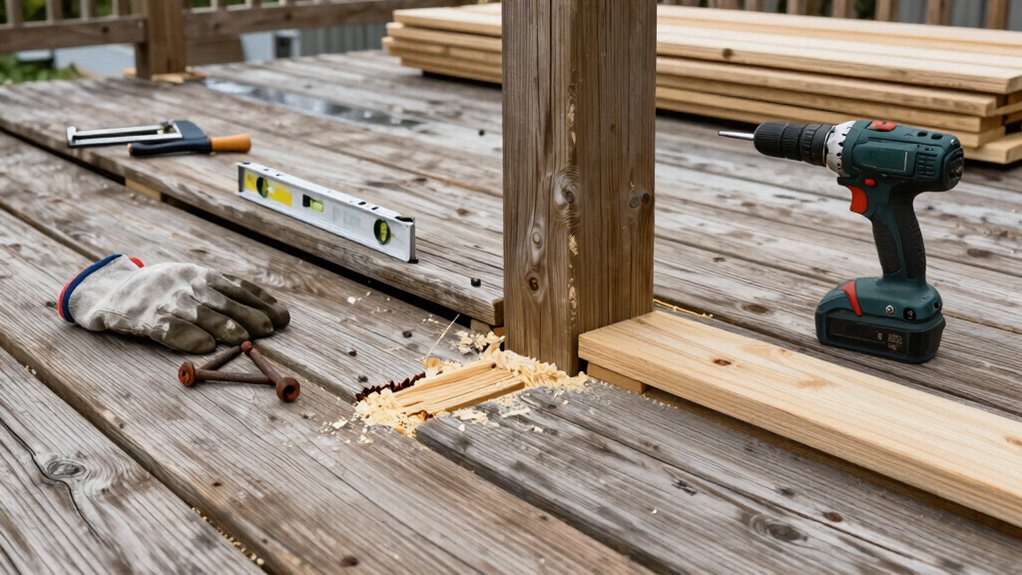
What tools and materials do you need for your deck project? You’ll gather a focused kit tailored to your deck type. Start with safety basics: gloves, eye protection, hearing protection, a sturdy dust mask.
For fasteners and hardware, stock corrosion-resistant screws, nails, a drill bit set, a driver, and a magnetic tray.
Add measuring and marking essentials: tape measure, speed square, carpenter pencil, chalk line, level.
Cleaning and prep demand brushes, scrapers, a stiff broom, power washer or garden hose with nozzle, and low-pressure cleaning detergent.
For repair, include a pry bar, hammer, putty knife, wood filler, and circular saw or hand saw.
Don’t overlook deck lighting integration planning and furniture placement considerations when choosing tools, to align setup with design goals and workflow.
Choose Material Type
Choosing your deck material sets the foundation for durability, maintenance, and look. You’ll pick between wood, composite, or PVC, weighing longevity, cost, and ease of care.
If you want natural warmth and sanded grip, wood is option A; if you crave low upkeep and consistent color, consider composite or PVC. Factor exposure, climate, and foot traffic into your choice, then estimate long-term expenses like staining, sealing, or replacement cycles.
Plan for structural compatibility with existing framing and fasteners to avoid hidden retrofits. Consider deck lighting and decorative railings as design anchors that influence material choice and finish.
Ensure moisture resistance and slip resistance align with safety goals. Finally, source from reputable suppliers, check warranties, and verify color stability under sun.
Prep Safely: Cleaning, Stripping, and Sanding Best Practices
Before you start cleaning, stripping, or sanding, lay out a clear plan and gather the right PPE and tools. Start with a surface assessment: note mill glaze, loose fibers, and nail pops. Wear eye protection, gloves, a respirator if needed, and sturdy shoes.
Choose a compatible cleaner or stripper, and test on a hidden spot to avoid discoloration. Follow label directions, apply evenly, and avoid solvent spills on decorative lighting or nearby deck furniture.
Use low-pressure water, not high jets, to rinse; let boards dry fully before sanding. Use 60–80 grit for initial, then 120 grit for smoothness. Work with the grain, clean between boards, and dispose of residue responsibly.
Plan the post-clean tasks to preserve aesthetics and safety.
Repair Techniques: Fix Deck Boards, Fasteners, and Railings
When deck boards show checks, looseness, or cupping, start with a quick assessment to prioritize repairs: replace damaged boards, secure loose fasteners, and fix wobbly rails before finishing. Next, inspect for rot or decay at joist ends and replace damaged stringers as needed. Remove and reinstall problematic boards, staggering gaps to maintain drainage.
Tighten screws or switch to galvanized or stainless fasteners to resist corrosion, and drive them flush without overtightening to avoid splitting. For railings, tighten posts, reinforce brackets, and replace any cracked balusters.
After structural fixes, perform a thorough deck cleaning to remove debris and mildew, ensuring a solid surface for future protection. Finally, plan maintenance steps, including wood staining, to extend life and improve appearance.
Choose Finishes: Stains, Sealants, and Colors for Longevity
After finishing the structural fixes, you’ll protect your deck by selecting the right finish. Choose finishes that balance longevity, appearance, and ease of maintenance. Your goal is durable protection with a color you’ll actually want to live with on sunny mornings and shaded evenings.
- Deck staining: deepens grain, adds color, and blocks UV damage without hiding character.
- Sealants: penetrate joints and boards for moisture resistance; apply uniformly for even sheen.
- Color selection: pick a hue that conceals dirt and blends with surroundings, then test on a sample panel.
Apply in light, even coats, follow recoat times, and maintain yearly. With the right finish, you’ll extend life and reduce future repairs.
Improve Water Management and Drainage to Prevent Damage
Water-shedding design, proper grading, and a clear drainage plan prevent standing water from soaking the deck joists and flashing. Check that the deck slopes away from the house, review drainage paths, and make sure gutters and downspouts route water away.
Establish regular drainage-system checks to spot clogs, leaks, and wear before damage spreads.
Water-shedding Design
Good water management is non-negotiable for a durable deck. Water-shedding design guides your structure to shed runoff efficiently, reducing rot and warping. You’ll install slopes and progressions that direct rain toward drainage without pooling.
Inspect surfaces to assure gaps and fasteners remain tight, preventing leaks from seeping behind boards. Here are core steps to visualize real impact:
1) Create a slight incline from the house toward the drains, avoiding standing water.
2) Incorporate integrated channels or weep holes at joints to carry moisture away.
3) Align deck lighting and outdoor furniture so shadows don’t trap moisture or hide dirt.
With these fundamentals, you protect framing, preserve finishes, and extend life while maintaining a clean, inviting outdoor space.
Grading and Sloping
Grading and sloping are your first lines of defense against water damage. You layout the deck with a slight, consistent fall away from the house and toward the drainage path.
Verify areas near the ledger and joists shed water quickly, avoiding pooling along beams. Check that the sloping is uniform across the surface, not just at the edges.
When you plan the grade, aim for a fall of about 1/8 inch per foot so drainage and runoff remain efficient without creating rough surfaces. Use low-spot checks after rain to confirm runoff directs water over the edge rather than toward gaps or fasteners.
Maintain the grade by clearing debris that could impede flow and by resealing joints to prevent washout and rot.
Drainage System Checks
Drainage system checks guarantee water doesn’t pool around the deck. You improve longevity by confirming flow paths, downspouts, and grading work together. Focus on directing moisture away from the wood to prevent rot and warping. Use these steps:
- Inspect storm drainage and downspouts for clogs, ensuring runoff exits your property without backing up.
- Verify gutters and guttering connections are secure, directing rain toward drainage rather than the deck edge.
- Test surface grading with a level, adjusting dirt to slope away from posts and joists for efficient water shedding.
Regular maintenance keeps moisture off fasteners and coatings. Schedule seasonal checks, clean gutters, and recheck drainage after heavy storms to preserve structural integrity and appearance.
Create a Yearly Maintenance Schedule for Longevity
To keep a deck lasting season after season, establish a clear yearly maintenance schedule that covers inspection, cleaning, sealing or staining, and any needed repairs.
Start with a spring check: inspect fasteners, boards, and railing posts for looseness or damage.
Clean thoroughly using a deck-safe cleaner, rinse, and let dry completely before finishing.
Apply a protective sealant or stain appropriate for your climate, following label directions for reapplication intervals.
Schedule mid-year touchups on high-wear areas and recoat as needed to preserve color and protection.
Document tasks and dates, then adjust for weather delays.
Consider seasonal amenities—check deck lighting for switches, bulbs, and connections, and evaluate outdoor furniture placement to prevent moisture buildup.
A disciplined routine reduces failures and keeps your space inviting year-round.
Troubleshoot Common Deck Problems (Mold, Warp, Splinters)
Mold, warping, and splinters are common deck problems, but they’re manageable with targeted checks and fixes. You’ll tackle these issues with a simple, practical plan that prevents recurring damage and preserves surface integrity.
- Inspect for moisture and mold buildup, then clean with a stiff brush and deck-safe cleaner. Prioritize areas under seating and corners.
- Test boards for warp and looseness; replace warped planks and re-secure fasteners to restore a flat, safe surface.
- Address splinters with preventive maintenance, sanding rough edges, and applying a protective finish to curb future splinter removal needs.
Focus on mold prevention by maintaining dry conditions and routine cleaning, and keep splinters from catching feet with smooth, sealed edges.
Quick Upgrades to Boost Curb Appeal
A few quick upgrades can dramatically boost curb appeal without a full redo. You can start by updating lighting to create inviting evening ambiance, using deck lighting that highlights steps and rail lines for safety and style. Choose low-profile fixtures that resist weather and adapt to your deck’s vibe.
Next, swap in decorative railings to instantly elevate the silhouette; opt for materials that resist rust and rot, and pick a finish that complements your home. Add a fresh stain or seal on posts and trim to unify the look without a full refinish.
Consider a small, durable planter and a weatherproof welcome mat to greet guests. Keep changes cohesive, avoiding crowded elements, so the deck reads clean, polished, and welcoming.
Conclusion
Your deck isn’t just wood; it’s a memory-lined path to sunlit moments. Treat each board like a chapter you’ll read for years—clean, repair, seal, and seal again. With steady hands and a watching eye, neglect fades and resilience rises. When rain drums and summer glare tests you, you’ll stand confident, because your routine has built a shield. Finish strong, maintain faithfully, and watch durability bloom into lasting curb appeal and enduring comfort.