
Is your home “solar ready”? Start by evaluating your roof and site: ensure materials and structure can support solar, check orientation, and watch for shading that cuts output. Verify your electrical panel has enough capacity and space for a solar inverter, upgrading if it’s older. Plan practical steps for permits, wiring routes, and financing early. Look at costs, incentives, and storage options to maximize value. If you keep exploring, you’ll uncover the details that seal the decision.
Assess Roof Suitability for Solar

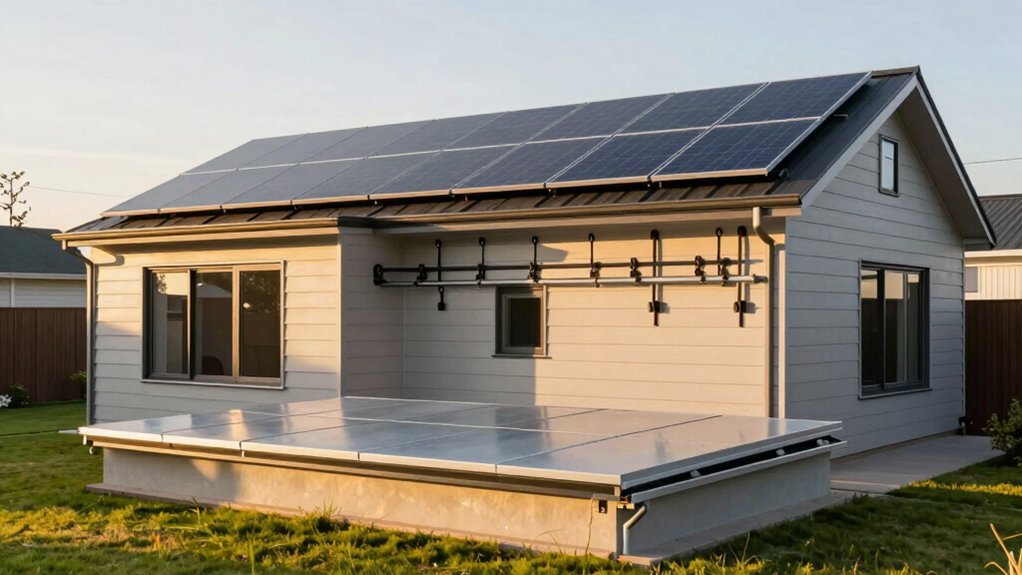
Evaluating roof suitability is the essential first step to going solar. You’ll assess whether your roof can reliably support an install, not just today but for decades.
Start with roof materials: some compositions handle mounting hardware and weight better than others, while others may need upgrades before any solar work begins.
Check your roof’s structural integrity by examining trusses, rafters, and existing fasteners for signs of rot, sagging, or moisture damage. If you see issues, address them before moving forward; failures here undermine system longevity and warranty coverage.
Consider roof accessibility and orientation to panels, ensuring there’s a clear, unobstructed footprint.
Finally, verify that flashing, underlayment, and sealants are intact to prevent leaks after installation.
How Orientation and Shade Affect Output
Your system orientation and seasonal sun angles determine how much energy you harvest, so your panels should face the ideal direction for your location and tilt you toward maximizing exposure.
Shade from trees, chimneys, or nearby structures can dramatically cut production, so identify and mitigate any obstructions during peak sun hours.
Consider how changing seasons alter sun path and adjust angles or placement to keep output steady year-round.
Orientation Effects On Output
The orientation of your solar array has a direct impact on how much sunlight it captures, and what shade it encounters throughout the day. You’ll maximize output by facing panels toward the sun’s peak path and avoiding long shadows from nearby structures.
If you’re in the Northern Hemisphere, ideal tilt and azimuth typically align with your latitude, but adjustments may suit seasonal needs.
Roof materials influence mounting constraints, so verify that racks won’t obstruct vents or tiles.
Also consider shading devices, such as eaves or trees, and plan for potential trimming to preserve sun exposure over time.
Regularly inspect for drifting shade during different seasons and adjust as needed.
Prioritize a clean, obstruction-free installation to sustain consistent energy production.
Shade Impact On Production
Shade can dramatically cut output even when panels point toward the sun. You’ll see losses when trees drift into the panel field or when building features cast long shadows across peak hours.
Start with site assessment: identify periods of shade, not just overall brightness. Then evaluate how roof obstructions, vents, or chimneys interrupt the array’s exposure.
If shade is unavoidable, prioritize panel placement to maximize hours of full sun, or consider microinverters to minimize impact from partial shading.
Regular pruning keeps tree shading under control and preserves performance.
Use commercial shade analysis tools or a solar installer’s survey to quantify potential loss.
Seasonal Sun Angles
Seasonal sun angles matter as much as constant orientation because changing daylight direction alters how effectively panels harvest energy throughout the year. You’ll maximize output by mapping seasonal sun paths for your roof.
In winter, lower sun angles mean you should optimize tilt and avoid shading from chimneys or nearby trees. In summer, higher angles reduce heat losses and keep panels sheltered from glare.
Consider roof materials and how they influence mounting or ballast—some materials demand special hardware or increased flashing. Shading from new growth or seasonal structures should be addressed with micro-inverters or optimizers to preserve energy during peak sun.
Check roofing warranties before any mounting work, ensuring penetrations won’t void coverage and that installation stays compliant with roof materials specifications.
Evaluate Your Electrical Panel for Solar Readiness

Before you plan solar, start by inspecting your electrical panel to gauge readiness. Your panel tells you what the system will demand and where to connect.
Look for a main breaker with enough amperage to support additional solar, and note the label indicating the service size. Check for a dedicated solar or PV breaker space; if you don’t see one, you may need a panel upgrade.
Assess wiring spacing, conductor gauge, and the presence of a properly rated busbar. Verify there’s room for future expansion without crowding.
Consider how electrical wiring routes from the panel to the roof, since planning alignment with roof material helps minimize long, exposed runs.
If anything seems uncertain, consult a licensed electrician for an inspection. A solid panel setup reduces surprises during installation.
Practical Prep Steps: Roof, Wiring, and Permits
With the panel checked and ready, you’ll want to map out the roof, wiring routes, and permits now to prevent delays later. Start with solid access points, note shading, and verify mounting compatibility.
Then lock in a clean wiring path that minimizes long runs and reduces voltage drop, prioritizing conduit protection and future maintenance access.
Finally, identify permit requirements early to avoid holds or rework.
- Roof assessment and mounting plan
- Wiring routes that optimize efficiency and safety
- Permit checklist and timeline to stay compliant
Keep solar panel maintenance in mind during setup and future care, so you can spot issues before they escalate.
Also consider battery storage options to align with your load needs and budget from day one.
Navigate Permits and Local Codes
Understanding permitting timelines, local code basics, and inspection readiness sets the foundation for a smooth solar upgrade.
You’ll align your project with typical approvals, know what inspections to expect, and map milestones to avoid delays.
Let’s outline the steps you’ll follow to stay compliant and stay on track.
Permitting Timeline Basics
Permitting timelines can vary, but you’re best off starting early and knowing what to expect at each step. In this section, you’ll grasp the cadence of approvals and how it affects your project schedule. Stay focused on practical actions, not fluff, so you can keep the build moving.
- Pre-application preparation: assemble site plans, equipment specs, and documentation on solar panel durability and inverter technology to streamline reviews.
- Plan review and permits: expect engineering checks, load calculations, and potential revisions before approval.
- Inspections and final sign-off: anticipate multiple on-site checks aligning with equipment installation and system commissioning.
Local Codes Overview
Local codes shape what you can build and how fast you’ll move through permits. This section helps you navigate jurisdiction rules without getting hung up on red tape. Start by identifying your local building department’s permit requirements, then map out submittals, timelines, and any plan-review fees.
You’ll want clear project scopes, labeled drawings, and product specifications to avoid revisions. Understand electrical codes that affect attachment methods, wire sizing, and disconnects for solar installations. Check whether your area has adopted a specific solar-ready or energy-code addendum and whether inspections require on-site pressurized testing.
When choosing equipment, compare solar panel types and inverter options for code compatibility and labeling. Align equipment with fire-resistance, setback, and shading requirements to streamline approvals.
Inspection Readiness Steps
Start by mapping the exact permit path for your project: identify the issuing local building department, required submittals, and typical review timelines. Then align your plan to those steps so you can anticipate delays and avoid revisions. You’ll focus on inspection readiness to prevent code holds and ensure a smooth review.
- Gather submittals that cover Roof materials, equipment specs, electrical interconnections, and any required tree pruning clearances.
- Confirm plan check timelines, and pre-approval options, so you can schedule inspections without stalling.
- Schedule on-site verifications for site access, roof angles, and safety measures, then document forms for final clearance.
Stay proactive: document code references, keep corners clear, and coordinate with arborists to maintain access during inspections.
Understand Solar Costs, Savings, and Financing
Considering how much solar can save you, understanding costs, savings, and financing is essential before you commit. You’ll evaluate upfront costs, ongoing maintenance, and potential tax incentives, then compare with your household energy usage to estimate payback.
Start with solar panel types to match efficiency, durability, and warranty to your climate and roof. If reliability matters or you’re off-grid-ready, factor in battery storage and its lifecycle costs, not just purchase price.
Explore financing options, including upfront purchase, loans, or leases, and check for utility rebates or state programs. Calculate a realistic monthly savings based on your rate plan and typical bills.
Don’t forget to account for system degradation over time and potential insurance changes as you plan your long-term energy strategy.
Solar Installer Questions: A Homebuyer Checklist
When you’re weighing solar options, selecting the right installer matters just as much as choosing panels. You’ll want a partner who explains options clearly, provides transparent pricing, and stands behind workmanship. Use this checklist to guide conversations and decisions.
- What warranties come with panels, inverters, and monitoring?
- Do you offer design, permitting, and inspection support, and who handles permits?
- How do you approach solar tax credits and energy storage options, including battery sizing and maintenance?
Ask for recent project references, system performance data, and a written timeline from contract to activation.
Guarantee they evaluate shading, roof orientation, and electrical upgrades.
Confirm after-sale support and response times.
Clarify grid interconnection steps, and whether financing includes maintenance.
This diligence helps maximize solar tax credits and aligns storage with your energy goals.
Quick Upgrades to Boost Solar Readiness
To boost your home’s solar readiness, tackle quick upgrades that pay back with faster system activation and better efficiency. Start with a roof and shade assessment; trim overhangs, replace damaged shingles, and guarantee ideal panel angles.
Know your solar panel materials options: monocrystalline for higher efficiency, polycrystalline for cost savings, and thin-film where space is plentiful.
Simplify wiring paths for the inverter by labeling cables and consolidating junction boxes, reducing installation time.
Upgrade your electrical panel if it’s older than 20 years to support modern inverters and battery integration.
Consider battery storage options to smooth out nighttime use and grid outages, selecting a size that matches your typical load.
Finish with a smart meter and app-based monitoring to optimize performance.
Is Solar Right for Your Home? Decision Factors
Installing solar makes sense only if it fits your home and daily energy needs. When evaluating whether it’s right for you, focus on factors you can control and measure. Consider these decision drivers:
1) Energy profile and consumption patterns: review utility bills, seasonal shifts, and your peak demand times to see if offsetting with solar is viable.
2) System durability and technology: prioritize solar panel durability and reliable inverter technology to minimize maintenance and maximize uptime.
3) Roof and site suitability: assess shading, orientation, roof age, and mounting options to ensure long-term performance.
Also, calculate payback, available incentives, and potential resale value. If your home aligns on these points, solar can be a practical, durable investment rather than a gap filler.
Conclusion
You can make solar fit your home, starting now. By evaluating roof suitability, orientation, shade, and panel readiness, you’ll see real value without surprises. Don’t fear upfront costs—explore financing and incentives that fit your budget. If you worry about disruptions, know permits, wiring checks, and quick upgrades can stay minimal. With practical steps and a trusted installer, you’ll gain energy independence and resilience, and you’ll feel confident you chose a smarter, cleaner future for your family.