
When you’re new to DIY woodworking projects, the key is choosing projects that build your skills without overwhelming you. Simple pieces like floating shelves, plant stands, and small side tables let you practice straight cuts, accurate measuring, and basic assembly while actually improving your home. With just a few tools and beginner-friendly woods, you can get solid results fast—if you know how to pick the right plans, avoid common mistakes, and finish them so they don’t look homemade…
How to Pick an Easy First Woodworking Project
How do you choose a first woodworking project that you’ll actually finish and feel proud of? Start by picking something small and useful: a simple wall shelf, a basic planter box, or a flat serving board. These projects use straight cuts, few parts, and simple joinery.
Match the project to your current skills and free time. If it looks complicated or requires lots of steps, skip it for now. Choose a design with clear measurements and a straightforward plan, not a “wing it” idea.
Consider the materials you can easily get and store. Soft woods like pine are forgiving and cheap, so you won’t stress over mistakes.
Finally, pick a project you’ll actually use or display; that motivation keeps you finishing strong.
Beginner Tools You Actually Need for Woodworking
Once you’ve picked a simple first project, you need a short, realistic tool list—not a garage full of gadgets. Start with a tape measure, a combination square, and a sharp pencil so you can mark accurately.
Add a circular saw for straight cuts and a jigsaw for curves and cutouts.
You’ll also want a drill/driver with a basic bit set for holes and screws, plus a countersink bit to keep screw heads flush.
Buy a small block plane or sanding block, 80–220 grit sandpaper, and a random-orbit sander if your budget allows.
For assembly, keep a claw hammer, a few clamps, carpenter’s glue, and a sturdy work surface.
With these essentials, you can build most beginner projects confidently and efficiently.
Woodworking Safety Tips for First-Time Builders
Before you plug in a saw or pick up a chisel, you need a few basic safety habits that become automatic every time you work. Always wear safety glasses, hearing protection, and closed‑toe shoes. Tie back long hair, remove dangling jewelry, and avoid loose sleeves that can catch in blades.
Keep your workspace bright, uncluttered, and dry. Secure your board with clamps instead of your hands whenever possible. Before using any tool, unplug it and check the cord, guard, and blade. Stand to the side of a cut line, not directly behind it.
Use a push stick with saws, never your fingers. Cut away from your body, keep both hands visible, and never rush. If something feels sketchy, stop and rethink the setup.
Best Wood and Materials for Beginner Projects
Even with simple tools and plans, your projects get easier and look better when you pick forgiving, stable materials. Start with softwoods like pine or spruce; they’re cheap, easy to cut, and available at any home center. Select boards labeled “select” or “common” with minimal knots and warping.
For a smoother finish, try poplar. It’s a hardwood, but it machines easily and takes paint well, making it ideal for small furniture and décor. Avoid oak and maple at first; they’re dense, harder on tools, and less forgiving of mistakes.
Use plywood rated as cabinet‑grade or sanded; it resists warping and offers a flat surface. Pair your wood with quality wood glue, #8 or #10 screws, and 120–220‑grit sandpaper.
Simple Beginner Woodworking: DIY Floating Shelves
Although they look sleek and complex, floating shelves are one of the simplest woodworking projects you can tackle as a beginner. You’ll practice accurate measuring, straight cuts, drilling, and secure mounting—all skills you’ll reuse in future builds.
Start by choosing straight, defect‑free boards sized to your wall. Cut them to length, then sand the edges smooth. You can round over corners slightly for a softer look.
Apply stain or paint before installation so you don’t drip on your wall later.
For mounting, use a hidden bracket or a simple cleat screwed directly into wall studs. Pre‑drill your holes, use a level, then attach the shelf to the bracket or cleat.
Test its strength with your hands before loading anything.
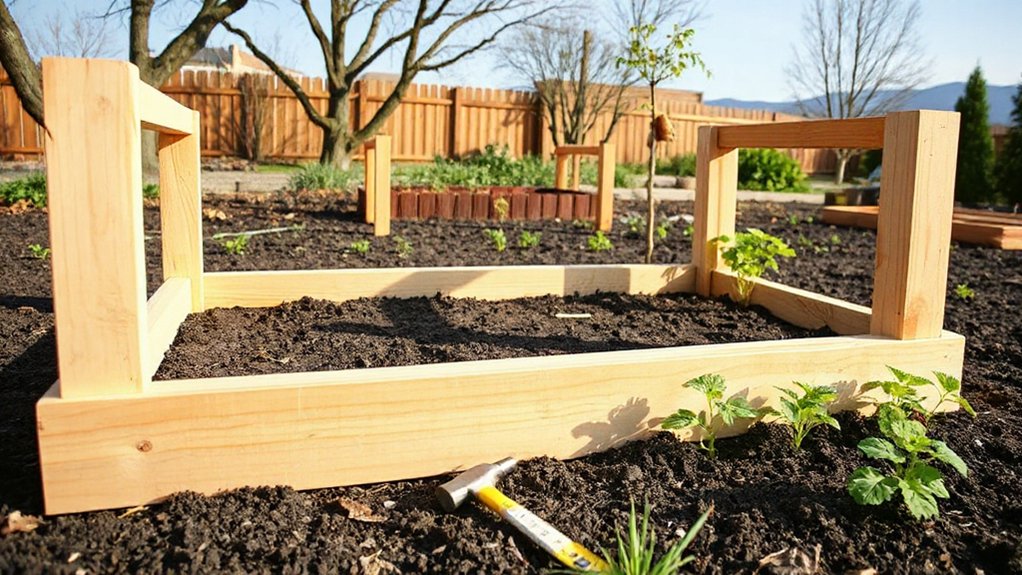
Easy Beginner Woodworking: Plant Stands and Racks
When you’re ready to move beyond simple flat boards, plant stands and racks give you an easy way to practice building sturdy, three‑dimensional pieces. You’ll work with legs, stretchers, and simple joinery while still keeping everything at a beginner level.
Start with a basic box‑style stand: four legs, a square frame, and a top panel or slats. Use 1×2 or 2×2 lumber for legs and pocket screws or pre‑drilled pilot holes with wood screws for strength. Check for wobble, then adjust by trimming legs or adding a lower brace.
For a ladder‑style rack, cut two long rails and several short rungs. Space the rungs evenly, glue, then screw from the outside. Sand thoroughly and seal against moisture.
DIY Entryway Organizers to Cut Daily Clutter
Those same skills you used for plant stands and racks now let you tackle something you’ll use every single day: DIY entryway organizers. With a few boards and hooks, you can turn a messy doorway into a landing zone that actually works.
Start with a simple wall-mounted board: cut it to length, sand the edges, then screw in sturdy hooks for coats, bags, and keys. Add a narrow top ledge to catch mail or sunglasses.
If you’ve got a bit more wall space, build a shallow cubby panel. Divide it into small compartments for hats, dog leashes, or wallets. Mount everything into studs, finish with stain or paint, and you’ve created a custom organizer that instantly cuts daily clutter.
Beginner Woodworking: Small Side Tables and Benches
Once you’re comfortable cutting, sanding, and fastening basic boards, you’re ready to tackle small side tables and benches that actually earn a spot in your home. These projects stay manageable in size but teach you core furniture skills: sturdy legs, flat tops, and solid joinery.
Start with a simple side table using four legs, an apron frame, and a square top. You’ll practice measuring consistent leg lengths, drilling straight pocket holes or screw joints, and keeping the frame square with a carpenter’s square or measuring diagonals.
For a bench, scale the same idea longer and slightly wider. Add a center support if it’s over four feet. Focus on wobble‑free joints, flush surfaces, and careful layout before you cut.
Finishing Tips to Make DIY Projects Look Pro
Sturdy tables and benches are a win, but the finish is what makes them look store‑bought instead of homemade. Start by sanding through grits: 80 to remove marks, 120 to smooth, 180–220 to prep for finish. Always sand with the grain and wipe off dust with a slightly damp cloth or tack cloth.
Choose your look: clear polyurethane for durability, wiping varnish for a hand‑rubbed feel, or stain plus topcoat for color. Test on scrap from the same project. Apply thin coats with a good brush or lint‑free rag, not foam. Don’t rush drying times.
Lightly sand with 220–320 grit between coats to knock down nibs, then wipe clean. For a pro touch, finish edges carefully and don’t forget the underside.
Conclusion
You’re ready to turn simple boards into pieces you’ll actually use and love. Start with one easy project, measure carefully, and don’t rush your cuts or sanding. Focus on softwoods, basic tools, and safe habits, and you’ll learn something new every time you build. As your confidence grows with shelves, stands, and small tables, you’ll see your home – and your skills – transform one project at a time.