
Updating a bathroom vanity comes down to your goal, budget, and timing. If you want a fast, budget-friendly update, a DIY refresh—paint, new hardware, and smarter storage—works well. For a cohesive, longer-lasting result or a changed footprint, buying a new vanity (custom, semi-custom, or ready-made) often pays off, especially with moisture-safe materials and proper installation. Weigh durability, plumbing rough-ins, and ventilation. Ready to weigh options? You’ll uncover practical criteria you can apply right away.
Define Your Vanity Update Goal: Refresh, Refit, or Replace?
Decide what you want from the project: a refresh, a refit, or a full replacement. You’ll choose based on function, budget, and time, not impulse.
A refresh keeps the core vanity and layout, offering a quick payoff with new hardware, finishes, or hardware accents.
A refit preserves structure but updates components to better fit today’s needs, balancing cost and modernization.
A full replacement rethinks size, storage, and plumbing alignment, demanding careful measurement and planning.
Consider vanity style and how it integrates with the room’s color coordination—units, mirrors, and countertops should feel cohesive, not competing.
Be pragmatic: map constraints, ask for professional input when needed, and align the goal with long-term value.
Clear goals reduce waste, save effort, and boost confidence in your update choice.
DIY Refresh Options: Painting, Hardware, and Storage Makeovers
If you’re aiming for a quick, cost-effective update, start with three low-commitment refreshes: paint, new hardware, and smart storage tweaks.
A fresh coat changes mood fast, so pick a durable, washable finish and a color scheme that coordinates with your overall bath. Swap knobs and pulls to immediately elevate the vanity’s style without a full remodel.
For storage, install slim organizers, percent-efficient drawer dividers, or a compact open-shelf for daily essentials. Add decorative accents like a framed mirror, decorative trays, or a small plant to ground the look.
Keep the palette cohesive across surfaces to avoid cluttered vibes. With these moves, you build personality and cohesion while staying affordable and feeling connected to your space.
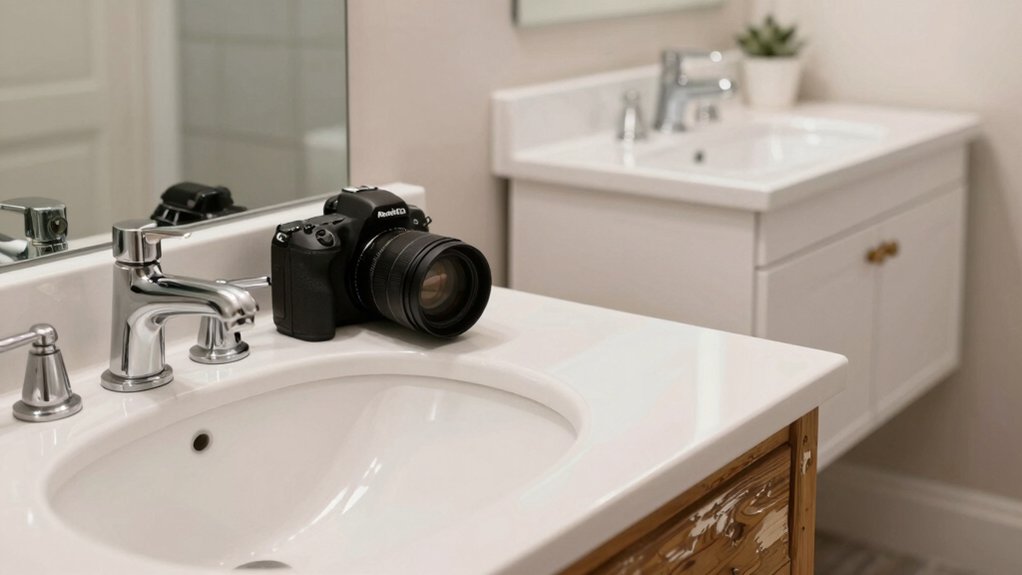
When to Refinish vs. Replace the Countertop and Sink
When you’ve refreshed the vanity with paint, hardware, and smart storage, the next decision is whether to refinish or replace the countertop and sink.
- Assess material wear: chips, stains, or etched surfaces signal refinishing isn’t enough.
- Consider durability and upkeep: high-traffic baths benefit from solid-surface or stone-appearance options.
- Align with sink styles: integrated or drop-in sinks influence feasibility and cost.
- Weigh resale and consistency: matching existing countertop materials for a cohesive look saves time and money.
If refinishing, choose a sturdy finish and color that complements your vanity.
If replacing, select a countertop material and sink style that balance daily use with your budget and design mood, ensuring a seamless progression that strengthens your bathroom’s overall feel.
Compare Costs: DIY Versus Buying a New Vanity
Considering whether to DIY or buy a new vanity, you’ll weigh DIY cost factors against buying costs and the long-term value each option offers.
You’ll compare upfront expenses, compatibility, and potential overruns with DIY versus store-bought vanities, plus installation time and warranties.
This quick frame sets up a practical cost-and-value discussion you can use to decide what makes sense for your bathroom project.
DIY Cost Factors
DIY costs vary widely depending on whether you tackle the project yourself or buy a new vanity. In this section, you’ll weigh factors that affect your bottom line and keep you on track with budget planning and material selection.
- Labor vs. time: gauge whether you’ll substitute your own labor for shop time, and remember opportunity costs.
- Materials upfront: plywood, MDF, hardware, and sinks shape total spend; pick durable options aligned with your goals.
- Finishing costs: paint, sealant, and reglazing add up—plan for multiple coats and dry times.
- Tool and rental needs: consider whether you own essential tools or must rent, which changes the overall price.
Buying Vanity Costs
If you’re weighing costs, you’ll quickly see that buying a vanity can be simpler—and often cheaper—than DIY, but the true total depends on style, size, and where you shop.
A straightforward cost comparison reveals your upfront price, delivery, and installation fees, versus DIY’s material and tool investments.
You’ll likely save on labor when you purchase prebuilt or semi-custom units, yet higher-end finishes and cabinetry can tilt the balance toward DIY if you already own tools.
Material selection matters: solid wood or plywood builds cost more than MDF, while hardware, sinks, and countertops influence total more than you might expect.
Plan for tomorrow’s needs too—paired vanity dimensions and faucet compatibility save rework.
Choose thoughtfully to harmonize budget, style, and belonging.
Long-Term Value Compared
Translating upfront savings into long-term value means weighing durability, maintenance, and resale potential just as much as price. When you compare DIY to buying new, you’re judging more than upfront costs—you’re weighing how design flexibility and aesthetic appeal hold up over time.
- Design flexibility: custom tweaks may improve fit and function, boosting daily satisfaction.
- Maintenance burden: DIY often fixes glitches yourself, but factory parts and warranties can reduce downtime.
- Durability and materials: engineered options may outlast stock vanities, preserving value.
- Resale potential: a well-executed, cohesive look tends to attract buyers and justify asking prices.
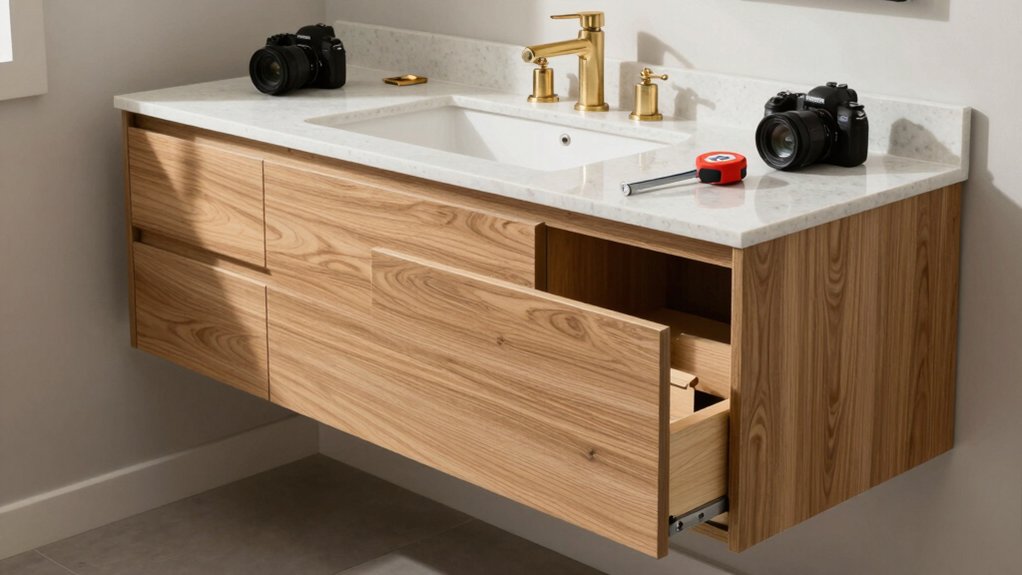
Durability Essentials: Cabinets, Materials, and Plumbing Fixtures That Last
When you choose cabinets and plumbing fixtures, prioritize durability as your baseline for value. Look for moisture-resistant cabinet materials and corrosion-resistant hardware that can handle daily use.
Focusing on longevity now saves frequent repairs and replacements later, keeping your bathroom looking and functioning reliably.
Durable Cabinet Materials
Durable cabinet materials matter because they resist moisture, wear, and staining in a bathroom. You want longevity without constant upkeep, so choose substrates and finishes that handle humidity and daily use.
- Plywood cores with veneer or solid wood faces for strength and repairability
- Moisture-resistant finishes like waterborne polyurethanes or UV-cured coatings
- Engineered options with low off-gassing and stable density
- Durable hardware-compatible substrates that accept cabinet hardware securely
When you pick materials, consider how wood finishes balance beauty with resilience. Ensure cabinet hardware screws bite into solid material.
Your goal is a cabinet that looks good year after year, with simple maintenance and consistent performance. This approach reinforces a sense of belonging—practical, dependable, and built to last.
Plumbing Fixture Longevity
Plumbing fixture longevity hinges on selecting durable components and ensuring proper installation, so you minimize leaks, drips, and replacements down the line. To maximize faucet lifespan, choose solid materials, corrosion-resistant finishes, and reliable cartridges. Verify maker warranties and standard sizes for easy serviceability.
For pipe durability, prioritize compatible fittings, correct sizing, and proper tightening to avoid stress on joints. Use mid- to high-grade supply lines and anti-kink designs in tight spaces. Install shutoffs within reach, and insulate exposed runs to prevent freezing damage in cold climates. Regular inspections help you spot wear before it fails.
Favor metal over flimsy plastics for critical connections, and document every update. When you select thoughtfully and install with care, your bathroom stays reliable, efficient, and welcoming to everyone who uses it.
Installation Realities: Demolition, Rough-Ins, and Ventilation
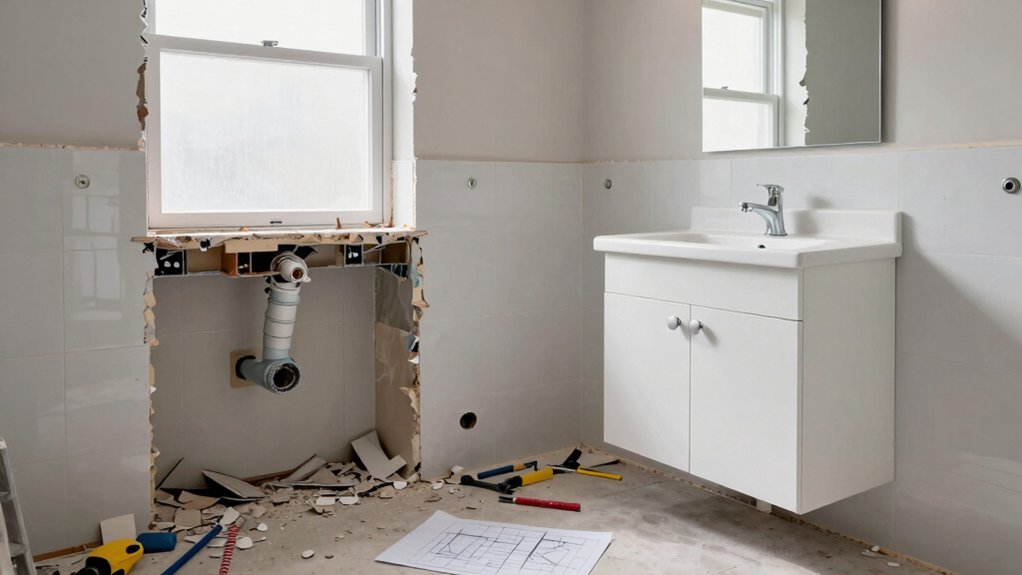
Demolition, rough-ins, and ventilation aren’t just steps to check off; they’re the core realities that determine how smoothly your bathroom vanity upgrade goes. You’ll face demolition challenges that reveal what’s behind walls and cabinets, so plan for possible surprises.
Rough-ins require precise measurements and alignment to avoid leaks or wobble. Ventilation requirements matter for moisture control and comfort, not just code compliance.
Ready for outcomes that fit today and tomorrow? Here’s what to focus on:
- Assess wall integrity and plumbing access before you cut
- Map exact cabinet, sink, and appliance clearances
- Verify duct routes and exhaust capacity for proper airflow
- Confirm moisture-rated materials and fasteners for safety
Vanity Options by Theme: Custom, Semi-Custom, and Ready-Made
You’ll weigh Custom, Semi-Custom, and Ready-Made options by how they fit your space, budget, and timing. Consider the pros and cons of a Custom vanity, the value factors in Semi-Custom setups, and the practicalities of Ready-Made choices.
This quick framework helps you compare builders, finishes, and installation implications to make a clear, informed decision.
Custom Vanity Pros And Cons
Custom vanities offer control over size, finish, and storage, but they come with higher cost and longer lead times than off-the-shelf options. You’ll shape vanity material and design style to match your space, lifestyle, and taste, creating a cohesive bath feel you belong to.
- Fully customized dimensions align with plumbing, windows, and user height
- Choice of materials and finishes, from durable wood to moisture-resistant composites
- Tailored storage configurations to fit daily routines
- Longer production timelines and potential budget variance
Pros: perfect fit, cohesive look, enhanced resale appeal, and unique character. Cons: higher price, extended wait times, and need for precise planning.
If you value personalization and a dedicated style, this route earns your confidence and reinforces your home’s identity.
Semi-Custom Value Factors
Semi-custom vanities strike a balance between fully bespoke and ready-made, delivering tailored dimensions and storage options without the long lead times or sky-high costs of full customization. You’ll often enjoy better fit and function for your space, plus flexible finishes that align with your bathroom’s vibe.
When evaluating vanity style, consider how lines, hardware, and silhouette support your overall theme without overwhelming the room. Material selection matters, too: choose durable surfaces that resist humidity and wear, such as solid wood cores or moisture-friendly engineered cores with sealed finishes.
Semi-custom options let you adjust depth, height, and drawer configurations for real-world usability. This approach reinforces a sense of belonging—your bath feels intentional, cohesive, and uniquely yours, while staying practical and attainable.
Ready-Made Practical Considerations
Even with ready-made vanities, you still get practical benefits: quick delivery, clear pricing, and straightforward installation that fit most standard bathroom layouts.
When you compare options by theme, focus on material selection and style compatibility to guarantee long-term satisfaction. Ready-made pieces minimize guesswork and let you verify measurements and finishes before you commit.
You’ll enjoy consistent support from retailers on returns and warranties, plus standardized hardware for faster installation.
Consider how the vanity’s surface, cabinet box, and sink align with your daily routines and décor. Keep an eye on stackable storage, undermount sinks, and water resistance.
Material selection matters for durability, while style compatibility preserves flow with fixtures. Choose confidently, knowing your vanity matches both function and aesthetic.
- Quick delivery and clear pricing
- Standardized installation and reliable warranties
- Consistent hardware and surfaces
- Clear compatibility with existing style and layout
Quick Functional Wins: Lighting, Mirrors, and Accessory Upgrades
Upgrading your bathroom’s essentials doesn’t require a full remodel; you can achieve noticeable results with quick, targeted changes. In this quick win, focus on three practical areas: lighting, mirrors, and accents.
Lighting upgrades should prioritize layered illumination: ambient, task, and accent, with dimmers to adapt mood and function. Choose bulbs with a neutral white tone for accuracy at the sink and makeup areas.
Mirror selection matters for presence and utility; pick a well-sized mirror with clear edges and minimal distortion, or pair two for width and framing options. Keep fixtures cohesive—finish, scale, and style should echo your vanity’s lines.
Add simple accessories that reinforce order, like a matched tray, organizer jars, and hand-towel rings. Small upgrades deliver a confident, cohesive, livable space.
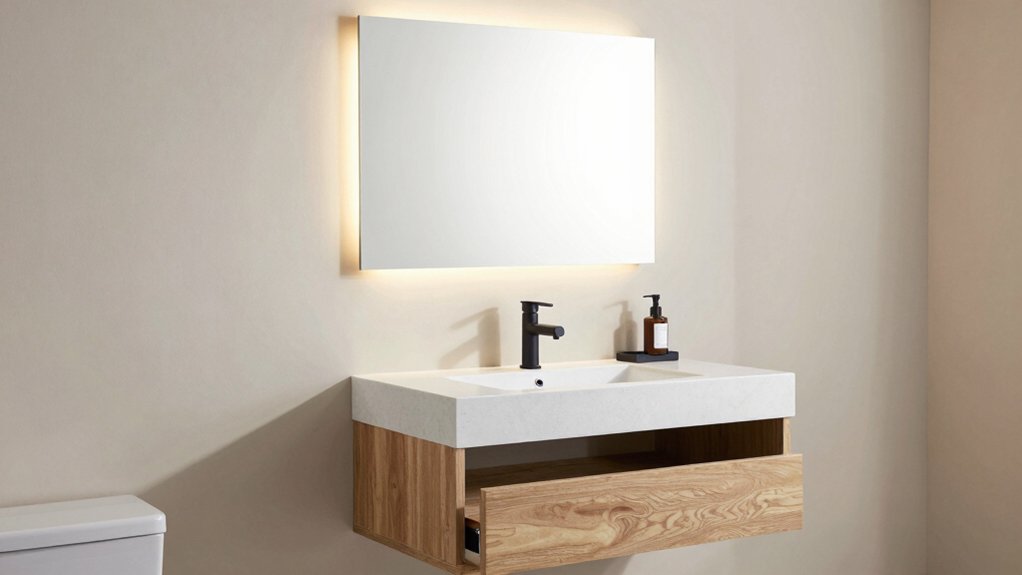
Value and Feel: How a New Vanity Impacts Your Space
A new vanity does more than change looks; it reshapes how you use the space every day. When you choose thoughtfully, you claim a room that feels like yours—calm, organized, and welcoming. Your personal style shows in finishes, hardware, and layout, while space optimization streamlines daily tasks and reduces clutter. The result is improved flow, easier maintenance, and a sense of belonging every time you enter.
- Reflective surfaces and lighting set the mood for routine
- Drawer and counter layout prioritize essentials you actually use
- Neutral bases with expressive accents balance versatility and personality
- Proper dimensions and storage support clean, efficient routines
Should You DIY or Buy New? A Practical Decision Framework
Deciding whether to DIY or buy new hinges depends on three basics: cost, timing, and your skill level.
You weigh the cost benefit of each path—not just price, but time, frustration, and potential errors. If you value speed and minimal risk, buying new often wins for predictability and warranty.
If you crave control and a custom fit, DIY can maximize your aesthetic appeal and suit your space precisely.
Consider your schedule: can you invest evenings and weekends, or do you need a turnkey result?
Your confidence matters: honest self-assessment keeps you from overreaching.
A practical framework balances budget with outcome, aligning choice to your priorities.
Ultimately, belong to a solution that respects your home, budget, and envisioned look.
Frequently Asked Questions
How Long Does a DIY Vanity Refresh Typically Take?
It typically takes a weekend to a few days, depending on scope. You’ll weigh cost comparison and style options, plan ahead, and finish confidently. You’ll stay organized, pace yourself, and feel connected by practical, achievable results.
Is There a Risk of Water Damage With Refinishing?
Like a guarded ship, you’ll minimize risk; refinishing can fail without proper precautions. Use waterproof sealant and guarantee moisture resistance, applying in thin coats. You’ll protect your vanity and your home, feeling included in the safety-conscious club.
What Tools Are Essential for a DIY Vanity Update?
You’ll need basic tools: a tape measure, level, drill, sander, & protective gear. For painting techniques, use a degreaser, primer, and topcoat; choose hardware selection that matches style. Stay practical, confident, and keep your project feeling communal.
Can I Reuse Existing Plumbing With a New Vanity?
Yes, you can reuse plumbing, but check compatibility and seal integrity first. Consider reuse considerations like trap alignment and valve positions, and plan for minor adjustments. If misfit arises, you’ll need adapters or a professional retrofit for reliable plumbing compatibility.
Which Warranty Covers DIY Versus New Purchases?
Warranty coverage varies by supplier, but you’ll usually see product guarantees for new purchases and limited or no coverage for DIY installations. You should expect longer warranties with professionally installed units, and ask about coverage details before buying.