
Converted attic spaces can add valuable, livable square footage with smart planning. Start by evaluating headroom, access, and truss layout to confirm a bedroom fits your climate and code requirements. Prioritize insulation, ventilation, and two safe egress routes, then design for bright, quiet comfort with well-placed windows, skylights, and layered lighting. Budget by envelope first—roof, insulation, and tight enclosure—before finishes. A well-executed conversion boosts energy efficiency and home value, and you’ll unlock practical, stylish extra space—plus guidance you’ll want as you proceed.
Is an Attic Conversion Right for You?
So you’re weighing an attic conversion, but is it the right move for you? You’re seeking space, value, and a sense of belonging in a home that fits your life. Start by evaluating need versus cost, timeline, and disruption.
Check attic insulation and roof ventilation as foundations for comfort and efficiency; poor insulation or stagnant air sabotages warmth in winter and cool comfort in summer. Consider structural compatibility, load limits, and entry access, but don’t overthink details that aren’t essential to decision-making.
If you value quiet, daylight, and a space that feels integrated, you’ll gain momentum toward a skilled plan. When you see clear benefits—energy efficiency, added square footage, a cohesive design—you’ll know you’re choosing wisely.
Attic Bedroom Feasibility: Headroom, Trusses, and Access
You’ll weigh headroom requirements against comfort and code, setting a clear baseline for usable space.
Truss configurations and their impact factors decide what’s feasible without costly remodels, so you map constraints before you plan.
Access considerations—stair geometry, head clearance, and egress—shape whether the attic becomes a true bedroom or a clever loft alternative.
Headroom Requirements
What headroom is truly required for an attic bedroom, and how do you determine if your space meets it? You assess usable space by measuring knee walls and clearances, then compare to a comfortable minimum that supports safe movement and furniture.
Aim for a ceiling height that feels spacious, typically at least 7 feet in the central area, with reachable corners for practical use. If you’re short of headroom, you’ll still create value by designing walkable zones and low-profile storage.
Prioritize clear egress, adequate insulation standards, and climate comfort as you plan. Remember that installation choices influence finish height, so coordinate with windows, skylights, and eave lines.
When you document your plan, you’ll reinforce belonging through thoughtful, compliant space that feels intentional and integrated.
Truss Impact Factors
Truss configurations substantially steer attic bedroom feasibility by shaping usable headroom, access routes, and framing costs. Your decision hinges on truss design and its impact on space efficiency, load distribution, and ceiling height.
When you evaluate options, consider how different truss types affect roof pitch, knee walls, and potential for dormers, all influencing practicality and comfort. Load capacity matters too, since it determines whether you can add insulation, finishes, and storage without compromising safety.
Favor designs that maximize interior space without excessive framing work, preserving structural integrity and cost control. You gain confidence by aligning truss choices with your family’s needs, budget, and timelines.
Informed selections simplify permits, reduce surprises, and support a seamless path toward a value-adding attic bedroom.
Access Considerations
Access to the attic matters as much as headroom and truss choices, because awkward stairs or tight openings can drain usable space and derail a project. You should evaluate access early, prioritizing a direct, future-friendly route that fits your furniture flow.
Consider stair width, head clearance, and landing comfort, as these determine daily usability and resale appeal. Favor codes-compliant layouts that minimize obstruction and maximize natural light.
Identify practical entry points, such as straight runs or quarter-turn designs, to reduce space loss. Integrate lighting design from the outset—strategically placed fixtures, skylights, and wall wells brighten every corner without sacrificing floor area.
Pair access with smart storage solutions to keep the attic organized, welcoming, and integral to your home’s living space.
Designing for Comfort: Insulation, Ventilation, and Temperature
Proper comfort in a converted attic starts with smart insulation, airtight detailing, and balanced ventilation that holds steady temperatures year-round. You’ll choose insulation materials that pair high R-values with breathable barriers, preventing moisture without trapping heat.
Combine this with continuous air barriers at seams and around wiring to minimize drafts. Then implement ventilation strategies that move stale air out and fresh air in, avoiding rapid swings in humidity.
A well-designed ridge vent, soffit intake, and a modest fan can create a quiet, steady flow without noise or heat loss. Keep zones flexible with zoning thermostats and removable furnishings that respect airflow.
The result is a living space that feels inherently present, comfortable, and genuinely part of your home’s thoughtful design.
Safety First: Egress, Fire Safety, and Codes
Safety first means you build in clear, compliant egress, robust fire protection, and code-led safeguards from day one. You assess attic access and ensure emergency exits meet local requirements, providing at least two unobstructed routes where feasible.
You choose a fire-rated ceiling, protected stairs, and a sprinkler or smoke-detection plan aligned with your home’s occupancy needs. You select egress windows sized for rescue and easy operation, with secure, easy-to-reach latches.
You document wiring, HVAC, and insulation to reduce fire risk without compromising habitability. You coordinate with inspectors early, embracing codes as a design partner, not a hurdle.
You foster fire safety as a shared value, reinforcing belonging through responsible, quiet diligence that safeguards every moment spent in your new space.
Brighten Small Spaces: Lighting, Windows, and Storage
Natural light transforms small spaces—so plan windows, lighting, and storage as a single, integrated system. You’ll maximize room feel by prioritizing natural lighting and purposeful window placement, then aligning task, ambient, and accent layers.
Begin with exterior details: secure well-placed windows that bring in daylight without glare, and consider transoms or skylights to pull light deeper.
Inside, choose slim, high-contrast trim and reflective surfaces to amplify brightness while preserving warmth. Opt for recessed or track lighting that contours ceilings and corners, avoiding shadows in corners and under eaves.
Multi-functional storage helps keep surfaces clear, enhancing perceived space. Pair light colors with durable materials, and select fixtures that complement the attic’s scale.
This cohesive approach creates a brighter, more inviting space you’ll gladly call home.
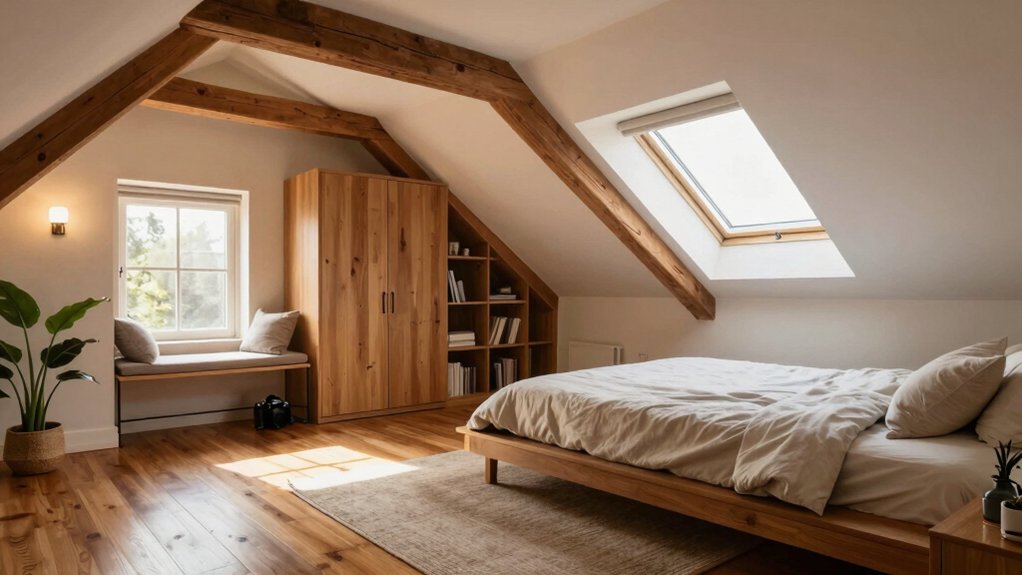
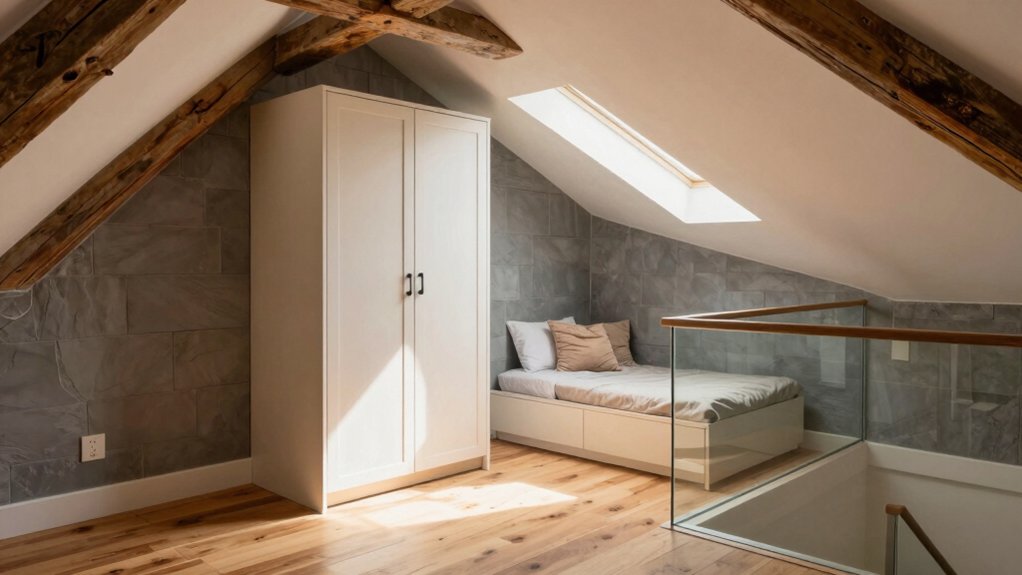
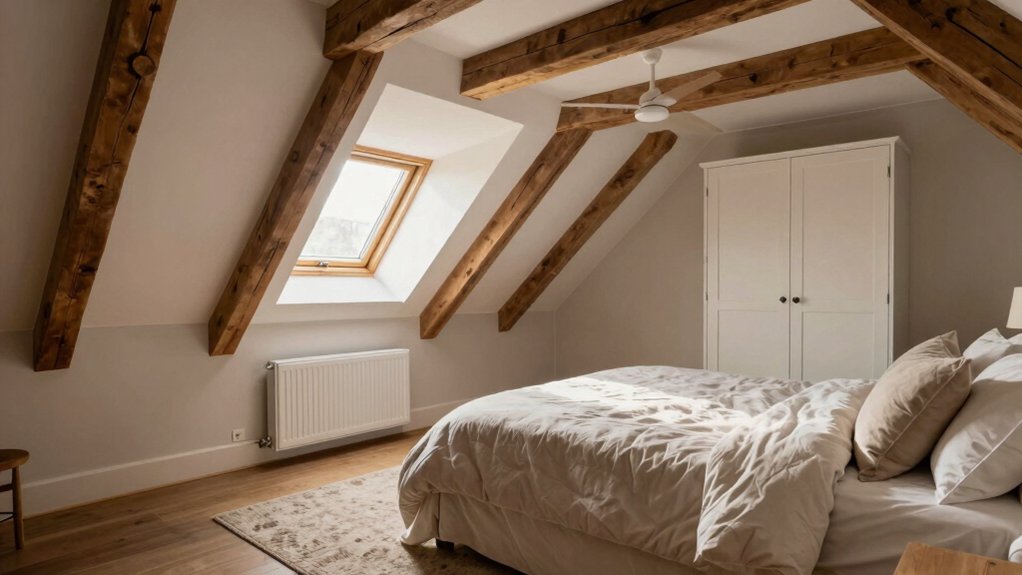
Attic Bedroom Layouts: 3 Practical Floor Plans
If you’re converting attic space into a bedroom, three practical floor plans fit common rooflines and heights without sacrificing comfort or flow. The first plan centers on a dormered layout, maximizing headroom and creating a natural traffic path from stairs to a ventureable closet.
The second plan leverages a sloped-ceiling zone for a cozy, tucked-in bed alcove, preserving usable wall space for storage and a compact desk.
The third uses a linear corridor with a skylight and evenly distributed egress, boosting ventilation and daylight.
Prioritize attic insulation and roof venting to keep temperatures stable year-round, reducing drafts and uneven heat.
Each plan respects routing for plumbing or electrical needs, ensuring practical elegance and a sense of belonging.
Budgeting for an Attic Bedroom: Cost Drivers and Examples
When budgeting your attic bedroom, start by sizing the scope of construction and weighing core costs like framing, electrical, and finish trades.
Consider how lighting design and insulation choices drive both upfront expense and long-term comfort, energy use, and maintenance.
With a clear view of scope and performance targets, you’ll spot cost drivers and compare practical examples that fit your priorities and budget.
Construction Costs by Scope
How much will your attic bedroom really cost, and where should you focus first? You’ll anchor the budget by scope, not guesswork. Start with essential structure: roof repair, framing, and insulation, then build out with finishes.
Prioritize envelope savings—attic insulation and proper ventilation reduce long-term energy use and comfort complaints. If the roof shows leaks or softness, fix that before adding studs or drywall.
Next, delineate scope into three lean bundles: shell work (weatherproofing, egress, stairs), mechanical and electrical (HVAC, wiring, outlets, lighting), and interior finishes (cladding, flooring, storage). Each scope has a price cadence; know your thresholds and align them with your home’s value.
Track changes, avoid scope creep, and preserve a clean path to completed comfort and belonging.
Lighting and Insulation Considerations
Lighting and insulation drive comfort and long-term costs in an attic bedroom, so start by sizing both for daily use and energy efficiency. You’ll prioritize natural light to reduce electric dependence while preserving privacy. Then design insulation to balance steady temperatures with sound control.
Select high-performance, compact lighting options and plan electrical wiring with future fixes in mind. Keep outlets and switches accessible from bed and workspace zones. Insulation choices should align with climate, roof geometry, and ventilation to minimize drafts and heat loss.
Budget for daylighting strategies, rug underfoot comfort, and air sealing to curb energy waste. Clear coordination between trades matters: wiring, insulation, and fixtures should harmonize, delivering a serene, welcoming retreat that adds lasting home value.
Finishes on a Budget: Affordable Materials and Fast Upgrades
If you’re renovating an attic on a budget, start with materials that deliver big impact at low cost. You’ll shape a polished feel quickly by choosing affordable, durable finishes that look elevated. Prioritize clean lines and uniform color palettes to make small spaces feel larger and calmer.
For walls, consider prefinished panels or durable vinyl-backed wallpaper that’s easy to install and swap later. Flooring can be achieved with budget-friendly vinyl planks or woven textiles layered over existing subfloors for warmth.
For surfaces, a matte paint in a warm neutral plus trim in a slightly darker shade creates depth without fuss. DIY tips keep costs down, while smart material sourcing delivers quality without compromise.
You’ll gain cohesion, value, and a space that welcomes everyone.
Value and ROI of Attic Bedrooms
Attic bedrooms offer meaningful value when you quantify both financial and lifestyle returns. You’ll boost resale appeal by highlighting adaptable space, improved energy efficiency, and added comfort, which translates to a higher perceived value.
ROI comes from careful upfront costs offset by longer-term savings and market demand for flexible suites. Prioritize durable finishes and code-compliant design to protect your investment.
Practical value hinges on quiet, well-lit rooms that feel connected to daily life, not isolated niches. To optimize performance, integrate attic insulation and roof ventilation early in planning; they reduce thermal swings, curb energy bills, and extend HVAC life.
With thoughtful detailing, your attic becomes a sought-after retreat that reinforces belonging, usability, and steady equity growth.
Step-by-Step Plan: What to Do Before You Hire Pros
Start by pinning down your budget and a realistic ceiling before you book any pros, so you know what’s truly feasible for approvals, design, and build.
Then map out permits and codes early—confirm which ones apply, who handles them, and the timeline you’ll need.
A clear, all-in-one checklist keeps your project focused and your conversations with contractors sharp.
Budgeting Before Booking
Before you book any pro, map out a real budget to guide every decision. You’ll anchor expectations by outlining a clear cost estimation from the start, then translate that into practical budget planning.
Identify must-haves versus nice-to-haves, and set aside a contingency for surprises. Break the project into phases: framing, insulation, electrical, and finishes, assigning realistic costs to each.
Research regional pricing, obtain a few quotes, and compare scope, not just totals. Build in a payment timeline that protects quality and keeps you aligned with cash flow.
Document decisions in a simple budget sheet you can update daily. This deliberate clarity makes you feel prepared, confident, and part of a trusted team delivering value and a cohesive, comfortable space.
Permits And Codes Check
Wondering what permits and codes you’ll actually need? You’ll start with a site assessment to spot zoning constraints, fire exits, and egress requirements.
Then identify the essential approvals: building permits and any special permissions for structural changes, electrical, plumbing, and insulation. Check local code compliance early to avoid redesigns, delays, or fines.
Document planned attic conversion details, including ceiling height, stair access, and ventilation, so your plans align with code expectations.
Before hiring pros, verify that permits can be obtained within your project’s scope and timeline. Gather your survey, occupancy goals, and energy-efficiency targets to streamline approvals.
Getting this right upfront keeps you focused, confident, and positioned to finish on time, within budget, and with a compliant, comfortable bedroom you’ll proudly inhabit.
Frequently Asked Questions
How Long Does an Attic Conversion Typically Take?
It typically takes several weeks, give or take, depending on scope and permits. You’ll schedule attic insulation checks and roof repairs first, then framing, electrical, and finishing steps, staying organized so your project feels seamlessly yours.
Will an Attic Bedroom Require Planning Permission?
Yes, you’ll likely need planning permission depending on your region, but you can pace the process by aligning with building codes and ensuring structural reinforcements are sound, so you feel confident and belonging throughout the upgrade.
Can I Convert a Sloped-Ceiling Attic Into a Usable Room?
Like a ship docking softly, you can convert a sloped-ceiling attic into a usable room. Make certain attic insulation and stair access are designed well, because smart, snug spaces invite belonging and practical elegance.
What Climate Control Is Best for Attic Spaces?
You should prioritize attic insulation and reliable ventilation systems for climate control. Use tight-sealing insulation, balanced ventilation, and moisture control; optimize airflow with soffit and ridge vents, and consider a ducted mini-split for consistent comfort.
Do Lenders Require Separate Appraisal for Attic Bedrooms?
Yes, lenders often require a separate appraisal for attic bedrooms to confirm value and safety. You’ll want strong documentation on attic storage, roof insulation, and finished space, showing compliance and durability for confident, belonging-driven financing decisions.