
Start by defining your goals and baseline needs—assess mobility, daily routines, and essential tasks. Then map a threshold-free layout from entry to living spaces, with wide doorways, consistent floors, and clear sightlines. Choose safety-focused fixtures, non-slip finishes, and intuitive controls, including adjustable heights and illuminated indicators. Plan a phased budget to start with essentials like safe pathways, and maintain the home with regular checks. If you keep going, you’ll uncover practical steps to implement these ideas.
Define Goals and Baseline Needs for Accessible Living
To define goals and baseline needs for accessible living, start by evaluating who’ll use the space and how they move. Consider what tasks are essential and what safety considerations must be addressed.
You’ll identify priorities, peg performance targets, and set measurable benchmarks for movement, reach, and visibility. Map out daily routines, entry points, and potential obstacles, then translate them into room-by-room requirements.
Your approach should be practical and inclusive, ensuring the plan reflects diverse needs and fosters belonging. Consider designing sensory friendly spaces to minimize overload while maximizing comfort, and outline where integrating assistive technology will boost independence.
Document constraints, budget, and timelines clearly, so everyone shares the same understanding and purpose.
Map Threshold-Free Layouts From Entry to Living Spaces
You’ll map a seamless threshold-free path from entry to living spaces, prioritizing clear circulation and adaptable routes.
Aim for a unified flow that minimizes turns, door thresholds, and barriers to wheelchairs, walkers, or strollers.
This sets the foundation for inclusive access that feels natural for every user.
Threshold-Free Circulation
Keep doorway widths generous enough for confident passage, avoiding tight corners that slow movement. Choose consistent floor textures and tonal cues to signal changes in level, reducing confusion and enhancing safety.
Integrate gentle ramp gradients where levels occur, ensuring slopes stay within recommended limits for comfort and control. Align door swings with main circulation routes, so doors open away from critical zones rather than into them.
Prioritize predictability, adjustability, and independent access, empowering every resident to move with dignity throughout the home.
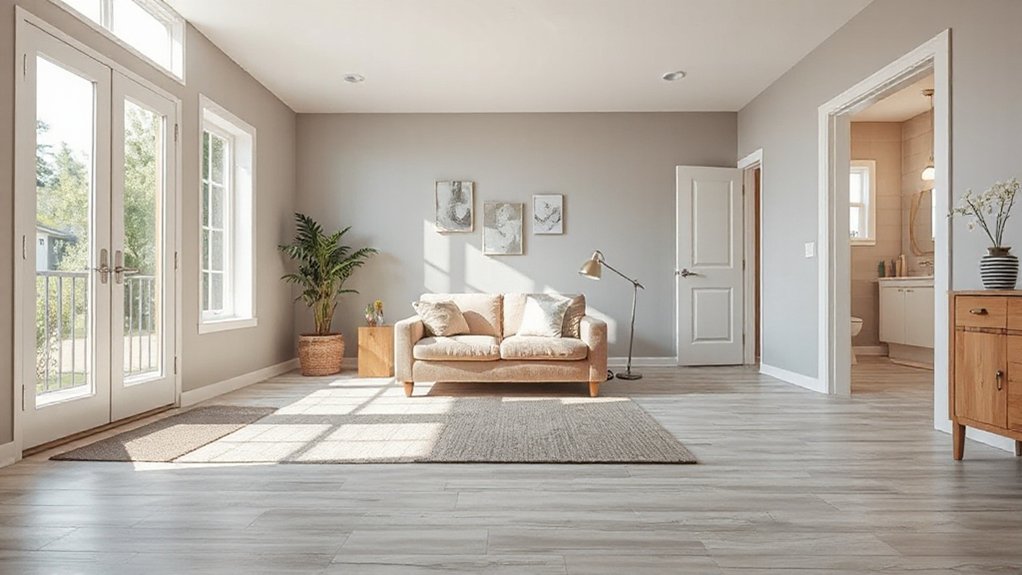
Unified Entry-To-Living Flow
Prioritize wide, clear sightlines and consistent floor heights to reduce hesitation and guarantee safe navigation for everyone. Integrate storage and controls at reachable heights, keeping routes concise and unobstructed.
Balance form with function by selecting finishes that unify spaces while signaling entry points. Aim for aesthetic integration so the flow feels intentional, not engineered.
This approach reinforces belonging, supports autonomy, and makes daily living effortless for residents and visitors alike.
Choose Safety-Focused Fixtures and Non-Slip Finishes
When you choose safety-focused fixtures, prioritize easy-to-use levers, reachable heights, and reliable switches to reduce strain and confusion.
Consider non-slip surface options for floors, tubs, and showers to prevent slips without compromising style or accessibility.
Look for accessible bath fixtures that balance grip, clearance, and water control to support safe, independent use.
Safe Fixture Selection
Look for smart fixture selection features like illuminated indicators, motion or touch activation, and lever handles that reduce grip strength requirements.
Prioritize fixture durability by selecting corrosion-resistant materials, solid mounting, and reliable delivery mechanisms to minimize maintenance.
Choose finishes with slip resistance on knobs and controls, and ensure dimensions accommodate wheelchairs or walkers where needed.
Consider universal design principles so guests and caregivers feel welcome, not limited.
Avoid crowded control panels and keep a consistent set of controls for ease of use.
Document installation specs and retrofit compatibility to support safe, long-term use.
Non-Slip Surface Options
Choosing non-slip surfaces is essential for safety and accessibility, so pick finishes that maximize grip without feeling gritty or uneven. You’ll create reliable footing without compromising comfort, and you’ll support outdoor safety and overall flooring durability across spaces people share.
- Slip-resistant outdoor pavers and deck boards
- Rigid, cushioned underfoot mats in transitions
- Porcelain or ceramic tiles with textured surfaces
- Epoxy or urethane coatings with non-slip additives
- Timber-look options with embossed grain for grip
Consider cleaning ease, wear patterns, and color contrast to aid visibility. Check ratings (dry and wet) and ensure edge and corner treatments reduce trip hazards.
Prioritize products tested for outdoor durability and broad accessibility standards. Your careful selection builds confidence, belonging, and safer daily use for everyone in your home.
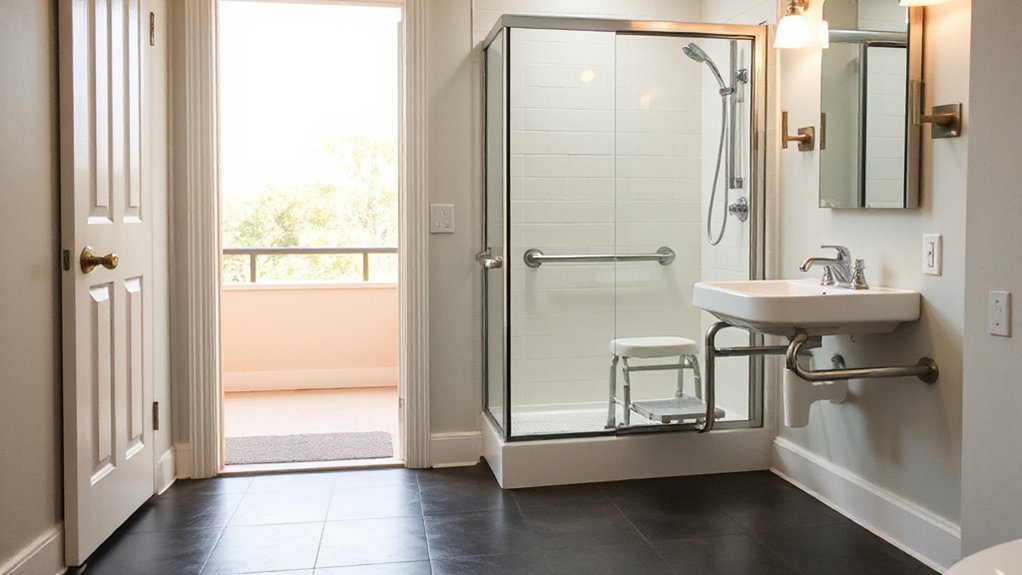
Accessible Bath Fixtures
Are you choosing bath fixtures that prioritize safety without sacrificing style? In accessible baths, select safety-focused fixtures that are easy to use from a seated position. Look for lever handles, oversized controls, and single-handle faucets that require minimal grip strength.
Install grab bars near the tub, shower, and toilet, with a comfortable diameter and non-slip textures. Choose non-slip finishes on floors and mats, and keep thresholds low to prevent trips.
Favor universal design principles so fixtures feel intuitive to everyone, including guests with mobility aids. Consider assistive technology options like programmable thermostats, touchless faucets, and smart shower controls that preserve independence.
Plan thoroughly, measure clearances, and test reach zones with a full range of users to ensure comfort, safety, and inclusion.
Plan Intuitive Controls and Easy-To-Use Technology
- Identify core routines and pair them with single-purpose interfaces
- Use consistent symbols, fonts, and color contrast
- Favor voice integration for hands-free tasks
- Test with diverse users for clarity and comfort
- Plan future-proofing that remains simple to use
Budget Smartly and Phase the Accessible Renovation
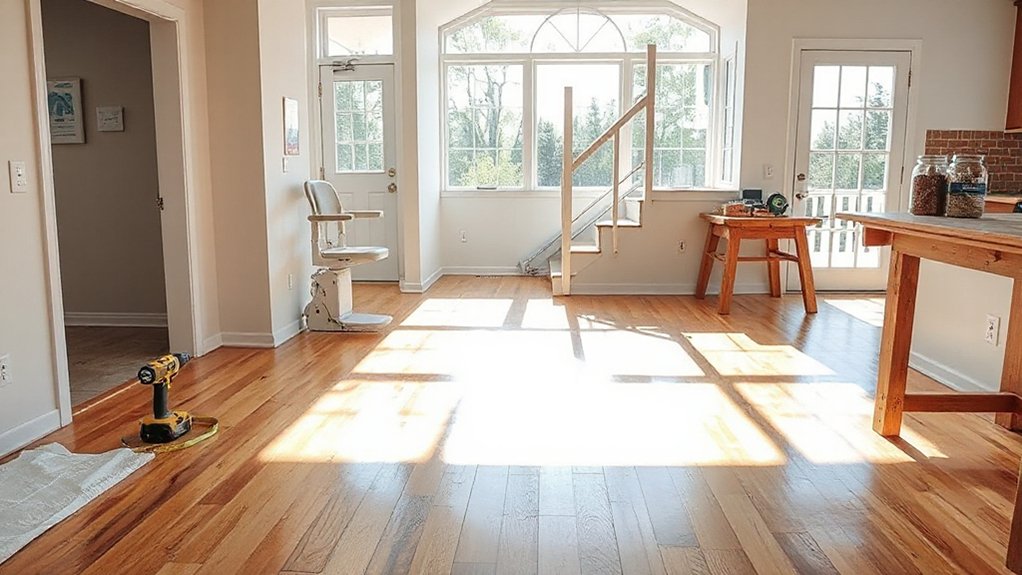
Smart budgeting sets your renovation up for success by aligning costs with your accessibility goals and privacy of use. You map priorities, then phase work to balance need, impact, and cash flow.
Begin with a clear baseline for essentials—threshold-free access, stable lighting, and safe pathways—then layer adaptive ideas as funds allow.
Plan one major area at a time, so you can test usability, gather feedback, and adjust before expanding.
Tie decisions to a realistic timeline and transparent milestones, avoiding scope creep.
Include adaptive furniture and sensory modifications where they provide meaningful gains in independence and comfort, but verify long-term value against upfront cost.
Communicate the plan with trusted partners, document changes, and stay flexible to evolving needs as you progress.
Your thoughtful pacing sustains progress and belonging.
Maintenance Checklists for Long-Term Usability
To keep long-term usability intact, establish a simple maintenance routine that you can actually stick to. You’ll protect accessibility features and invite everyone to contribute, learn, and belong.
Build a predictable schedule that covers safety, comfort, and function, and adjust as needs evolve. Use clear checks, visible reminders, and inclusive language with all household members.
Track wear, leaks, and grip tests, then address issues before they escalate. Incorporate landscaping accessibility and emergency preparedness into your plan so outdoor paths stay usable and you’re ready for surprises.
- Create monthly checks for doors, thresholds, and railings
- Inspect lighting, switches, and floor surfaces
- Review ramps, landings, and doorway widths
- Clear debris and ensure stump-free walkways
- Test alarms, exits, and emergency supplies
Frequently Asked Questions
How Do I Measure Accessibility Needs for Family Members?
You measure accessibility needs by observing daily tasks, noting barriers, and asking family members how they feel. Use mobility assessments and consider assistive technology options, ensuring inclusive decisions that foster belonging and practical, comfortable living for everyone.
What Are the Best Door Widths for Wheelchairs?
“Slow and steady wins the race.” Guarantee door clearance is at least 32 inches when opened, and consider 34 inches for smoother wheelchair passage, accommodating tighter turns and a comfortable, inclusive flow throughout your home.
Which Materials Reduce Slip Risk in Wet Areas?
Non slip flooring minimizes slip risk in wet areas, and water resistant surfaces further protect footing. You’ll feel secure as you move, choosing textured, compliant materials that grip, dry quickly, and remain accessible for everyone in your space.
How Can I Ensure Future Adaptability Costs Are Predictable?
One study shows 70% of homeowners overestimate costs; you can beat that with proactive future cost planning. You’ll implement renovation budgeting steps now, monitor variances, and adjust scopes to keep predictable expenses and inclusive outcomes.
What Funding or Grants Support Accessible Renovations?
You can access grants like CDBG, HUD, and state programs for accessible renovs, plus tax credits; seek universal design incentives and partner with local housing authorities. Smart home integration funding may exist; apply early, document need, demonstrate impact, budget wisely.
Conclusion
You’re steering a ship through calm waters that turn busy in a blink. Think of your home as a friendly harbor; once you map the currents (threshold-free paths, safety grips, simple controls), the voyage becomes steadier for everyone aboard. When you budget and phase work, you’re loading steady provisions for every mile. Maintain the vessel with simple checklists, and the harbor stays welcoming—accessible, dependable, and ready for the next voyage you all share.