
You’ll dramatically cut energy waste by starting with a thorough home assessment, then seal all gaps and drafts before upgrading insulation. Inspect windows, doors, and glazing for tight fit and air leaks, replace cracked glazing, and add weatherstripping and door sweeps. Prioritize attic and roof insulation first, seal subfloor joints, rim joists, and crawl spaces, and use moisture-aware materials. Integrate smart HVAC controls and continuous air barriers, track performance, and schedule maintenance—you’ll uncover more steps that boost comfort and efficiency.
Start With a Home Assessment: Identify Biggest Drafts and Heat Loss
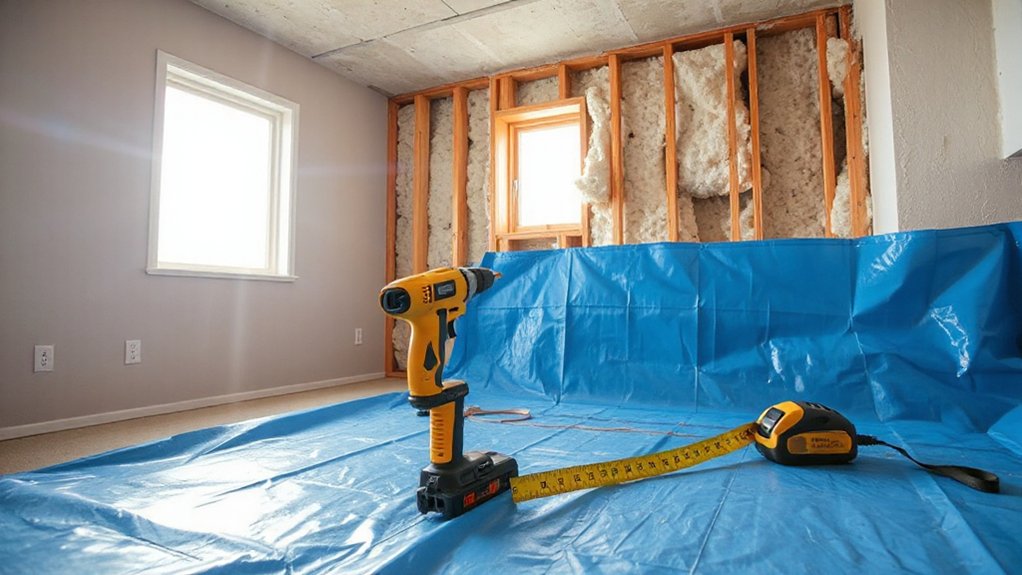
Start with a home assessment to pinpoint where heat escapes. You’ll map the flow of warmth through walls, ceilings, and floors, spotting the real culprits behind drafts. Begin with a practical inspection: observe doorways, windows, and attic access; note ceiling or wall gaps that scream for attention.
Use simple tools—flashlight, tape measure, and a basic thermometer—to verify suspicions and quantify losses. Next, assess interior decor and landscaping features that influence heat retention, such as window treatments, rugs, and shade structures that can either trap or release heat.
Document findings with clear sketches and measurements, then prioritize fixes by impact and effort. This disciplined approach builds a sense of belonging—knowing you’re taking decisive steps toward a warmer, more efficient home.
Seal Gaps and Drafts to Lock in Warmth
After identifying where heat leaks from your assessment, the next step is to seal gaps and drafts to lock in warmth. You’ll improve efficiency by targeting obvious openings first, then fine-tuning with precise air sealing techniques.
Apply weather stripping to doors and operable windows, and use foam or caulk for cracks around outlets, plumbing penetrations, and baseboards.
Inspect attic hatches and crawl spaces, addressing any penetrations that channel cool air inward. Remember draft prevention is about continuous barriers, not quick fixes, so treat joints and seams as continuous lines of defense.
Use smoke tests or a simple candle test to verify air movement after sealing.
This disciplined approach strengthens your home’s envelope and reinforces a shared sense of belonging through comfort.
Build a Better Envelope: Windows and Doors for Thermal Performance
You’ll assess window tightness and fit, ensuring sash and frame gaps are minimized to prevent heat loss.
Consider door sealing and thresholds to stop cold drafts and maintain consistent interior temperatures.
Evaluate glazing choices for solar gain balance, optimizing when and how much light and warmth enter your space.
Window Tightness and Fit
If a window doesn’t seal well, drafts will sap warmth and raise heating costs, so evaluating tightness and fit is essential to a durable envelope.
You’ll assess framing integrity, sash movement, and glazing options to determine where heat leaks originate and how to fix them. Focus on proper window framing alignment, weatherstripping, and operable seal integrity, then verify that glazing maintains solar gain without hot spots. Precision matters: gaps as small as a few millimeters can undermine performance.
- Inspect for cracked glazing and replace with appropriate glazing options
- Tighten fasteners and adjust sashes to eliminate rubbing
- Apply weatherstripping compatible with your window type
- Verify overall frame alignment against the wall for consistent contact
Door Sealing and Thresholds
Start with door craftsmanship that fits snugly, aligning panels to the frame and ensuring pivot or hinge wear doesn’t create gaps. Select threshold materials that resist warping, moisture, and temperature swings, then install airtight weatherstripping along the door perimeter.
Consider a bottom seal or door sweep for uneven floors, and verify clearance to avoid rubbing. Test for air leakage using a simple candle or smoke pencil during a tight shut.
Together, these steps strengthen comfort, save energy, and foster a sense of belonging through reliable, well-built performance.
Glazing and Solar Gain
Glazing choices directly shape solar gain and overall comfort, so choosing the right mix of glass, framing, and shading is essential for a tight envelope. You’ll optimize performance by balancing glazing efficiency with frame type, spacer design, and low-emissivity coatings.
Smart shading and orientation reduce peak loads, making solar gain management practical year-round. Prioritize airtight seals around openings to prevent drafts that undercut efficiency and comfort.
Consider how operable vents and overhangs work with seasonal changes, not just aesthetics.
- Align glazing spec with climate to maximize efficiency and comfort
- Choose glazing efficiency that supports airtight, draft-free performance
- Plan shading strategies for controllable solar gain
- Integrate windows with doors for a cohesive, high-performance envelope
Insulation by Location: Walls, Attics, and Floors Explained
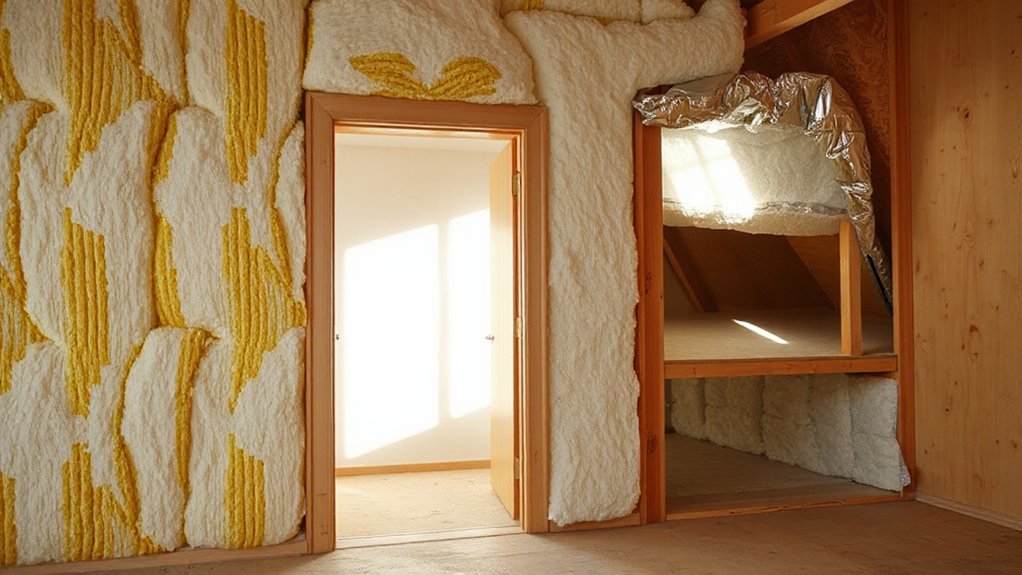
Walls, attics, and floors each pose unique insulation challenges, so start by understanding Wall Insulation Basics. Then map out Attic Thermal Barriers and Floor Insulation Methods to close gaps across the home.
You’ll assess performance, costs, and install feasibility for each location to prioritize improvements that yield the biggest, most reliable gains.
This framework lets you target the right materials and techniques without overdoing it, keeping renovations focused and effective.
Wall Insulation Basics
Wall insulation is a critical factor in preventing heat transfer through exterior and interior partitions, and understanding its basics helps you choose the right approach for your home. You’ll assess wall material and insulation types to match performance with budget, climate, and framing.
Start by checking existing cavities, air leaks, and moisture risks, then select appropriate insulation that fits your wall system. Consider how different materials affect R-values, vapor control, and long-term durability.
Precision matters: proper gaps, layering, and fit prevent cold spots and drafts. With the right choice, you gain comfort, lower utility costs, and a sense of belonging in a better-sealed home.
- Wall material implications on performance
- Insulation types vs. climate demands
- Air leaks and moisture considerations
- Proper fit, gaps, and layering for efficiency
Attic Thermal Barriers
Focus on reducing thermal bridging where joists, cans, or ducts create shortcuts for heat movement. Seal air leaks with meticulous air sealing before adding or topping up insulation, since airflow undermines even thick layers.
Attic ventilation matters too: balanced soffit and ridge venting prevent moisture and heat buildup that can compromise performance.
Floor Insulation Methods
Floor insulation is the next practical step, building on the airtightness and high-R strategy you’ve applied to the attic. You’ll evaluate under-floor boards, joists, and crawl spaces, then choose between subfloor insulation, rigid foam, or mineral wool to minimize drafts and heat loss.
Consider moisture control, vapor barriers, and long-term durability as you compare flooring material options. Soundproofing techniques can reduce impact noise between floors, while preserving comfort and a sense of belonging in your home.
Precision matters: seal gaps, optimize thickness, and match material density to your climate.
- Assess existing subfloor gaps and seal them before insulation
- Compare rigid foam, mineral wool, and blown-in options for performance
- Integrate soundproofing techniques without sacrificing warmth
- Align insulation with your chosen flooring material options and budget
Attic and Roof Insulation Upgrades for Real Energy Savings
Upgrading attic and roof insulation is one of the most cost-effective steps you can take to cut energy use and improve comfort, since heat losses through the top of your home account for a large share of total demand. You’ll measure current performance, identify gaps, and select materials that fit your attic’s access and climate.
Dense, properly installed batt or spray foams reduce drafts and maintain steadier interior temperatures without excessive runoff costs. Consider ventilation needs to prevent moisture buildup and preserve roof longevity.
Align upgrades with historical architecture and aesthetic considerations, so insulation changes respect rooflines and finishes while preserving character. Choose breathable yet airtight solutions, verify installation quality, and schedule blower door testing to confirm real savings.
Your proactive plan yields comfort, efficiency, and lasting value.
Subfloor and Basement Insulation: Keeping Cold Floors at Bay
Subfloor and basement insulation directly tackles cold floors and damp crawl spaces, where heat loss sneaks in from below. You’ll tighten comfort by choosing robust, value-driven methods that respect the building’s character while improving efficiency.
Prioritize airtight seams, proper insulation thickness, and thermal break strategies to reduce drafts without overburdening the structure. Opt for eco friendly materials that perform well in basements and are respectful of historical preservation concerns.
Assess subfloor voids and basement walls for gaps, then seal with appropriate products before adding insulation. Combine performance with practicality so finished spaces feel inviting and cohesive with the home’s heritage.
- Prioritize airtight detailing and strategic insulation thickness
- Choose eco friendly materials compatible with historical preservation
- Target subfloor joints, rim joists, and crawl spaces for gaps
- Balance comfort, cost, and long-term durability
Moisture Matters: Vapor Barriers and Moisture Management

Moisture control starts with choosing the right vapor barrier and installing it correctly to prevent hidden dampness.
You’ll weigh barrier material, placement, and sealing strategies against your climate and wall assemblies to keep moisture where it belongs.
Consider ongoing monitoring and maintenance as essential parts of the plan to sustain insulation performance.
Moisture Barrier Essentials
A moisture barrier is a critical line of defense in any renovation, protecting insulation, framing, and finished spaces from condensation and mildew. You’ll prioritize proper placement, material choice, and seam detail to minimize hidden moisture risks.
By understanding vapor retarders and moisture control, you align construction with long-term durability and comfort.
- Choose permeance appropriate to climate, guaranteeing enough barrier without trapping future moisture
- Seal joints, edges, and penetrations with compatible tapes and membranes
- Install continuous layers across assemblies to avoid gaps and thermal bridges
- Inspect after installation for moisture traps and guarantee ventilation paths remain clear
This approach supports a sense of belonging through reliable performance, clear expectations, and confident, informed decisions.
Moisture Control Strategies
If you want effective moisture control, start with a clear strategy that blends climate considerations, material choice, and detailing. You’re designing a system that minimizes condensation risks and supports long-term comfort.
Begin with proper vapor barriers and air barriers, positioned to prevent unintended migration while allowing drying potential where needed. Prioritize assemblies that manage moisture drainage toward suitable collection points, and specify materials with proven permeability where allowed by climate.
Integrate continuous detailing at joints, penetrations, and edges to close gaps without trapping moisture. Use humidity sensors to monitor interior conditions and trigger adjustments before problems arise.
Regular inspection keeps systems balanced, avoiding over-drying or saturation. This approach fosters a confident, cooperative, and resilient living environment.
Align HVAC With Insulation: Smart Controls for Efficiency
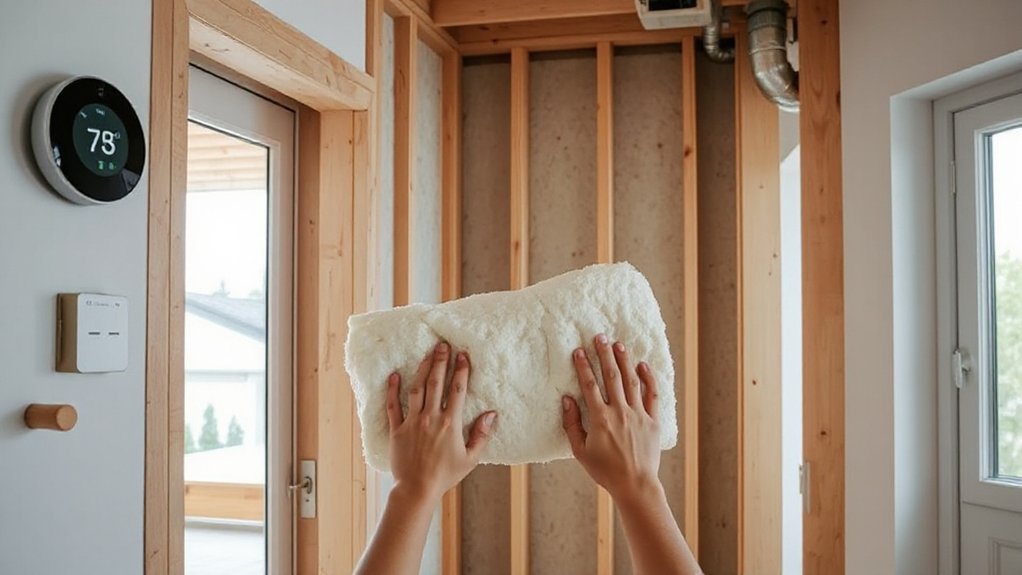
Smart controls align HVAC with your insulation to boost comfort and lower energy use. When you pair smart decisions with solid insulation, you gain consistent temperatures and quieter operation, while reducing waste.
Use smart thermostats to tailor heating and cooling to your actual space, not just the timetable. Run regular energy audits to identify gaps between performance and expectations, then adjust settings and targets accordingly.
Focus on sealing leaks first, then optimize cycles and setback routines for weekdays and weekends. The result is a cohesive system where every component supports efficiency, reliability, and cost savings you can track over time.
- Align controls with measured insulation performance for precise comfort
- Use smart thermostats to respond to occupancy and weather shifts
- Conduct energy audits to validate gains and reveal opportunities
- Set clear targets and monitor progress to reinforce belonging and accountability
Prioritize Upgrades by Payback and Impact
To make smart upgrades pay off, rank improvements by payback period and overall impact on comfort and energy use. You’ll compare where each upgrade delivers tangible savings, factoring in both operating costs and long-term reliability.
Start with envelope improvements that reduce heat loss, followed by systems work that lowers energy demand. Prioritize options that yield faster returns without compromising comfort or durability.
Historical renovation context matters: preserve character while upgrading performance, so choices honor the property’s provenance and long-term value. Consider aesthetic considerations alongside efficiency—windows, insulation, and seals can boost both appearance and function.
This approach helps you build confidence among stakeholders and neighbors, reinforcing a sense of belonging to a thoughtful, responsible renovation community.
Conclude with a clear, data-driven plan for selected upgrades.
Budgeting Your DIY Retrofit: Costs, Tools, and Financing
Budgeting your DIY retrofit starts with a clear cost picture and a practical financing plan. You map upfront expenses, estimate tool investments, and factor ongoing maintenance to avoid surprises.
You’ll balance material selection with true costs, not just sticker price, and weigh environmental impact against performance gains. This disciplined approach keeps you in control, reduces risk, and reinforces a shared sense of purpose with your project team.
- Identify essential tools and rental options to minimize capital outlay
- Compare material options by both price and environmental impact
- Build a contingency fund for weather or supply delays
- Align financing with phased milestones to sustain momentum
Common Insulation Mistakes and How to Avoid Them
Insulation mistakes are common when tackling DIY retrofits, but most can be prevented with a disciplined checklist and mindful installation. You’ll gain confidence by prioritizing proper material selection and precise execution.
Common errors include undersizing and overcompressing insulation, which create cold spots and reduced R-values. Be deliberate about using the right insulation materials for each cavity and climate, and avoid mixing incompatible products that compromise performance.
Make certain airtightness isn’t sacrificed during installation; gaps around outlets, corners, and seams flow heat right out. Document each step, verify fit, and follow installation techniques for continuous coverage.
Don’t underestimate ventilation and moisture control, which protect long-term effectiveness. With careful planning, you’ll build a more comfortable, energy-efficient home and feel connected to a smarter retrofit process.
How to Verify Performance After Renovation
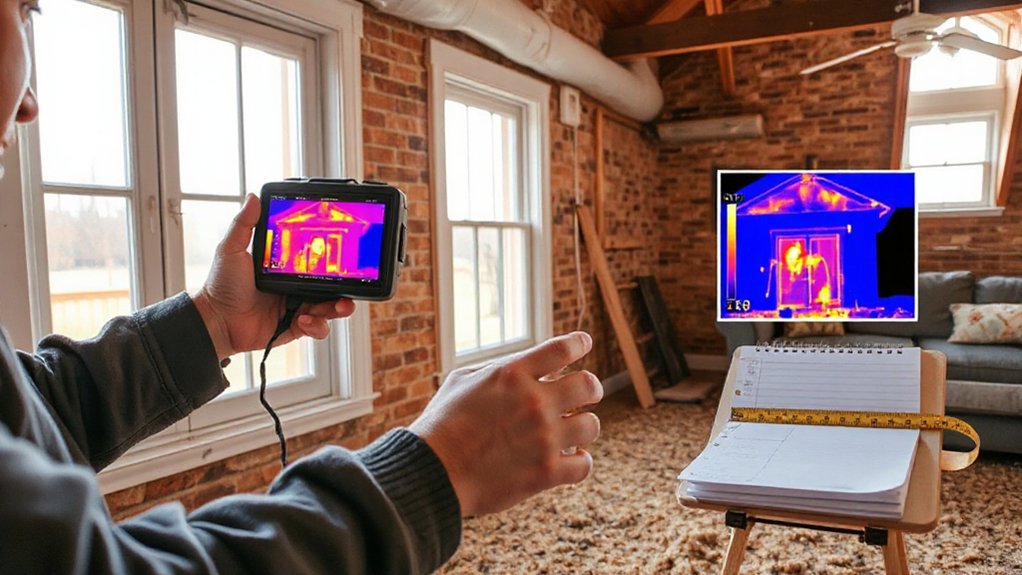
After you finish the renovation, you’ll want a clear plan for confirming performance. You verify results by comparing measured performance to targets, focusing on thermal performance and how insulation materials perform under real conditions. Use simple tests, record data, and adjust expectations based on climate and occupancy.
Document air sealing, moisture risk, and system interoperability to validate overall efficiency. Prioritize reproducible measurements, so future audits are straightforward. You’ll gain confidence when gaps are identified early and addressed with concrete fixes rather than guesswork.
This approach reinforces belonging, showing you’re intentional about comfort and value.
- Pre- and post-renovation energy metrics
- Quick blower door and thermographic checks
- Insulation material gaps and compaction review
- Commissioning plan for ongoing performance tracking
Maintenance Habits for Long-Term Comfort and Efficiency
Regular, proactive upkeep keeps comfort and efficiency from slipping between inspections, so you should establish simple, repeatable habits—check seals, filters, and moisture risk on a routine schedule and act quickly if you notice drift in performance.
In daily practice, mirror the renovation ethos: methodical checks, data-driven adjustments, and clear ownership.
Schedule seasonal inspections for windows, doors, insulation gaps, and moisture paths, documenting findings and remedies.
Maintain a consistent interior decor approach that supports thermal performance, avoiding clutter that obscures seals or vents.
Integrate Landscaping design considerations to manage exterior moisture and solar gain, guiding plantings to shade heat-prone areas.
This disciplined rhythm reinforces long-term comfort, reduces energy waste, and builds belonging through dependable routines you can trust.
Frequently Asked Questions
How Do I Detect Hidden Air Leaks Beyond Obvious Drafts?
You can detect hidden leaks by performing a thorough attic inspection and checking air ducts for gaps with smoke or a blower door test, then seal those leaks, because careful, data-driven checks help you belong to a tighter, more efficient home.
Which Insulation Type Works Best for End-Of-Life Homes?
Like a shield for your heritage, you’ll choose mineral wool or cellulose for end-of-life homes, balancing performance and cost. You’ll prioritize Historical preservation, eco friendly materials, and practicality, proving you belong by making informed, durable insulation choices.
Can I Retrofit Insulation Without Professional Air Sealing?
You can retrofit insulation without pro air sealing, but DIY methods work best when you also seal gaps. Use quality DIY methods, then choose insulation materials like dense-pack or foam in walls, ensuring proper ventilation and predictable results.
What Signs Indicate Moisture Problems After Insulation?
Moisture problems show as condensation on walls, musty odors, damp spots, peeling paint, and mold growth. If you notice these, reassess moisture control and your insulation materials; missteps can magnify issues and undermine comfort and belonging.
How Often Should I Recheck HVAC Alignment Post-Renovation?
You should recheck HVAC alignment every 3–6 months after renovation, prioritizing season changes. Include HVAC maintenance and duct inspection in your routine, turning up efficiency and comfort while fostering a sense of belonging through proactive care.
Conclusion
You stand at the threshold where drafts become memories and warmth flows like a steady current. Picture your home as a lighthouse, its envelope tightened, windows clear as watchful eyes, roof and walls whispering insulation into every seam. With each improvement, you trade waste for comfort, risk for calm, and bills for balance. Stay diligent: test, seal, and monitor. The result isn’t just quieter nights or warmer mornings—it’s a future that breathes easier, built with your careful hands.