
Turn your small garden into a smart outdoor kitchen by defining compact zones for prep, cooking, cleaning, and socializing. Choose a compact grill with solid insulation and easy cleanup, and use space-saving islands with built-in storage. Maximize weatherproof storage, wall rails for tools, and labeled containers. Plan quick maintenance routines and a 15-minute setup for cookouts. Focus on durable, fade-resistant materials and layered lighting to boost ambiance. Ready to optimize your layout and workflow? You’ll learn more soon.
Plan Your Small Outdoor Kitchen: A Step-by-Step Framework

Start by defining what you’ll actually use the space for—grilling, prep, dining, or all three—so you can design around your priorities. You’ll map zones that feel natural, not crowded, and you’ll keep sightlines to a single focal point.
Define your workflow: cold prep near counter space, hot work near the grill, and a seating area close enough for conversation.
Choose compact, modular elements to maximize flexibility, and plan for easy maintenance with durable surfaces.
Consider outdoor decor that reflects your style while staying weather-ready, and plant placement to soften edges without crowding pathways.
End with a simple build-out plan and a timeline you can actually follow, so your small kitchen becomes inviting, usable, and truly yours.
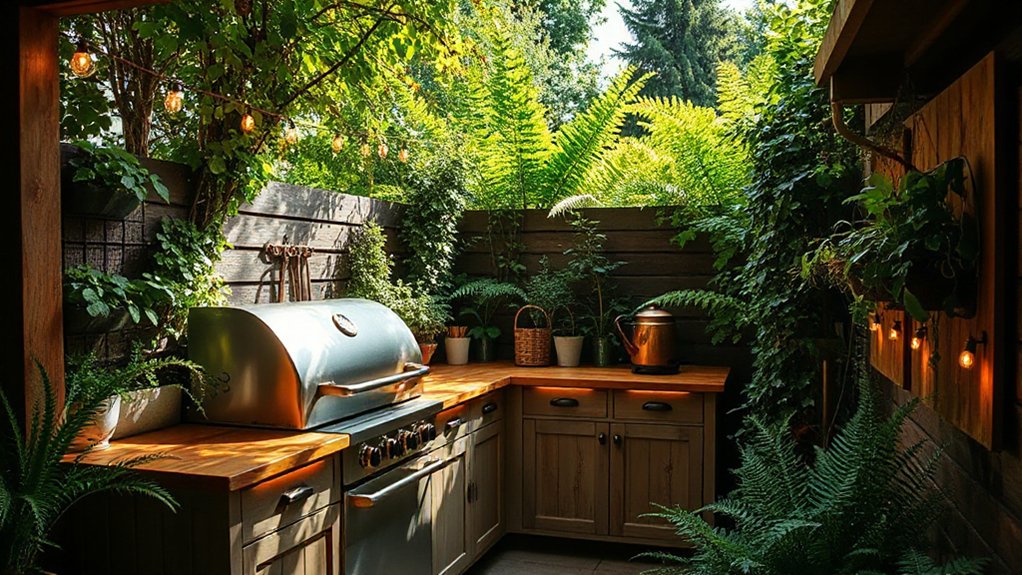
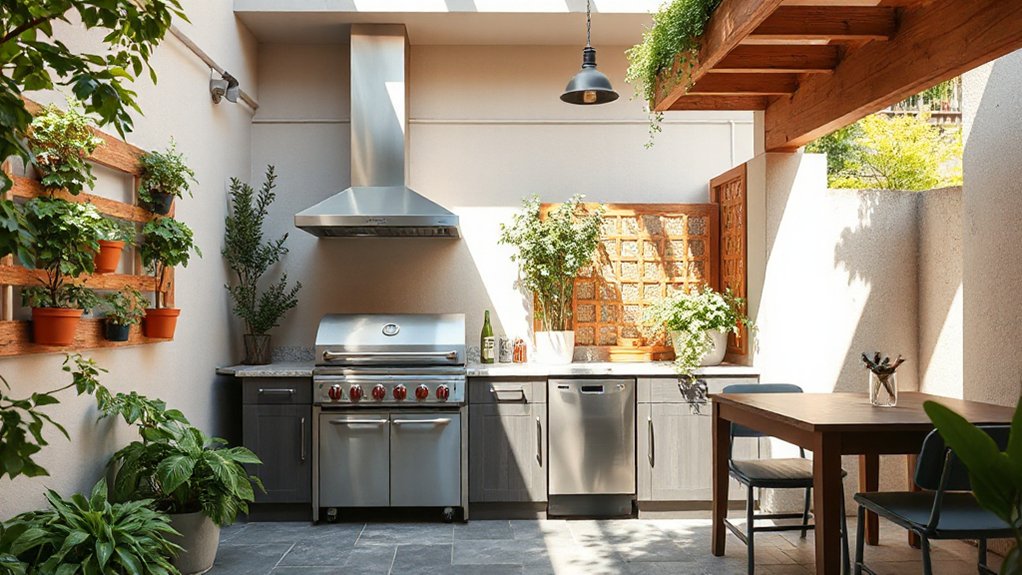
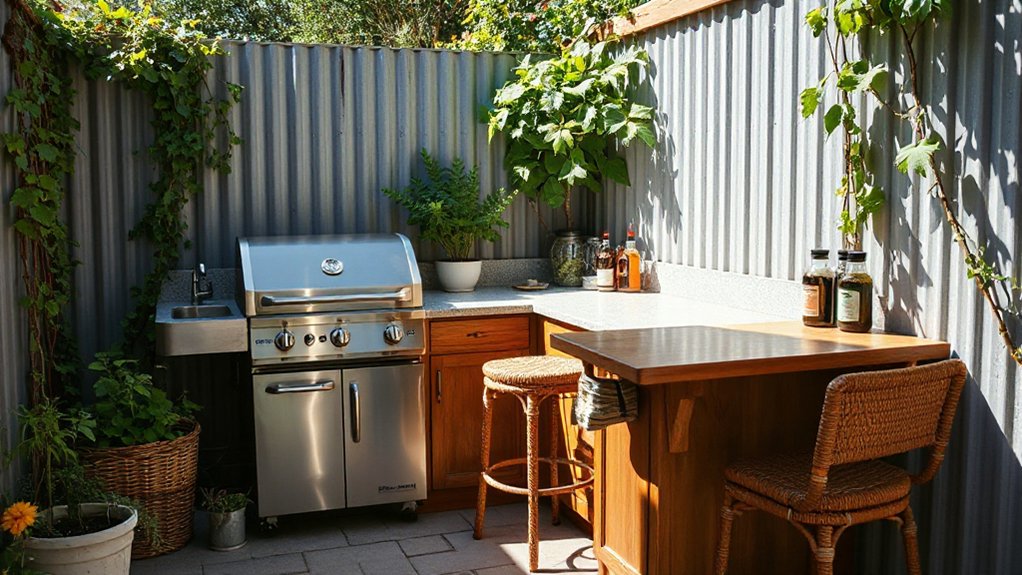
Choose a Compact Grill for Tiny Spaces
If you’re tight on space, a compact grill can still deliver big flavor without hogging inches. You’ll want something that fits your tiny space while still searing, grilling, and inspiring confidence.
- Compact grill that marries efficiency with performance
- Even heat control for reliable sear in a small footprint
- Smoker-friendly design or compatible accessories for variety
- Lightweight, portable, and easy to stash after sunset
Choosing a compact grill means prioritizing footprint, build quality, and heat output. Look for models with solid lids and good insulation so you don’t chase temp swings.
A reliable cover and easy cleanup will keep your tiny space inviting, not intimidating. Remember, great meals start with smart selection, not size, so pick a tool you’ll use weekly and that makes you feel part of a welcoming outdoor dining circle.
Compact grill, tiny space—big flavor is within reach.
Design Compact Prep Zones: Zoning, Work Surfaces, and Flow
Design compact prep zones by mapping a clear flow from ingredient entry to cooking finish, so you minimize steps and maximize efficiency. You’ll set distinct zones for washing, chopping, and staging, then connect them with a logical path that reduces backtracking.
Apply zoning principles to keep raw ingredients separate from ready-to-cook items, and place frequently used tools within arm’s reach. Work surface ergonomics matter: align counters at a comfortable height, use repeatable work angles, and keep scrap bins close but out of the primary workflow.
Minimize clutter with wall-mounted racks and magnetic rails for knives and utensils. This approach builds belonging: you’ll feel confident, organized, and in control, even when guests are chatting nearby.
Focus, flow, and micro-adjustments create efficient, enjoyable prep moments.
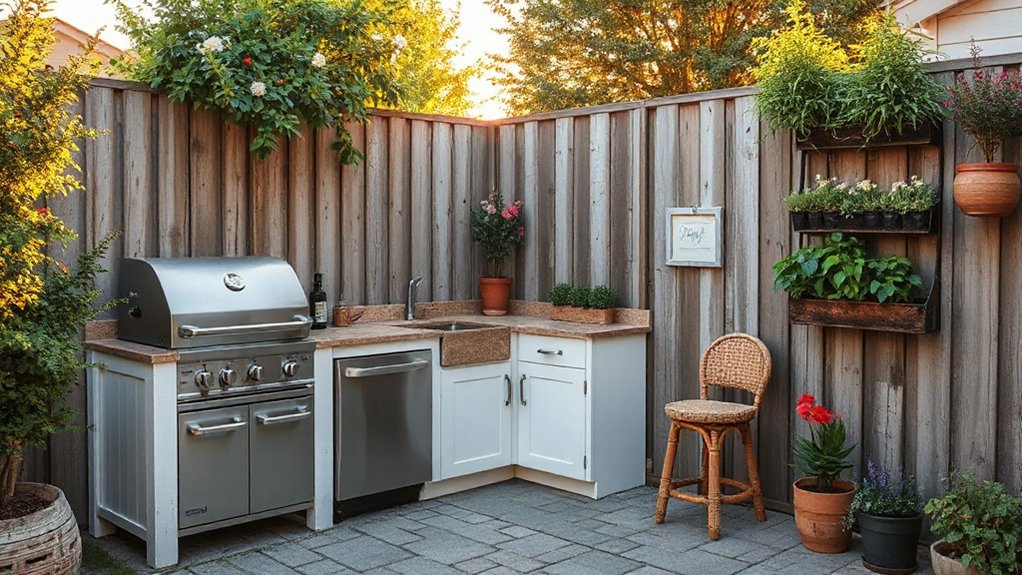
Space-Saving Islands: Size, Shape, and Built-In Storage
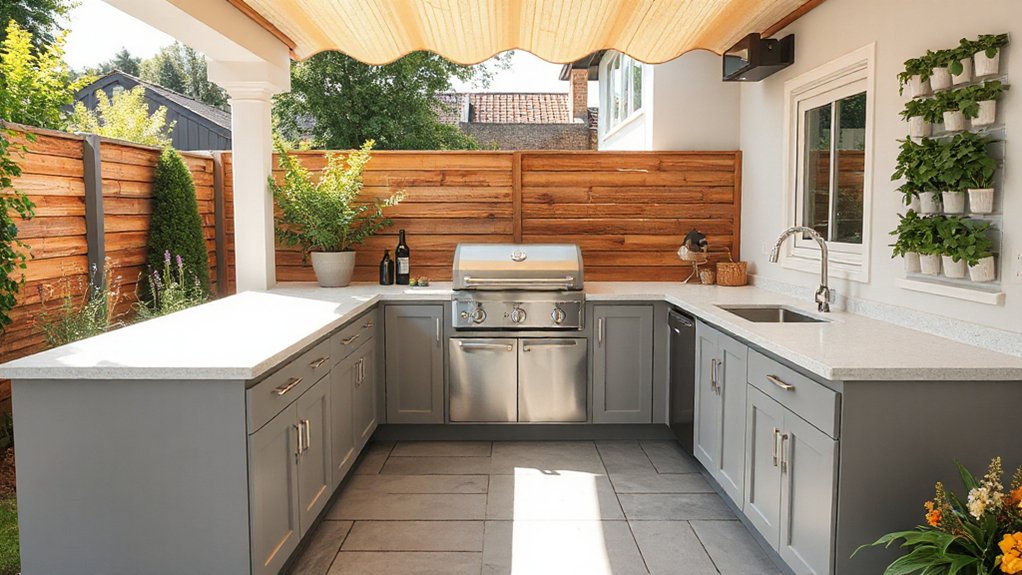
Space-saving islands maximize usable counter space without crowding the kitchen. You’ll design for flow, choosing compact footprints that still support prep and social moments. Built-in storage keeps essentials at hand without extra furniture, while a balanced shape promotes movement around the grill and sink. Shape customization lets you tailor the island to your space, whether you crave a rectangular work zone or a rounded edge to ease traffic.
- Built-in storage with drawers and vertical racks
- Shape customization for right-angle, peninsula, or compact island
- Integrated power, lighting, and plug-in stations for gadgets
- Multi-level surfaces that separate prep, dining, and cleanup
Choose finishes that echo your garden, and you’ll feel instantly connected, invited, and at home.
Weatherproof Storage Solutions That Realistically Work
When you’re outfitting an outdoor kitchen, weatherproof storage should be sturdy, accessible, and low-maintenance, not a hassle. You want solutions that keep gear dry and ready without constant fiddling.
Choose weather resistant furniture that’s built to resist sun, rain, and temperature swings, with simple latches and solid bases.
For tools, keep waterproof storage behind a gasketed door or in a watertight bin tucked under counter or bench space. Elevate containers on feet to avoid ground dampness, and use modular bins you can reconfigure as you grow.
Seal gaps with brush seals, not flimsy flaps, to prevent drafts and insects.
Label compartments for quick access, and align storage with your cooking workflow so you feel at home outdoors.
Your setup should invite participation and ease.
Selecting Durable, Space-Saving Countertops
When you choose durable surface materials, you’ll get lasting performance that withstands heat, spills, and weather without fuss.
Look for space-saving countertop designs that maximize prep area while fitting compact layouts.
Consider how material durability and clever shapes can cut maintenance time and keep your outdoor kitchen looking clean and ready.
Durable Surface Materials
Durable, space-saving countertops are essential in an outdoor kitchen, where performance matters as much as style. You’ll prioritize surface textures and material choices that endure sun, rain, and heat, while still inviting collaboration and belonging in your space.
- Weatherproof finishes that resist stains and fading
- Non-porous surfaces for easy cleanup and hygiene
- Heat-tolerant materials that won’t scorch or crack
- Slip-resistant edges and stable seams for safety and continuity
Choose textures that hide wear but feel friendly underfoot and in hand. Think matte granite-look or solid-surface warmth, with colorways that blend with your garden.
Material choices matter: low-maintenance, durable, and repairable options keep your outdoor kitchen welcoming year after year. With thoughtful durability, you invite family and friends to gather, cook, and share memories.
Space-Saving Countertop Designs
A smart, space-saving countertop design blends compact footprint with durable performance, so you get extra prep room without crowding the outdoor kitchen. You’ll choose materials that resist weather, heat, and spills while keeping a clean, cohesive look.
Prioritize compact profiles, integrated storage, and modular elements that tuck away when not in use. Think narrow drawers, pull-out trays, and a fold-down section for optional seating or chopping surfaces.
Choose countertop materials that balance longevity with ease of maintenance, like sealed stone or resin composites, so you stay practical year-round.
Pair surfaces with smart storage solutions: wall-mounted organizers, magnetic strips, and under-counter bins. The right combo keeps utensils, spices, and tools handy, reinforcing belonging by inviting shared prep and easy cleanup for every cook.
Integrated Prep Areas for Limited Space
Integrated prep areas can make a small outdoor kitchen feel purpose-built rather than improvised. You’ll want a compact work zone that flows from chopping to plating, with smart storage and counter depth that suits your space. Prioritize a pull-out or drop-in prep surface, a dedicated trash nook, and a weatherproof cutting board bin to cut clutter.
Pair it with a slim, integrated sink and a small drop-leaf extension for extra room when needed. Keep tools at arm’s reach, and design with seating arrangements in mind to encourage conversation.
Landscaping integration blends the zone with your garden, using planters to soften edges. It feels like belonging when every task is close at hand, neatly organized, and thoughtfully integrated.
- Seating arrangements
- Landscaping integration
- Efficient workflow
- Hidden storage
Lighting Ideas That Expand Outdoor Kitchen Usability
Lighting isn’t just about visibility after dark; it shapes how usable your outdoor kitchen feels once the sun goes down. You’ll boost usability by layering ambient illumination with task-focused light where you cook and serve.
Think soft wall sconces along pathways, pendant fixtures over prep zones, and recessed uplights to highlight counters without glare. Dimmer controls let you adapt mood for gatherings, while warm color temperatures keep the space inviting.
Add decorative accents like lanterns or string lights to reinforce a sense of belonging and charm. Plan lighting routes that minimize shadows on work surfaces and avoid overpowering brightness.
With practical placement and thoughtful accents, you create a welcoming, functional hub that travels well from day to night.
Weatherproofing Essentials for Year-Round Use
Weatherproofing is essential if you want a reliable outdoor kitchen year-round, not just in pleasant seasons. You’ll keep features functional with simple, deliberate choices that invite and belong. Focus on durable materials, sealed joints, and smart storage to reduce maintenance. Use weatherproof furniture that resists moisture and sun exposure, and rotate Seasonal decor to signal year-round use without clutter.
- Invest in a covered prep area with drainage and a wind break.
- Choose cushions and seating in fade-resistant fabrics.
- Seal grills, cabinetry, and hinges, rechecking annually.
- Store tools and spices in moisture-proof containers, near readiness.
This approach creates a cohesive, inviting space, where Weatherproof furniture and thoughtful Seasonal decor reinforce your sense of home, no matter the forecast.
Power and Utility Considerations for Small Kitchens
How can you power and plumb a small outdoor kitchen without turning the space into a tangle of cables and hoses? Keep utility planning simple and clean. Start with a dedicated outdoor-rated electrical wiring run from a weatherproof outlet or GFCI-protected circuit to a compact power station or island, minimizing extensions. Choose conduits and muted cable trays that blend with your landscape, and keep switches reachable yet discreet.
For water supply, install a compact, code-compliant line with a frost-free shutoff and backflow prevention, routed to a small sink or prep area. Horizontal and vertical runs should stay away from heat sources and drainage. Plan accessibility for maintenance, and label connections clearly.
With clear routing and durable components, you’ll enjoy reliable power and water without clutter.
Ventilation and Smoke Management in Tight Spaces
You’ll want solid ventilation basics for tight areas, so you’ll plan airflow paths and choose components that don’t clog space. Think about smoke channeling and flow to keep cooks comfortable and add safety margins, not just power.
Prioritize safe, efficient outdoor exhausts that perform well in confined setups and are easy to maintain.
Ventilation Basics for Tight Areas
Ever wonder how to keep smoke out of your outdoor kitchen in tight spaces? You’ll want simple, proven ventilation basics that fit your setup and make you feel at home there.
- Indoor ventilation pairings that boost air circulation without blasting you with wind
- Strategically placed vents and openings to encourage a steady breeze
- Compact fans or ceiling fans aligned with cooking zones for consistent air flow
- Sealing gaps around doors or screens to control drafts while inviting fresh air
Smoke Channeling and Flow
Smoke can drift from your grill into tight spots unless you guide it with intention. In small yards, you prioritize smoke channeling by shaping the path it travels—using walls, screens, and lean-to shelves as barriers that steer heat and aroma away from living areas.
Position the fire box or grill to face open airflow, not corners, so drafts pull fumes upward rather than trapping them. Implement simple flow optimization: align vents with prevailing wind, keep fuel accessible but elevated, and use a quick-rinse hood or nearby planter screen to fragment rising smoke.
Practice steady, deliberate vent adjustments during cooking, so guests feel welcome rather than overwhelmed. With these tweaks, you foster belonging and enjoy cleaner, more predictable outdoor entertaining.
Safe, Efficient Outdoor Exhausts
Effective outdoor ventilation guarantees smoke is drawn away from living spaces and heat is directed where it’s best used. You’ll prioritize fire safety with practical exhaust layouts that work in tight spaces.
Think about exhaust placement so cooking smoke exits away from doors, seating, and windows, minimizing drafts and odors.
- Position vents high and remote from seating, aligning with prevailing winds
- Use a dedicated hood, or a small chimney, to channel heat upward
- Route ducts away from joints and combustibles, sealing every seam
- Keep accessories accessible for cleaning and inspection
With clear planning, you’ll enjoy safer cooking, longer-lived equipment, and a sense of belonging in a well-thought-out outdoor kitchen.
Budget-Friendly Upgrades That Feel Premium
Add a few well-chosen upgrades to your outdoor kitchen to feel premium without draining your wallet. You’ll get bigger impact from smart choices in budget planning and material selection, not by chasing every trend.
Start with durable, low-maintenance surfaces—think quartz-look laminates or sealed concrete—that mimic luxe without the upkeep. Choose hardware and fixtures in cohesive finishes to unify the space, avoiding fussy details that scream “renovation.”
Reimagine storage with pull-out organizers and modular cabinets, which feel premium through function and order. Upgrade lighting with warm, energy-efficient LEDs and dimmers to create mood without a hefty bill.
Finally, invest in a reliable, compact grill setup and a portable workspace cart you’ll actually use. Practical upgrades, deliberate choices, and a sense of belonging with your outdoor kitchen. Budget planning, material selection.
Aesthetic Strategies: Color, Materials, and Texture
Color, materials, and texture set the tone for your outdoor kitchen, so pick a cohesive palette and tactile choices that balance durability with warmth. You’ll create a welcoming space by layering color harmony with material contrast, ensuring each element complements the next.
Think durable stone counters against warm wood accents, or matte metals paired with glazed ceramics for subtle sheen. Texture adds depth, from rough-cast walls to smooth planters and soft seating.
Keep scale in mind to avoid visual clutter and preserve flow. Your goal is comfort that invites lingering conversations and shared meals.
- Cohesive palette with deliberate contrasts
- Durable, tactile materials chosen for warmth
- Varied textures to add depth and comfort
- Simple, uncluttered surfaces that invite gathering
Maintenance Hacks to Keep a Tiny Kitchen Tidy
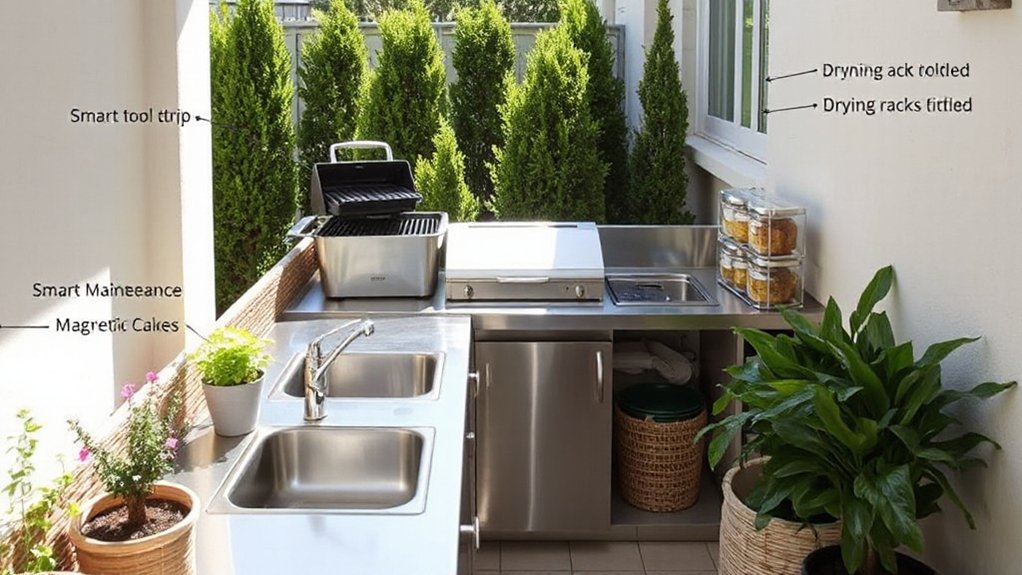
A tiny outdoor kitchen stays tidy when you set up a practical Tidy Toolbar with everyday tools and labeled containers you can grab fast. Use daily cleaning cues—wipe spills, rinse and store, and do a quick sweep after cooking—to keep clutter from piling up.
Start with simple habits you’ll actually stick to, like a 5-minute wipe-down and a weekly reset of your essential gear.
Tidy Toolbar Tricks
When your tiny kitchen looks cluttered, quick, proven tricks can keep the space functional without a full remodel. You’ll lean on tidy toolbar tricks to lock in order, and you’ll feel part of a shared routine—where everyone contributes. Use vertical hooks, magnetic strips, and labeled bins to channel tools into defined zones, saving seconds and stress.
Embrace organizational hacks that pair function with warmth, so your outdoor kitchen remains inviting and user-friendly.
- Magnetic spice rails above the prep area
- Chalkboard labels on containers for quick recognition
- Fold-away utensil hooks near the stove
- Slim, overhead rail for grilling tongs and towels
Daily Cleaning Cues
Set a brief 5-minute tidy window before sunset to clear counters, sweep debris, and reset the grill area.
Create simple Cleaning routines: designate a bin for waste, a towel for spills, and a brush for grates. Use labeled containers to minimize clutter and track what’s on hand.
Schedule a weekly check for supplies and a monthly deep clean to prevent grime buildup.
This routine supports clutter management and ease of hosting, so you feel welcome and confident sharing meals in a compact, functional space. You belong here.
15-Minute Setup Routines for Quick Cookouts
Short on time before guests arrive? You can still pull off a memorable outdoor cookout with coordinated, minute-ready routines. Grab your essentials, preheat, and breathe in confidence as you move. Quick recipe ideas and outdoor cooking tips guide you, helping you stay calm and connected with your guests.
- Prep a small mise en place: bowls, tongs, towels within arm’s reach
- Preheat grill while you greet guests, so heat’s ready when they settle
- Use a simple two-sauce setup for versatile finishes
- Plate family-style, letting conversation do the rest
This approach feels effortless and inclusive, inviting everyone to belong. You’ll avoid chaos, maximize flavor, and enjoy the moment you’ve worked to create. Your outdoor kitchen shines, even on a busy evening.
Safety Tips Tailored to Small Outdoor Kitchens
Even with a compact setup, safety should come first to keep the gathering smooth and enjoyable. In small outdoor kitchens, plan clear work zones so guests aren’t crowded near grills or hot surfaces.
Keep a bucket of sand or a fire extinguisher within arm’s reach, and designate a dedicated zone for hot tools. Practice fire safety by maintaining dry paths, supervising flames, and never leaving the grill unattended.
For electrical precautions, use outdoor-rated cords, weatherproof outlets, and strain relief to prevent trips. Store fuels away from heat sources and use proper ventilation to avoid smoke buildup.
Install a simple, reachable first-aid kit and share emergency contacts with guests.
Simplicity here builds trust, comfort, and lasting memories.
Personalize Your Small-Kitchen Layout With Zones
To personalize a small-kitchen layout, set distinct zones that map to how you cook and entertain. Your space becomes efficient, inviting, and uniquely yours through thoughtful zone planning and a personalized layout.
Think about flow, storage, and prep surfaces, then assign areas that support that routine. Keep passages smooth so guests feel welcomed rather than crowded.
- Preparation zone near prep sink and cooler access
- Cooking zone with compact grill, fire-safe surface, and utensil station
- Cleaning and waste zone tucked away from guests
- Social zone with seating, lighting, and a small serving counter
With these zones, you tailor your outdoor kitchen to your rituals, making every gathering feel intimate and easy.
Frequently Asked Questions
How Do I Maximize Storage Without Crowding the Space?
You maximize storage by using Creative shelving above work zones and Multi functional furniture that folds or tucks away. You optimize appeal and space, keep things accessible, and feel you belong, organized, and confident in compact, clever, practical design.
What Are the Best Non-Slip, Weatherproof Flooring Options?
For non-slip, weatherproof flooring, pick Eco friendly materials like textured composites or sealed concrete, and choose Stylish patterns that hide dirt. You’ll feel grounded, practical, and belonging, while durable surfaces keep your outdoor kitchen safe and stylish every day.
Can I Retrofit My Balcony Into a Functional Kitchen?
Yes, you can retrofit your balcony into a functional kitchen, despite concerns about space. Balcony privacy matters, and you’ll optimize with compact appliances, modular storage, and sturdy rail-safe countertops for a practical, belonging-filled cooking nook.
How Do I Discreetly Hide Utilities in Small Setups?
You conceal utilities by installing concealed utility panels and decorative utility covers, keeping them accessible yet discreet. You plan placement near functional zones, blend with finishes, and maintain easy access for maintenance, creating a cohesive, belonging-focused, practical setup.
What Affordable Upgrades Create a Premium Feel Quickly?
Upgrade with affordable upgrades that feel premium fast: add luxury accessories and elegant lighting, you’ll instantly elevate the vibe. You’ll enjoy practical, insightful touches, and feel you belong as guests admire your clever, approachable, stylish outdoor kitchen improvements.
Conclusion
You can transform a tiny patio into a five-star culinary stage, with just a smart plan and a dash of daring. Picture a compact grill singing, a snug prep zone, a space-saving island, and weatherproof storage that never sighs under rain. With 15-minute setup and rapid cleanup, your outdoor kitchen feels like a magic trick—everything you need appears in a wink. Tiny footprint, giant flavor. You’ve got this; your small space will revolutionize every cookout.