
Sunlight spills along the windowsill as you plan a built-in seat with hidden storage. You’ll map dimensions, loads, and materials with precision, choosing joints and a lid mechanism that stay smooth for years. The right balance of comfort and durability hangs on careful framing, moisture-resistant panels, and proper finishes. Before you commit to a design, consider how the seat will function daily and where to conceal or expose hardware—a detail that subtly defines the project’s success.
Planning the Window Seat Space
To plan the window seat space, start by defining its purpose and required footprint. You’ll determine primary functions—seating, storage, and light exposure—then translate them into measurable constraints.
Assess window location, sill height, and wall depth to avoid interference with curtains, blinds, or trim. Establish seat width for comfort across users and a depth that accommodates cushions without crowding.
Specify access to storage compartments, hinges, and ventilation to prevent moisture buildup. Evaluate ergonomics by aligning seat height with typical chair standards and ensuring a supportive backrest angle.
Document material tolerances, load capacities, and anchoring methods. Consider aesthetic design choices that harmonize with the room’s finishes and lighting.
Finalize a plan sheet, including fasteners, clearance envelopes, and a rough bill of materials.
Measuring for a Perfect Fit
Measure each dimension precisely from the window frame outward to capture true clearances for seating, storage, and hinges. Start with exterior width, then interior width between trim reveals, ensuring alignment with existing walls. Record depth from window apron to back wall and note any protrusions that affect seat lies or lid clearance.
Height considerations matter: total seat height, cushion thickness, and hinge travel must fit within trim lines and room activity zones. Use a reliable straightedge and calipers for accuracy, and annotate tolerances to accommodate framing variance.
Translate measurements into built-in plans, verifying that storage depth doesn’t impinge on knee space. When selecting fabric choices and color schemes, confirm that measured seat width supports upholstery layout.
Precision ensures a seamless, functional, and durable window-seat assembly.
Choosing Materials and Finish
When selecting materials, prioritize durability, moisture resistance, and workability for a window seat with storage.
Consider options like plywood with a solid veneer, MDF, or solid wood, weighing cost, rigidity, and finish compatibility.
For finishes, balance aesthetics with maintenance—lacquers, water-based polyurethanes, or paints/veneers—ensuring compatibility with seating use and storage stability.
Material Options
Choosing the right materials for a window seat with storage balances durability, cost, and aesthetics. You’ll select components that meet load requirements while minimizing woodworking risk and deflection. Prioritize solid-core options for structure, with plywood or MDF backing to guarantee consistent panel thickness and fastener seating.
For the seat top, use hardwood or high-quality plywood with a veneer or laminate that resists moisture and denting. Material durability guides frame construction, edge banding, and hardware compatibility; avoid soft woods for high-stress zones.
For trim and facings, opt for rigid profiles with minimal expansion gaps. Consider moisture exposure and cleaning regimes to maintain aesthetic appeal.
Simpler assemblies favor standardized sheet goods and concealed fasteners, while more premium builds justify solid timber frames and robust hardware. Plan material choices to support long-term performance.
Finishing Considerations
Finishing considerations start with selecting compatible materials and a durable, compatible finish that protects the core structure and resists moisture, wear, and UV exposure. You’ll choose substrates that tolerate framing loads and hinge or lid mechanisms without warping.
Opt for finishes that bond well with the base material, resist scratching, and clean easily. Apply a moisture barrier in any hemmed or jointed area to prevent swelling.
Consider color palette up front to guide stain, paint, or sealant choices and to maintain consistency with surrounding cabinetry. Match decorative accents to the overall design so texture and sheen enhance function rather than distract.
Test samples under lighting conditions similar to site use, ensuring color stability and long-term performance before full installation.
Determining Storage Types
You’ll choose storage types based on access needs and the items you plan to store, balancing pull-out and lift-up mechanisms with available space.
Consider Organizing Inside Selections to optimize drawer layouts, dividers, and bins for efficiency and quick visibility.
This discussion sets the framework for selecting options that align with your window seat design and daily use.
Storage Type Options
What storage type best fits a window-seat project depends on how you’ll use the space and the access you require. Your choice hinges on load expectations, material compatibility, and how you’ll access contents daily.
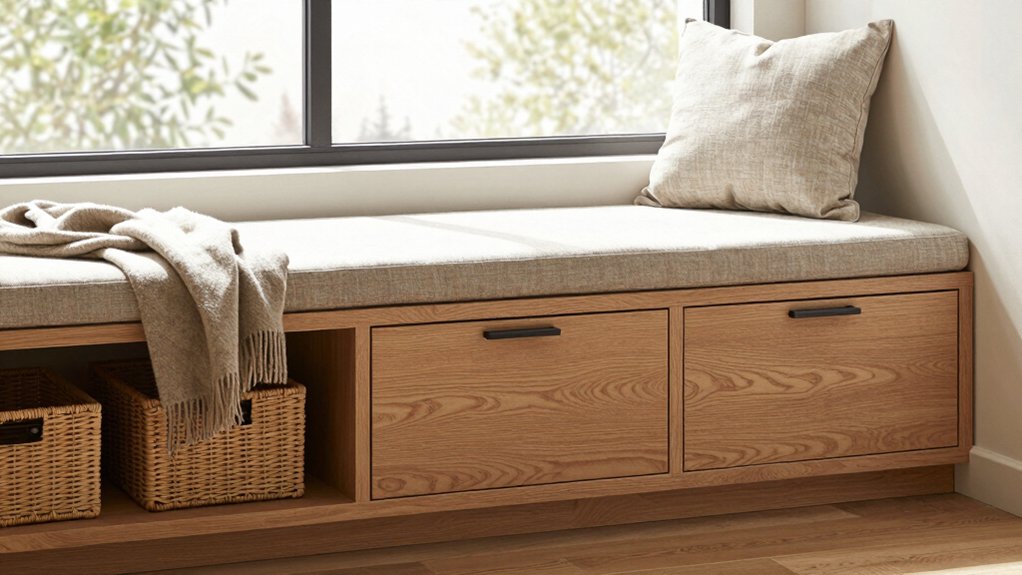
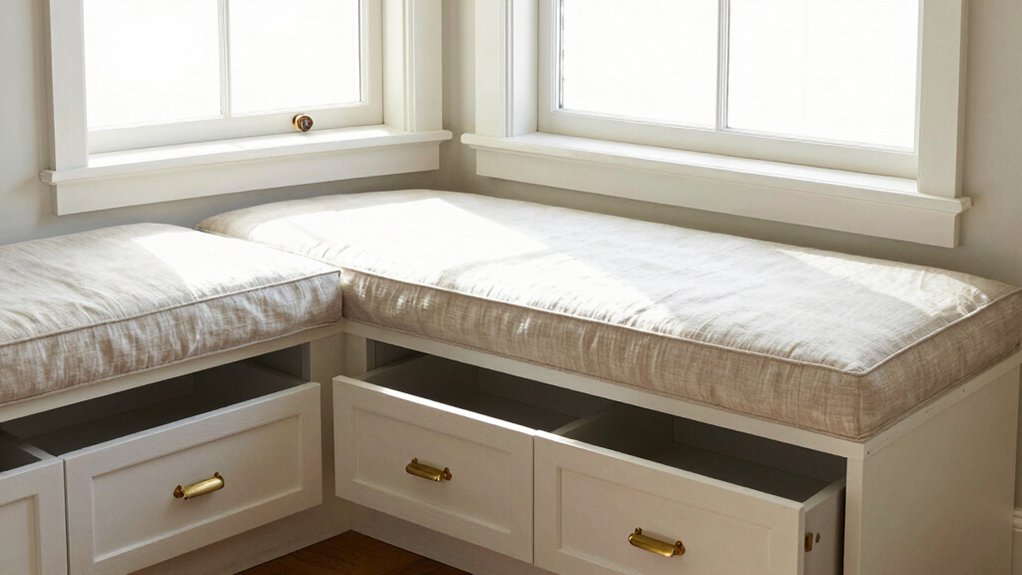
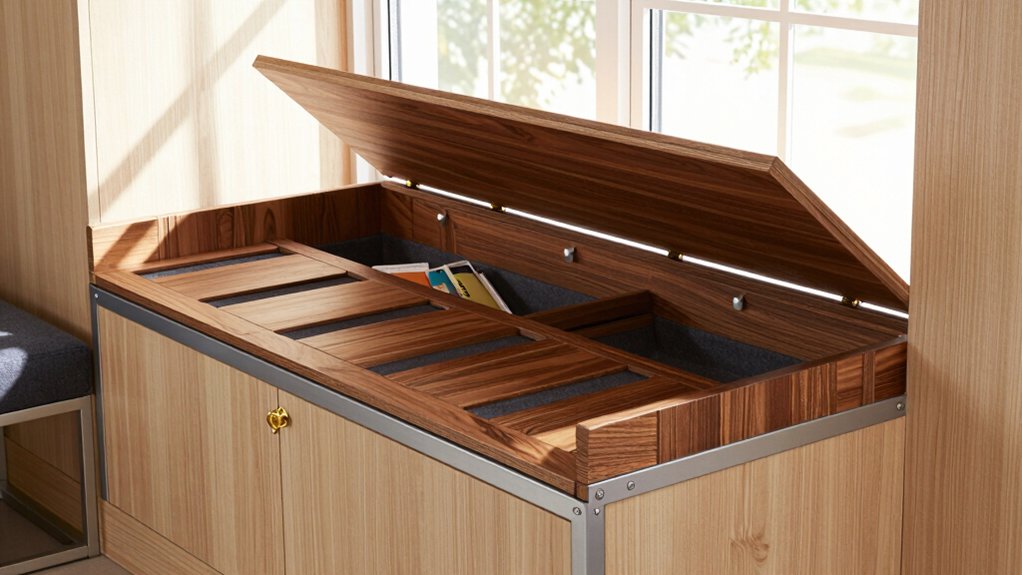
For hidden storage, hinged lids or lift-top compartments offer straightforward operation, but can limit space when open. Slide-front bins maximize reach without full lid clearance, at the cost of taller profiles. Built-in drawers deliver organization and robust weight capacity, yet require precise framing.
Consider a mixed approach: shallow drawers for small items and a lift or hinged lid for bulk storage.
Choose upholstery styles that resist wear and are easy to clean, and plan ventilation options for moisture-prone contents. Prioritize airtight seals where humidity matters, and ensure removable liners for maintenance.
Organizing Inside Selections
Organizing inside selections starts with matching storage types to how you’ll use the space and access contents. You assess daily access patterns first, then assign bins, drawers, and lift lids to those rhythms.
Prioritize clear visibility for frequent items, and reserve deeper compartments for bulk or seasonal supplies. Consider lightweight, durable materials that resist wear and moisture, matching interior finishes to the seat’s aesthetic.
Use modular units that can reconfigure as needs shift, maximizing capacity without clutter. Labeling helps you find items quickly while preserving clean lines.
For decorative accents, keep them separate from functional storage to avoid mixing function and form. This approach yields steady retrieval, reduced misplacement, and defined aesthetic enhancements without sacrificing practicality or safety.
Designing the Seat Lid Mechanism
Designing the seat lid mechanism requires selecting a reliable hinge and support system that balances ease of use with safety. You’ll choose components that support smooth opening, controlled lowering, and secure closure without pinch points. Prioritize a lid that stays level during operation and resists unintended drift.
Evaluate latch mechanisms for secure, rapid engagement and minimal wear under repeated cycles. Guarantee alignment tolerances are tight to prevent binding and misalignment over time.
Integrate hydraulic lifts or gas springs when you need consistent damping and assisted lifting, especially for heavier lids. Confirm installation leaves no obstruction to storage access and fits within your window seat’s interior dimensions.
Document weight ratings, travel limits, and servicing intervals to maintain performance and safety over the life of the unit.
Building a Sturdy Frame
You’ll evaluate frame joint types for strength and ease of assembly, prioritizing right-angle and reinforced connections.
Consider load-bearing design early to make certain the seat supports users and stored weight without sag, and select materials with good stiffness and nail/screw hold.
Pick suitable materials and fasteners now, so your sturdy frame transfers loads efficiently while staying durable over time.
Frame Joint Types
When building a sturdy frame for a window seat with storage, choosing reliable joint types is essential. You’ll depend on these joints to transfer loads, resist shear, and maintain square geometry over time.
Favor mechanical joints that tolerate wood movement, such as dowel or biscuit connections, for consistent alignment without excessive hardware. Consider mortise-and-tenon where thickness and grain orientation permit, delivering high shear strength with minimal flex.
Box joints offer strong, repeatable performance for carcass-to-frame interfaces, while lap joints provide quick assembly with good load distribution. Ensure joints are sealed and lubricated to minimize binding as panels expand and contract.
Use precise cut sizes, test-fit before assembly, and document each joint type for consistent framing techniques across the project.
Load-Bearing Design
A sturdy window-seat frame relies on accurate load-paths and conservative strength estimates to prevent deflection, failure, or misalignment over time. You specify a primary structural path from the seat surface through framing members to the floor or supporting studs, limiting eccentric loads.
Use joinery and hardware rated for concentrated loads, with fasteners spaced to avoid timber splitting. Design the frame to carry anticipated loads with a safety margin, accounting for dynamic use and seat occupants.
Integrate vertical supports, cross members, and diagonal bracing to resist shear and racking. Detail connections to the built-in storage chest to ensure transfer of weight without joint creep.
Prioritize window seat ergonomics and aesthetic integration while maintaining predictable deflection characteristics and repeatable performance across seasons. Verify through simple tests before finishing.
Material Selection
Selecting materials for the window-seat frame requires matching strength, stiffness, and durability to the load paths defined earlier. You assess species and grades for structural members, prioritizing consistency in board thickness, grain orientation, and joinery compatibility.
Choose fasteners and connectors that resist shear and withdrawal, with corrosion resistance appropriate to your environment. You balance weight, cost, and fabrication tolerance, preferring components that minimize deflection under anticipated loads.
Material durability guides choices for cores, faces, and edge treatments, ensuring long service life without excessive maintenance. Eco-friendly finishes are favored when they meet performance targets, providing moisture resistance and UV stability without releasing harmful volatiles.
Document material specifications, test results, and installation tolerances to support future inspection and repairs.
Installing the Base and Support Structure
To install the base and support structure, begin by anchoring the framework to the window opening with purpose-built cleats and brackets, ensuring square alignment and solid fasteners.
You’ll plumb verticals and perform plumbness checks, then secure with corrosion-resistant screws to framing studs.
Install a continuous subbase plate to distribute loads, and verify load paths through the sill and jambs.
Use temporary shims to maintain level progress and prevent binding during assembly.
Once the base is square, fit the primary supports, ensuring joint hardware remains accessible for future maintenance.
Attach cross-bracing as required for rigidity, and confirm static and dynamic stability before proceeding.
Integrate decorative trim and aesthetic accents to achieve a clean, finished appearance without compromising structural integrity.
Creating Hidden Storage Bins
Hidden bin materials should balance durability with weight, selecting plywood or reinforced MDF, sealed with a moisture-resistant finish for longevity. Consider lid mechanisms that provide quiet operation and reliable access, such as counterweighted hinges or gas springs, to maintain a clean, unobtrusive look. We’ll compare material options and lid choices to optimize load capacity, ease of use, and long-term performance.
Hidden Bin Materials
When choosing materials for hidden storage bins, start with sturdy plywood or MDF for the box. Guarantee a smooth interior finish, and select a lid that stays flush with the seat surface. You’ll prioritize rigidity and durability, resisting wear from daily use.
Use plywood with a balanced core or medium-density fiberboard for uniform surfaces and stable edges. Opt for exterior-grade finishes that resist moisture and staining, and seal all joints to prevent debris intrusion.
For internal components, choose durable fasteners and low-friction hardware to allow quiet operation. Sustainable materials reduce environmental impact without compromising strength.
Incorporate decorative hardware only where it enhances aesthetics after assembly. Verify side clearance and lid alignment during fits, ensuring consistent gaps and a seamless appearance as you complete the hidden bin system.
Lid Mechanisms Choices
Shifting from sturdy box construction, choose lid mechanisms that deliver quiet, reliable operation and a flush, seamless appearance. You’ll balance access with concealment by selecting hinge types that minimize gap exposure and maximize load distribution.
Prioritize soft-close or damped variants to reduce slam risk and preserve the seat’s finish. For lid opening, opt for gas springs or pneumatic supports when you need controlled ascent and hands-free use; use a simple piano hinge only if you require rigid, low-profile alignment.
Double-check mounting points align with structural members to avoid sagging. Favor self-contained mechanisms that integrate with hidden bins and resist dust intrusion.
Verify clearance around the lid edge to prevent contact with upholstery. Test opening speed, repeatability, and ease of maintenance before final installation.
Incorporating Pull-Out Drawers
Are you maximizing space and accessibility by adding pull-out drawers under a window seat? You’ll design channels that align with drawer sides, ensuring smooth operation and reliable support. Size drawers to store odds and ends without crowding, using full-extension slides for maximum reach. Choose a uniform depth that matches seat construction, and reinforce carcasses with cross-members to prevent rack movement.
Precision gaps matter; maintain even clearances for full drawer travel and lids. Select pull-out hardware with corrosion resistance and rated weight capacity suitable for daily use. Apply custom paint during assembly for a seamless finish, and attach decorative hardware as a visual accent without compromising function.
Document installation tolerances and test glide, noting any rub or misalignment for prompt correction.
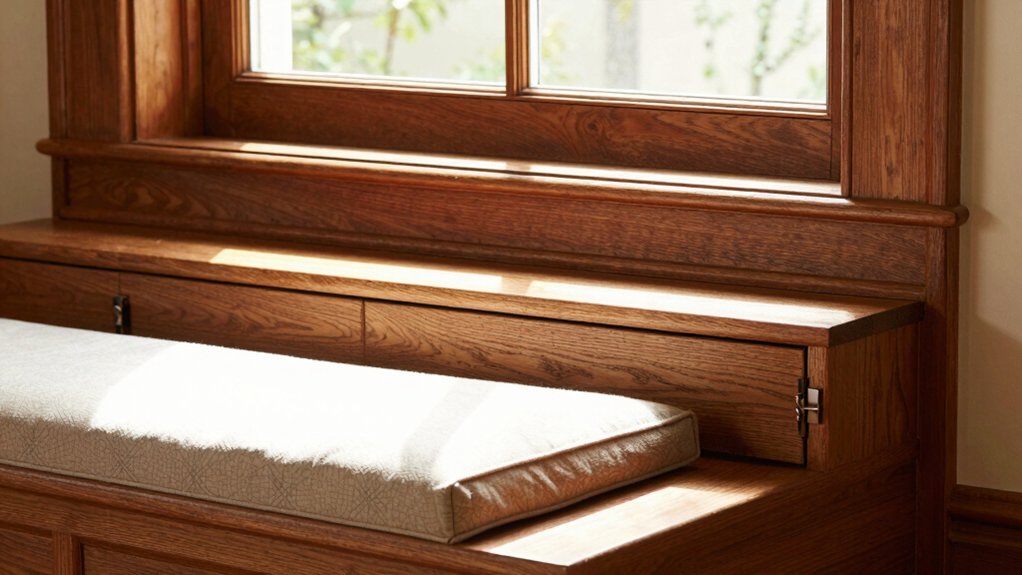
Installing Hinges and Lid Support
Hinges and lid supports must be sized and mounted to match the seat’s construction and expected use. Choose hinge types that support the lid’s weight without sagging, and align mounting points with the seat frame to prevent binding.
For a shallow seat, use compact, non-rising hinges; for deeper units, consider full-swing or continuous-inset options to maximize access.
Install lid supports that hold the lid open at a safe angle and prevent accidental closure. Position hinges and supports to clear upholstery, fasteners, and any storage components, maintaining straight lines for reliable operation.
Pre-test both open and closed motions, checking for binding, misalignment, or audible interference.
Use stainless or zinc-coated hardware for durability and consistent performance in varying temperatures and humidity.
Padding, Cushions, and Upholstery
Padding, cushions, and upholstery must be selected and applied to support comfort without compromising the seat’s structure or lid operation. You prioritize form and function, ensuring the padding thickness aligns with lid clearance and prop supports.
Use dense foam or high-resilience foam for durability, with a moisture-resistant layer to deter deformation. Edge joints should maintain seam integrity under repeated use, while fabric choices resist wear and cleaning challenges.
Attach cushions to a rigid, slip-resistant base to prevent shifting during opening and closing. Upholstery should be tensioned evenly, avoiding sag at the lid interface.
Consider decorative accents that complement the overall design without affecting mechanics. Maintain consistent sewing and reinforcement at corners, and select fabrics that tolerate sunlight exposure and daily handling.
Finishing Touches: Trim and Accent Details
Finishing touches elevate the window seat’s practicality and polish without altering its mechanics. You add decorative trim and select accent details to enhance profile without compromising storage access or seating comfort.
Start with precise trim choices—square-edged, profile, or vented—that integrate with the frame and casing, ensuring clean reveals and alignment. Match finish and wood species to the surrounding cabinetry for cohesive aesthetics. Apply caulk sparingly at joints to prevent gaps that collect dust.
Accent details should be restrained: consider underline moldings, subtle roping, or a single, contrasting border that echoes room hardware. Hardware finish choices—brushed nickel, oil-rubbed bronze, or matte black—should be consistent with handles and fixtures.
Confirm door panels, lids, and cushions close softly, without rattle, while maintaining accessibility.
Lighting and Electrical Considerations
Could lighting and power access dictate the window seat’s placement and usability, or can you design around existing circuits without compromising comfort? You’ll plan lighting and electrical access before enclosure, mapping load requirements and locations for outlets, switches, and fixtures.
Prioritize ambient lighting to reduce glare on seating surfaces and maintain a calm mood; integrate dimmable options for versatility. Layout electrical wiring with code compliance in mind, concealing runs within framing or joist spaces and selecting low-profile boxes.
Install outlets at convenient heights for recharge duties and for easy vacuuming access beneath the seat. Consider a lightweight, accessible lighting solution above the seat to avoid shadows on knees.
Verify GFCI protection where needed, and label circuits for quick future adjustments to maintain safety and reliability.
Maintenance and Care Tips
Regular upkeep keeps a window seat with storage functional and safe. You should establish a routine: inspect hinges, fasteners, and drawer slides for looseness; tighten or replace as needed.
Clean surfaces with appropriate tools to prevent grime buildup that can compromise finish or upholstery. Use a soft cloth and mild cleaner on wood; avoid abrasive pads that scratch.
For fabric cushions, vacuum weekly and spot-clean spills promptly with a manufacturer-recommended solution.
Schedule periodic paint touch-ups to maintain aesthetics and deter moisture ingress; match color, test in an inconspicuous area, and apply thin, uniform coats, allowing full curing between passes.
When weather permits, seal exposed wood joints with a compatible finish to resist humidity.
Store cleaning supplies safely away from children and pets.
Document maintenance activities for future reference.
Troubleshooting Common Issues
When a window seat with storage isn’t functioning as expected, start with the basics: check for loose hardware, misaligned drawers, and sticking hinges. Then address root causes before proceeding to component replacements.
You’ll diagnose interaction issues between lid, seat panel, and drawers, verifying tracks, fasteners, and mounting brackets are secure. If drawers bind, inspect sides for warping and rails for straightness, lubricating with appropriate products only if specified.
Assess load distribution and sealing around the finish to prevent binding from humidity. Consider climate considerations; wood movement can misalign components, so allow seasonal acclimation and adjust tolerances accordingly.
Ensure aesthetic integration remains intact by matching trim, color, and hardware. Document changes, retest, and implement preventative checks to avoid recurrence.
Frequently Asked Questions
How Can I Access Hidden Storage Without Dismantling Cushions?
Access hidden compartments by carefully lifting the edge of the cushion and locating a seam or latch; avoid removing cushions permanently. Some models use hidden magnets or velcro. Cushion removal isn’t required if you reveal the concealed access.
What Is the Best Seat Height for Adults and Kids?
Actually, the best seat height respects both adults and kids: about 16–19 inches from floor. You’ll maximize cushion comfort and seat ergonomics, ensuring you sit tall, align hips, and avoid strain—no funny business, just precise measurements.
Can I Retrofit a Window Seat Into an Existing Wall?
Yes, you can retrofit a window seat into an existing wall. Use pivot hinge for access and guarantee wall reinforcement with studs, blocking, and proper fasteners to support seating loads and user safety.
How Do I Maximize Natural Light While Seated?
How do you maximize natural light while seated? Use proper window treatments and optimize light reflection with light-colored surfaces. You’ll position a low, unobstructed seating area, incorporate mirrors, and adjust angles to direct daylight efficiently.
What Safety Features Prevent Small Children From Getting Pinched?
You implement pinch protection by using childproof locks and smooth, rounded edges; you guarantee hinges are concealed, gaps minimized, and latches secure, preventing finger entry, while consistently checking for wear to maintain reliable pinch protection.
Conclusion
In sum, you’ve planned a durable, stylish window seat with smart storage. Measure precisely, select moisture-resistant panels, and choose sturdy hinges or lift mechanisms for smooth operation. Use robust joints and proper supports to transfer loads reliably. Finish with trim, cushions, and subtle hardware for a cohesive look. Remember to wire for lighting safely if needed, and apply routine maintenance to keep latches and lids dependable. If problems crop up, consult the plan and adjust before jousting with the drill—anachronism: a medieval trebuchet.