
To add storage to a loft conversion, start by identifying constraints and goals, then measure the roofline and eaves accurately to map usable space. Plan a layout that follows daily flow, placing frequently used items within easy reach. Use built-ins under sloped ceilings, under-eave niches, and hidden wardrobes to maximize awkward angles. Integrate cable management with storage, choose light finishes, and opt for affordable upgrades that feel high-end. With careful planning, you’ll create practical, clutter-free zones that quietly elevate the space—more tips await.
Loft Storage: Identify Constraints and Goals
To start, map out what you actually need to store and where you’ll access it. You’ll set clear constraints by ceiling height, headroom, and access routes, then translate them into practical goals.
Identify items you’ll keep long-term versus seasonal spur-of-the-moment needs, and note frequency of access. Consider weight distribution, moisture risk, and potential odors, so you don’t overload joists or hamper airflow.
For loft insulation, plan discreet storage solutions that don’t compromise insulation performance or heat loss. Include ventilation planning to prevent condensation and musty smells, ensuring vents remain unobstructed.
Align your goals with existing structure and future use, so your space feels like belonging, not clutter. Document decisions, coordinate with builders, and revisit constraints if plans change.
Quick Assessment: Measure Roofline and Eaves Accurately
You’ll want to Measure Roofline Precisely, so you know what space you have to work with.
Next, Track Eaves Extents to avoid misjudging storage fit and headroom.
Finally, Record Roof Angles Correctly to plan supporting structures and any slope-related constraints.
Measure Roofline Precisely
Accurately measuring the roofline and eaves is essential for planning loft storage. You’ll map usable space by noting peak height, knee walls, and any sloped sections that limit where boxes fit.
Use a metal tape to measure from soffit to ridge at multiple points, then average for a representative line. Record longest and shortest clearances to avoid fragile beams or vents.
Check for obstructions like chimney breasts, dormers, or light wells that affect layout. Keep a simple sketch with scale and labeled dimensions to guide assembly.
Remember roof insulation and ventilation planning implications: tight spaces change airflow needs, so plan access routes that don’t impede insulation or air movement.
Precise measurements save rework and help you feel confident about storage placement.
Track Eaves Extents
Pinpointing eaves extents helps you map usable loft space quickly and accurately. Track the roofline and eaves with steady, repeatable steps so you know exactly where storage can fit.
Begin at the gable end and work toward the ridge, noting where the ceiling height drops below practical limits. Use a tape measure to capture eave overhangs and internal vertical drops, recording lengths on a simple sketch.
Check for consistent eave depth along both sides, spotting any jogs or bumps that reduce usable space. Consider eaves insulation and how it sits under the rafters, as gaps can affect lining and storage fits.
Plan roof ventilation access near the eaves to avoid restricting future storage panels or shelves. Accuracy now saves rework later.
Record Roof Angles Correctly
To assess roof angles quickly and reliably, start with a direct measurement of the roofline and eaves, then verify results against each other. You’ll want to record both long and short diagonals, and note any irregularities along hips or valleys. Use a fixed tape or laser level for consistency, and log angles in a simple sheet.
Compare measurements from multiple spots to confirm accuracy, then average the valid results. Document any deviations caused by irregular rafters or sag. This precise data informs placement of storage features and guarantees safe access.
Consider Roof insulation needs and how insulation gaps may affect usable space. Plan Ventilation planning early to avoid moisture buildup in compact loft zones and maintain comfort across seasons.
Plan Your Storage Layout for Best Flow
Start by planning an efficient footprint that makes the most of every inch. Then map out reachable access so you don’t trap yourself in tight corners.
Prioritize storage that stays within easy reach for daily use, and place built-ins where they streamline movement rather than block it.
Keep the layout smart and integrated, using built-ins to maximize space without clutter.
Plan Efficient Footprint
A well-planned footprint is essential for a loft conversion, because smart storage shapes the flow and usability of the space. You map zones that align with daily rhythms, placing drawers and shelves where you naturally pause.
Think vertical first: tall units reduce clutter on the floor, while under-eave niches maximize awkward angles. Keep doorways clear and reach-accessible, with compact furniture that doesn’t crowd.
Plan color schemes and lighting options that visually expand the footprint, using light tones to reflect daylight and warm accents to create intimate corners. Favor modular components you can adjust over time, so growth stays seamless.
Communicate clearly with builders about load paths and ventilation, ensuring safety alongside efficiency. Your footprint supports confidence, connection, and a space that feels like home.
Prioritize Reachable Access
Is it possible to move most-used items within easy reach? Yes. Prioritize reachable access by mapping a flow from doorway to primary living zones, then place frequently used items in accessible shelving and easy reach zones.
Keep shelves lower than eye level in high-traffic areas to reduce bending and reaching. Use labeled, modular units so you can reconfigure as needs change, avoiding wasted space above doors or under eaves.
Group similar items together: daily essentials, seasonal gear, and rarely used possessions. Leave a clear path for movement, avoiding clutter that blocks access.
Choose adjustable shelving to adapt to item height, and install pull-out baskets for slim gaps. Accessible shelving and easy reach zones create intuitive, comfortable storage that supports everyday belonging.
Integrate Built-Ins Smartly
Design built-ins to reinforce the flow you mapped, not clutter it. When you plan, position storage where it supports movement, sightlines, and room function. Integrate modules with the ceiling line to minimize visual bulk, and choose finishes that blend with your color schemes for a cohesive look. Use creative lighting inside shelves or cabinets to highlight items and reduce perceived clutter.
Build in multipurpose units that shift with your needs, so the loft feels spacious and inviting rather than crowded. Prioritize accessibility and safety, especially near stairs and low ceilings. Keep corners soft with rounded edges to invite everyone in.
- Align storage to major pathways for seamless navigation
- Use hidden or recessed lighting to enhance color schemes
- Choose modular systems that adapt to changing needs
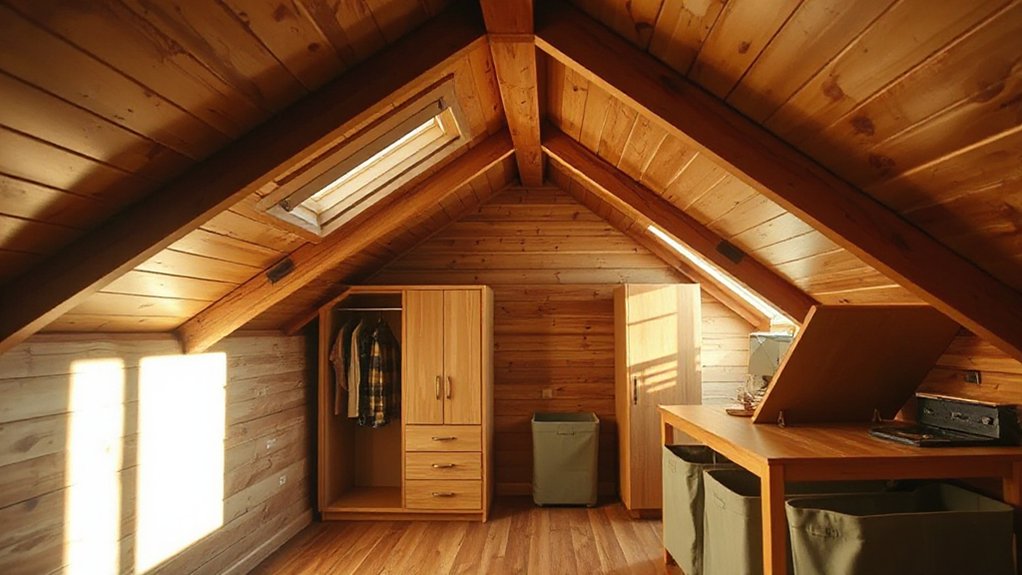
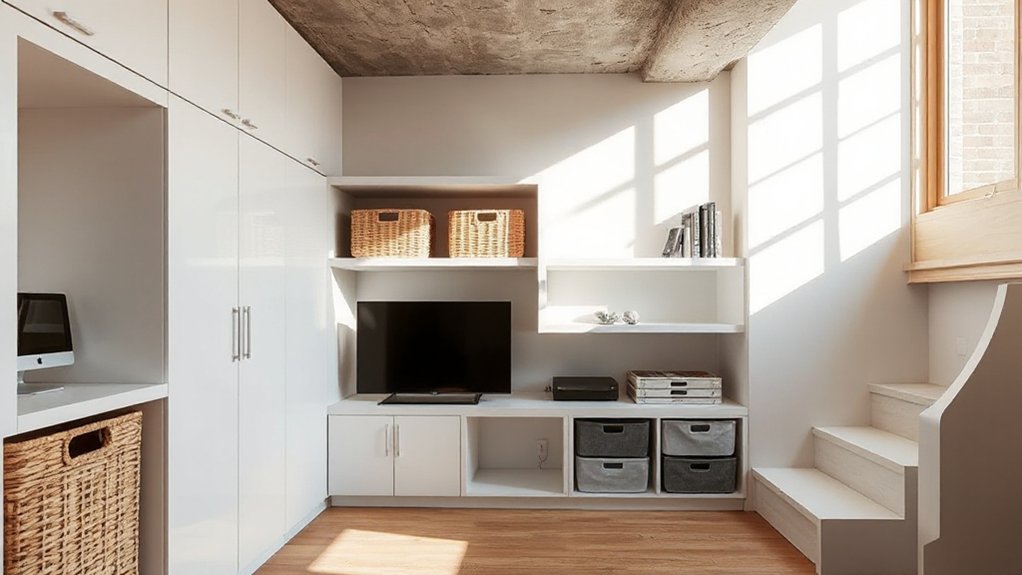
Built-Ins Under Sloped Ceilings: Practical Designs
Under sloped ceilings, built-ins can transform awkward nooks into usable storage and display spaces. You’ll maximize headroom by choosing shallow drawers, adjustable shelves, and low-profile cabinets that follow the slope.
Design with harmony in mind: match finishes to existing wood or plaster for a seamless feel, and integrate decorative details that help you belong in the space. Use decorative wall panels to conceal joints and add texture, then pair with integrated lighting to highlight displays without glare.
Loft lighting solutions should be slim, warm, and dimmable, so you can shift from day to night use. Opt for modular units you can rearrange as needs change, which keeps the room flexible, affordable, and inviting for family and guests alike.
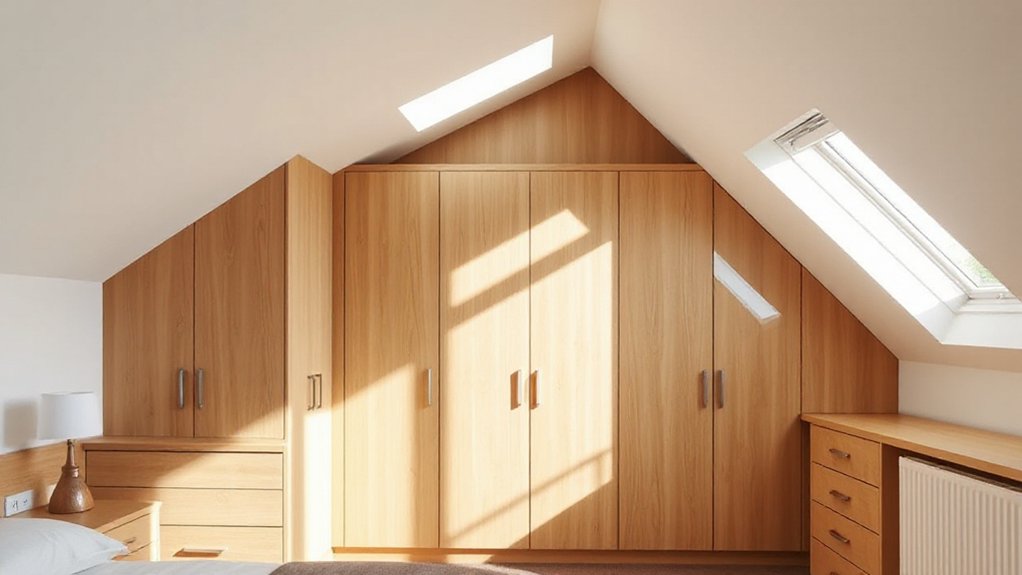
Hidden Wardrobes for Angled Spaces
Hidden wardrobes in angled spaces maximize storage without crowding the room, using recessed or custom-built rigs that follow the slope for seamless integration. You’ll gain usable depth where walls narrow, with doors that hug the angle and stay out of the primary traffic flow.
Prioritize hidden compartments inside, so garments, accessories, and seasonal gear stay organized and accessible without visual clutter. Angled doors hide contents while preserving a clean ceiling line and room feel, reinforcing a sense of belonging in a shared space.
Choose finishes that match existing woodwork for a cohesive look, and install lighting that highlights organized tiers. This approach pairs practical storage with a polished, inclusive atmosphere.
- Tailored depths and hidden compartments optimize every inch
- Flush, angled doors minimize visual bulk
- Integrated lighting enhances visibility and accessibility
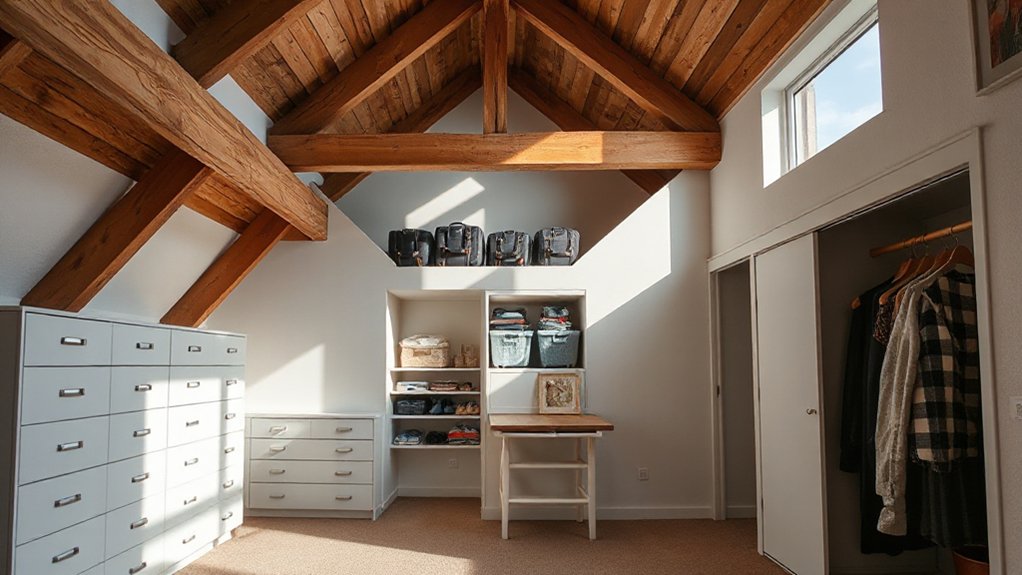
Under-Eave Drawers and Cubbies: Maximize Every Inch
Under-eave spaces are your clocking-in on wasted inches, so plan drawers and cubbies that fit the slope without crowding the ceiling.
Think shallow drawers and vertical cubbies that pull out for easy access in tight nooks, especially where reach is limited.
We’ll explore how to size, place, and finish these units for real-world storage gains.
Under-Eave Storage Tips
When you’re optimizing loft space, under-eave storage is a practical, high-value solution you can execute with minimal disruption. You’ll maximize each inch by choosing shallow drawers and hinged cubbies that align with the slope, so nothing feels awkward or wasted.
Prioritize clean lines to keep the room feeling open, and pick finishes that blend with your existing décor. For a touch of Vintage decor, select hardware with a retro vibe and muted tones that age gracefully.
Consider lighting options that enhance usability—under-eave LEDs or motion-activated strips keep your storage bright without glare.
- Shallow drawers with slim fronts for a seamless look
- Hinged cubbies that tuck into the eaves without crowding
- Integrated lighting to improve visibility and ambience
Cubbies In Loft Nooks
Use decorative cubbies to add texture and a cohesive look that feels intentional, not cluttered. Keep channels narrow and doors soft-closing to preserve clean lines and a tidy aesthetic.
Label bins for quick retrieval, so you don’t waste precious loft space searching. These cozy nooks invite you to personalize: a splash of color, a natural wood finish, or a subtle pattern.
With thoughtful placement, you’ll convert awkward corners into useful, inviting storage that strengthens your sense of belonging in the home.
Staircase Landing Storage Upgrades
How can you maximize storage on a staircase landing without sacrificing clearance or flow? You can optimize a landing by using shallow built-ins under the sloped ceiling, and choosing doors that tuck away when open. Prioritize vertical storage above eye level to keep the path clear, and install magnetic or soft-close hardware for quiet access.
Confirm there’s adequate Loft insulation and consider wraparound shelves that follow the landing’s contour. Integrate a slim bench with hidden compartments for seasonal items, and keep every bin labeled for quick retrieval. If you add a small cabinet here, mirror it with roof ventilation points nearby to prevent moisture buildup.
- Slim, under-ceiling cabinets that don’t intrude on the stair path
- Pull-out or lift-up storage to maximize depth
- Discreet vented panels linked to roof ventilation
Multi-Functional Furniture With Built-In Storage
Choose pieces that fit your routine: ottomans with hidden compartments, beds with under-bed drawers, and desks that tuck away clutter. Prioritize modular designs that adapt as needs change, so the room remains usable and organized.
Integrate Creative lighting thoughtfully to highlight storage zones and create ambience, not glare. Ventilation options should stay accessible; opt for parts that don’t trap heat or dust, maintaining air quality.
Tidy, accessible storage reduces clutter, reinforcing belonging and a sense of control. Guarantee finishes resist wear and blend with architectural features for a seamless, enduring loft environment.
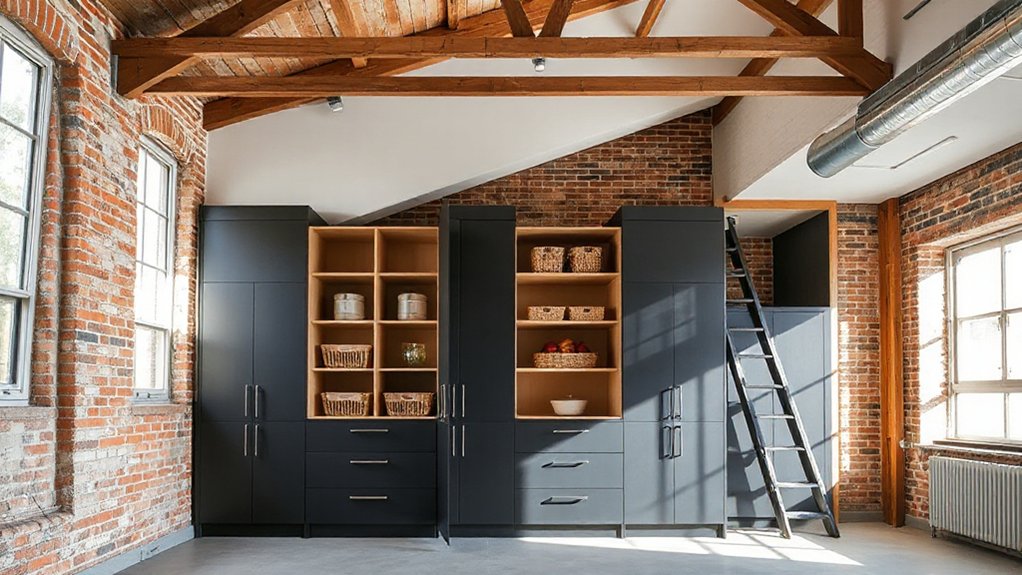
Custom Cabinetry: Durable Materials and Finishes
Choosing the right cabinet finishes and weather-resistant materials sets the tone for durability in your loft. You’ll want surfaces that resist wear, moisture, and stains while keeping a clean, modern look.
We’ll cover practical options that balance longevity with easy maintenance.
Durable Cabinet Finishes
- Eco friendly finishes for lower VOCs and lasting protection
- Vintage cabinet styles that complement modern lofts
- Simple, durable care routines that extend life
Weather-Resistant Materials
For doors and shelves, select core materials with stable, dimensionally secure properties, plus edge treatments that prevent peeling. Seal joints properly and apply weatherproof sealants where panels meet walls or ceilings to reduce drafts and condensation.
Insulation barriers behind cabinetry help regulate temperature and prevent cold patches that could warp wood or vinyl wraps. Prioritize kitchen-adjacent zones and bath areas with moisture-rated veneers and water-resistant substrates.
Wardrobe Systems for Awkward Angles
- Custom modules fit awkward angles without bulk
- Integrated lighting highlights items and creates depth
- Modular systems adapt as needs change
Seasonal Storage for a Bright, Clutter-Free Loft
Seasonal storage should be planned with a clear rotation routine so you keep your loft bright and clutter-free all year. You’ll benefit from practical, labeled bins and a documented calendar that marks seasonal shifts.
Start with a seasonal inventory: decide what belongs, what rotates out, and what stays accessible for quick swaps. Use seasonal organization principles to group items by usage window—summer gear, winter textiles, holiday decor—then store them in clearly mapped zones.
Prioritize clutter reduction by limiting what you keep, discarding or donating surplus. Regularly reassess needs; rotate items before peak seasons to prevent overstuffing.
Maintain quiet simplicity with uniform containers, tight seals, and stock-free shelves. This disciplined approach reinforces belonging: your space reflects you, organized and ready for each season.
Cable Management Integrated With Storage Solutions
Cable management should be built into your storage plan from the start, not tacked on later. When you design shelves, allocate dedicated channels and backs for cables, so concealment feels intentional, not makeshift.
Position power outlets with accessibility in mind—near desks, entertainment hubs, and charging stations—while keeping run lengths short to reduce clutter. Integrate outlets into cabinetry where possible to hide cords behind doors and pull-out trays.
Use labeled zones for data, power, and AV to simplify future upgrades and maintenance. Choose slim, low-profile conduit or cable trays that align with your storage aesthetic, ensuring a clean, cohesive look.
- Cable concealment is proactive, not reactive.
- Plan power outlet placement for practicality and flow.
- Group, label, and route cables with hidden trays.
Materials and Finishes That Keep Loft Feel Light
To keep a loft feel airy, choose materials and finishes that reflect light and avoid heavy, bulky textures. You’ll prioritize slim profiles, glass, and matte whites to bounce daylight across the room.
Opt for light-toned woods or engineered alternatives with minimal grain and clean lines, reducing visual weight. Use reflective surfaces—mirror-backed cabinets or glossy tile—in moderation to widen spaces without clutter.
Choose durable, low-porosity materials that resist grime and still feel airy. Keep color palettes cohesive: pale neutrals with occasional cool accents.
Incorporate vintage lighting as focal points to add character without bulk, and pair it with recessed or track lighting for even illumination.
Favor eco-friendly finishes to minimize impact while preserving a calm, breathable atmosphere. This approach fosters belonging through thoughtful, practical design choices.
Budget-Friendly Upgrades That Read High-End
Could you upgrade your loft without blowing the budget? You can achieve a high-end feel with smart, budget-conscious choices that align with your sense of belonging.
Start with creative lighting to shape space, add warmth, and highlight storage features without costly fixtures. Choose cohesive color schemes that make limits feel intentional and calm, not cluttered.
Focus on scalable storage, stylish handles, and hidden panels that read premium. Use durable finishes in neutral tones, then add texture through textiles and hardware to elevate the look.
Small upgrades add up: reflect light, define zones, and keep surfaces clean and simple for a refined feel.
- Creative lighting ideas that transform the space
- Color schemes that reinforce a luxe, cohesive vibe
- Hidden, multifunction storage that reduces visual clutter
Safety, Access, and Long-Term Care for Loft Storage
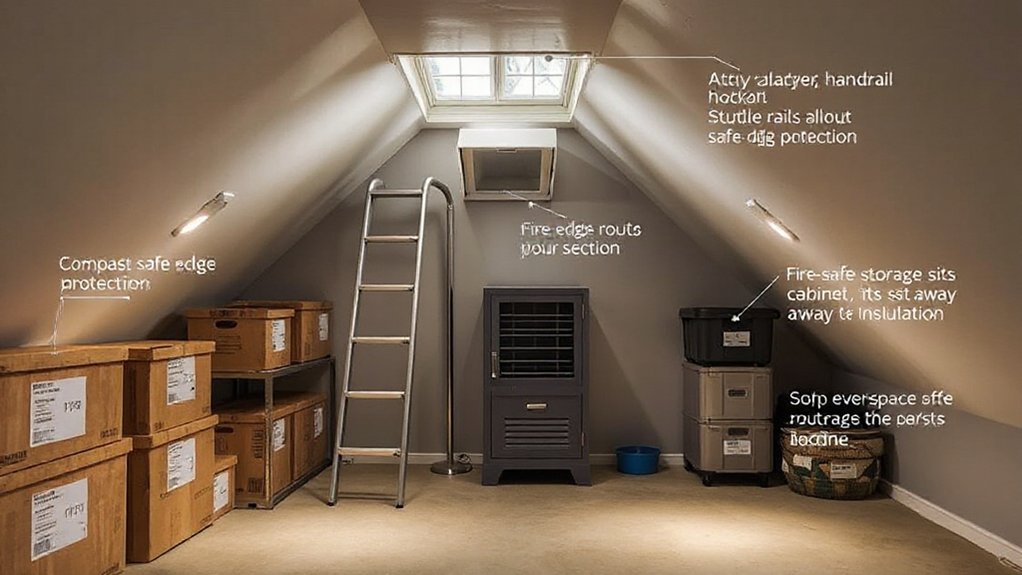
Loft storage is only as good as the safety and access it provides, so start by the basics: secure access, stable platforms, and clear pathways. You should fit a robust ladder or fixed staircase, guardrails, and non-slip decking. Keep all access routes free from obstructions and guarantee lighting is adequate for every season.
Use storage measures that prevent shifting items, with labeled bins and weight limits clearly posted. Regularly inspect joists, fasteners, and floorboards for wear, and address squeaks or looseness promptly.
Prioritize fire safety by installing smoke alarms nearby, storing flammable items away from heat sources, and maintaining clear egress.
Include ventilation maintenance in your routine to prevent damp, mold, and odor buildup, preserving safe, long-term use.
Frequently Asked Questions
How to Prevent Moisture in Loft Storage Areas?
You’ll prevent moisture in loft storage areas by installing moisture barriers and improving ventilation. Guarantee continuous insulation, seal leaks, and add vents or a small extractor fan; keep humidity low, dry goods off the floor, and monitor seasonal changes.
What Lighting Improves Small Loft Storage Spaces?
Install warm decorative lighting and bright task lighting to brighten small loft storage spaces; you’ll feel organized and at home. Use dimmable decorative lights for ambiance and focused task lighting for drawers, shelves, and access points.
Can Loft Storage Affect Roof Integrity or Insulation?
Loft storage can affect roof integrity if poorly placed, but focused planning protects structure through proper roof reinforcement and careful load distribution. You’ll gain safety and comfort with insulation enhancement, keeping warmth in and drafts out. You belong here, confidently.
How to Access High Shelves Safely in Sloped Ceilings?
Elevated shelving helps you maximize space; use a sturdy ladder and maintain three points of contact. Inspect ceiling clearance first, secure shelves, and keep tools within reach. Prioritize ladder safety, breathable footwear, and calm, deliberate movements.
What Are Best Practices for Child-Friendly Loft Storage Safety?
You should prioritize child safety by securing storage surfaces, keeping heavy items low, and using rounded corners. Maintain clear pathways, label bins, and practice supervision. Embrace storage organization habits to create a welcoming, family-friendly loft space.
Conclusion
You’ve mapped your loft storage like a blueprint for calm: tight spaces become deliberate, snappy systems, not clutter traps. Think of your roof as a sail—lean into the slope, don’t fight it. With built-ins under eaves, hidden wardrobes, and clean cable lines, you’ll release flow without sacrificing light or feel. Keep safety in the crew’s foreground, and maintain it like a garden: regular checks, tidy edges, enduring use. Your attic becomes a trusted extension, not a risky attic.