
To build a raised bed, pick a sunny, well-drained spot and plan a 3–4 foot-wide bed for easy access from both sides. Choose sturdy, rot-resistant materials like cedar or galvanized steel, plus a durable bottom barrier if needed. Gather basic tools, then assemble a square, level frame with secure joints and a solid footer. Fill with a soil blend (40% topsoil, 40% compost, 20% aged manure), mulch 2–3 inches, and set a simple irrigation plan. You’ll discover practical steps that maximize success as you progress.
Choose Location for Your Raised Bed
Choosing the right location is foundational to a successful raised bed. You’ll optimize sun exposure, drainage, and accessibility, which supports steady growth and makes daily care easier.
Look for a spot that receives at least six hours of sun, with minimal shade from trees or buildings. Confirm the ground drains well, never pooling after rain, to prevent soggy roots and disease.
Consider wind patterns—surroundings that protect against drying or desiccating gusts help preserve soil moisture.
Accessibility matters too: you’ll want to reach the bed from multiple sides for easier planting, weeding, and harvesting.
For garden aesthetics and pest control, place it where you’ll enjoy viewing and tending it daily, while reducing attractants and barriers for pests.
This thoughtful placement reinforces belonging and confidence in your growing journey.
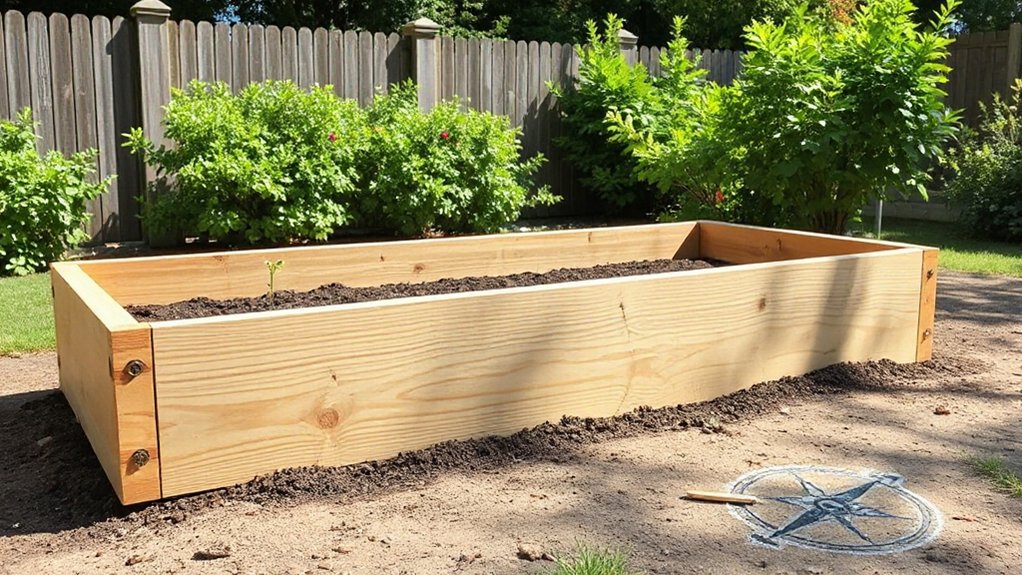
Measure and Plan Bed Size
How big should your raised bed be? Start with a practical plan that matches your space and workflow. Measure available area, consider paths for access, and set a bed size you can manage without overreach. A consistent size helps with maintenance, watering, and planting density.
Use these steps to refine your plan:
- Choose bed width for easy reach from both sides (typically 3–4 feet).
- Align length with available sun, water, and existing garden aesthetics.
- Determine soil depth based on crops (usually 6–12 inches).
- Allow for margins and edging to prevent weed encroachment and pest control challenges.
Document measurements, create a quick sketch, and estimate annual inputs. This grounding keeps you confident and connected to your garden community.
Pick Materials: Wood, Metal, or Alternatives
With your bed size in mind, you’ll want materials that balance cost, durability, and ease of assembly. Here, you compare wood, metal, and sensible alternatives through a practical lens.
Material durability informs long-term performance: rot-resistant cedar or treated wood lasts longer in moist soil; galvanized steel resists rust and keeps corners tight; high-density composites resist warping but may cost more upfront.
Cost comparison shows initial expense varies by material, yet life-cycle value matters: wood often cheaper upfront but may require sealing or replacement; metal lasts decades with minimal maintenance; alternatives like recycled plastic offer zero rot but can be pricier per foot.
Choose based on climate, load, and aesthetic. Prioritize predictable maintenance, consistent dimensions, and a plan for future repair or replacement.
Gather Essential Tools for a Simple Raised Bed
You’ll want a straightforward, essential tool set to build a simple raised bed, focusing on reliability and efficiency. Start with the basics: a tape measure, hammer, saw, square, level, drill, and a set of screws or nails, plus a utility knife and work gloves.
This minimal list keeps setup fast and costs predictable while still covering precise measurements, cutting, and assembly.
Gather Essential Tools
Gathering the right tools upfront saves time and keeps the project moving smoothly. You’ll approach setup with confidence when you have these essentials at hand, ensuring steady progress and fewer interruptions.
- Tape measure and pencil for precise dimensions
- Circular saw or handsaw and level for straight, square cuts
- Drill with bits and screws for sturdy frame joints
- Garden gloves, pruning shears, and a trowel for quick planting prep
With these basics, you align your process, supporting garden pests prevention and smart plant selection later. You’ll feel a sense of belonging as you match tools to tasks, reducing guesswork.
Keep your space organized, label components, and verify measurements before cutting. This practical setup underpins safe, efficient work and helps you stay focused on the bigger goal: a thriving, low-stress bed.
Basic Tool List Only
A solid raised-bed project starts with the essentials: a focused, minimal tool list that keeps setup fast and accurate. You need a tape measure for precise sizing, a square or level to plumb corners, a carpenter’s saw or circular saw for frame cuts, and sturdy gloves for grip and protection.
Keep a drill with bits, a screwdriver, and a small hammer for fasteners, plus a square-mleece or string line to align edges. A level, a hand saw, and a set of clamps prevent wobble during assembly.
A wheelbarrow or tub helps transport soil, and a garden knife clears debris. Lightweight helpers reduce fatigue, boosting garden decor as you work.
Plan for pest control basics, and you’ll finish confidently.
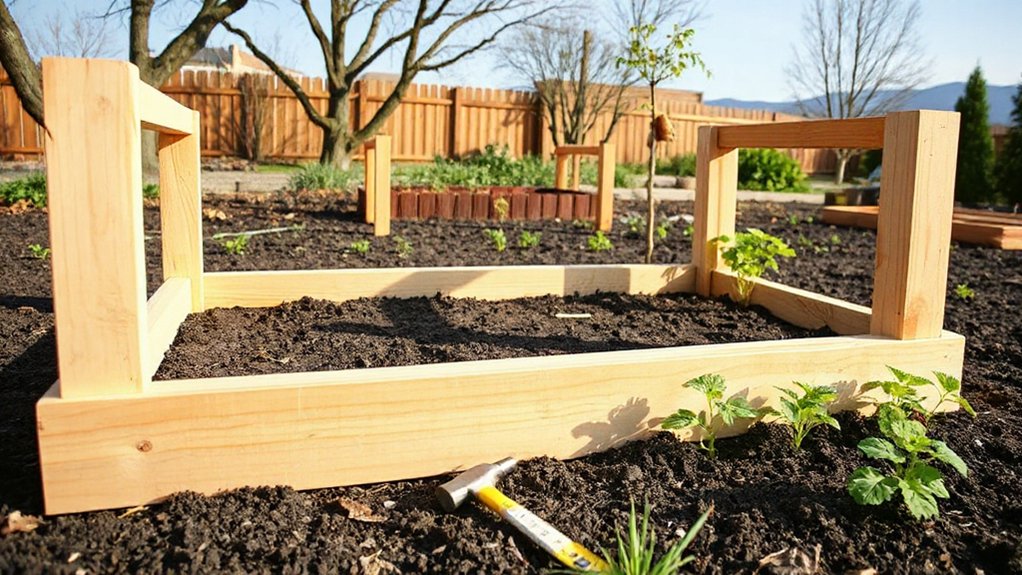
Build the Frame: Step-by-Step Assembly
First, gather materials safely and verify quantities before cutting so your measurements stay precise.
Next, plan the layout and make clean, straight cuts to guarantee the frame fits snugly.
Finally, assemble the frame securely, checking joints and fasteners for stability and durability.
Gather Materials Safely
As you start assembling the frame, identify all required materials and inspect each item for damage before use. You’ll verify fasteners, panels, and protective coatings, ensuring no cracks or warping compromise the structure. Prioritize safe handling to prevent injuries and material defects, and follow manufacturer guidelines for all tools.
- Inspect each board edge and fastener head for splinters or corrosion, replacing damaged pieces promptly.
- Verify moisture content and coating compatibility to avoid warping after assembly.
- Separate components by size and purpose to streamline assembly and reduce missteps.
- Confirm storage area is dry and free of contaminants, mitigating pest exposure and contamination risks.
Garden pests and composting techniques inform material choice, keeping beds durable and productive.
Cut and Plan Layout
To cut and plan the layout, start by laying out your boards on a flat, clean surface and mark each piece for length and orientation before cutting. You’ll label corners for a square footprint and set aside extra stock for joins and reinforcement. Measure twice, cut once, and confirm screw placement and underlying support to prevent warping.
Draft a simple plan: dry-fit rails, then step back to judge balance and garden aesthetics—straight edges, clean ends, consistent gaps. Record measurements for all sides to streamline assembly.
Anticipate pest control considerations in gaps and framing height, ensuring airflow without inviting crawl spaces. This deliberate approach builds confidence, reinforces belonging, and yields a sturdy frame you can trust as you grow.
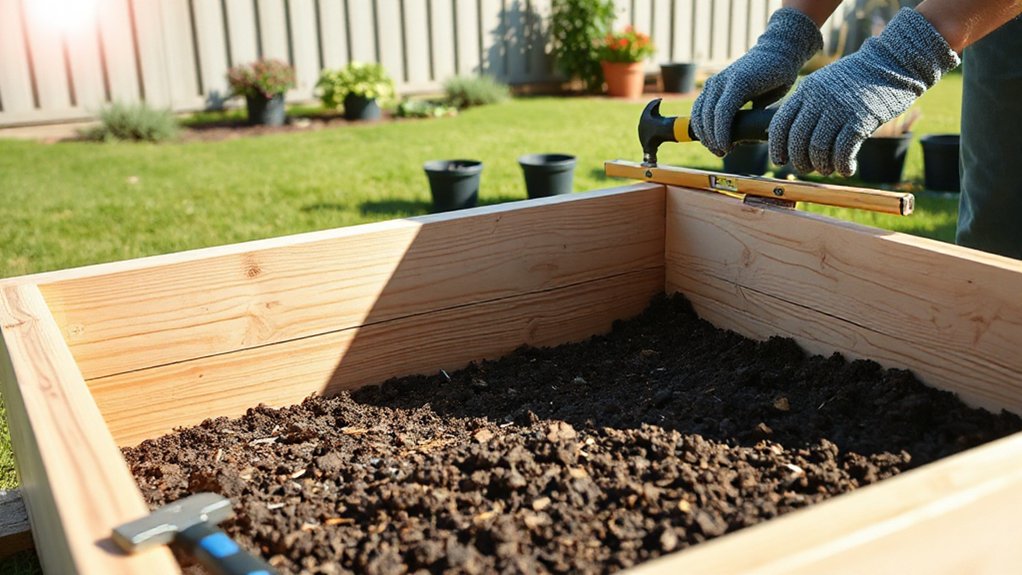
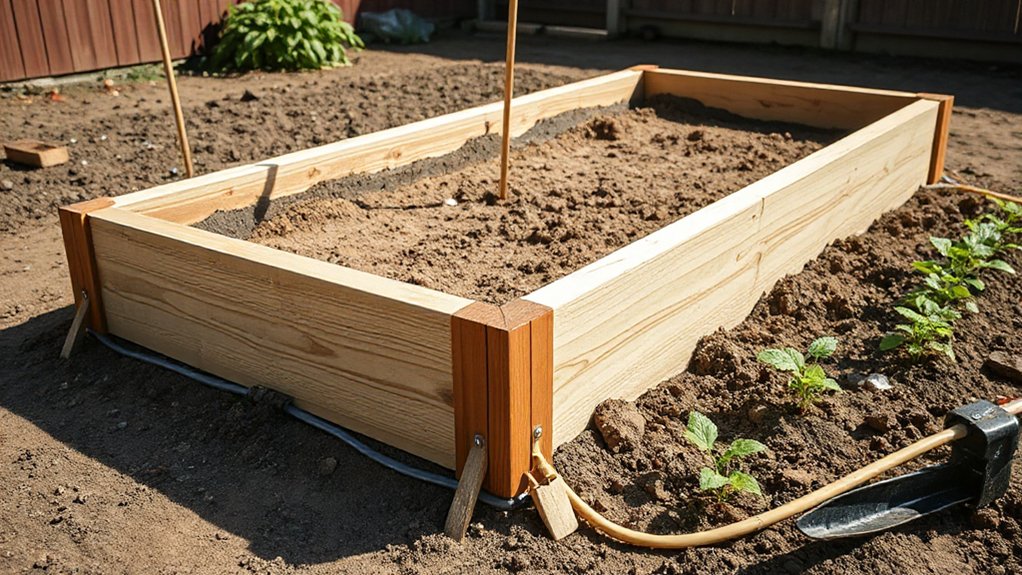
Assemble Frame Securely
Then assemble the frame by laying the cut pieces on a flat surface and driving the fasteners in a logical sequence to keep edges square. You’ll build a solid base that lasts season after season.
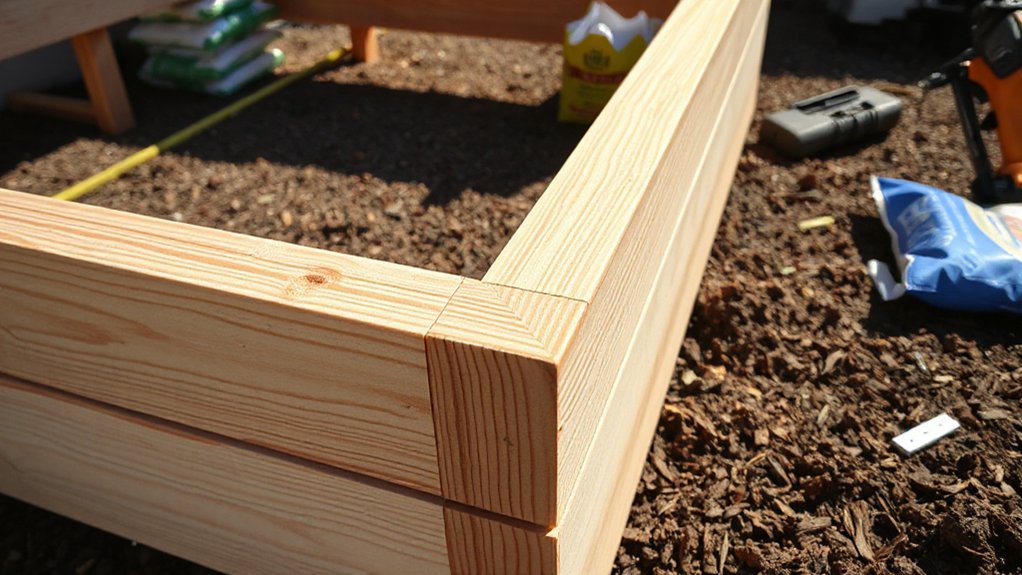
- Align corners, use a square, and start with the bottom frame for rigidity.
- Attach side boards to the corners, ensuring screws sit flush.
- Pre-drill in tighter joints to prevent splitting and maintain accuracy.
- Check for square, then install a top rail to tidy edges and add wind resistance.
This approach delivers Garden aesthetics while remaining practical. You’ll feel a sense of belonging as you see a sturdy frame come together, ready to attract wildlife without compromising structure.
Stabilize With a Backing or Footer
Stabilizing the raised bed with a backing or footer adds essential rigidity and prevents shifting over time. You’ll improve overall stability by adding a continuous backing along the interior or a footer channel beneath the base.
Backing stabilization distributes weight more evenly, reduces rack and wobble, and helps resist soil pressure when you add mulch and plants. A simple plywood or treated board backing, securely screwed into studs or frame members, solves common flex issues in longer beds.
Footer reinforcement, installed along the outer bottom edge, anchors the frame to the ground and limits movement on uneven terrain. Choose materials rated for outdoor use, seal edges, and verify level alignment before filling.
This approach yields a sturdier bed you can trust season after season.
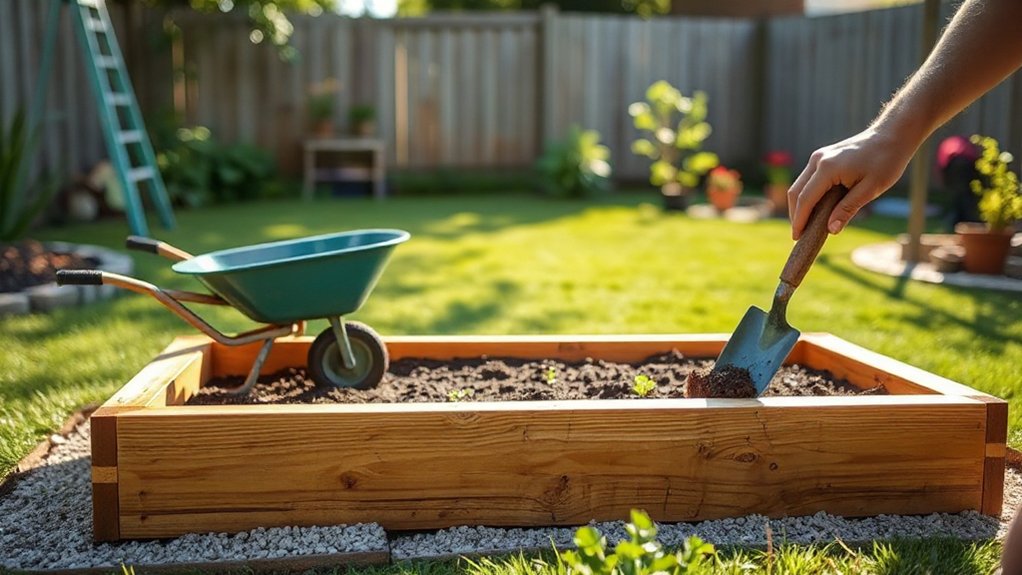
Fill With Soil: What Your Bed Really Needs
Choosing the right soil mix is essential for a productive raised bed, and you’ll get the best results by balancing structure, drainage, and nutrients. You’ll build confidence as you choose components that support soil composition and nutrient balance, not just volume.
- Analyze your bed’s drainage needs, then select components that improve aeration.
- Use a base of well-rotted compost to supply micronutrients and organic matter.
- Add a mineral amendment (like screened topsoil or aged mulch) to stabilize texture.
- Reserve a portion for living soil: include a splash of inoculant or compost tea to boost biology.
This approach keeps your bed compact yet thriving, fosters plant integrity, and invites others to share in your growing success.
Mix Your Perfect Soil Blend for Veggies

To start your soil mix, you’ll build a rich base first.
Then layer in components like compost, loam, and a touch of sand for drainage.
Keep it data-driven by measuring texture and nutrient content, adjusting as you go to hit a balanced profile.
Test and tweak the blend, then fine-tune with mulch and organic amendments to sustain structure and fertility.
Build Rich Base
Crafting a rich base starts with a precise mix that matches veggie roots’ needs: loam for drainage, organic matter for structure, and balanced nutrients for steady growth. You’ll optimize soil chemistry by testing pH and adjusting with lime or sulfur as needed, ensuring nutrients stay available.
A solid base also supports pest prevention by boosting beneficial microbes that suppress pathogens.
- Choose a loam-rich mix: 40% topsoil, 40% compost, 20% aged manure or leaf mold.
- Add minerals: a light dusting of lime or sulfur to tune pH.
- Incorporate slow-release fertilizers for steady nutrient release.
- Top with a mulch layer to conserve moisture and feed soil life.
This approach gives you predictable results, practical data, and a sense of belonging in the garden community.
Layer Soil Components
Layering soil components builds a veggie-friendly base by combining texture, nutrients, and biology in reliable ratios. You’ll mix layers with purpose, prioritizing drainage, water-holding capacity, and biology.
Begin with a foundation of high-quality topsoil or compost to supply viable soil composition. Then add a structured middle layer of aged manure, coconut coir, or peat-free peat substitutes to balance moisture.
Incorporate a small amount of aged wood ash or rock phosphate only if your test shows a phosphorus need, avoiding excess.
Top with a light, airy, mineral-rich layer such as fine compost or well-screened loam. Throughout, think in terms of layer materials that support root growth and microbial activity.
This approach creates a cohesive, resilient bed you’ll trust season after season.
Test and Adjust Mix
If you want the right mix for your veggies, start by testing your soil and then adjusting based on the results. A deliberate test and adjust mix helps you tailor drainage, nutrients, and organic matter to your bed, boosting yields and root health. Use reliable soil testing methods and interpret results with a goal of balanced pH and essential nutrients.
- Gather a representative sample and run a licensed or trusted test to identify imbalances.
- Adjust organic matter first, adding compost or well-rotted manure to improve structure.
- Amend nutrients based on results, focusing on N-P-K balances suitable for greens and roots.
- Re-test after two to four weeks and track changes to verify progress and keep your bed thriving.
Drainage and Elevation: Why It Matters
Drainage and elevation determine how water moves through and around a raised bed, preventing root rot and ensuring consistent moisture. Proper elevation avoids water pooling and promotes air-filled root zones.
You’ll want a base layer for drainage, followed by soil that mixes crumb structure with organic matter. This supports soil aeration and steady water drainage, reducing stress during rain events and heat waves.
Aim for a slight slope outward so excess moisture exits the bed rather than pooling at roots. Use permeable liners only where necessary, and consider localized compost to improve structure without compacting.
Regularly monitor moisture with a simple touch test and adjust material depth accordingly. When you respect drainage patterns, you empower plant vigor and create a sense of shared, hopeful success.
Protect Against Borers and Rot: Linings and Barriers
To protect your bed from borers and rot, start with liners that deter pests and seal the soil from moisture intrusion. Use barriers that block wood-destroying organisms and rot-inducing fungi, while allowing drainage and airflow.
In practice, choose proven materials, follow manufacturer guidelines, and tailor barriers to your climate and crop mix.
Linings For Burier Prevention
Linings and barriers are essential for preventing borers and rot in a raised bed. You’ll protect roots and extend bed life by choosing the right materials and layout, informed by pest control data and plant selection science. Implement these steps:
- Choose untreated, rot-resistant liners where soil contact is unavoidable, avoiding treated woods near roots.
- Lay a weed barrier at the bottom to reduce soil-borne pests while preserving drainage.
- Add a thin insulating layer for temperature stability to deter overwintering insects.
- Orient lines to minimize moisture pockets, promoting drier zones that deter borers.
This approach supports a belonging-driven garden community, where trusted practices, pest control insights, and plant selection choices align with shared success.
Barriers Against Rottingwood
Use pest-control fabric or rigid barriers beneath the mulch layer to deter boring insects without impeding drainage. Guarantee seams are overlapped and secured, and check that edges don’t rub against wood that could wear away the barrier.
Pair barriers with routine pest control practices and regular soil testing to detect early signs of infestation or rot. Favor breathable materials that still block pests.
This approach supports a thriving, shared growing space, where you and your fellow gardeners can rely on sound, data-driven decisions to protect crops and community.
Ensure the Bed Is Level, Plumb, and Square
Before you start placing stakes and boards, make certain the bed is level, plumb, and square.
1) Verify base level with a short carpenter’s level; tweak supports until the frame sits flat on all sides.
2) Check plumb sides by measuring diagonals from corner to corner; adjust until those measurements match.
3) Confirm right angles at corners with a square; loosen and re-torque as needed for true corners.
4) Re-check after assembly with a quick cross-measure to ensure stability and alignment, then secure all fasteners.
A square, true frame reduces soil disturbance, aiding soil conservation and pest control.
When the bed breathes evenly, you establish a strong foundation for consistent moisture and rooted growth, fostering a community that belongs to itself.
Install a Simple Irrigation Plan
A simple irrigation plan can save water and boost crop health by delivering moisture where it matters. You’ll install a basic drip or emitter system tied to a timer, which reduces evaporation and keeps foliage dry to minimize disease.
Start with a short, zone-based layout: plant groups with similar water needs in the same circuit, and run low-pressure tubing along bed edges. Use emitters at the base of each plant and calibrate for soil type and crop stage.
Program daily or every other day runs, adjusting for rainfall and heat waves. Regularly inspect connections for leaks, and replace damaged emitters promptly.
A consistent routine supports garden aesthetics, pest control, and a sense of belonging among neighbors who value efficient stewardship.
Mulch and Surface Care for Moisture Retention
Mulch and surface care are essential for conserving soil moisture and reducing surface evaporation in raised beds. You’ll gain consistency in plant hydration and fewer watering events when you apply the right layer and keep it refreshed.
- Mulch application depth: aim for 2–3 inches to balance moisture retention with air movement.
- Material choices: use straw, shredded bark, or composted mulch; avoid weed seeds and dyed chips.
- Maintenance cadence: inspect weekly; replenish after heavy rain or wind exposure.
- Surface erosion control: add a narrow buffer of mulch along edges to protect soil from washing away.
This approach supports steady moisture, lowers stress on roots, and creates a shared, confident garden space you belong to.
Planting Layout: Companion Planting Ideas
Ever wondered how to maximize space and yield in a raised bed with smart pairings? In this layout, you’ll group compatible crops to reduce pests and optimize nutrient use. Use companion planting principles to pair nitrogen-fixers with heavy feeders, and place aromatic herbs near tomatoes to deter pests and attract beneficial insects.
Rotate crops seasonally, so you don’t exhaust soil biology or invite disease; plan a simple crop rotation that cycles family groups (leafy greens, roots, fruiting plants) through sections of your bed. Space in blocks that reflect mature sizes, not just seed packs, to maintain airflow and reduce disease risk.
Track results, adjust companions, and refine sequences for steady, predictable yields. This approach fosters belonging through predictable, data-driven success.
Maintenance Routine: Cleaning, Weeding, and Soil Refresh
Do you want a clearer, more productive bed? A steady maintenance routine keeps soil healthy and pests at bay. You’ll build consistency with simple practices that fit your schedule and garden needs.
- Clean and inspect weekly: remove debris, check for disease, and rinse surfaces to deter pests.
- Weeding strategy: target shallow-rooted weeds first, then mulch to suppress new growth and conserve moisture.
- Soil refresh: add compost or aged manure annually, and rotate crops to prevent nutrient depletion and pest buildup.
- Pest control and rotation plan: monitor pest signs, employ crop rotation to break cycles, and introduce beneficial allies when appropriate.
These steps reinforce belonging to a steady gardening community while maximizing yield and soil health.
Common Pitfalls and How to Avoid Them
Common pitfalls in raised-bed gardening often come down to planning and maintenance gaps. You’ll avoid them by mapping your bed’s sun, drainage, and access before digging in.
Too often, people underestimate soil needs, packing in a cheap mix that compacts; opt for a balanced soil blend and top it with mulch to sustain moisture.
Regularly monitor moisture levels and plant compatibility, rotating crops to minimize disease pressure.
Invest in reliable Gardening gadgets, like moisture meters and simple trellises, to reduce guesswork and boost yields.
When pests appear, act early with integrated pest control strategies—hand removal, natural predators, and targeted barriers—rather than broad-spectrum sprays.
Schedule a monthly check, deadline-driven tasks, and neighborly sharing of tools to cultivate a sense of belonging and accountability.
Quick-Start Checklist: Build, Fill, Plant, and Grow
To get started fast, follow this four-step quick-start: Build the frame, fill with a balanced soil mix, plant with suitable crops, and establish a steady growing routine.
- Build with sturdy materials, align corners, and seal joints to deter pests and moisture loss.
- Fill using a uniform soil blend, then test soil for nutrients and pH to guide amendments.
- Plant thoughtfully—choose crops that pair well with your climate, rotate seasons, and monitor spacing.
- Grow with discipline: water consistently, inspect weekly for signs of garden pests, and adjust care based on soil testing results.
This approach anchors you in reliable practice, fosters belonging, and delivers measurable progress.
Frequently Asked Questions
How Deep Should Raised Beds Be for Root Crops?
A good depth for root crops is at least 12 to 18 inches, depending on the variety and your soil. You’ll support robust root growth if you target 12 inches for shallow-rooted crops and push toward 18 inches for carrots, beets, and potatoes.
Make sure soil depth is uniform, with loose, well-draining soil. Regularly test and amend, because healthy soil depth directly influences root growth, nutrient availability, and your garden’s sense of belonging in a thriving community.
Can I Reuse Old Bricks or Pallets Safely?
You can reuse old bricks or pallets, but you must check for chemical treatments and stability first. Start by inspecting bricks for cracks and pallets for mold, nails, or creases, and avoid treated woods near edible plants.
Make certain all pieces lock securely and use a barrier to prevent soil contamination. Recycling materials is great, yet prioritize Safety considerations and structure integrity so you feel confident and belong in your growing community.
How Often Should I Water a New Raised Bed?
Water your new raised bed deeply 2–3 times the first week, then settle into 2–3 moderate soakings per week, adjusting for rain and heat. Track soil moisture, aiming to keep it consistently moist but not soggy.
Soil preparation matters; mulch helps conserve moisture.
For pest control, monitor daily and rotate crops.
A regular watering routine builds soil life and plant vigor, fostering a sense of belonging in your growing community.
Are There Eco-Friendly Treated Wood Options?
Yes—eco-friendly options exist. Look for sustainable wood treated with non toxic treatments, like natural oils or safer inorganic preservatives, rather than traditional harsh chemicals.
You’ll get durable boards without compromising soil or garden health. When selecting, verify certifications and product labels for low-VOC claims.
This approach supports your environmental values and helps your garden thrive. You’ll feel confident, connected to responsible choices, and part of a community that prioritizes sustainable wood and non toxic treatments.
Do Raised Beds Work in Shaded Areas?
Yes, raised beds can work in shaded areas. Assess shade type and hours; you’ll maximize productivity with plants showing shade tolerance and careful sunlight management.
Track sunlight requirements, optimize bed location, and choose fast-growing, shade-tolerant crops.
Use reflective mulch to boost light, and stagger planting to align with available sun.
You’ll gain reliable yields by tailoring the bed’s exposure, soil depth, and plant choices to your specific shade pattern, creating a supportive, belonging-focused growing space.
Conclusion
You’ve laid the groundwork, kept scale sensible, and picked sturdy materials—your enthusiasm meets practical prep. If a misstep sneaks in, view it as a tiny nudge toward a smarter layout or better soil. With steady maintenance, your bed will flourish, and the garden will quietly reward your patience. Remember: imperfect starts often seed seasoned results. Stay curious, measure twice, adjust once, and let your raised bed become a reliable, productive corner of your outdoor world.