
To choose the right window treatments, start by defining your goals: privacy, light control, and style for each room. Assess insulation needs, noise, and moisture, then pick a type—curtains for softness, blinds for precise control, shades for minimal upkeep, or shutters for insulation. Measure accurately, decide inside or outside mounts, and guarantee hardware and fabric suit the space. Check operation: smooth movement and no sticking. If you keep going, you’ll master fit, finish, and long-term value.
Define Your Window Goals: Privacy, Light, and Style
Defining your window goals is the essential first step: determine how much privacy you need, how much light you want to admit, and the style that best fits your space. You’ll balance function and feel, aligning choices with daily routines and shared spaces.
Consider decorative accents that reflect your personality while staying cohesive with existing decor. Think about material choices that suit your climate and maintenance preferences, from easy-care fabrics to sturdy woods or metals.
Clarify whether you prioritize filtered glow, complete blackout, or adjustable diffusion. Map each goal to a treatment type, noting how operate mechanisms will integrate with your walls and furniture.
With clear targets, you’ll select designs that enhance comfort, cohesion, and belonging for everyone in your home.
Assess Privacy, Light Control, and Insulation Needs by Room
To tailor your window treatments effectively, assess each room’s privacy, light control, and insulation needs by considering how you actually use the space.
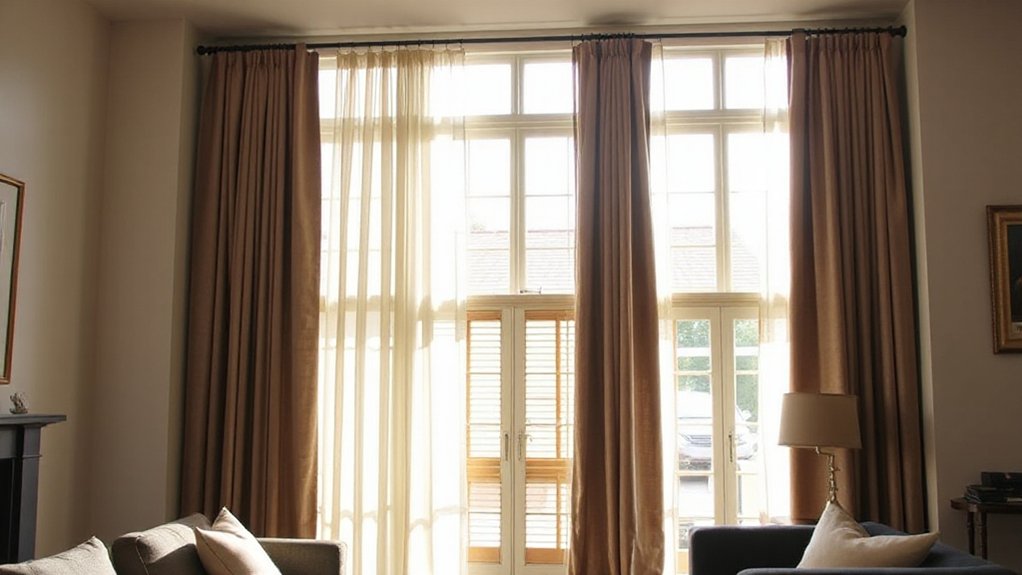
In living areas, prioritize soft daylight management and quiet operation, allowing décor to shine through with decorative patterns that echo your color coordination.
For bedrooms, emphasize total darkness or gentle wake‑ups, choosing fabrics and mounting options that reduce noise and heat transfer without clutter.
Kitchens and baths demand moisture resistance and easy cleanup, so pick low‑maintenance solutions that still respect style.
Home offices benefit from adjustable light without glare on screens, plus privacy when needed.
Map each room’s functions, align textiles with overall palette, and reserve critical emphasis for insulation gaps near doors or large windows to optimize comfort and energy use.
Compare Window Covering Types: Curtains, Blinds, Shades, Shutters
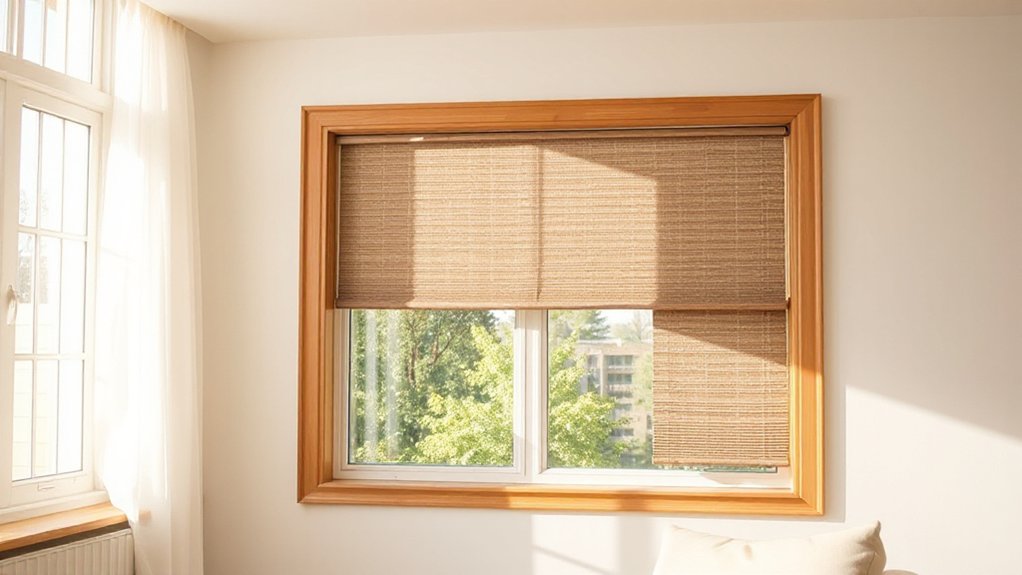
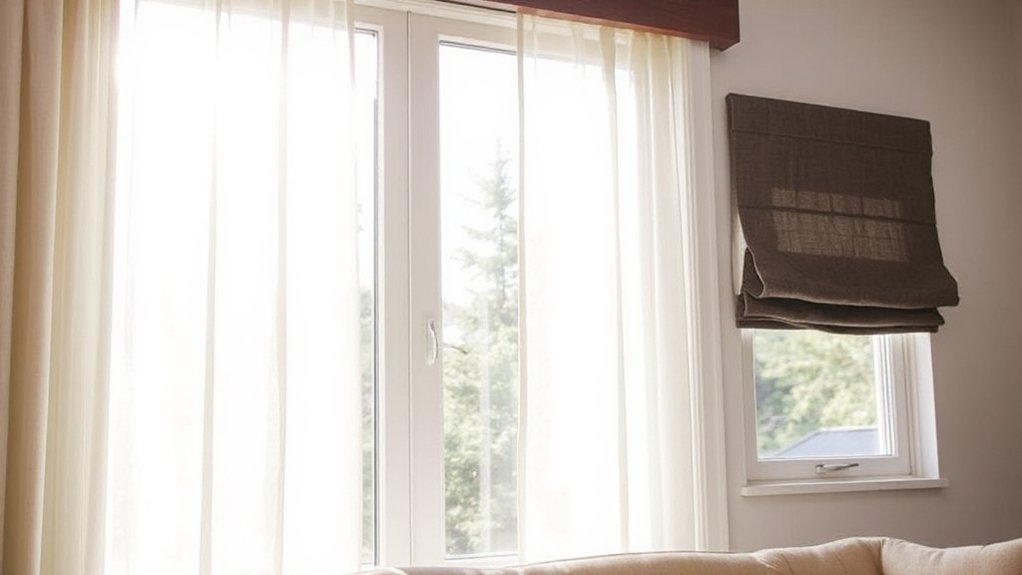
Curtains, blinds, shades, and shutters each offer distinct control of light, privacy, and style, so start by matching their core strengths to your needs: curtains provide soft, flexible coverage and decorative potential; blinds deliver precise light and privacy with durable materials; shades offer clean lines and energy efficiency with simple operation; shutters give timeless, sturdy light control and maximum insulation.
In this comparison, focus on how fabric textures influence feel and room cadence, and how material durability aligns with daily use. Curtains vary from linen to velvet, shaping mood and acoustics.
Blinds span wood, faux wood, and aluminum for toughness and wipe‑clean practicality. Shades emphasize minimal maintenance and insulating value.
Your choice should balance texture, durability, and ease of upkeep to create lasting comfort.
Room-by-Room Criteria: Function, Style, and Light Requirements
When planning window treatments room by room, start by identifying each space’s function, style, and light needs, then align choices to those specifics.
In living areas, prioritize soft textures and cohesive color coordination that echo your palette, while maintaining natural light control.
For bedrooms, favor blackout potential and calm materials to support rest, with tactile, breathable options for comfort.
Kitchens and baths demand moisture resistance and easy-clean surfaces; select fabrics and finishes that withstand humidity while harmonizing with existing decor.
Home offices benefit from light management without glare, so opt for adjustable shading and subtle patterns.
Always consider material selection for durability and tone; balance contrasts and harmonies to reinforce a unified, welcoming feel.
Measure Like a Pro: Tools, Steps, and Tips
Equip yourself with a pro toolkit, including a tape measure, pencil, notepad, and a level, so you capture exact window dimensions.
Follow the step-by-step process to measure width, height, and depth from the windowsill to the casing, noting inside vs. outside mounts and any obstructions.
Use these pro tips to verify measurements twice, account for molding or trim, and keep your notes organized for precise order placement.
Essential Measuring Tools
To measure accurately, start with the essentials: a steel tape or laser measure, a pencil, and a notepad. You’ll use these every time, because precision builds confidence in your project.
Keep the tape taut, note exact window width, height, and sill depth, and record any obstructions. A sturdy ladder or step stool helps you stay stable at standard heights, while a chalk line marks reference points without smudging.
Choose a pencil with a fine lead for clean marks that erase easily.
When you review fabrics, consider fabric textures and color coordination to guarantee your treatments harmonize with the room.
With reliable tools and consistent notes, you’ll measure once, decide confidently, and avoid rework while designing cohesive, inviting spaces.
Step-by-Step Measurement Process
Below is a precise, step-by-step measurement process you can follow like a pro.
Start by noting window width and height from both inside and outside, choosing the most accurate sources.
For inside mounts, measure at three points across the width and three points down the height, recording the smallest width and the largest height to guarantee a snug fit.
Add in casing, trim, or ledge considerations to your total.
Always measure from edge to edge, not from decorative trim.
Confirm depth availability to accommodate mounting hardware.
Record window orientation (sun exposure) to guide material selection and color coordination.
Keep a clean, labeled diagram for reference.
Finalise by pairing measurements with your chosen fabric or shade, ensuring color and texture harmonize with room palette.
Pro Tips and Tricks
When you measure like a pro, start with a clean workspace, the right tools, and a clear plan. You’ll work methodically, verifying each dimension before you record it. Use a steel tape for accuracy, a laser if you’re comfortable, and a sturdy ladder for high windows.
Measure width, height, and depth from multiple points, noting where trim or molding affects exposure. Record the exact window reveal, sill depth, and any obstructions, then double-check with a third reading. Prefer metric or inches consistently and annotate changes in light or shade across the day.
Historical trends guide proportion and stack height, while color psychology influences fabric and shade choices. Apply these checks to ensure a precise fit, predictable operation, and a space that feels like belonging.
Choose Mounting Options: Inside vs. Outside, Surface Setup
Inside mounts give you clean lines and easier shade operation, but you’ll trade off glass size and frame fit.
Outside mounts handle larger fabric coverage and more control over light, yet you must account for wall space and trim, plus potential obstruction.
Surface setup changes installation depth and mounting hardware choices, so consider how each option affects accuracy, aesthetics, and practical constraints.
Inside Mount Pros and Cons
Choosing an inside mount keeps blinds and shades tucked within the window frame, delivering a clean, built-in look that preserves exterior trim and daylight.
- Pros: seamless edges, preserves view, maximum wall space, fewer install gaps, stable operation
- Cons: limited depth, may restrict larger hardware, precise measurement needed, potential wall intrusion, possible light gaps if not aligned
- Material options you’ll consider: wood, faux wood, vinyl, aluminum, fabric
- Color choices guide: match trim for cohesion or contrast for emphasis
- Practical tip: prioritize window depth and mounting accuracy to avoid shading interference
If you value a cohesive room feel and easy maintenance, an inside mount supports a precise, belonging-forward aesthetic with deliberate material and color selections.
Outside Mount Considerations
Outside mount offers a straightforward way to cover the window frame from the wall or exterior surface, often delivering a more expansive look and easier alignment across irregular openings. When you choose this option, you gain immediate access to exterior shading, since accessories and fabric extend beyond the casing for full sunlight control.
You’ll notice simpler installation on uneven walls and quicker updates to window aesthetics, as the treatment sits outside the frame rather than inside it. Measure critical margins to guarantee proper sweep and to avoid protrusions that crowd the opening.
Consider trim and sill visibility—outside mounts emphasize architectural lines and can enhance curb appeal. This approach prioritizes practicality, cohesion, and a sense of belonging through coordinated, exterior-focused design decisions.
Surface Setup Impacts
Careful surface setup can determine how well a window treatment performs, so pick mounting options that align with your wall and frame geometry. Your choice—inside, outside, or flush—shapes not only function but the room’s aesthetic focus and perceived scale. Prioritize clean lines, even seams, and alignment with architectural features to maintain a cohesive look.
Surface setup affects light control, insulation, and fabric longevity, so measure precisely and plan for hardware thickness. Here are practical steps to optimize your result:
- Assess wall depth and stud placement before deciding inside vs outside mount
- Use level guides to ensure perfect alignment with trim and casings
- Account for track or rod hardware when calculating fabric fall
- Choose mounting brackets that minimize visible hardware
- Test with mock-ups to confirm your aesthetic focus aligns with performance
Determine Installation Basics: Quick, Safe, and Accurate

Before you start hanging window treatments, establish a clear plan for installation that’s quick, safe, and accurate. You’ll assess wall material, weight, and bracket placement first, then gather tools you trust.
Prioritize material durability in hardware choices and mounts to prevent sagging or failure over time. Confirm live electrical or hidden obstacles before drilling, and use a stud finder to anchor securely.
Follow manufacturer guidelines for anchor depth and weight limits, and wear safety glasses during every step. Keep measurements double-checked and level laser-guided when possible to ensure precise results.
Maintain clean work zones and label components for easy reassembly. Good installation safety reduces rework and builds confidence, so you feel connected to your space and its long-term functionality.
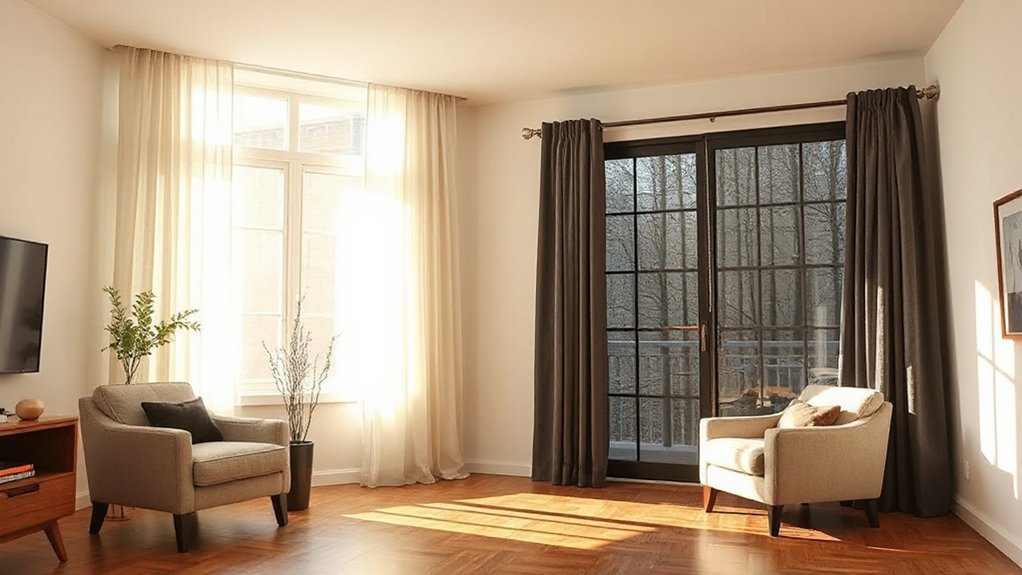
Match Your Style: Traditional, Modern, and Eclectic Looks
When selecting window treatments, the goal is to align texture, color, and scale with your room’s architecture and mood. You’ll coordinate styles to reflect traditional warmth, modern minimalism, or eclectic energy, ensuring each element feels intentional.
Use Color schemes that unify furniture, art, and textiles, reinforcing your chosen look. Focus on proportion, texture, and finish to avoid mismatches, and let hardware underscore the style you embrace. This approach creates a cohesive, welcoming space you’ll love.
- Traditional: rich fabrics, carved wood, muted tones
- Modern: clean lines, neutral palette, matte metals
- Eclectic: bold contrasts, mixed patterns, global accents
Color coordination: repeat key hues across textiles and accents.
Texture balance: pair smooth surfaces with tactile fabrics for depth.
Budget and Value: Upfront Costs and Long-Term Durability
When budgeting window treatments, consider both upfront costs and the long-term value you’ll gain from durability.
You’ll want materials and mechanisms that resist wear, resist fading, and require minimal upkeep to justify the initial investment.
In practical terms, compare total lifetime costs, including replacements and maintenance, rather than just the purchase price.
Upfront Cost Considerations
Upfront costs set the baseline for your window treatment project, so start by identifying the total purchase price plus essential installations and any required hardware. You’ll balance material options and color schemes to maximize value without overextending your budget.
- Compare base costs across fabric, wood, and faux options for upfront value
- Include hardware, tracks, installation, and potential professional labor
- Look for blend of performance and aesthetic in core materials
- Anticipate delivery times and any rush fees that affect total
- Assess potential savings from universal sizes and modular components
This approach keeps you grounded, informed, and aligned with a cohesive style. You’ll feel confident choosing materials and palettes that fit your space and budget while signaling belonging through thoughtful detail.
Long-Term Durability Value
Now that you’ve weighed upfront costs, it’s time to focus on long-term durability value. You want window treatments that hold their shape, color, and function year after year, without frequent replacement.
Look beyond price to material composition: fibers, trims, coatings, and hardware determine wear resistance, stain tolerance, and UV fading. Consider the manufacturing process, because consistent quality control, seam construction, and finishing treatments influence longevity as much as raw materials.
Choose fabrics and materials engineered for durability in real rooms, not just showroom conditions. Ask about stain resistance, washability, and warranty coverage, then compare to your routine life—pets, kids, sunlight exposure, and cleaning cycles.
When durability aligns with your habits, you gain lasting value, comfort, and a sense of belonging in a thoughtfully curated home.
Maintenance and Durability: Cleaning, Longevity, and Care
Regular upkeep preserves both function and appearance, so start with a simple routine: vacuum or dust weekly to prevent buildup, and spot-clean spills immediately to avoid staining.
- Cleaning schedules: establish cadence that fits your textiles, room use, and family needs
- Material resilience: choose fabrics and surfaces known for bounce-back after cleaning
- Routine checks: inspect cords, seams, and hardware for wear every month
- Cleaning methods: use manufacturer-recommended products and gentle tools to extend life
- Longevity planning: rotate treatments or blinds seasonally to distribute wear evenly
Following these practices, you’ll maintain performance and cohesion in your space, reinforcing belonging through dependable, well-cared-for window accents.
Demo Light Scenarios: Test Before You Buy
Testing light scenarios before you buy helps guarantee you pick window treatments that perform as promised in your space. To evaluate properly, set up real-world demonstrations during daylight hours, comparing how each option handles direct sun, ambient glow, and evening radiance.
Focus on light testing from multiple angles and at different times of day, then note accuracy against your goals for glare control and privacy. Observe how fabrics, slats, or panels diffuse, reflect, or absorb, and assess thermal impact on the room’s warmth or coolness.
Document measurements and impressions, so you can compare options objectively. This practical approach strengthens confidence in your choice and fosters belonging within your design vision, ensuring the final selection meets practical needs without sacrificing style.
Fit Checks for Each Type: Size, Clearance, and Operation
To guarantee window treatments perform as intended, verify fit by evaluating size, clearance, and operation for each type. You’ll compare your window opening, mounting space, and movement path to the product’s specs, then confirm practical function with your chosen hardware options and material choices.
- Measure precisely: depth, width, and height, accounting for mounting brackets.
- Check clearance: ensure shade stacks, drapery folds, or blinds won’t snag.
- Test operation: raise, lower, tilt, slide smoothly without resistance.
- Review hardware options: brackets, rails, and hardware finishes align with style and function.
- Confirm material choices suit room use and light control needs.
With these steps, you belong to a confident community of informed buyers.
Troubleshooting Common Fit and Operation Issues
When fit and operation don’t meet expectations, diagnose with a methodical checklist: verify measurements against specs, recheck mounting clearances, and test movement through full ranges. You’ll pinpoint where it stalls or binding occurs.
If hardware binds, assess hardware compatibility—screws, brackets, and supports must align with the window and treatment profile. Swap to matched components if misfits are found, avoiding improvisation that can fail later.
For sliders or drawcords, inspect track cleanliness and any warping that hinders smooth travel. Color coordination matters too: mismatched shades can reveal installation errors or hardware strain over time.
Correct these issues by realigning, replacing incompatible parts, and ensuring consistent finishes. Once components align and travel is frictionless, your window treatment feels integrated, durable, and visually cohesive.
Frequently Asked Questions
How Do I Balance Privacy With Natural Light?
You balance privacy and light by layering, not blocking. Install Window film on outer panes to blur, while keeping views open with privacy screens on interior doors or sidelights.
Choose frosted or low-adhesion film for daytime glow, and switch to patterned screens at night for depth. Pair with sheer drapes to soften glare.
This approach keeps you secure, connected, and part of a welcoming, shared space.
Which Window Treatment Lasts Longest in Humidity?
In humidity, vinyl blinds last longest, thanks to superior moisture resistance and material durability. You’ll notice less warping, fading, or mold compared to fabrics.
For reliably damp environments, consider PVC-coated or faux-wood options, which maintain shape and color over time.
If you prefer fabric, choose treated synthetics with moisture resistance and sealed edges. You’ll gain enduring function, easy cleaning, and a sense of belonging knowing your choice stands up to humidity.
Can I Install Without Professional Help?
Yes, you can, but prep matters. DIY installation is doable if you follow instructions, measure twice, and use proper hardware.
Start with lighter components to build confidence, then tackle heavier panels.
Expect a precise process, minimal tools, and steady hands.
Compare costs upfront with a simple cost comparison, and don’t rush clearance for safety.
If you hit complexity, pause and reassess, ensuring level mounts and secure brackets.
You’ll save, learn, and feel you belong here.
Do Custom Sizes Justify Higher Costs?
Yes, custom sizes can justify higher costs when you value precise fit and long-term performance. Your cost vs. quality balance improves with expertly measured, properly installed panels or blinds that eliminate gaps and drafts.
Consider custom options that align with your window architecture and decor, delivering flawless operation and consistent light control.
If you plan to stay long-term, the extra investment often pays off in aesthetics, comfort, and resale appeal within a belonging-focused home.
How Often Should I Replace or Refresh Treatments?
You should refresh window treatments every 5 to 7 years, or sooner if material durability shows wear. Regular updates keep your space feeling fresh and cohesive.
Look for moisture or sunlight damage, fraying, or fading, and replace accordingly.
Choose options with high material durability and aesthetic versatility to maximize longevity and fit evolving decor.
With careful care, you’ll enjoy reliable performance, timeless style, and a sense of belonging as trends shift.
Conclusion
Choosing the right window treatments comes down to clear goals: privacy, light control, and style. Assess each room’s needs, measure accurately, and compare options—curtains, blinds, shades, or shutters—before you buy. Test light scenarios, verify proper fit, and plan for maintenance from the start. Fun fact: rooms with measured treatments that block 30–50% of indoor glare report a 20% improvement in perceived comfort. Precision and practicality keep your look timeless and function reliable.