
To refresh your bathroom with new fixtures, start by defining goals and priorities—durability, moisture resistance, and easy cleaning—while planning visible changes like faucets, a showerhead, and a toilet. Check plumbing compatibility and space before buying. Set a realistic budget, then choose durable, low-VOC materials and a cohesive finish. Remove old fixtures safely, install the new ones, and upgrade lighting, mirrors, and smart storage. Finish with a clean, organized look that invites daily use—and you’ll be ready for more specifics.
Define Your Bathroom Refresh Goals and Priorities
Start by defining what a successful bathroom refresh looks like for you. You picture a space that feels calm, organized, and aligned with your daily rhythm. Your goals focus on function, mood, and lasting value, guiding every choice from layout tweaks to fixture styles.
Prioritize practical needs first: storage, lighting, ventilation, and ease of cleaning. Then map your aesthetic: how Color schemes influence calm or energy, and which Decor accents reflect your personality without clutter.
Set measurable benchmarks—install a water-saving faucet, brighten with layered lighting, and create a dedicated wipe-clean surface.
Budget thoughtfully, allocating room for both essential upgrades and small, meaningful touches. When you finish, you’ll know you’ve built a refresh that belongs to you.
Check Plumbing Compatibility for New Fixtures
First, verify pipe siting to guarantee new fixtures align with existing lines and don’t create conflicts.
Next, check valve compatibility so your supply and shutoff options match the fixtures you’re installing.
Finally, confirm clearances around each fixture to prevent crowding and leaks, and plan adjustments before you buy.
Verify Pipe Sittings
Before you replace fixtures, verify pipe sittings to guarantee compatibility with new connections. You’ll check where existing pipes terminate, size, and thread type, ensuring leaders align with your chosen fixtures.
Start by measuring rough-in locations and confirming that supply lines match valve inlets. Look for clean, undamaged threads and ensure seals will seat properly without leaks.
Consider pipe insulation surrounding hot water lines; intact insulation helps maintain heat and reduces condensation.
Assess water pressure in the supply lines to avoid overburdening new fixtures. If pressure is too high or low, plan for a suitable regulator or adjustment before installation.
Document measurements and mark alignment points so fittings seal evenly. With precise prep, your refreshed bath maintains steady flow, comfort, and long-term reliability.
Check Valve Compatibility
To guarantee your new fixtures function correctly, verify that any built-in or external check valves align with the intended flow paths and valve types. You want seamless operation and clear compatibility, so check for common Valve types and avoid Compatibility issues that trip you up later.
- Identify all valves in the system and map their flow direction to the fixture layout.
- Confirm each valve type matches the manufacturer’s recommendations for your new fixtures.
- Test for unintended cross-connections or backflow paths and address any mismatches.
This step keeps your install cohesive and reliable, reinforcing a sense of belonging within your refreshed space. If a mismatch appears, consult documentation or a pro before proceeding.
Confirm Fixture Clearances
Measure the rough-in depths and wall clearances for each fixture material, noting any offsets or blocking that could impede seating, alignment, or access panels.
Check compatible water pressure at the point of use and make sure regulators, if needed, won’t compromise performance.
Consider universal dimensions and manufacturer tolerances to avoid cramped under-sink areas or tight backsplashes.
Confirm coupling types and valve placements align with your chosen fixtures, so you don’t encounter surprises at install.
Set a Realistic Budget for Fixtures and Tools
Set a realistic budget first, so you avoid overspending on fixtures and tools.
Start by defining typical costs for what you need and factor in a contingency for surprises.
Track every purchase against your plan to stay on target and prioritize essential upgrades.
Set Realistic Budget
Before you buy, establish a realistic budget for fixtures and tools that aligns with your project scope and priorities. You’ll gain confidence when you plan thoughtfully and share the goal with your household. This is about deliberate choices, not scarcity.
Consider these steps:
- Budget planning: set a total cap, align it with the scope, and leave a 10–15% contingency for surprises.
- Material selection: compare options that balance quality, durability, and price to avoid frequent replacements.
- Priorities: identify must-haves versus nice-to-haves, then allocate funds accordingly.
Define Fixture Costs
When you define fixture costs, start with a clear list of what you’ll need and estimate prices for each item, including tools you’ll reuse across projects. Map out faucets, showerheads, cabinets, lighting, mirrors, and tiling hardware, then add installation supplies and fasteners.
Include a realistic allowance for disposal and delivery fees, plus a small contingency for unexpected needed items. Factor in fixture maintenance costs, such as replacement cartridges or seals, so you’re not blindsided later.
Consider fixture warranties and choose components with solid coverage to protect your investment. Set a cap for tools you’ll reuse, like wrenches, tape measures, a level, and pliers.
Document costs, review periodically, and adjust as your project progresses. This creates belonging through confident, informed decisions.
Choose Durable Materials and Finishes
Selecting durable materials and finishes is essential for a long-lasting bathroom refresh. You’ll balance aesthetics with performance, choosing options that resist moisture, stains, and wear. Prioritize materials that feel cohesive with your space and values, including eco friendly materials and aesthetic finishes.
1) Eco friendly materials: look for low-VOC paints, recycled or responsibly sourced surfaces, and sustainable countertop options that don’t compromise durability.
2) Finish durability: pick finishes with proven wear resistance, easy cleaning, and moisture tolerance to keep your bathroom looking fresh over time.
3) Seamless integration: ensure textures and colors coordinate across surfaces, so the room reads as intentional and inviting, fostering a sense of belonging.
Avoid trends that sacrifice longevity; opt for timeless, efficient choices that perform beautifully day after day.
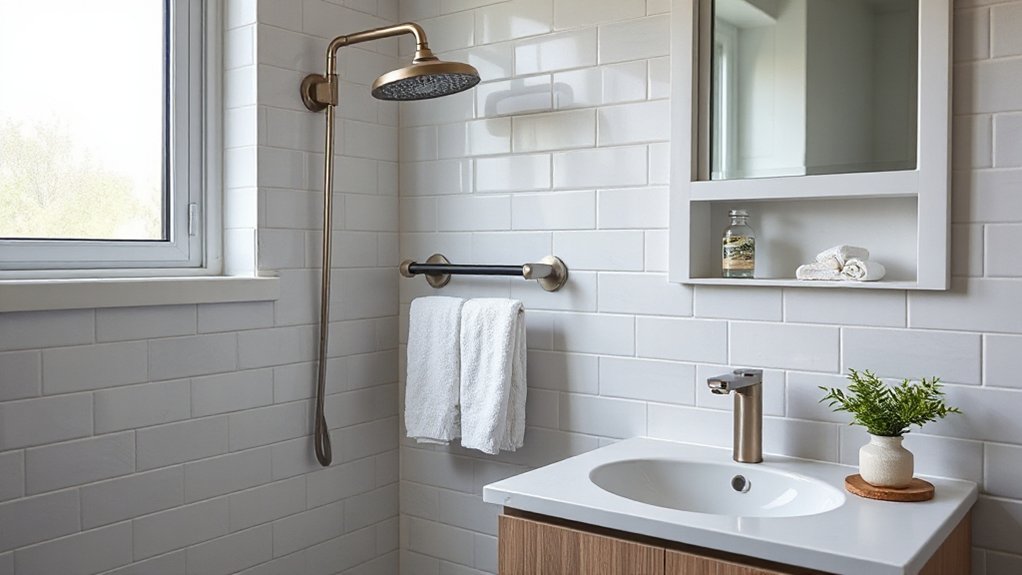
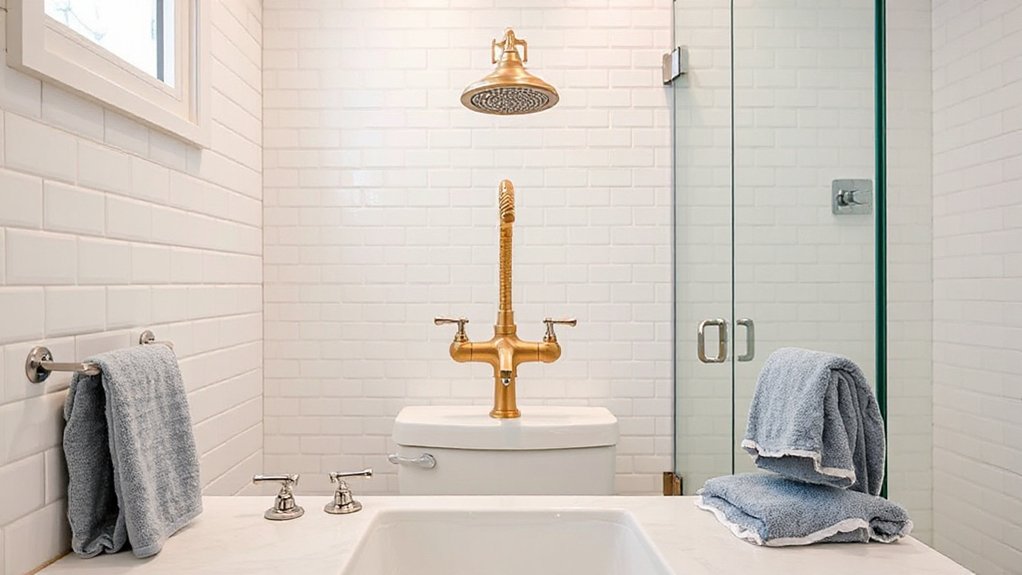
Pick Essential Fixtures: Faucets, Showerhead, and Toilet
Choosing the right faucets, showerhead, and toilet sets the tone for both function and style in your refreshed bath. Start with core choices: durable materials, reliable performance, and a cohesive finish that matches your design.
Opt for vintage styles if you love timeless charm, but make sure parts are up to date and readily serviceable. Consider water-saving features, aerators, and low-flow toilets to support eco-friendly options without sacrificing comfort.
Match faucet and shower finishes to trim and cabinetry for a unified look. Prioritize ease of use, accessibility, and maintenance—smooth handles, clear levers, and simple cleaning.
Set a realistic budget, read warranties, and select trusted brands to secure lasting value and a space you’re proud to inhabit.
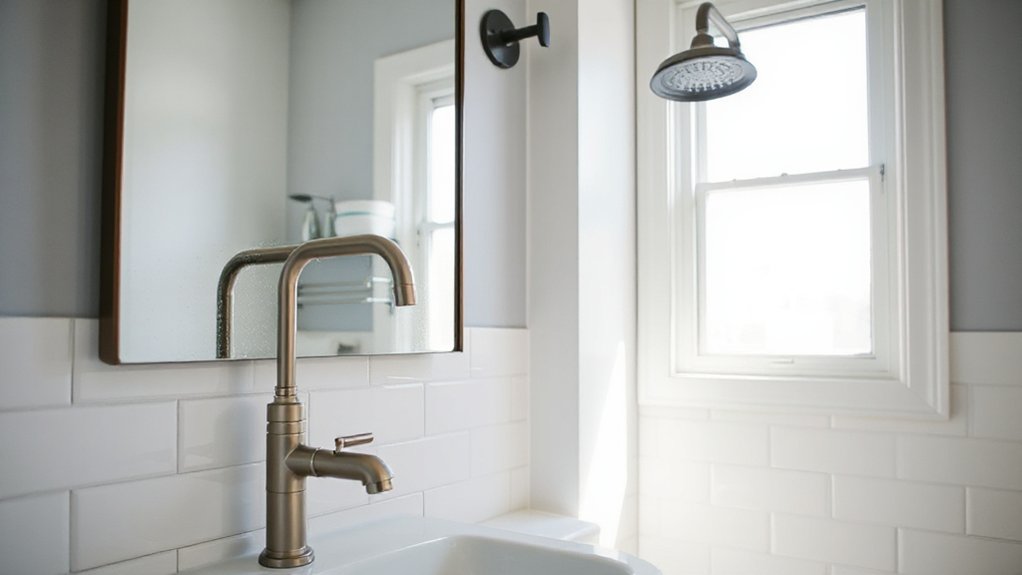
Select Lighting and Mirrors for Function and Style
Lighting and mirrors set the tone and function of your refreshed bath, so plan them together for a cohesive look and day-to-day practicality.
1) Choose ambient lighting first, using layered sources—overhead, task, and a subtle glow near the sink—to shape mood and visibility.
2) Pick mirrors with the right scale and style; decorative mirrors add personality while reflecting more light and space.
3) Match finishes and hardware to your faucet and fixtures for a unified, inviting feel.
Ambient lighting, decorative mirrors, and thoughtful placement make daily routines easier and more enjoyable.
Aim for contrast between bright tasks and soft background glow to flatter you and your space.
If you’re unsure, consult a lighting guide or showroom expert for tailored options.
Plan Storage Upgrades to Reduce Clutter
After you’ve set the mood with ambient lighting and mirrors, it’s time to tame bathroom clutter with smart storage upgrades. Begin by prioritizing essentials and choosing containers that fit your daily routine. Opt wall-mounted cabinets or slim organizers inside the vanity to keep countertops clear.
Use decorative baskets for towels and a few decorative accents to personalize the space without crowding it. Plan vertical storage to maximize space—shelves, hooks, and a magnetic strip for small items.
Integrate hidden compartments for concealable storage, cords, and toiletries. Align your color schemes with existing decor for a cohesive feel, and select adjustable solutions so the setup adapts as needs shift.
This approach creates calm, functional spaces you’ll feel proud to share.
Measure for Fit and Clearance
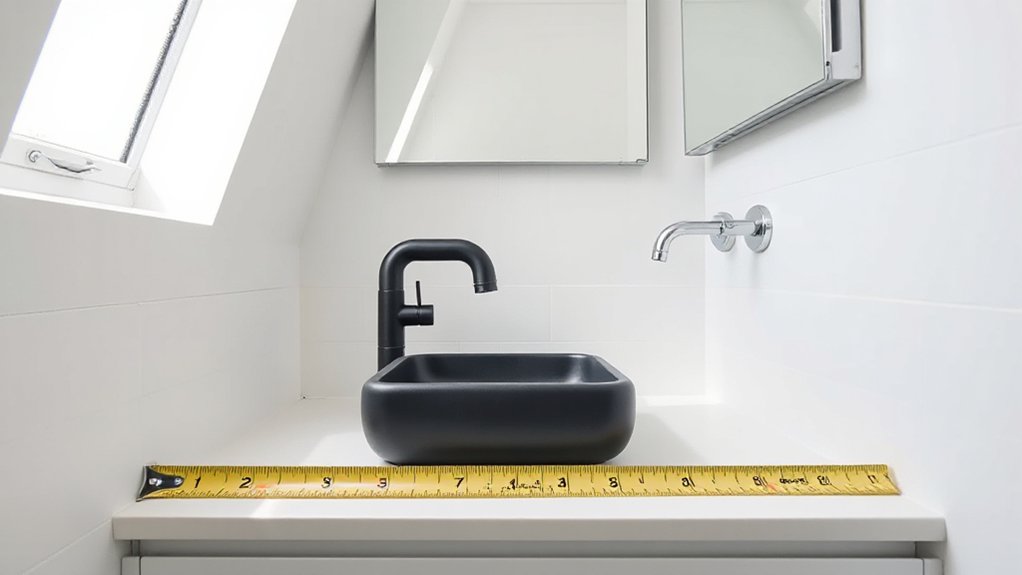
To guarantee a smooth install, you’ll measure clearance before choosing fixtures. Check door swings, cabinet tops, and tub/shower dimensions to verify enough space for operation.
Confirm fit space now to prevent awkward gaps or rework later.
Measure Clearance Ahead
Before you start installing new fixtures, measure clearance carefully to guarantee fit and safe operation. You’ll want predictable space for doors, drawers, and swinging hardware, plus room to reach switches and faucets without crowding. Plan around decorative accents and color schemes to keep visuals cohesive while preserving clear paths.
- Measure doorway and hallway widths to assure incoming units pass without bumping walls or fittings.
- Check swing radii for doors, drawers, and cabinet doors, reserving extra space for easy operation.
- Confirm vertical clearances above sinks, toilets, and vanities to avoid contact with lighting or mirrors.
Keep these numbers handy as you assemble, so everything aligns with the overall design and feels intentionally chosen for your space.
Verify Fit Space
Double-check all measured clearances to confirm the fixtures will fit and function as planned. Verify fit space by rechecking door swings, vanity depth, and toe-kick clearance under sinks. You want comfortable movement and open access, not cramped corners.
Compare rough-in distances to manufacturer specs and account for wall deviations, plumb lines, and floor flatness. If you’re installing a new shower or tub, confirm alcove dimensions and tile thickness won’t block doors or panels.
Consider color schemes and decor accents you’ll pair with fixtures, ensuring harmony rather than clash. Note electrical and plumbing offsets, setback requirements, and ventilation needs to prevent future bottlenecks.
Document measurements, mark potential interference, and adjust early to preserve a cohesive, welcoming bathroom space.
Gather Tools and Safety Gear
Having the right tools and safety gear on hand makes a bathroom fixture swap smoother and safer, so gather everything before you start. You’ll want a focused starter kit and a few safety items to keep you confident as you work, especially when you’re coordinating decorative accents with color schemes later on.
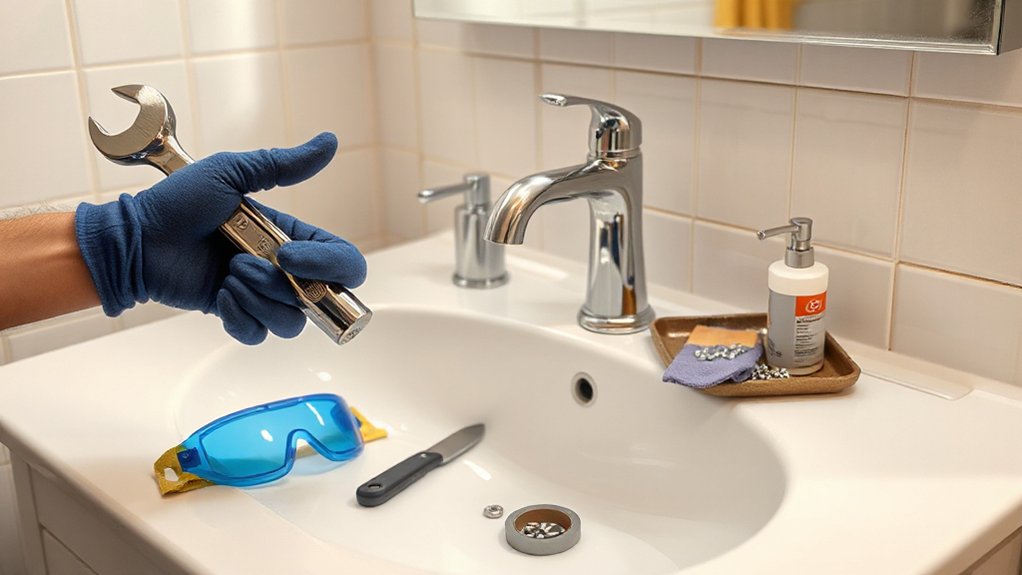
- Tools: adjustable wrench, screwdriver set, utility knife
- Safety: safety glasses, gloves, duct tape for leaks or temporary fixes
- Optional extras: flashlight, small level, painter’s tape
Keep everything within reach, labeled, and organized so you move efficiently. With the right setup, you’ll feel grounded and ready to customize your space.
This mindset helps you belong in a collaborative process and align finishes with your decorative accents and color schemes.
Prep the Workspace to Minimize Disruption
Use eco-friendly options when possible—reusable containers, compostable bags, and labeled bins to streamline cleanup. Plan cord management and outlet access in advance, so smart technology devices stay functional without intrusion.
Notify household members about timing and access needs, fostering belonging and cooperation. Protect flooring and surfaces with drop cloths, and cover fixtures you won’t touch.
Label bags and containers for quick retrieval, then review your layout to confirm smoother workflow and minimal disruption throughout the project.
Step-by-Step: Remove Old Fixtures Safely
You’ll prep your space first, gathering the right tools and shutting off water and power to prevent surprises.
Then you’ll disconnect safely, following clear steps to avoid leaks or shocks.
Finally, you’ll remove old fixtures with clean techniques, keeping surfaces intact and ready for the new ones.
Prep Work Essentials
Removing old fixtures safely starts with a clear plan and the right tools. You’ll set expectations, gather essentials, and protect surrounding surfaces as you begin. Focus on two goals: prevent damage and minimize disruption to your space. By planning steady steps, you’ll keep momentum and confidence.
- Inventory and prep: label valves, turn off water, and cover nearby surfaces to protect decorative accents and finishes.
- Gather tools: adjustable wrench, screwdriver set, and bucket; have towels handy for leaks and cleanup.
- Mask and remove selectively: detach components in manageable sections, stacking components for easy reassembly later and ensuring smooth color schemes alignment.
With a focused plan, you’ll preserve style and create a seamless progression to your refreshed bathroom.
Safe Disconnection Steps
Begin by verifying the plan from Prep Work Essentials and then proceed to disconnect each fixture in safe, controlled steps. You’ll start with the water shutoff, opening taps to relieve pressure, then cap lines to prevent drips. Disconnect the supply hoses carefully, keeping containers ready for any residual water.
Move to the vanity and remove hardware, keeping screws organized. When handling the toilet, follow manufacturer instructions for tank and bowl disconnection, and set it aside on a tarp to protect the floor.
For the shower and tub fixtures, detach handles and trim, labeling pieces for easier reassembly. Maintain bathroom ventilation throughout, and wipe surfaces to prevent moisture buildup.
This approach supports mold prevention and creates a solid foundation for a clean, confident refresh.
Clean Removal Techniques
To remove old fixtures safely, follow a controlled, step-by-step approach that minimizes damage and mess. You’ll feel confident using the right Cleaning solutions and Removal tools to protect surrounding surfaces and plumbing.
- Prepare: shut off water, drain lines, and cover nearby areas with tarps; gather Cleaning solutions and tools.
- Loosen: apply solvent as needed, then unscrew fittings with appropriate Removal tools, keeping parts organized.
- Remove: lift fixtures gently, inspect walls for hidden fasteners, and seal exposed openings to prevent residue spread.
Tips for success:
- Work slowly to avoid snapping plaster or tiles.
- Wipe after each step to maintain a clean workspace.
- Label components for easy reassembly with new fixtures.
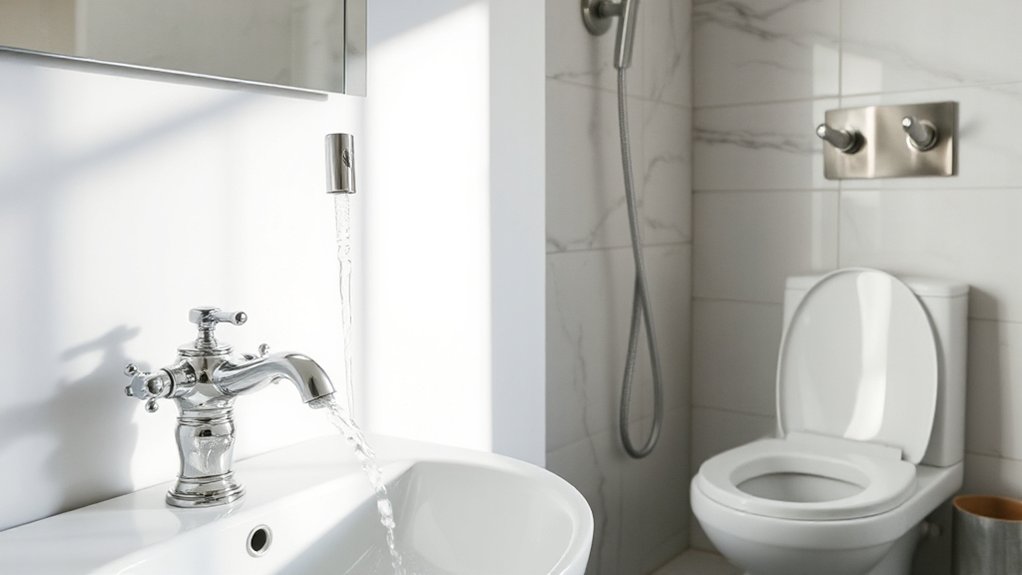
Install Faucets, Showerhead, and Toilet
Upgrading your bathroom starts with installing the new faucets, showerhead, and toilet, then testing each connection for leaks and proper operation. You’ll align fittings snugly, seal joints, and verify water supply lines are fully shut off before testing.
Install the faucet supply lines, attach the showerhead with care, and set the toilet according to the manufacturer’s instructions. Check for drips at every connection and adjust as needed.
After installation, run water to confirm steady pressure and proper drainage. Prioritize bathroom ventilation by ensuring any exhaust vent remains clear and functional, reducing moisture buildup.
Embrace water conservation by choosing efficient fixtures and using the correct flow settings. Your refreshed space feels cohesive, comfortable, and ready for daily routines.
You belong in this updated, dependable bathroom.
Upgrade Lighting, Mirrors, and Storage Details
With the plumbing finalized, you’re ready to elevate the space with lighting, mirrors, and smart storage details. A cohesive bathroom decor starts with lighting that flatters skin tones and highlights color schemes. Choose fixtures in a finish that ties to your hardware and vanity, then add mirrors that widen the room without clutter.
- Install layered lighting (ambient, task, accent) to balance shadows and echo your color schemes.
- Hang a frameless or strategically framed mirror to maximize space and reflect light.
- Integrate compact storage options—recessed shelves, medicine cabinets, and slim cabinets—to keep essentials out of sight.
These choices reinforce belonging by creating a calm, personalized, and functional sanctuary.
Finishing Touches and Cleanup for a Polished Look
Finishing touches seal the deal: you’ll add small, intentional details and a final clean sweep to guarantee the space feels complete.
Start with decorative accents that harmonize your color schemes and emphasize the fixtures you chose. Choose a cohesive mix of textures—matte metal, warm wood, and soft textiles—to build visual depth without clutter.
Place towels, rugs, and soap dispensers in complementary tones, keeping symmetry for a calm, welcoming vibe. Keep surfaces gleaming with a quick wipe-down after use and a weekly wipe of chrome fixtures to prevent water spots.
Store extras out of sight, so counters stay clear. Step back, assess balance and rhythm, and adjust as needed.
The result is a polished look that invites belonging and daily confidence.
Frequently Asked Questions
How Long Does a Full Bathroom Refresh Typically Take?
You’ll typically finish a full bathroom refresh in about 1 to 2 weeks, depending on scope. You’ll factor in bathroom lighting and tile selection, coordinating schedules, and keeping the space usable while updates unfold.
Can I DIY All Plumbing Connections Safely?
You can DIY some minor plumbing, but you shouldn’t tackle all connections yourself. For safety, consult a pro for critical parts while you design tile patterns and color schemes that reinforce your confident, belonging bathroom refresh.
What’s the Best Order for Fixture Replacements?
Did you know 60% of remodels fail to match fixtures? Start by shower, then toilet, vanity, and finishes. You’ll maintain color coordination and compare fixture styles as you go, ensuring a cohesive look and smooth, efficient replacements.
How Do I Avoid Water Damage During Upgrades?
You protect yourself by using waterproofing techniques and proper moisture barriers, then monitor for leaks to prevent mold. Inspect periodically, use quick-dry materials, and insist on professional membrane applications; this keeps your bathroom safe, durable, and mold-free for everyone.
Are Permit Requirements Needed for Minor Remodels?
Yes—permit exemptions exist for minor renovations, but rules vary by jurisdiction, so verify now before you start. You might avoid delays if your project stays within limits; anticipate questions, stay organized, and document your compliance.
Conclusion
You stand back and watch the bathroom shed its old heartbeat for a brighter one. New fixtures gleam like fresh droplets after rain, faucets whispering smooth, confident streams. A showerhead rain-kisses tile, a toilet sits with quiet certainty, lighting frames everything in clean, inviting glow. Mirrors reflect your refreshed confidence, storage hides nothing but keeps essentials close. You feel lighter, organized, ready to start the day with intention—each detail a small triumph, every finish a promise fulfilled. Your refreshed bathroom, yours to enjoy.