
To refresh your bathroom with new tiles, start by defining clear goals and success metrics, like durability, look, and easy maintenance. Choose moisture-rated tiles that suit your style, then plan a layout that fits your space and light. Set a realistic budget and timeline, gather essential tools, and pick complementary grout and sealants. Clean as you go to prevent staining, and address issues like flatness and moisture early. Stay organized, and you’ll uncover practical steps that lead to a professional finish as you proceed.
Define Your Bathroom Tile Refresh Goals and Success Metrics
To refresh your bathroom tiles effectively, start by defining clear goals and concrete success metrics. You’ll determine what success looks like before a single tile is chosen, ensuring every decision aligns with your space and your routines.
Identify the key outcomes: improved durability, a specific aesthetic, easier maintenance, and a refreshed feel that supports daily confidence.
Translate these into measurable targets—tile texture that feels comfortable underfoot, grout color that anchors the room, and a maintenance plan with realistic timelines.
Set benchmarks for cleaning frequency, stain resistance, and color retention over time.
Track progress with photos and a quick checklist.
When you specify these criteria, you create a shared standard for yourself and your team, fostering belonging through purposeful, accountable action.
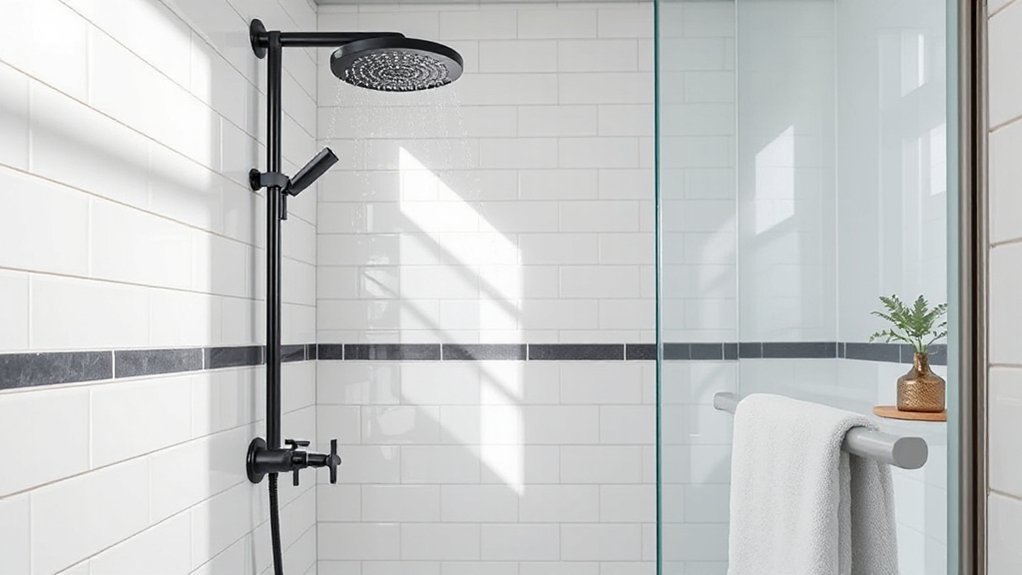
Choose Moisture-Rated Bathroom Tiles That Fit Your Style
Choose moisture-rated tiles that align with your style, so you meet both performance and design goals. Consider the moisture rating, tile type, and how the look fits your bathroom’s vibe and traffic.
This is where practical selection of Moisture Rating Essentials, Style Meets Moisture Needs, and Tile Type Considerations starts shaping a durable, cohesive result.
Moisture Rating Essentials
When selecting tiles for a moisture-prone bathroom, prioritize ratings that match the environment: look for tiles labeled as moisture-rated or suitable for baths and showers. You want reliability you can trust, not guesswork. Check the tile’s water absorption, breaking strength, and slip resistance, then verify installation guidance for wet areas.
Prioritize products with proven durability in humidity-rich conditions, and favor formats that minimize grout joints where possible to reduce permeation paths. Your goal is a cohesive, low-maintenance system, so pair tiles with appropriate moisture barriers and compatible sealants.
Balance aesthetics with performance: choose tones and textures that feel timeless, while supporting easy cleaning and long-term hygiene. Focus on humidity control, consistent product specifications, and documented test results to reinforce your bathroom’s lasting comfort and value.
Style Meets Moisture Needs
Pair moisture-rated tiles with your style goals by narrowing options to finishes that tolerate humidity without sacrificing personality. You’ll balance practicality and aesthetics by choosing textures, tones, and patterns that suit your bathroom decor while resisting common moisture challenges.
Consider matte finishes for slip resistance and contemporary warmth, or glossy looks for brighter, cleaner feels—each with proven moisture performance.
Pair colors with your lighting and storage, so the space feels cohesive, not competing.
Ventilation needs matter; guarantee an exhaust fan meets square footage and humidity levels to protect grout and adhesives.
When in doubt, test grout sealants and tile edge treatments in humidity simulations.
With intentional selections, you create a space that feels like you—durable, purposeful, welcoming to every guest and member of your home.
Tile Type Considerations
Moisture-rated tiles aren’t a one-size-fits-all choice; your goal is to match performance with personal style. When choosing tile types, prioritize moisture resistance without sacrificing form. Porcelain and ceramic are reliable staples, but consider actual porosity, slip resistance, and how you’ll clean grout lines.
Look at finish options that suit your bathroom’s traffic and lighting—matte hides water spots, while glazed surfaces offer color longevity. Think about tile color in relation to room size and mood; lighter shades can widen a compact bath, bolder tones create focal points.
Don’t overlook grout options, as they influence maintenance and cohesion. Select grout with resistance to cracking and staining, and opt for color that complements your tile while concealing routine wear.
Your informed choice reinforces belonging to a thoughtfully designed space.
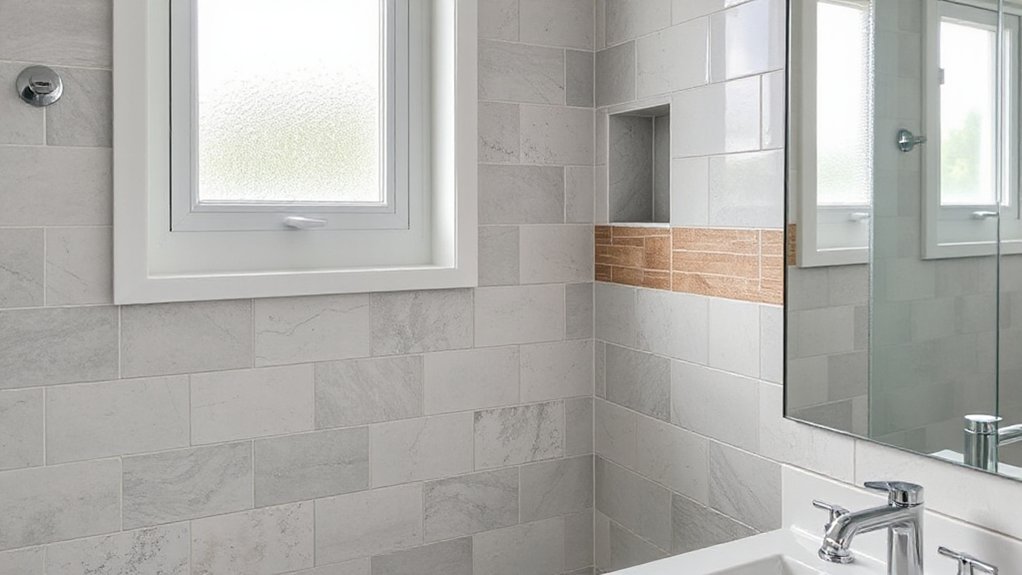
Decide on a Layout That Suits Your Space and Light
To design a layout that fits your bathroom’s footprint and lighting, start by mapping the room and noting windows, doors, and fixed features. Then prioritize traffic flow, storage access, and shower or tub location to minimize disruption later.
Consider vertical dynamics: mirror placement, towel bars, and lighting that flatters the space while avoiding glare. Visualize zones for dirt-prone tasks and quiet, relaxing areas, and test sightlines from multiple angles.
Use decorative accents strategically to anchor focal points without crowding. Plan color coordination across tile, cabinetry, and accessories so hues feel cohesive under varying light.
Draft a simple sketch and measure critical clearances, ensuring doors open freely and fittings don’t crowd aisles. With a thoughtful arrangement, your refreshed bathroom gains both function and a welcoming sense of belonging.
Set a Realistic Budget and Timeline for Tiling
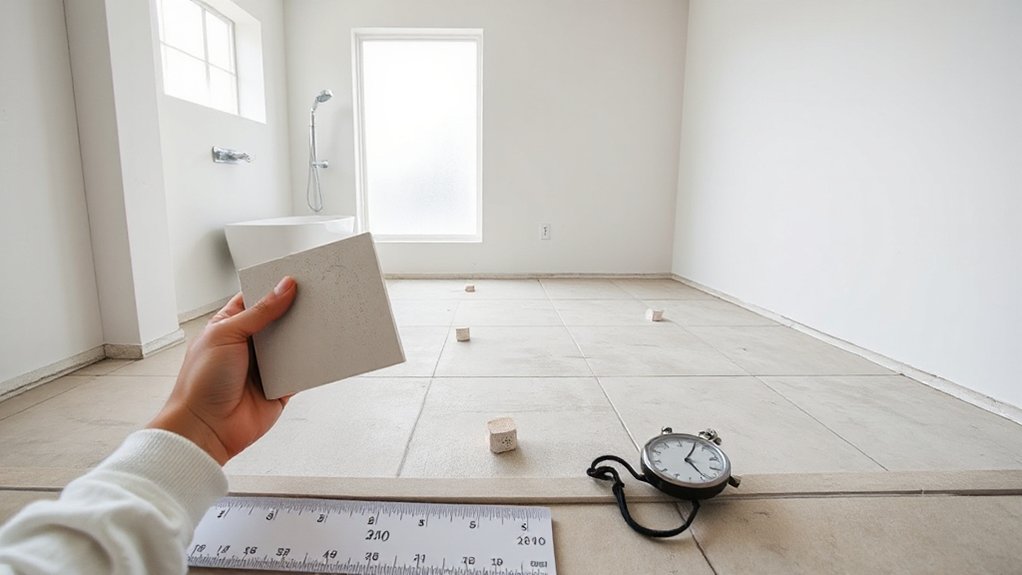
Set a realistic budget now so you know what’s feasible and where to allocate priorities.
Map out a tiling timeline with clear milestones and built-in buffers for delays or material shortages.
You’ll stay in control by tracking costs, estimating labor needs, and adjusting as you confirm product choices.
Set a Realistic Budget
Before you plunge into tiling, set a realistic budget and timeline that align with your scope and priorities. You’ll allocate funds for materials, tools, and potential trades, then build in a contingency—10% is prudent.
Prioritize components that affect daily use, like durable tiles and reliable grout, while forecasting labor costs if you’re hiring help. Consider bathroom lighting and ventilation options early; good lighting can reduce waste and errors, and proper ventilation prevents mold and costly re-tiling later.
Set phasing rules: purchase essential supplies first, reserve a fund for unexpected needs, and schedule work around plumbing or cabinet install windows. Track expenses in real time, and adjust as scopes shift.
A clear budget keeps motivation high and outcomes aligned with your home’s value and your sense of belonging.
Establish Tiling Timeline
Establishing a tiling timeline keeps your project on track and avoids costly delays. You’ll start by outlining key milestones: measurements, material orders, and installation windows.
Set a realistic schedule that accounts for delivery times and curing periods, with buffers for unexpected setbacks. Allocate time for surface prep, waterproofing, and tile layout planning, ensuring you test tile color and grout options early in the process to align expectations.
Communicate clear responsibilities to helpers or contractors and confirm access constraints, so crews aren’t stalled.
Track progress with a simple checklist and adjust as needed, keeping momentum without rushing details. A concise timeline reduces stress, reinforces quality, and helps you feel a sense of belonging as your bathroom transformation progresses.
Gather the Tools and Materials You’Ll Need
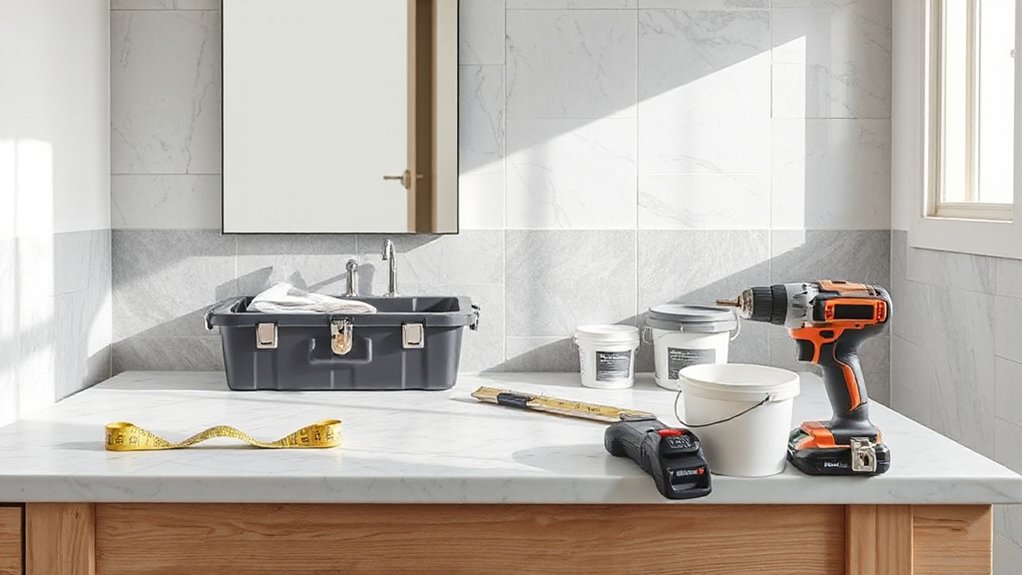
To start, gather everything you’ll need: tools like a tape measure, utility knife, level, notched trowel, grout float, and sponge, plus materials such as tiles, thinset mortar, grout, spacers, and backer board if you’re replacing substrate.
You’ll also want a pry bar, margin trowel, and a mixer or drill with a paddle for even mortar. Decide on decorative accents and color schemes now, so selections stay cohesive.
Group items by task: layout, cutting, mixing, setting, grouting, sealing.
Keep a dedicated workspace with drop cloths and a safety kit—gloves, goggles, mask. Label tile batches and mixed mortar containers to avoid mismatches.
Plan for waste disposal and storage of leftover materials. Finally, verify ventilation and lighting; clear sightlines help guarantee precise cuts and confident placement.
Prepare Walls and Floors for Tile Installation
You’ll inspect walls and floors for flatness, clean them thoroughly, and repair any damage before you start tiling.
Keep doors, fixtures, and surrounding areas protected with drop cloths and tape to prevent accidental damage.
Inspect and Prep Surfaces
Before you lay a tile, inspect every surface and address any issues that could affect adhesion. You’ll check walls and floors for flatness, moisture, and cleanability, then plan repairs with precision. Remove loose paint, flaking plaster, and old caulk; fill gaps with a compatible patch and let it cure fully.
Sweep, vacuum, and wipe to remove dust before prime or sealant. Test for moisture in walls if you’re tiling a shower or wet wall; address any persistent dampness first.
Choose a substrate-appropriate thinset and grout, considering color combinations to confirm a cohesive look. Confirm substrate rigidity to prevent cracking and inspect for any movement clues.
Finally, verify tile durability expectations align with usage and maintenance.
Protect Areas During Tile Work
Cover floors with drop cloths or rosin paper to catch spills and grit, and remove nearby valuables to reduce risks.
Plan dust containment by isolating the work zone with negative pressure if possible, and run a dedicated trash path to a bin outside the area.
Maintain clear access routes for airflow and emergency exits.
This careful preparation reinforces a professional standard, helps you feel confident, and demonstrates respect for your home and guests.
Remove Old Tile Without Damaging the Substrate
Carefully remove the old tile while preserving the substrate by breaking the job into controlled steps. Begin by scoring grout lines to weaken bonds, then choose a proper chisel setup to minimize substrate impact. Use a carbide-tipped hammer and a pry bar with guards to keep edges intact.
Work gradually, lifting tiles in small sections rather than prying large chunks, so you don’t shock the substrate. Keep a masonry bucket handy for debris, and vacuum frequently to avoid grit embedding.
When tiles loosen, switch to a bolster bit on a drill to cut through stubborn spots without hammering. Wear eye protection and a dust mask; protect adjacent walls with painter’s tape.
Tile removal demands patience; protection of the substrate guarantees a stable, clean start for installation.
Repair, Patch, and Level Surfaces for a Clean Install
To guarantee a solid install, assess the substrate for flatness and repair any divots, cracks, or high spots before tiling. Begin by washing the surface and letting it dry. Then true low areas with a Portland cement mortar patch and feather edges to meet surrounding planes.
Fill minor irregularities with a skim coat, sanding smooth once cured. Seal porous substrates to prevent moisture wicking, and verify a consistent moisture level across the area.
Use a straight edge or level to confirm flatness within a tolerable gap, and correct high spots with light grinding if needed.
Plan decorative accents and color coordination in advance, ensuring trims align with tile joins. This attention to prep yields a durable, visually cohesive bathroom update.
Plan Your Tile Pattern and Layout With Precise Measurements

Before you lift a tile, map out a precise grid and verify room dimensions. You’ll plan a layout that respects walls, corners, and doors, choosing color combinations intentionally and noting how pattern variations affect perception. This careful setup guides every cut and placement, reducing errors and waste.
- Visualize the end result and mark key reference lines.
- Calculate tile counts with margins for grout lines and waste.
- Align patterns to doorways and fixtures for cohesive flow.
- Document final layout on a sketch to ensure confidence during installation.
A precise plan reinforces belonging: you’ll feel in control, trusted, and part of a craft. Color combinations and pattern variations become your language for a balanced, durable, and stylish bathroom refresh.
Use Spacers, Levels, and Guides for a Precise Finish
While you’ve mapped a precise pattern and layout, the next step is to lock in the execution with tools that keep rows level and joints uniform. Spacers, levels, and guides aren’t just accessories; they’re the framework that guarantees consistency you’ll be proud to show.
Use spacers at every tile edge to preserve even grout lines, and trust a bubble level to verify straight runs before adhesive grabs. Guides help maintain staggered or centered patterns across progressions, so decorative accents land in sync.
Check frequently, not after the row—precision now prevents backtracking later. This approach strengthens tile durability by reducing lippage and misalignment.
With disciplined tool use, you cultivate a bathroom that feels intentional, cohesive, and worthy of belonging.
Mix and Apply Thinset for Durable Adhesion
Mix a thick, workable thinset and avoid skim or soupy mixes, since mix consistency directly affects bond strength.
Press tiles evenly with steady, even pressure and twist slightly to seat them, ensuring full transfer and minimal voids.
Follow cure time guidelines closely to prevent lippage and compromised adhesion.
Mix Consistency Matters
Mixing thinset correctly sets the foundation for durable tile adhesion, so measure exactly, combine with water per the manufacturer’s guidance, and mix to a smooth, lump-free consistency.
- Master your mix: accurate ratios prevent cracks and revert to a reliable hold.
- Check pot life: work in short, controlled batches to avoid setting too early.
- Match consistency to tile: firmer for large formats, softer for intricate patterns.
- Audit color coordination and tile patterns: uniform shade and joints yield a cohesive look you’ll love.
With the right mix, you’ll feel confident choosing grout tones and pattern layouts that reinforce belonging. Your project becomes a rhythm—consistent, predictable, and done with authority.
Press Tiles Evenly
Spike any uneven areas with gentle taps, not brute force, to avoid lippage. Mix enough adhesive for your working window and keep the consistency steady for predictable results.
As you lay, consider tile patterns to guide alignment and create a cohesive design that feels intentional. Match grout colors to emphasize lines or soften progression, enhancing perceived room size.
Clean excess mortar promptly and check for full bed contact before moving on. Your careful approach builds a durable foundation and a confident, belonging-ready finish.
Cure Time Guidelines
Now that your tiles are firmly set, you’ll want to plan the cure phase to guarantee durable adhesion. During cure, you’ll mix and apply thinset with consistent consistency, avoid overworking, and protect joints from moisture. This discipline preserves Bathroom color and tile patterns, ensuring lasting alignment. Follow these steps to maintain confidence and control:
- Allow the thinset to cure fully beneath tiles before grouting, honoring manufacturer timing.
- Maintain room conditions—stable temperature, low humidity, no drafts—to prevent weak spots.
- Shield the surface from foot traffic or moisture for the recommended window.
- Verify edges stay flat and straight as the adhesive cures; reassess if adjustments are needed.
Respect the timeline, stay precise, and you’ll enjoy enduring adhesion and a cohesive bathroom look.
Cut and Fit Tiles Around Obstacles and Fixtures
When you’re tiling around obstacles and fixtures, plan each cut before you make it to minimize waste and guarantee a clean edge. Start by laying full tiles in open spaces to visualize gaps and margins, then mark precise cut lines with a carbide pencil.
Use a tile cutter for straight, repeatable cuts, and a wet saw for curves or tight radii near fixtures. Dry-fit pieces first to ensure accuracy, then tweak if needed.
Pair tiles to create decorative borders that echo room accents, and maintain color coordination by testing grout tones alongside samples. Measure twice, cut once, and use spacers for uniform joints.
Label frequently trimmed pieces for easy reassembly, and set everything aside promptly to keep your project organized and efficient.
Grout, Seal, and Protect Your New Tile
Grout ties the whole tile job together, so start by choosing a grout that complements both the tile color and the shower or bathroom design. To keep surfaces long-lasting, follow thoughtful sealing and protection routines.
1) Seal the grout after curing to prevent moisture intrusion and mold prevention.
2) Use grout coloring if you want a unified look or to highlight tile texture, applying evenly for a smooth finish.
3) Clean tooling lines promptly, then wipe with a damp microfiber cloth to prevent haze.
4) Establish a maintenance rhythm: regular wipe-downs, a gentle cleaner, and a periodic re-seal schedule to preserve color and strength.
Your confident setup protects your investment, reinforces belonging, and keeps your new tile pristine.
Clean as You Go to Prevent Staining and Debris
Keep up the clean-as-you-go habit you started with sealing and protecting your grout. Adopting a steady rhythm helps you prevent staining and debris buildup before it becomes noticeable. Establish targeted cleaning routines that fit daily life, not a slog—wipe high-use surfaces after showers, rinse sinks, and sweep the floor before it dries.
Use a mild, tile-friendly cleaner and a non-abrasive sponge to avoid dulling grout lines. Set aside a designated cloth or sponge for bathroom tasks to deter cross-contamination.
Track debris prevention by inspecting corners and vent areas weekly, addressing mortar dust, soap scum, and mineral deposits promptly.
Consistency signals shared ownership of the space, reinforcing belonging and pride in a refreshed, durable tile finish.
Troubleshoot Common Tiling Problems and How to Fix Them
Even with careful installation, tiling can run into issues that slow a bathroom refresh. You’ll fix problems efficiently by prioritizing practical steps, clear choices, and confidence in your plan. Focus on concrete fixes that reinforce your sense of belonging to a DIY-minded community.
- Misaligned edges: re-check layout, trim, and grout lines for a clean frame.
- Color mismatch (tile color concerns): verify batch numbers, blend across sheets, and adjust lighting to read true tones.
- Uneven surfaces: shim high spots, remedy lrow or substrate deflection before adhesive cures.
- Cracked grout: reseal with compatible grout, sealant, and maintenance schedule to preserve longevity.
Remember grout selection matters for moisture zones, and tile color sets the room’s mood and cohesion.
Maintenance Tips to Keep Bathroom Tiles Looking Fresh
To keep bathroom tiles looking fresh, establish a quick, weekly routine that targets high-mossier zones like the shower and vanity backsplash. You’ll wipe grout lines with a mild cleaner, rinse soap scum, and dry surfaces to prevent mineral deposits.
Schedule a monthly deep-clean that focuses on corners, seals, and tile edges, checking caulk for gaps and reapplying as needed. Maintain ventilation after showers to reduce humidity-driven mildew.
When you notice discoloration, treat promptly with a non-abrasive tile cleaner and a soft brush.
For long-term upkeep, pair your routine with smart plumbing maintenance: inspect supply lines for leaks, and replace worn gaskets to protect grout from water damage. This approach supports cohesive bathroom decor and confident plumbing maintenance.
Frequently Asked Questions
How Long Does a Bathroom Tile Refresh Typically Take End-To-End?
A typical end-to-end bathroom tile refresh takes 2–4 days, depending on size and drying times. You’ll apply tile adhesive, set tiles, and choose grout color options carefully to guarantee a seamless, lasting result you’ll proudly share.
Can I Tile Over Existing Grout or Tiles Safely?
Yes, you can tile over existing grout or tiles safely if you assess adhesion first. Start with grout cleaning, then test for looseness; if stable, you can proceed with tile sealing and appropriate thinset, ensuring proper substrate prep.
What Are the Best Tiles for a Small Bathroom Floor?
You’ll want small-format porcelain or ceramic tiles with non-slip texture for safety, choosing tile patterns that visually elongate the room. Pair neutral color schemes with a few accent pieces to create depth, warmth, and a welcoming, belonging-filled feel.
Do I Need a Permit for DIY Bathroom Tiling?
You don’t necessarily need a permit for DIY bathroom tiling, but check local codes first; prioritize DIY safety and tile maintenance, and guarantee electrical and plumbing work is grandfathered or inspected, so you stay compliant and feel truly supported.
Which Grout Type Resists Mold Best in Showers?
Grout sealing with mold-resistant materials best resists mold in showers; you’ll stay confident. You seal after grouting, avoid moisture traps, and feel belonging as you maintain a durable, clean space that endures daily use.
Conclusion
Refresh with purpose, plan with precision, and act with confidence. Define goals, choose moisture-rated tiles, and map a layout that suits your space and light. Budget wisely, time it realistically, and gather every tool you’ll need. Grout, seal, and protect diligently, then clean as you go to prevent staining. Troubleshoot early, fix problems promptly, and maintain consistently. Follow these steps, stay organized, and you’ll achieve a refreshed bathroom that’s durable, stylish, and easy to enjoy. You’ve got this.