
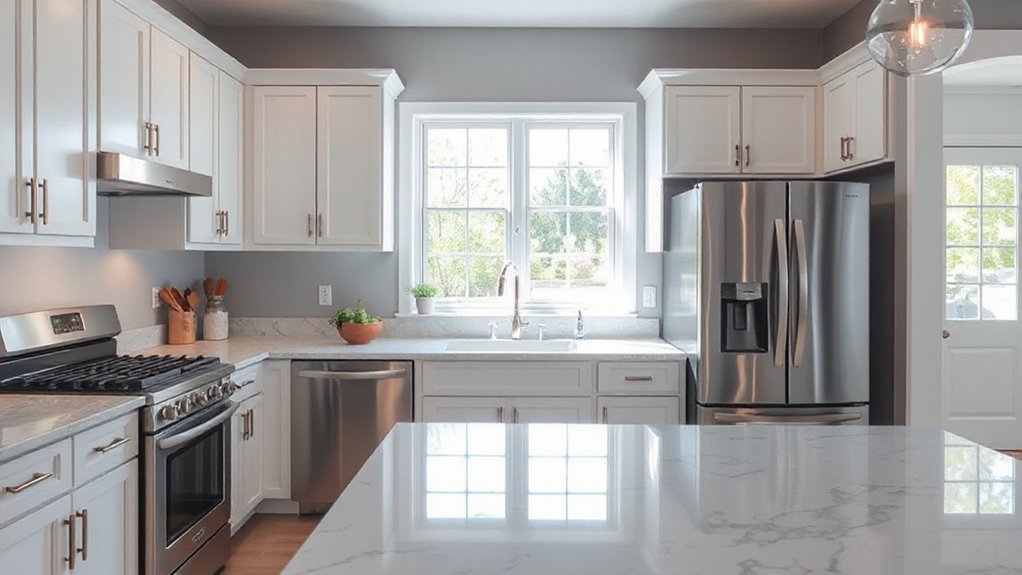
Revitalizing your kitchen without ripping out cabinets is practical and cost-conscious. Start by defining scope and a realistic budget, then assess frames for sturdiness and layout fit. Choose repaint or stain to update finishes, swap doors or hardware, and seal gaps for a vibrant look. Improve workflow with the kitchen triangle and add under-cabinet lighting. Use DIY fixes to save time, or hire pros for tricky elements. If you keep going, you’ll gain even more budget-smart ideas.
Why Refresh Instead of Replace Cabinets
Revitalizing cabinets can be far more practical than replacing them, especially if the frames are solid and the layout works. You benefit from lower disruption, faster completion, and tighter control over renovation costs.
Restoring finishes or repainting can dramatically alter the room’s feel without uprooting plumbing or appliances. You’ll want to contemplate cabinet materials you already own or can source affordably; durable coatings and veneers can yield long-lasting results without a full swap.
By focusing on parts you can reuse—doors, boxes, hardware—you preserve value and reduce waste. This approach also helps you fit a realistic budget while maintaining a cohesive look with existing countertops and lighting.
In short, refreshing is a smart, inclusive path for practical homeowners who value belonging and togetherness.
Define Scope and Set a Kitchen-Refresh Budget
Set a clear budget range you’re willing to spend, with a realistic top cap and a contingency for surprises.
Define your scope boundaries by listing what you’ll upgrade, what you’ll keep, and where you’ll compromise to avoid scope creep.
Tie both elements together with a simple plan: allocate amounts to specific tasks, track costs, and adjust early if bids threaten the ceiling.
Define Budget Range
To define your budget range, start by clarifying the scope of the refresh: which areas and upgrades are in or out, and what you’ll handle yourself versus hire out. This clarity shapes realistic budget planning and prevents overreach.
List priorities (new countertops, hardware, paint, lighting) and optional enhancements (backsplash, smart upgrades). Estimate costs for each item, then add a contingency, typically 10–15%. Use cost estimation as a guiding tool, not a ceiling, so you can adjust as you compare quotes.
Consider financing options or phased purchases to spread expense. Track every estimate against your total range, and revisit as quotes come in.
A well-defined budget range keeps you grounded, fosters confident decisions, and builds a shared sense of ownership with your kitchen-renovation partners. Budget planning, cost estimation.
Scope Boundaries Set
Establish clear scope and a practical budget for the refresh before you pick a plan. You’ll define what’s in and out, then allocate a realistic cap that covers materials, labor, and contingencies.
Tie choices to your home’s color psychology, balancing warm vs. cool tones to feel inviting without overspending. Prioritize upgrades that boost perceived value and durability, focusing on durable surfaces and reliable finishes.
- Set a hard cap and track spend weekly to avoid creeping costs.
- Choose fixes that maximize impact per dollar, like paint, hardware, and durable finishes.
- Confirm material durability with warranties and return policies, so you don’t pay twice.
This approach creates belonging through thoughtful, affordable updates that look cohesive and stay within budget.
Assess Cabinet Frames and Overall Condition
Before diving into upgrades, inspect the cabinet frames and overall condition to determine what’s truly viable. You’ll assess frame sturdiness, hinge alignment, and door warping, noting loose screws and sagging panels. Check for water damage, cracks, fiber board cores, and any delamination that hints at hidden mold or rot.
Measure openings to confirm you can restore function without replacement. Consider hardware compatibility—cabinet hardware that’s worn or mismatched can guide your refresh, not just aesthetics. Test drawer slides, soft-close mechanisms, and door gaps for uniformity.
If frames are solid, you can focus on finishing touches like Paint color choices and hardware updates. Document findings, budget impact, and a realistic timeline to keep your project practical, collaborative, and within reach.
Repaint or Stain: Picking the Right Finish
Choosing between repainting and staining hinges on the look you want and the condition of your cabinets. You’re aiming for a cohesive, welcoming kitchen, so pick a finish that fits your space and budget. Repaint to brighten the room and cover flaws; stain to preserve grain and add warmth. Consider maintenance and surface durability when deciding.
1) Assess color needs and grain visibility to balance character with practicality.
2) Weigh cost, labor, and your time: paint is usually quicker; stain may require more prep for even tone.
3) Choose finish options that align with daily life—wipeable, durable coatings for high-traffic areas.
Update Doors and Panels Without Replacing Cabinets
You can refresh your kitchen by updating door aesthetics, panel finishes, and a smart hardware swap without ripping out cabinets. Start with inexpensive door fronts or overlays, then refresh panels with laminate, veneer, or paint to lift the look without big costs.
Finish with targeted hardware changes to maximize impact—think pulls, hinges, and knobs that suit your style and budget.
Update Door Aesthetics
Updating the cabinet doors and panels can dramatically refresh your kitchen without a full remodel. You’ll maximize impact with simple changes to door aesthetics that feel fresh yet still fit your space and budget. Focus on hardware and profiles that echo your style while staying durable.
- Swap door hardware for a cohesive finish (brushed nickel, matte black, or brass) to unify accents across hinges and pulls.
- Tighten or replace cabinet hinges to improve alignment and operation, giving a smoother, like-new feel.
- Consider a lightweight paint or stain to breathe new life into your cabinets, enhancing their appearance without adding significant weight or cost.
These small updates can make a big difference in transforming your kitchen’s overall look with minimal effort.
Refresh Panel Finishes
If you’re aiming for a refreshed look without tearing out cabinets, panel finishes are a smart lever to pull. You’ll start with a consistent palette across doors and adjacent panels to strengthen cabinet aesthetics. Choose finishes that mimic wood grain, matte paints, or subtle glazes for depth, then test samples on small areas to confirm color and sheen under your lighting.
Prepare surfaces by cleaning, sanding, and sealing any rough spots, which improves adhesion and durability. Budget-friendly options include chalk-based paints, laminate overlays, or vinyl wraps that install with minimal mess.
Precision matters: align edges, careful seams, and uniform coats to avoid visible progressions. The payoff is a cohesive, updated feel that enhances your kitchen’s character without the expense of full replacement.
Hardware Transformation Tips
Even without replacing cabinets, swapping or updating hardware can dramatically change the look and feel of your kitchen. You’ll feel the upgrade without the expense, choosing finishes and profiles that harmonize with your space. Start by auditing your current doors, panels, and drawers to identify the best places for impact.
- Pick complementary Cabinet hinges and Drawer pulls that reflect your style—matte black for modern, brushed nickel for classic, or brass for warm heritage.
- Measure precisely and consider soft-close options to reduce noise and wear. Then mount with level accuracy for a polished, cohesive finish.
- Match hardware to accents like fixtures, lighting, or open shelving, ensuring consistency across all surfaces for a welcoming, belonging-filled look.
Install Hardware That Updates the Look
Swapping in new hardware is one of the quickest, most cost-effective ways to freshen a kitchen without ripping out cabinets. You’ll choose cabinet hardware with care, matching scale to door size and existing profiles. Start with a cohesive hardware styles theme—sleek stainless, matte black, or warm brass—to unite drawers, doors, and the pantry.
Measure hole spacing, and consider updating only high-visibility areas first to maximize impact. Budget-friendly options include standard pulls or knobs, with mid-range finishes that resist fingerprints.
Install is straightforward—screwdriver, spacer if needed, and a quick wipe-down to remove oil residue. This small change sets the tone for the room, improves function, and signals belonging to the space you’ve refined with intention.
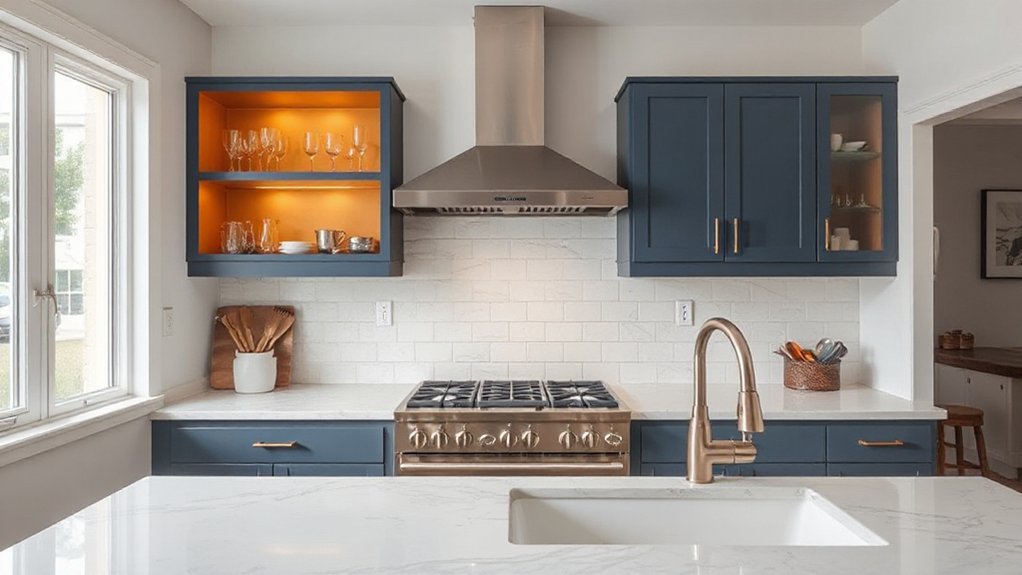
Refresh With a Color-Backed Backsplash
A color-backed backsplash gives you a bold focal point without gutting the room, so you can refresh affordably. Consider bold color choices, then mix in a tile pattern that suits your layout, not your fantasy Pinterest board.
Tidy up with a smart grout transformation to sharpen lines and extend the look.
Bold Color Choices
- Choose a bold accent that echoes your room’s personality, not just a trend, guided by color psychology to evoke warmth or calm.
- Pair the backsplash with cabinet tones you already own; keep costs down by reusing existing tiles or repainting around the area for a fresh look.
- Plan under-budget pops—small tiles, glass, or metallics—that amplify light and perception without a full remodel.
This approach builds belonging through intentional, confident choices, delivering a refreshed kitchen you’re proud to show off.
Tile Pattern Play
Plan a layout that centers the focal tile, then surround it with smaller repeats to maintain rhythm. Consider a color-backed approach: a warm slate, cool white, or muted charcoal works with most cabinets.
Measure precisely, then order extra for cuts and potential breakage. Install in a dry run, taping grout lines to confirm alignment before sealing.
This strategy delivers texture, cohesion, and a polished feel, all while staying budget-friendly and inviting, so you’ll feel a true sense of belonging in your refreshed kitchen.
Grout Transformation
Now that you’ve set a cohesive color-backed backsplash, it’s time to transform the grout to pull the whole look together. You’ll gain a cleaner, unified feel without replacing cabinets, by focusing on practical steps and budget care.
1) Grout cleaning: start with a gentle scrub and a pH-neutral cleaner to remove grime, then wipe with a damp cloth and dry to prevent mold buildup.
2) Color choice: pick a grout color that complements the backsplash—darker grout hides stains, lighter creates brightness, both heighten cohesion.
3) Grout sealing: seal after cleaning and curing to protect your work and extend life.
With these, you’ll enjoy refreshed grout that enhances your kitchen’s belonging and value.
Budget Countertop Updates That Pair With a Cabinet Refresh (Optional)

A quick budget-friendly way to pair countertops with a cabinet refresh is to choose materials that either complement or mimic the existing tones without breaking the bank. You’ll want countertop materials that harmonize with your cabinets’ color, texture, and sheen, so the room feels cohesive rather than piecemeal.
Consider inexpensive options like laminate with high-resolution print or faux stone that mimics marble or granite, or ready-to-install solid surfaces in subtle veining. If you prefer a warmer look, opt for wood-look laminates or butcher-block overlays that resist moisture with proper sealing.
Budget friendly options also include laminated sheets for a quick edge wrap or tile countertops for a durable, affordable surface. Plan installation carefully to limit waste and downtime.
Upgrade Lighting for Function and Mood
Layer in layered lighting to cover task, ambient, and accent needs without overhauling cabinets. Start with dimmable ceiling and under-cabinet lights.
Add a bright task option for prep areas, and finish with a mood fixture like a warm pendant in key zones.
Choose affordable, energy-efficient LEDs and simple controls to tailor function and atmosphere without blowing your budget.
Layered Lighting Options
To make a kitchen feel brighter and more functional, start with layered lighting that combines task, ambient, and accent layers. You’ll create a cohesive, welcoming space without a full remodel, prioritizing efficiency and comfort. Think practical placements, budget-minded choices, and easy upgrades that boost kitchen ambiance.
- Install under-cabinet LEDs for precise task light, reducing eye strain and cutting glare during prep.
- Add a dimmable ceiling fixture or recessed cans to provide soft ambient glow that invites gathering and improves mood.
- Introduce a small, focused accent light on open shelving or artwork to highlight textures and color, enhancing depth and belonging.
Layered lighting ties function to feel, making your kitchen more usable and inviting.
Mood-Enhancing Fixtures
If you want lighting that both functions well and sets the mood, start with fixtures you can control easily and affordably. Begin with dimmable LEDs and a simple switch or smart dimmer to tailor brightness for meals, homework, or cozy evenings.
Choose mood lighting that complements task zones without glare; use warm white (2700–3000K) near seating and warm accents around artwork or glassfront cabinets.
Plan fixture placement to highlight countertops without creating shadows on your work surface, and install under-cabinet strips for steady task light.
Layer effects: a central ceiling light, wall sconces at eye level, and accent pendants above an island.
Prioritize consistency in finish and height for a cohesive feel, reinforcing a sense of belonging while staying on budget.
Maximize Storage With Smart Organizers
Smart organizers help you reclaim every inch of cabinet space without buying new cabinets. You’ll transform clutter into accessible zones with budget-friendly, practical moves that feel like a personal upgrade. Focus on consistency, gravity, and accessibility to build a sense of belonging by making daily tasks smoother.
- Use adjustable dividers and labeled bins to create dedicated spots for lids, spices, and measuring cups, reducing search time.
- Install slim pull-out shelves and pot-stand risers to reveal hidden areas and support even heavy items without tipping.
- Group similar items and keep frequently used tools in front, rotating rarely used pieces to back shelves.
These smart storage ideas deliver organizational solutions with minimal cost, maximizing every inch while keeping the kitchen cohesive and welcoming.
Create Visual Drama With Color Blocking and Contrast
Color blocking and contrast can transform a kitchen refresh without new cabinets by guiding the eye and defining zones with deliberate color pairings. You’ll anchor work zones with a stronger hue on the backsplash or base cabinet accents, and keep surrounding cabinets in a neutral that reads calm and approachable.
Use color contrast to highlight functional areas—prep, cooking, and cleaning—without cluttering surfaces. Choose two primary tones and a supporting neutral, testing swatches side by side in natural light. This approach builds visual harmony, making your space feel intentional and cohesive.
Prioritize budget-friendly options like acrylic paints, contact, or removable decals for temporary drama. When done thoughtfully, you’ll experience a refreshed mood, easier navigation, and a kitchen that welcomes family and guests.
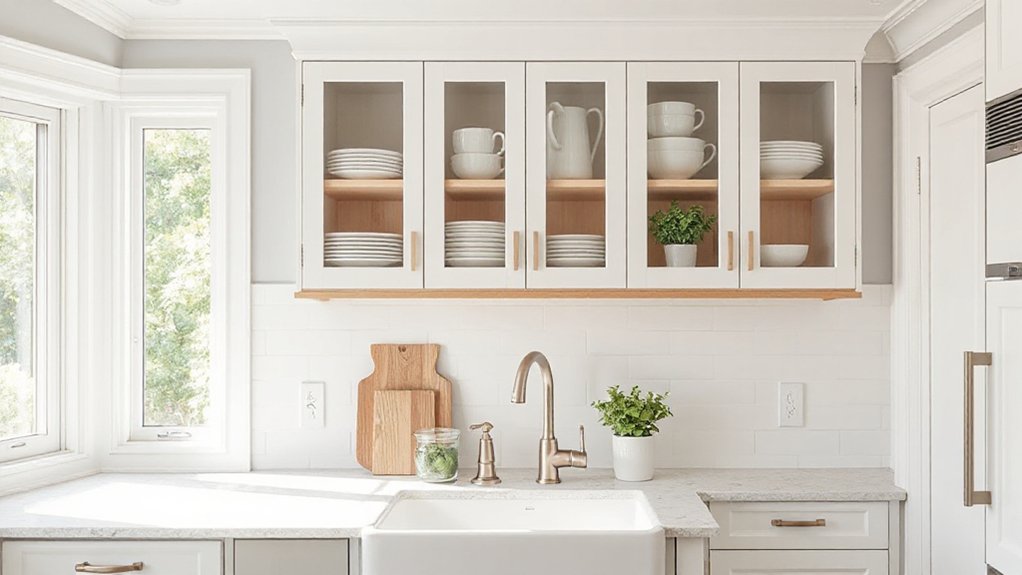
Open the Space With Glass-Front and Glazing Options
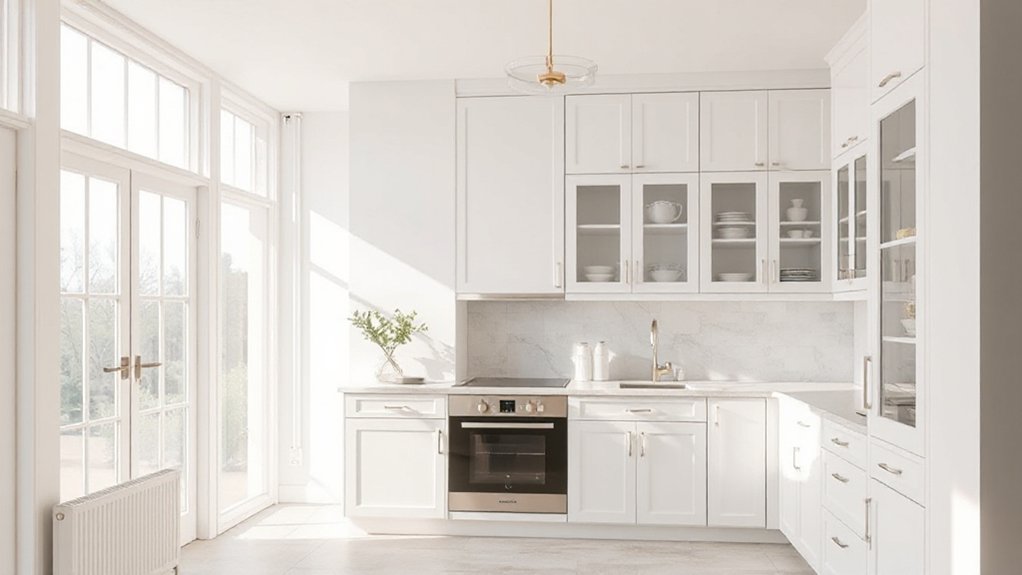
Glass-front cabinets and glazing details are a smart, cost-conscious way to open up a kitchen without a full remodel. You’ll gain visual breathing room while keeping your layout intact, and you can mix glass accents with existing cabinetry for cohesion.
- Install glass-front doors on a few upper cabinets to reflect light and showcase curated pieces, using simple mullions to add character without heavy cost.
- Choose glazing options for the door panels—clear for brightness, frosted for privacy, or a slight amber tint to warm the space.
- Add interior lighting inside glass cabinets to highlight displays and improve navigation while reducing under-cabinet clutter.
These choices stay practical, affordable, and inviting, helping you belong in a brighter, more open kitchen.
Bring in Texture With Natural Elements
You can add natural texture in practical layers by mixing earthy materials like wood, stone, and woven textiles. Start with affordable elements that echo earthy charm—think a butcher-block cutting board, a slate or cork backsplash, and a jute rug—to build depth without a full renovation.
Keep it cohesive by pairing textures in a limited palette so each piece reads as intentional, not cluttered.
Natural Texture Layers
One easy way to add warmth and depth without new cabinets is to layer in natural textures. You’ll create a cohesive, inviting look by mixing fibers, woods, and stone-like finishes that read as timeless rather than trendy. Focus on how texture layering changes light, shadow, and perception of space, not just what it costs.
Keep surfaces practical, yet tactile, so you feel a sense of belonging when you cook and linger.
- Add woven baskets, linen towels, and a cork or jute rug near the sink for soft texture.
- Introduce wood or bamboo cutting boards, butcher block accents, and a pressed-wood tray for warmth.
- Use stone-look tiles, or a granite-esque countertop edge, to anchor color and depth.
Natural textures unite function and comfort without major renovations.
Elements With Earthy Charm
Earthy textures bring warmth and grounding to a refreshed kitchen without ripping out cabinets. You’ll layer tactile elements that stay practical and affordable, focusing on natural surfaces and restrained color.
Start with a concrete or clay-look backsplash or a textured tile to add depth without dramatic costs. Add eco-friendly materials, like reclaimed wood shelves or cork flooring accents, to bring warmth underfoot and a soft contrast to stainless steel.
Introduce vintage accents—a worn oak stool, a ceramic canister, or a weathered cutting board—to create a gathered, belonging feel. Mix linen or burlap textiles for window treatments and chair cushions to soften lines.
Finish with potted herbs and stones for organic texture, keeping maintenance simple and the look cohesive.
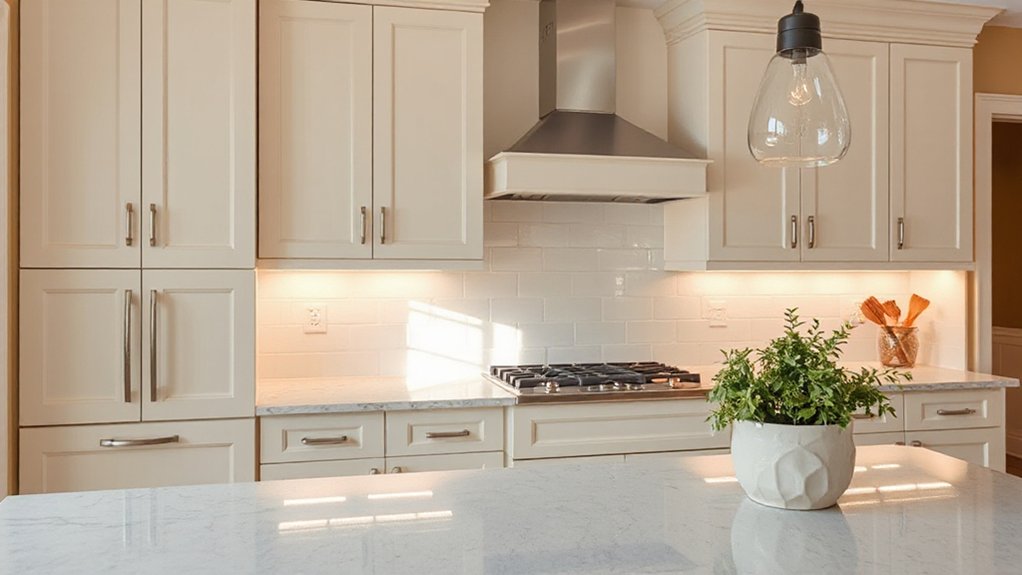
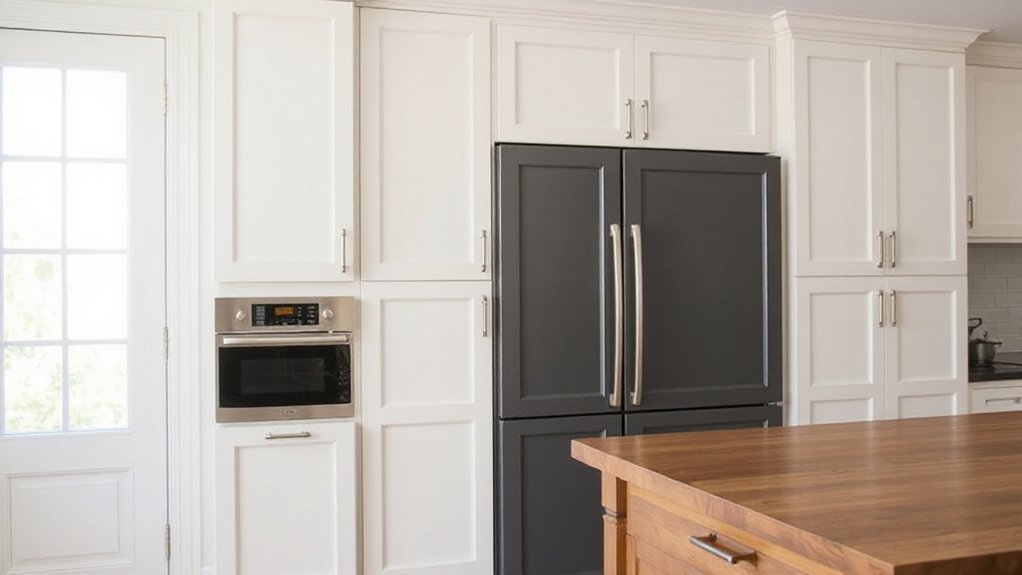
Update Appliances and Fixtures Strategically
Upgrading appliances and fixtures isn’t about chasing the latest trend; it’s about balancing function, cost, and future-proofing. You tailor choices to your space, keeping layout, energy use, and resale in mind. Focus on reliable basics you’ll actually use daily, and avoid gimmicks that won’t age well.
Prioritize thoughtful placement and cohesive fixture selection to create flow and efficiency.
- Appliance placement: position fridge, range, and dishwasher for smooth work triangles, accessible aisles, and door clearance without crowding countertops.
- Fixture selection: choose durable finishes, water-efficient faucets, and energy-saving lighting that complements cabinets and hardware.
- Budget-conscious upgrades: pair affordable, compatible models with existing wiring, and plan phased swaps to spread cost.
This approach invites ownership, reduces friction, and reinforces a shared, practical space.
Finishing Touches That Refresh the Vibe
To refresh the vibe without a full overhaul, start with small, intentional updates that punch above their weight. You’ll notice the room shift when you choose finishing touches that feel cohesive and affordable.
Prioritize items you’ll touch daily: hardware pulls, cabinet labels, and a few decorative backsplashes. Opt for vintage accents—think a restored lantern, brass knobs, or a retro timer—to anchor character without a full remodel.
Complement with eco-friendly materials like cork, bamboo cutting boards, or recycled glass tiles for a subtle surface refresh. Keep color and texture consistent with existing tones to avoid clutter.
Add textiles—a weighted linen curtain, rug, or handmade placemats—that pull the space together and invite gatherings, reinforcing belonging and shared rhythm in your kitchen.
Improve Workflow: The Kitchen Triangle and Ergonomics
When you’re invigorating without a full remodel, the next practical step is to optimize how you move in the kitchen. Focus on the kitchen triangle and ergonomic design to reduce steps, strain, and fatigue while cooking daily. Small shifts here pay off with every meal prep, dish, and cleanup, and they fit a budget-conscious mindset.
Smart storage and deliberate layout help you feel a sense of belonging in a space that works for you.
- Map the triangle: place fridge, sink, and stove in a roughly triangular flow, keeping counters clear between zones.
- Align heights and reach: store frequently used items within easy reach; use pull-out drawers and adjustable shelves.
- Zone by task: create dedicated spaces for prep, cooking, and cleanup to minimize movement and improve focus.
DIY Fixes That Save Time and Money
Even on a tight budget, you can make meaningful gains with simple DIY fixes that save time and money. You’ll focus on practical details that compound value without chaos.
Start with small updates: swap hardware for matte black or brass pulls, pair with labeled organizers inside drawers, and seal gaps with clear caulk to cut drafts. Use Eco friendly materials like low-VOC paints and bamboo cutting boards to refresh surfaces without toxic smells.
For tired cabinetry, re-stain or paint cabinet faces in a single, cohesive tone, then replace doors only where needed to minimize cost. Consider vintage restoration touches—vintage-inspired knobs or enamelware—to add character without overhauling.
Plan, execute with precision, and involve household members to build belonging and shared pride.
When to Hire Pros vs. DIY
Knowing when to hire pros versus DIY is about balancing safety, cost, and time. You’ll decide based on project complexity, your skills, and the impact on daily living, especially kitchen storage and appliance placement.
- Do-it-yourself if tasks are simple, measurements are clear, and you’re comfortable with basic tools.
- Hire a pro if electrical, plumbing, or structural changes are involved, or you need permits to protect safety and resale value.
- Consider a hybrid approach for tricky spots: handle finish work yourself, but bring in a pro for wiring, gas lines, or cabinet modifications that affect capacity and flow.
Maintenance Plan to Keep Your Refresh Lasting
To keep your kitchen refresh looking sharp and performing well, set up a practical maintenance plan you’ll actually follow. Schedule a monthly quick-tune: wipe high-traffic surfaces, check caulk, and tighten loose hardware before it becomes expensive repair.
Use a simple checklist to track tasks and costs, so you stay mindful of your budget. Prioritize eco-friendly materials for cleaners and touch-ups; opt for low-VOC products and reusable cloths to reduce waste.
Refresh small details with vintage accents—regrouted grout, refreshed hardware finishes, or a new dish towel set—without a full redo.
Protect investments by sealing wood surfaces, cleaning vents, and clearing spills promptly.
Build habits in your family, celebrate small wins, and invite friends to share ideas for ongoing improvements.
Frequently Asked Questions
How Long Does a Cabinet Refresh Typically Last?
A cabinet refresh typically lasts 5 to 15 years, depending on use and upkeep.
To maximize cabinet durability, choose durable paint, with proper prep, primer, and sealing coats.
Practice good cleaning routines and avoid harsh abrasives.
Paint longevity improves when you maintain humidity levels and address chips promptly.
You’ll feel a sense of belonging knowing you saved money while preserving value.
Regular touch-ups, quality hardware, and careful light traffic can extend life beyond the lower end.
What’s the Cost Range for a Full Refresh?
A full cabinet refresh typically costs between $3,000 and $12,000, depending on scope and finishes. You’ll want to prioritize Budget planning from the start and Material selection carefully to control costs.
Expect higher quotes for custom glazing or solid wood doors, and savings with refaced doors or thermofoil.
You’ll feel included as you compare options, choose durable yet affordable materials, and plan contingencies so the project stays on track and within reach.
Will Repainting Cabinets Affect Resale Value?
Repainting cabinets can boost resale value if you choose a timeless color and quality finish. Cabinet material matters—solid wood and plywood hold paint better and stay durable longer than particleboard.
Opt for a high-quality primer and durable enamel; paint durability depends on prep and coats. This helps buyers feel a practical, shared space you’ve updated without overflowing costs.
You’ll save, not scrimp, and your home will look cohesive, welcoming, and worth considering in today’s market.
Can I Repaint With Existing Hardware in Place?
Yes, you can repaint with existing hardware in place. First, remove or shield pulls and knobs, then clean, sand, and prime cabinets.
Reassemble only after paint cures. Use high-quality cabinet paint and light coats to avoid drips.
Cabinet hardware should be reinstalled tight and level for a polished look.
For safety, wear a mask and guarantee ventilation during repainting.
This saves money while giving you a refreshed, cohesive feel and a sense of belonging in your space.
Which Finishes Resist Kitchen Zones and Moisture Best?
“Think of it as a shield.” You’ll want finishes that resist moisture and kitchen zones best: high-gloss or satin enamel paints, and solid-surface finishes. But tile keeps more moisture at bay when paired with a waterproof sealant.
For durability, use a tile backsplash with a backer that won’t flex, then seal grout. Make practical choices, cost-conscious, and you’ll feel you belong in a durable, refreshed space.
Conclusion
You can refresh your kitchen without a full tear-out, and you’ll save significant time and money by focusing on finishes, doors, and layout tweaks. If you’re worried about durability, choose high-quality paints, durable veneers, and solid panels, and plan a simple maintenance routine. With clear scope, a realistic budget, and DIY-friendly steps, you’ll get a refreshed look that works—and you’ll avoid the disruption and cost of a full remodel.