
To renovate for better insulation, start by setting clear goals and a realistic budget, prioritizing air sealing first. Inspect exterior walls, roof, and crawl spaces for gaps, moisture, and leaks, and perform an air-leak test to locate weak spots. Choose cost-effective insulation suited to your climate—batt, sprayed, or boards—while checking local codes and incentives. Seal gaps around windows, doors, and penetrations, then upgrade walls, attic, and foundation as needed. You’ll gain durable comfort and ongoing savings—more details ahead.
Set Renovation Goals for Better Insulation
Setting clear goals guides every decision and keeps the project focused on insulation gains. You start by framing measurable targets that align with interior aesthetics while strengthening exterior performance.
Define minimum R-values for walls, attic, and floors, and specify airtightness criteria to reduce drafts without compromising comfort. Map your budget, timeline, and scope to continuous improvement, not chaos.
Prioritize actions that yield the biggest gains first, such as sealing gaps, upgrading insulation, and selecting efficient windows. Tie goals to daily routines you value, so progress feels personal and achievable.
Consider outdoor landscaping as a complementary driver of comfort—proper layout and plantings reduce heat gain and support insulation strategies.
Document milestones, review results, and adjust as needed to sustain belonging and momentum.
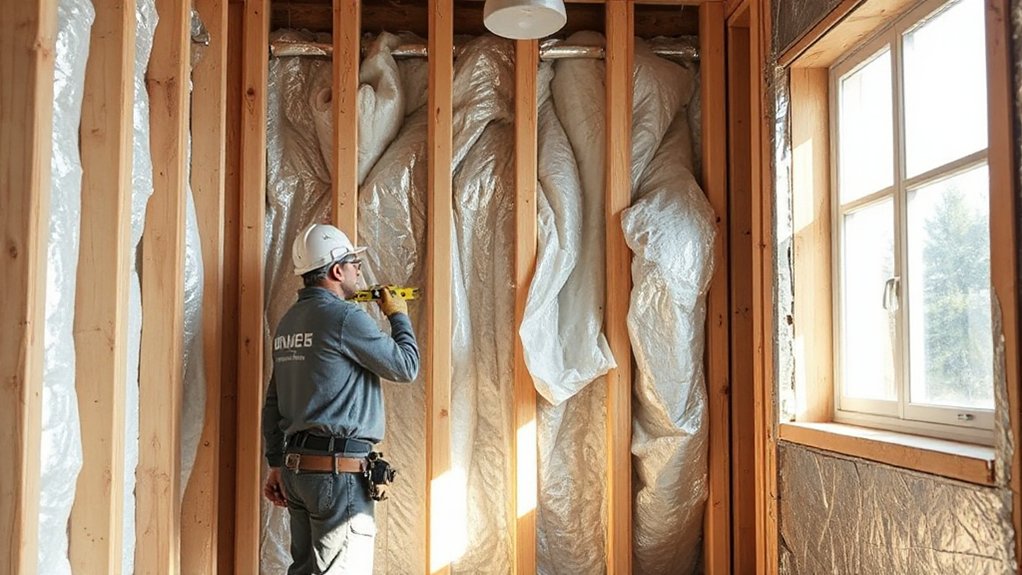
Audit Walls, Roof, and Leaks for a Smart Plan
To move from goal setting to action, you’ll audit your walls, roof, and leaks with a clear, practical plan. You’ll identify weaknesses in wall assessment and prioritize leak detection as a core step, so your plan is actionable and inclusive. You’ll use precise checks, documented findings, and a shared path forward that strengthens belonging among your team and family.
- Inspect exterior walls for cracks, gaps, and moisture signs.
- Test for air leaks and insulation gaps around doors, windows, and penetrations.
- Scan the roofline and attic for moisture, staining, or insulation voids.
- Verify plumbing and appliance connections for hidden leaks and water intrusion.
Choose Budget-Friendly Insulation for Your Climate
Start by mapping your climate needs to budget-friendly options, focusing on practical performance vs. cost.
Compare insulation materials for R-values, installation ease, and long-term savings, so you pick the best value for your area.
Check local code requirements early, and align your choice with regional energy programs and incentives.
Budget-Friendly Climate Planning
Choosing budget-friendly insulation tailored to your climate saves money now and keeps your home steadier year-round. You’ll plan with purpose, prioritizing simple steps that deliver steady comfort and shared responsibility. Integrate energy-aware choices into daily living, and you’ll feel a community of like-minded homeowners moving in the same direction.
1) Assess seasonal extremes and flag high-use zones for targeted upgrades
2) Match comfort goals to affordable materials and local rebates
3) Prioritize energy efficient lighting and sustainable building materials for long-term gains
4) Schedule phased improvements to spread costs without sacrificing performance
This approach keeps costs predictable, reduces waste, and reinforces belonging to a practical, forward-thinking group. You’ll sleep easier knowing your plan supports climate resilience and neighborly stewardship.
Insulation Material Comparisons
With budget in mind, selecting insulation that fits your climate means weighing material performance against cost. You’ll compare options by expected R-values, installation ease, and how long each choice lasts.
Consider batt, sprayed, and board forms for typical climates, but prioritize products with consistent insulation durability under your seasonal patterns. You want comfort without overpaying, so balance initial price with long-term savings from reduced heat loss and draft control.
Look for materials that resist moisture, mold, and pests, yet maintain breathable air barriers where needed. Material sustainability matters too: opt for products with recycled content, low embodied energy, and clear recycling guidance.
In practice, choose a solution that aligns with your home’s envelope, your budget, and the sense of belonging you’re building through reliable, responsible renovations.
Local Code Considerations
Local code requirements can make or break your budget, so start by checking how insulation rules vary by climate zone and jurisdiction. You’ll align with Local code considerations and guarantee legal compliance from day one, preventing costly rework later.
Know the minimum R-values, ventilation, and fire safety standards that apply to your project, and verify permits before you drill in. Use a practical, budget-minded approach to select materials that meet code without overspending.
The following steps help keep you compliant and confident:
- Confirm climate-zone requirements and permit needs
- Compare tested products for code-approved performance
- Document installation methods that meet listed standards
- Schedule inspections at key milestones to ensure ongoing compliance
Seal Air Leaks Before You Insulate
Start by identifying air leaks around doors, windows, and attic hatches. Then seal gaps strategically with appropriate materials.
Once you’ve blocked the leaks, test the envelope to confirm tightness before you insulate.
This order—Identify, Seal, Test—ensures you don’t waste insulation on a leaky shell.
Identify Air Leaks
Identifying air leaks is the essential first step before insulating because leaks waste heat and undermine insulation’s effectiveness. You’ll improve comfort and feel more confident when your home seals tightly, preserving air quality and efficiency.
Focus on where air moves and how it enters—without overhauling the whole system yet. Air flow matters, and locating weaknesses helps you plan targeted improvements. Pay attention to ventilation systems that unintentionally draw conditioned air out or bring in humidity.
- Inspect doors and windows for drafts and misalignment
- Check electrical outlets, switches, and plumbing penetrations
- Test attic hatches and garage barriers for seal integrity
- Examine chimney and vent pipes for gaps and soffit leaks
Seal Gaps Strategically
Now that you’ve pinpointed where air moves, it’s time to seal gaps strategically so insulation can do its job. You’ll apply targeted Gaps detection to locate remaining openings, prioritizing doors, windows, attic hatches, electrical penetrations, and framing joints.
Use proven sealing techniques: backer rod for large gaps, pressure-rated foam for continuous runs, and caulk for small cracks around trim and moldings. Weatherstripping on operable components locks in conditioned air and reduces drafts.
Don’t overfill; excess materials can trap moisture or crack with temperature shifts. Maintain a clean edge before applying any sealant, ensuring adhesion and longevity.
Confirm consistency across spaces, then proceed to insulation with confidence, knowing the air barrier is tight, predictable, and ready to perform.
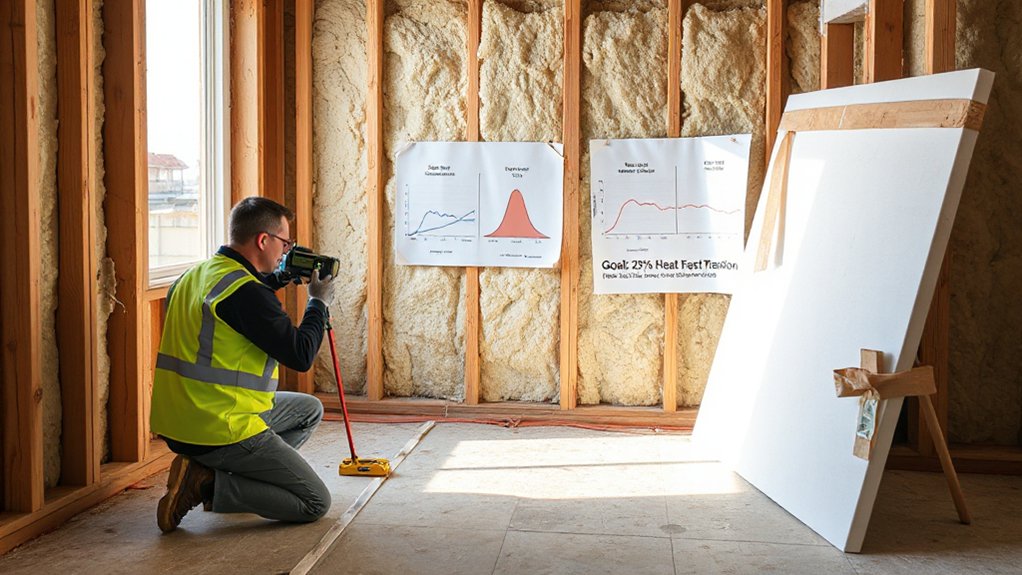
Test Before Insulation
Before you insulate, test for air leaks to confirm the existing barriers are airtight. This step focuses on identifying gaps that could undermine comfort and efficiency.
Conduct insulation testing to establish a baseline, then address leaks before adding any material. Your goal is to achieve a measurable reduction in infiltration and a solid, continuous envelope.
- Perform a blower door test to quantify air leakage and locate weak spots.
- Seal cracks, joints, and penetrations with appropriate materials based on guidance from test results.
- Re-test to verify improvements and confirm the envelope meets target airtightness.
- Document findings and plan subsequent insulation upgrades with evidence-backed accuracy.
These test results guide precise sealing work, ensuring effective insulation and a united sense of homeownership.
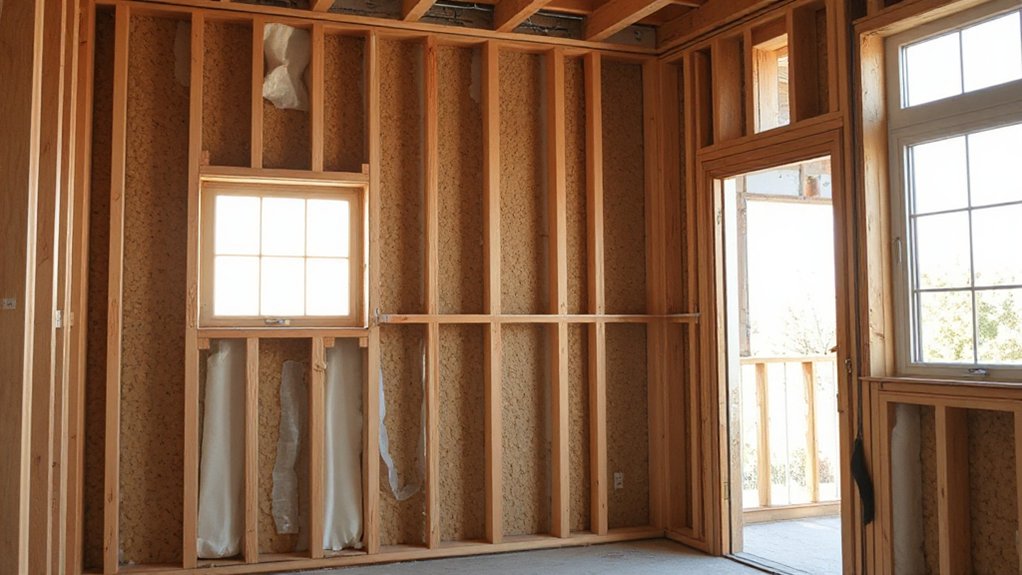
Retrofit Walls for Modern Insulation
To retrofit walls for modern insulation, you’ll start by evaluating your current wall assemblies, identifying gaps, air leaks, and moisture risks. Then choose a method that fits your climate and budget.
You’ll prioritize proven options like exterior insulation, dense-pack cavity fills, or staged interior finishing, depending on structure and access. Guarantee proper air sealing at seams, joints, and penetrations to prevent drafts and heat loss.
Plan for moisture barriers and vapor controls appropriate to your climate, avoiding condensation that can compromise framing. For long-term durability, emphasize Wall reinforcement where studs, sheathing, or gypsum retreat under pressure from added loads.
Coordinate with trades, maintain continuity of barriers, and verify performance with simple, repeatable tests. Your upgraded walls reinforce comfort, efficiency, and a shared sense of secure belonging.
Attic and Roof Upgrades to Stop Heat Loss
Attic and roof upgrades are a high-impact move to stop heat loss, especially in temperate and cold climates. You’ll tighten the shell with targeted practices that deliver lasting comfort and lower bills. Focus on two core elements: attic ventilation and roof insulation techniques, applied with discipline and care.
- Inspect and upgrade soffit and ridge vents to ensure balanced airflow.
- Seal gaps around penetrations and baffles before adding insulation.
- Choose high-performance roof insulation techniques, such as spray foam or dense-pack cellulose.
- Install extra ceiling insulation if access allows, aligning with venting needs and climate.
With these steps, you create a durable, energy-efficient roof system. You’ll feel the difference in warmth, reduced drafts, and a sense of belonging in a well-sealed home.
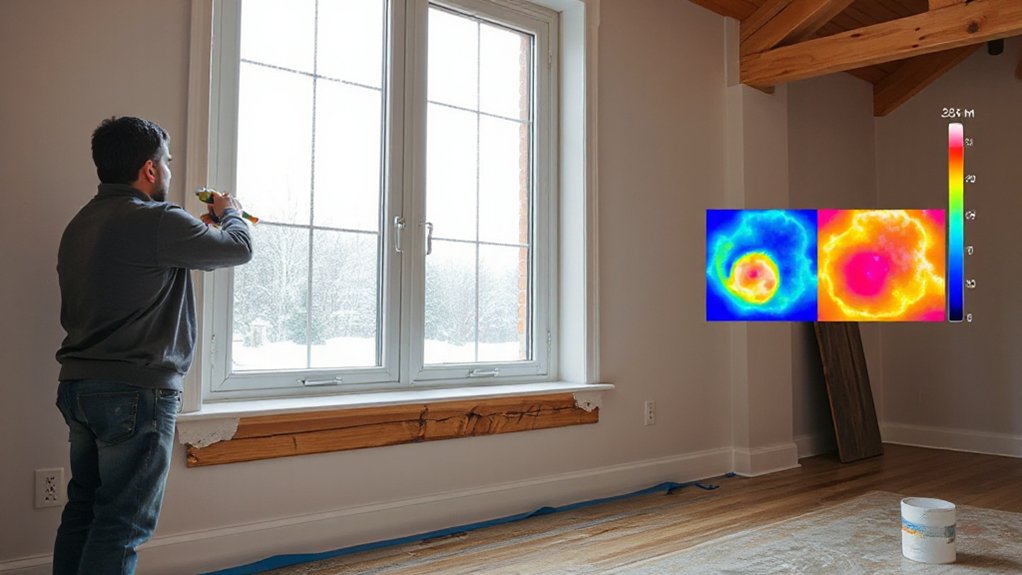
Windows, Doors, and Framing for a Tight Shell
Windows, doors, and framing are critical to a truly tight shell, so start with airtight installation and precise, continuous insulation. You’ll evaluate window framing for weather-tight joints, ensure studs are square, and use proper flashing to prevent leaks.
In door installation, verify hinge alignment, lever placement, and threshold sealing to minimize drafts. Choose high-performance units with low U-values and compatible gasketing, then test for air movement with a simple pressure check.
Align framing to allow consistent insulation continuity—no gaps, no compressions. Use fire-rated, compatible materials where required, and seal all penetrations before drywall.
This approach reinforces a secure envelope you can rely on, fostering a sense of belonging through comfort and steady temperatures. Window framing and door installation become seamless parts of your tight-shell routine.
Insulate Foundation and Crawl Spaces Effectively
Even with a tight shell, you must treat the foundation and crawl spaces as integral to your insulation strategy. You’ll seal, insulate, and vent to maintain a stable indoor climate and prevent moisture buildup. Prioritize straightforward, durable methods that blend with the home’s structure and your budgeting goals.
- Seal gaps at sill plates and rim joists to minimize air leaks.
- Install rigid insulation to reinforce foundation walls, keeping heat loss low.
- Use foundation vents strategically or seal them where unnecessary to avoid drafts.
- Create controlled crawl space access with a moisture barrier, improving airflow without compromising insulation.
These steps create a cohesive barrier, so your crawl space remains dry, accessible, and energy-efficient.
DIY vs Pro: When to Call in the Experts
Deciding whether to DIY or hire a pro comes down to scope, cost, and risk. You assess project complexity, required permits, and nearby hazards. If the task stays within your skill set, you can save time and keep momentum by DIYing, but you must respect limits.
When it crosses into specialized work—structural changes, electrical, or complex ventilation—you should call in a licensed pro to protect safety and code compliance.
Consider smart pricing: compare quotes that itemize labor, disposal, and clean-up, then verify warranties. For material sourcing, confirm product compatibility with existing insulation, moisture barriers, and local climate needs.
Documented timelines, clear communication, and written agreements reduce friction and reinforce belonging. When in doubt, consult a pro for a brief assessment to avoid costly missteps.
Value, Maintenance, and Monitoring for Long-Term Comfort
Value-driven renovations set the baseline for long-term savings and comfort, so you’ll want clear criteria for cost, payoff, and durability.
Maintain a practical schedule for upkeep and inspections to protect performance over time.
You’ll also monitor envelope performance and system efficiency to catch small drops before they become big problems.
Value-Driven Renovation Basics
By focusing on value, maintenance, and monitoring, you guarantee your renovation delivers lasting comfort at a sensible cost. Start by evaluating priorities that matter most to daily living and energy use. You’ll align upgrades with durable performance, not just appearance, and maximize long-term savings. Consider how every choice affects comfort, resilience, and resale value from day one. Implement a simple, repeatable framework to guide decisions, track costs, and measure results.
- Prioritize energy benefits first, selecting Energy efficient windows and Sustainable building materials where they’ll matter most.
- Plan a balanced mix of upfront efficiency and ongoing maintenance to minimize lifecycle costs.
- Establish clear benchmarks for comfort, air quality, and moisture control.
- Schedule lightweight monitoring routines to catch issues early without disrupting daily life.
Maintenance Scheduling Practices
To keep comfort steady and costs predictable, set a simple, repeatable maintenance schedule that aligns with your renovation priorities. You’ll establish a routine that prioritizes energy efficiency, system checks, and timely repairs, so long-term warmth stays reliable.
Schedule seasonal inspections for insulation gaps, air leaks, and window seals, and pair them with quick functional tests of energy efficient lighting and basic plumbing care. Record actions in a clear log to build continuity and shared value with your household.
Keep tasks concise, assign responsibilities, and set reminders that mirror your living rhythm. Emphasize preventive steps over reactive fixes, because consistent upkeep protects comfort and efficiency.
Include Plumbing upgrades where appropriate, and verify system performance after each service cycle.
Monitoring for Long-Term Comfort
Long-term comfort hinges on continuous monitoring and disciplined maintenance. You’ll keep efficiency high by tracking performance, replacing worn seals, and validating insulation integrity over time. Pair smart systems with steady habits to sustain comfort and cut costs.
Here’s a concise plan:
- Install and calibrate Smart thermostats to optimize settings and seasonal changeovers.
- Schedule regular inspections of ducts, windows, and doors, noting any drafts.
- Track energy consumption and indoor temperatures to identify anomalies early.
- Integrate Renewable energy options when feasible, ensuring systems remain balanced and reliable.
Maintain a simple log, review quarterly, and adjust as families grow or seasons shift. With consistent monitoring, long-term comfort becomes part of daily life and belonging.
Frequently Asked Questions
How Long Does a Full Insulation Renovation Typically Take?
A full insulation renovation typically takes 1–4 weeks, depending on size and access. You’ll coordinate with contractors, plan around weather, and use eco friendly materials in historical buildings to guarantee comfort and maintain your sense of belonging.
What Is the Typical Return on Investment for Insulation Upgrades?
Expect a typical ROI of 10–20% for insulation upgrades. You’ll gain energy efficiency and concrete cost savings, plus steadier comfort, which reinforces belonging as your home pays back and performance improves with prudent investment.
Can I Insulate Myself Without Professional Permits or Code Concerns?
You can’t insulate yourself without considering permit requirements and DIY risks. You should verify local rules, obtain permits, and follow code. Skipping them risks fines, unsafe work, and future resale problems, which undermines your sense of belonging in a compliant, responsible team.
Which Insulation Type Is Best for Extreme Cold Climates?
For extreme cold, you choose insulation materials like dense-pack cellulose or spray foams, prioritizing air sealing and moisture control. Climate considerations set your R-values and installation methods; you’ll feel warmer, more confident, and part of the energy-conscious community.
How Often Should Insulation Be Inspected or Refreshed?
Maintenance schedules vary, but inspect annually and refresh every 15–30 years, or when performance dips. You’ll keep your home’s rhythm steady with ventilation improvements and moisture control, ensuring comfort and belonging through durable, trusted insulation care.
Conclusion
You can dramatically boost comfort and cut energy bills by prioritizing insulation upgrades in smart, phased steps. Start with air sealing and focus on walls, roofs, and foundations before adding modern insulation. This approach often yields quicker payback and fewer drafts. An interesting stat: properly sealed homes with modern insulation use up to 15% less energy on heating compared to poorly sealed ones. Stay practical—document gaps, budget, and schedule, then monitor performance after each retrofit phase.