
You’ll start by pinpointing your storage pain points and goals, then measure space constraints like door widths, ceilings, and fixed features. Choose a layout that prioritizes flow and easy access, with built-ins and modular systems that flex over time. Pick durable materials and plan smart lighting for visibility. Budget with care, and map a phased renovation roadmap. Maintain momentum with simple dashboards and tighten routines; more optimization tips await as you continue.
Pinpoint Your Storage Pain Points and Goals
Start by identifying what storage issues matter most to you: cluttered spaces, difficult-to-reach items, or shrinking usable room. You’ll map these pains to concrete goals, then translate them into actionable renovations.
Prioritize projects that yield the biggest daily impact, like wall-mounted solutions, modular units, or clever nooks. As you plan, think about decorative accents and aesthetic integration so upgrades feel cohesive rather than portable fixes.
Define success with measurable results: more floor space, faster item retrieval, and reduced visual chaos. Align your choices with belonging—select finishes, textures, and layouts that reflect you and your household.
Finally, document constraints, costs, and timelines, ensuring every decision moves you closer to a calm, usable, and beautifully organized home.
Measure Space: Key Dimensions, Access, and Constraints
To effectively plan storage upgrades, measure the space for key dimensions, access routes, and constraints—from doorway widths and ceiling height to alcoves, columns, and swing clearance. You’ll map floor-to-ceiling measurements, door swing arcs, and path widths to guarantee smooth navigation around stored items.
Note ceiling height variance to avoid overflows and choose shelves that fit without crowding. Identify fixed features like supports, HVAC, and wiring, plus potential obstructions from vintage fixtures that affect clearances.
Assess exterior access points for loading gear and potential exterior enhancements that don’t impede interior flow. Record measurements with precision, then validate against your planned storage modules.
This disciplined approach builds belonging through confidence, aligning renovations with existing aesthetics and practical needs without overpromising on future adaptability.
Choose a Layout That Maximizes Flow and Accessibility
Start with a layout that creates a clear flow from entrance to storage zones, minimizing detours and backtracking.
Prioritize accessible pathways and easy-reach zones for frequently used items, placing them where they’re most logical in your daily routines.
Use a zone placement strategy to map storage by function, so each area supports efficient grip, grab, and go.
Layout for Clear Flow
Could you easily move from one area to another without backtracking or obstacles? A clear layout prioritizes intuitive paths, logical zoning, and minimal door intersections.
Start with a central core that serves as a hub, guiding you to storage, work zones, and maintenance areas without detours. Corridors should be wide enough for carts, equipment, and pallets, with sightlines that keep you oriented.
Place frequently used items near destinations, and group related tasks to reduce switch time. Consider traffic patterns when adding shelves or cabinets, ensuring doors don’t block walkways.
For aesthetics, fuse interior decor with function by selecting color schemes that demarcate zones while maintaining cohesion. A calm palette enhances focus, making storage feel intentional and welcoming.
Accessible Pathways, Easy Reach
Prioritize accessible pathways and easy reach to maximize workflow. You’ll design spaces where every item has a defined route and a clear stopping point, reducing inches wasted searching.
Start with a logical loop: entry, primary storage, then secondary tasks, so you move smoothly without backtracking.
Use wide aisles and consistent clearance to support Accessible pathways and Easy reach, especially near work surfaces and shelves you use often.
Group related items by function, not height alone, and place frequently used tools at mid-height for quick access.
Consider pocket zones for seasonal or rarely used loads, but keep access open.
Choose sturdy, labeled storage that invites collaboration and shared care.
With thoughtful layout, you’ll boost efficiency, safety, and a sense of belonging for everyone in your space.
Zone Placement Strategy
Effective zone placement centers on routing efficiency and easy access: arrange spaces so each zone supports the next step, minimizing backtracking and travel. You design the flow by clustering related tasks, separating clutter zones from high-use work areas, and positioning storage access near entry points.
Prioritize a logical sequence: dirty prep, storage, inspection, and finish, so you don’t double‑back. In garage organization, place frequently used items within arm’s reach of the door, while seasonal or rarely used goods shift toward back walls or upper racks.
In attic storage, install sturdy, labeled bins and alternating low‑profile shelving to preserve headroom. Cross‑zone sightlines reduce wandering, and lighting follows traffic paths.
This strategy elevates efficiency, safety, and belonging, guiding you toward dependable, well‑ordered spaces.
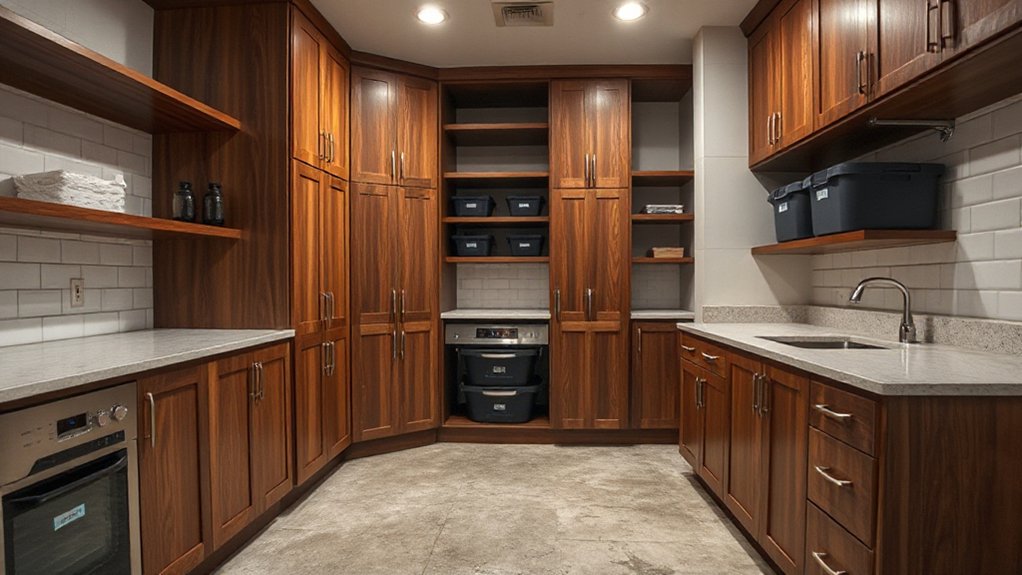
Prioritize Built-Ins and Modular Storage Systems

Start with built-in focus areas to maximize storage without sacrificing floor space. Then map modular solutions that can adapt as needs change.
Prioritize systems that fit your actual daily routines, like reachable drawers, pull-outs, and adjustable shelves.
This approach keeps your spaces efficient, scalable, and easier to maintain over time.
Built-In Focus Areas
- Design around essential routines to minimize rummaging
- Choose modular units that reconfigure with changing needs
- Integrate color cues to define zones and simplify access
- Sharpen alignment between furniture arrangement and storage flow
Modular Storage Solutions
Start with a clear mission: prioritize accessibility, durability, and ease of use. Choose modular components that nestle beside windows, doors, and corners to maximize underutilized areas.
Use precise measurements and naming for each zone—office, laundry, gear—so everyone understands where things belong.
Add decorative accents to soften industrial frames and create a cohesive feel, reinforcing belonging rather than isolation.
Focus on aesthetic enhancements that remain functional, like concealed hardware, aligned edges, and color-matched panels.
Regularly review demand, swapping modules for evolving routines to sustain long-term organization and harmony.
Select Durable Materials and Finishes for Longevity
Choosing durable materials and finishes is essential for lasting storage value; select options that withstand wear, moisture, and temperature swings. You’ll prioritize proven performance, ease of maintenance, and consistent aesthetics that foster belonging in shared spaces.
- Metal shelving with powder-coated finishes for rust resistance and easy cleaning.
- High-density plywood or MDF with moisture-resistant core and durable laminates.
- Epoxy or polyurethane coatings on floors to resist abrasion and stains.
- PVC or composite wall panels that clean quickly and tolerate humidity.
Durability testing guides your material selection, validating load ratings, edge protection, and seal integrity before installation. Commit to a strategic, well-documented process so you feel confident in every choice, knowing the results support long-term storage reliability and a cohesive, welcoming environment.
Integrate Smart Storage Solutions for Everyday Use
To make everyday storage work smoothly, start by designing systems that fit how you actually use the space. You’ll implement Smart technology to automate routine tasks, like inventory tracking and item retrieval, so daily chores feel effortless.
Choose adaptable furniture and modular storage that flex with your needs, not against them. Prioritize intuitive layouts: label zones, group similar items, and keep high-use supplies within arm’s reach.
Incorporate innovative design that blends aesthetics with function, ensuring spaces feel calm and purposeful rather than cluttered. Integrate sensors, timers, and smart bins to reduce waste and misplacement.
Train everyone in the household to return items to their designated spots, reinforcing stability, predictability, and belonging in your renovated storage system.
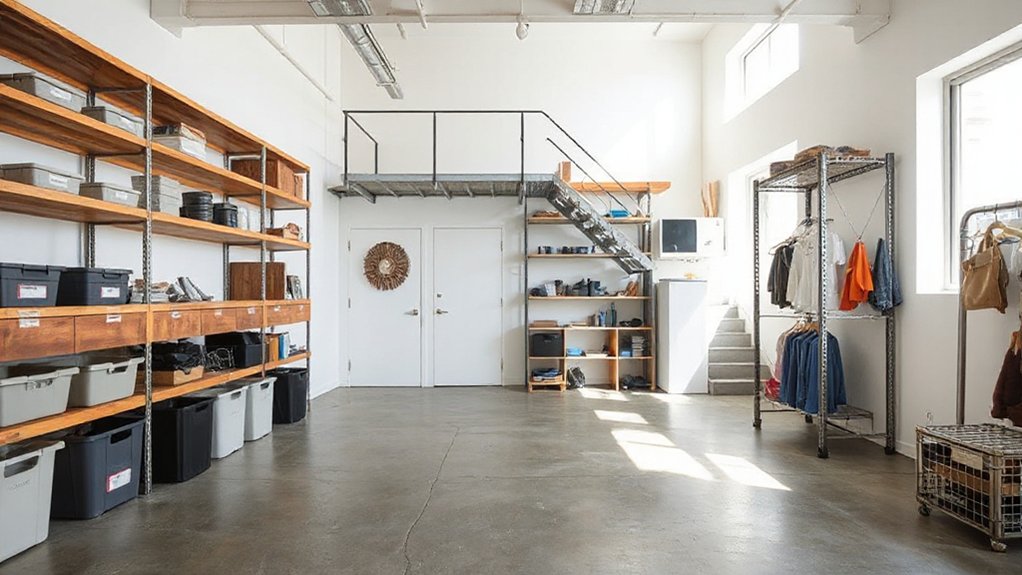
Use Vertical Space and Underutilized Areas
Maximize vertical storage by using shelves that run from floor to ceiling. Keep items organized with labeled bins.
Look for underutilized corner spaces and turn them into pull-out solutions or tall cabinets to free floor area.
Prioritize shelving from floor to ceiling to create continuous storage without clutter.
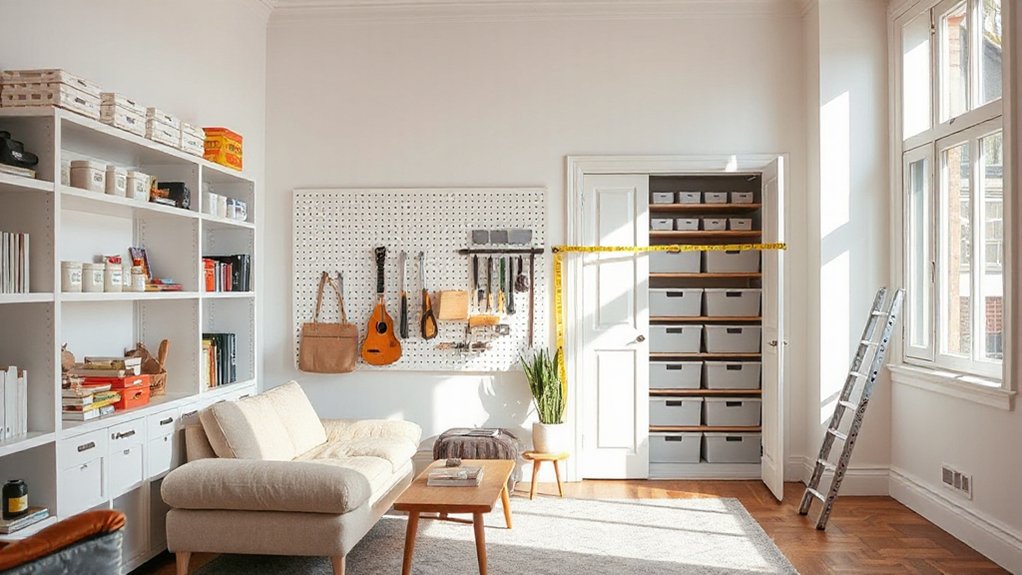
Vertical Storage Hacks
Vertical storage isn’t just about adding shelves; it’s about reclaiming dead space and shaping a more efficient layout.
You’ll maximize every inch by choosing sturdy, high-capacity solutions that blend with your space. Focus on consistency, so items stay visible and reachable, reducing clutter and decision fatigue.
- Install wall-mounted rails for lightweight bins and hooks, keeping floor space clear.
- Use adjustable shelving with labeled zones to fit seasonal items.
- Add ceiling or wall-mounted pegboards for misc tools, cords, and decorative accents.
- Integrate hidden storage behind decorative accents that align with aesthetic considerations.
Underutilized Corner Spaces
Corner spaces often get overlooked, but they’re prime real estate for storage if you treat them as deliberate zones rather than afterthought gaps. You’ll map each nook, measuring height, depth, and access, then tailor solutions that feel intentional rather than DIY afterthoughts.
Use vertical access: reach-ins, corner hooks, and slim cabinets that hug walls without crowding pathways. Prioritize consistency with existing color schemes to create calm, cohesive zones you’ll actually use.
Incorporate decorative accents that signal belonging—paired baskets, woven lids, and subtle lighting to invite routine use. Choose modular pieces that adapt as needs shift, so corners grow with you.
Label zones lightly to reinforce purpose, maintain order, and sustain momentum. With deliberate design, underutilized corners become trusted storage allies, not clutter hotspots.
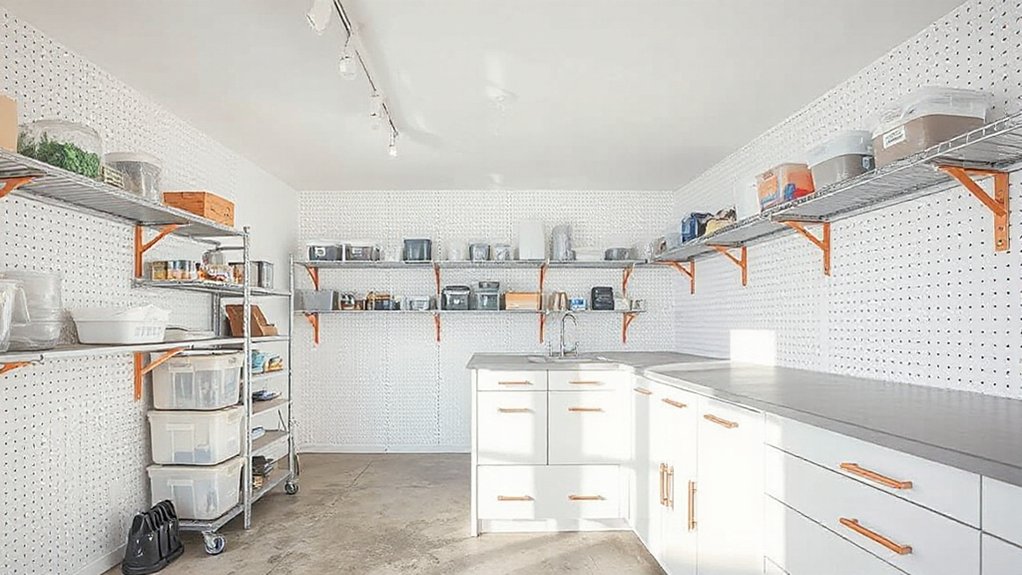
Shelving From Floor To Ceiling
To make the most of every inch, install shelving that runs from floor to ceiling and uses every vertical niche these spaces offer. You’ll maximize storage by staging items in layers, keeping frequently used supplies at eye level and seasonal decor higher or lower for easy rotation. This approach supports a cohesive look that blends vintage decor with modern practicality, strengthening exterior aesthetics through a tidy, intentional exterior display.
- Measure ceilings precisely, then choose adjustable shelves to adapt as needs shift.
- Use uniform bins and labeled containers to maintain order and accessibility.
- Install sturdy brackets and verify load limits to prevent sagging.
- Plan color and material continuity to reinforce belonging and curb appeal.
Plan Lighting for Visibility and Ease of Use
A solid lighting plan starts with your goals: you want clear visibility, safe navigation, and easy access to stored items.
You map zones by activity: frequent grabs near the door, seasonal bins toward the back, and fragile items on protected shelves.
Choose fixtures that deliver steady, bright light without glare, and place them to minimize shadows in aisles and corners.
Prioritize color rendering that helps distinguish labels and fabrics, reducing misplacements.
Layer lighting for versatility: overhead ambient, task lighting for work surfaces, and motion-activated accents along pathways.
Keep wiring tidy and accessible for future updates.
Focus on fixture selection that complements your space without crowding walls.
This approach creates lighting ambiance you’ll trust and ownership you’ll feel in every storage interaction.
Budget Smart: Cost Estimates and Value-Focused Choices
Smart budgeting keeps your storage upgrade on track without waste. You’ll choose cost-efficient upgrades that deliver lasting value, aligning spend with what matters: function, feel, and belonging. Prioritize options that boost aesthetic appeal while staying within your project’s core needs. Use price benchmarks, but don’t sacrifice essentials or comfort.
- Estimate true costs for materials and labor, plus a contingency.
- Compare options by durability, maintenance, and aesthetic impact, favoring luxury finishes where they enhance value.
- Schedule purchases to avoid idle stock and price spikes; time savings equal savings.
- Track progress with a simple dashboard, rebalancing if assumptions shift.
Your budget should reflect strategy, not impulse, ensuring the space feels premium without overspending.
Step-by-Step Renovation Roadmap for Storage Upgrades
Craft a clear, actionable plan by mapping your storage upgrade from start to finish: assess needs, define priorities, and lay out a phased timeline with owners and milestones. You’ll create a practical blueprint that guides every decision, from space reconfigurations to budget guardrails.
Begin with a needs audit, then translate findings into concrete phases: demolition, build, install, and finish. Assign owners for each milestone and set check-ins to keep momentum.
Choose flexible storage solutions that scale with your life, ensuring seamless integration with daily routines. Infuse your project with Creative decor and cohesive Color schemes to foster belonging and motivation.
Establish a validation moment after each phase to confirm alignment with goals, budget, and timing, then proceed confidently to the next fold in your upgrade.
Maintenance Habits to Keep Your Storage Efficient Long-Term
To keep storage efficient long-term, establish a simple maintenance routine you can actually stick to: set a quarterly audit to purge unused items, reallocate tools, and adjust setups as your space or needs change. You’ll stay organized, save time, and feel a sense of belonging as teammates see your care.
1) Schedule quick inspections: test labels, check contents, and rotate items for visibility.
2) Reallocate by frequency: place high-use tools within arm’s reach and store seasonal gear out of the way.
3) Update aesthetics: refresh labels, add clear bins, and implement small DIY tips for a cleaner look.
4) Document changes: keep a simple log to track improvements and future needs. DIY tips, aesthetic enhancements.
Frequently Asked Questions
How Do I Prioritize Storage Needs Within a Tight Budget?
Prioritize multi-functional solutions and prioritize essential items first. Use Budget planning to allocate funds, focusing on high-impact space optimization. You’ll save time, feel supported, and belong as you transform cramped areas into organized, affordable storage that works now.
What Are Best Practices for Hidden Storage Solutions?
Hidden drawers and concealed compartments are your best bets; install them strategically in entryways, walls, and furniture. You’ll maximize storage without visual clutter, feel included, and keep belongings secure, organized, and easy to access every day.
How Can I Ensure Accessibility for All Users?
Did you know 15% of households struggle with accessibility? You guarantee accessibility for all users by applying universal design and adaptive features, designing flexible pathways, adjustable controls, and inclusive signage, so everyone feels belonging and can participate confidently.
Which Materials Resist Moisture and Wear Longest?
Moisture resistant materials span concrete, pressure-treated plywood, and sealed vinyl; wear resistant surfaces rely on epoxy coatings and ceramic tile. You’ll choose durable options, ensuring reliable, shared spaces that feel included, protected, and easily maintained for everyone’s needs.
What Maintenance Schedule Keeps Storage Efficient Long-Term?
You stay on top of it with a steady cadence: perform weekly inventory checks, monthly audits, and quarterly maintenance. This keeps inventory management sharp and space optimization consistent, ensuring you belong to a reliably organized, efficient storage system.
Conclusion
You’ll finish with space that works like a well-tuned tool, not a cluttered shelf. Picture a calm, organized cockpit where every item has a home and every path is clear, like a ship gliding through a harbor at dawn. You’ve aligned measurements, chosen durable finishes, and mapped a lighting plan that catches every detail. When you step back, you’ll feel the quiet efficiency of a system that lasts—steady, ready, and practically timeless.