
To renovate for open-plan living, start with clear goals and a master plan that maps zones, traffic flow, and future needs. Assess structural walls to remove or reinforce, and document load paths with input from a qualified engineer. Layer daylight and lighting—natural light, task lighting, and ambient LEDs—while using cohesive materials. Add flexible partitions, modular furniture, and hidden storage to evolve spaces. Keep safety and disruption in check, and maintain adaptable zones as life changes; you’ll learn how next.
Open-Plan Renovation: Your Step-by-Step Plan

To start an open-plan renovation, define your goals and layout constraints before you pick any design details. You’ll map a clear sequence: assess timing, budget, and space flows, then set nonnegotiables for movement, light, and acoustics.
Create a step-by-step plan that aligns with current design trends while prioritizing material durability. Begin with a coarse layout, then refine with zones that read as cohesive yet distinct.
Specify load paths, electrical access, and plumbing routes early to avoid costly changes later. Choose durable surfaces and modular storage that support ongoing use and future adjustments.
Document decisions, measurements, and supplier contacts in one master file. Maintain open communication with trades, and test ideas with scale drawings or samples.
Your plan ensures confidence, belonging, and a practical path to a connected home.
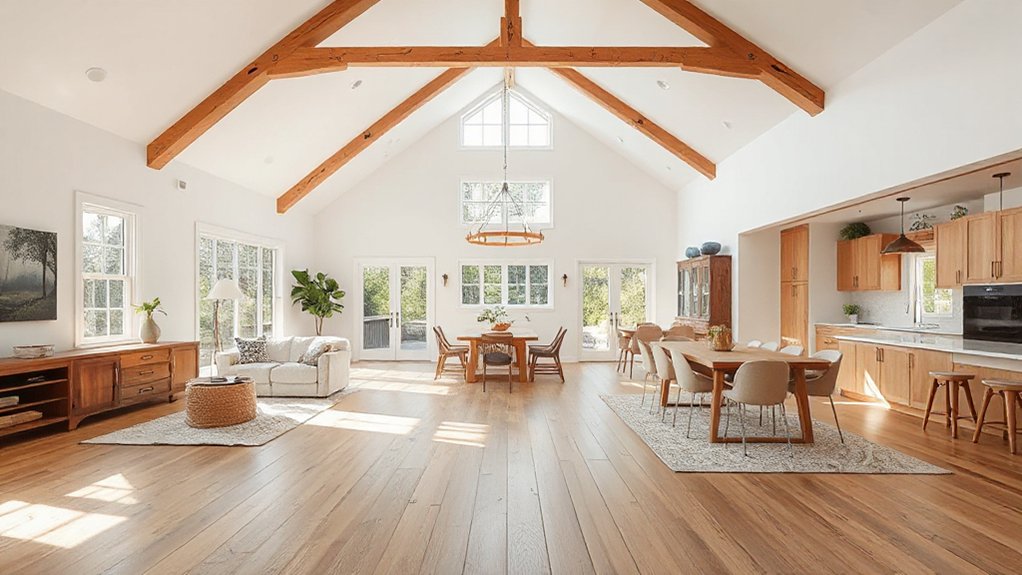
Assess Your Space and Zone the Kitchen, Living, and Dining
Assess your space by taking precise measurements, noting doorways, windows, utilities, and traffic patterns. Then map zones that align with how you live: designate the kitchen for cooking and cleanup, the living area for conversation and gathering, and the dining zone for meals and display.
Use sightlines to keep the flow intuitive, avoiding repeated trips and awkward bottlenecks. Consider how doors, windows, and natural light influence where people linger.
Plan passages with gentle changes in flooring or ceiling height to reinforce boundaries without closing the space. Factor outdoor integration—sliding doors or a covered patios connection—so indoor and outdoors feel one.
Address acoustic insulation where open sightlines exist, ensuring voices don’t bounce harshly between zones. Your layout should invite belonging, practicality, and comfortable, effortless interaction.
Set a Realistic Budget for Open-Plan Renovations
Set a realistic budget early, then allocate it by area and risk. You’ll begin with budget planning that matches your open-plan priorities and lifestyle, not just sticker prices.
List zones—kitchen, living, dining—in order of importance, then assign reliable cost estimates to each.
Use a conservative contingency, typically 10–20%, to cover hidden variables.
Track every line item from fixtures to finishes, so you don’t drift toward scope creep.
Engage trades early to refine cost estimation and identify value options that preserve flow and cohesion.
Compare multiple quotes, but weigh quality and longevity alongside price.
Maintain documentation and a revision log, so teammates share a single financial frame.
A clear budget supports belonging, confidence, and calm as your open-plan vision becomes reality.
Structural Changes: Which Walls to Remove or Reinforce
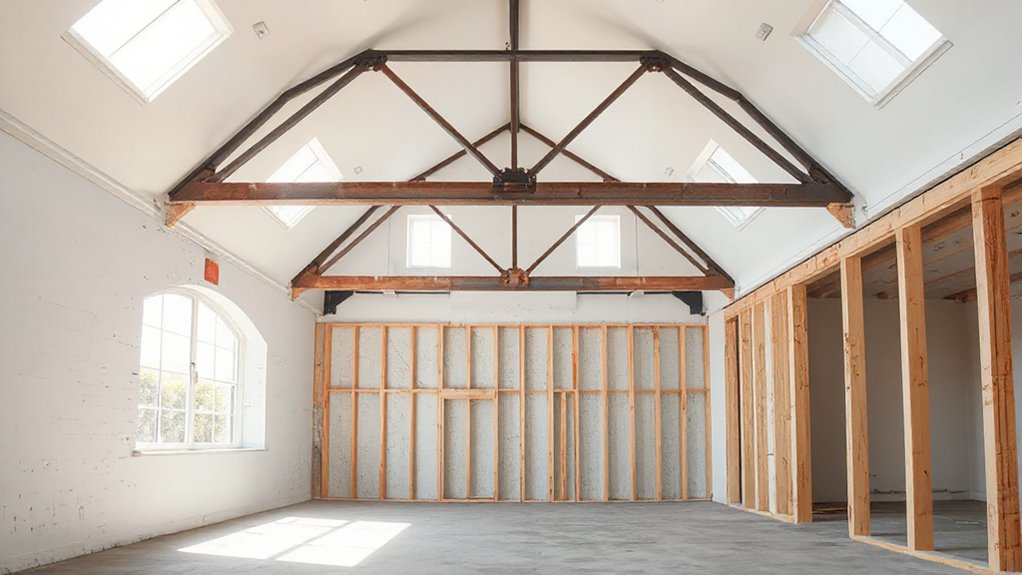
Before deciding which walls to remove or reinforce, map the load paths and structural roles of every candidate wall. You’ll then prioritize safety, sustainability, and future usability.
Begin with a simple load bearing analysis: identify walls that carry floor or roof loads, and distinguish them from non-structural partitions.
For walls that are load-bearing, plan reinforcement or alternative support before removing any section. Consider options like beam spans, headers, or under-floor joist bridging to preserve integrity while creating open sightlines.
Document every change in a clear schematic, so future renovations stay safe.
Communicate with a qualified engineer or architect to confirm calculations and anchors.
Wall reinforcement decisions should align with your open-plan goals and long-term residency needs.
Open-Plan Lighting: Layer Daylight, Task, and Ambient
To create a truly flexible open-plan interior, layer daylight, task, and ambient lighting so spaces feel bright, functional, and comfortable at all times.
In practice, map zones for natural illumination first—large windows, skylights, and light shelves—then add layered layers that adapt to activity. Use dimmable LED fixtures and color temperatures around 2700–4000K to support mood enhancement without glare.
Position task lighting at desks, counters, and reading nooks, ensuring shadows fall away from work surfaces.
Integrate ambient sources through coves, wall washers, or concealed canning where appropriate, to soften progressions between zones.
Control schemes should be intuitive: wall switches, sensors, and an app tie natural and artificial light together, fostering belonging through consistent, comfortable brightness.
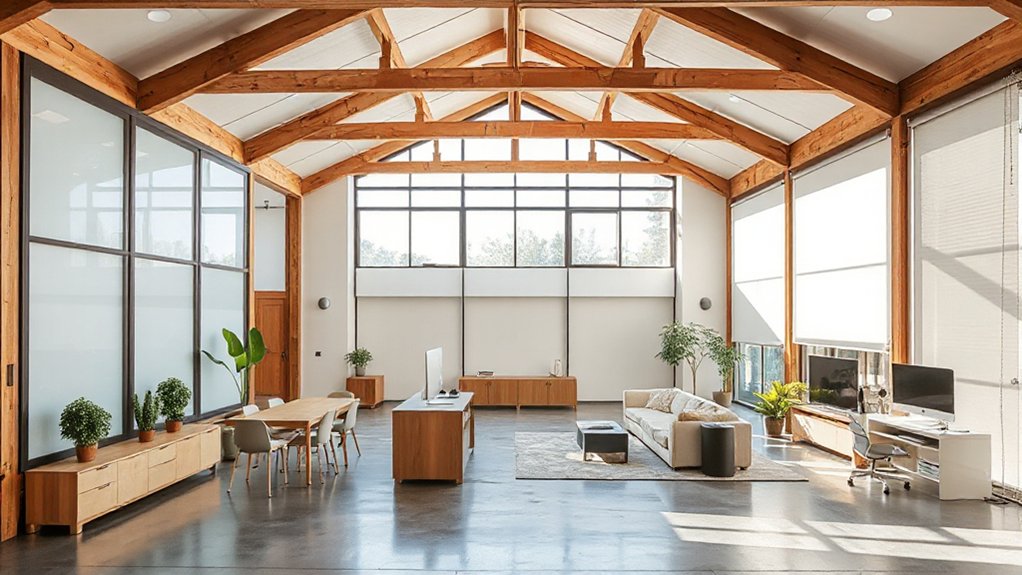
Materials That Unify Open-Plan Spaces
Materials that unite spaces hinge on consistent materials and finishes across zones, so your open plan reads as a single, cohesive area. Use textures that flow—from flooring to cabinetry and upholstery—to create a tangible, layered rhythm without abrupt changes.
Start by choosing a core material and pairing it with complementary textures to softly define zones while preserving overall continuity.
Materials That Unite Spaces
When you unify open-plan spaces, choosing materials that flow visually and functionally is essential. You’ll aim for a cohesive palette and seamless progression, so floors, walls, and surfaces share common tones, textures, and scale.
Use materials that perform well together: wood or wood-look flooring anchors living and dining areas, while large-format tiles or concrete slabs reduce visual clutter.
Introduce decorative accents that reinforce unity without shouting disruption, and emphasize color coordination across zones to prevent jarring shifts.
Consider cabinetry, countertops, and built-ins that echo a single finish or hue, tying disparate areas together.
Select lighting and hardware with consistent metal tones to read as deliberate choices, not accidents.
This approach fosters belonging through thoughtful, restrained, purposeful material decisions.
Textures Across Open Areas
Textures carry the rhythm of an open-plan home, so you’ll want a tactile thread that runs from living to dining to kitchen without shouting but with confidence.
To build texture across zones, focus on controlled contrasts and layered surfaces that feel intentional, not arbitrary. Here’s how you can do it:
1) Apply a consistent base: soften with a matte plaster or concrete tone that grounds each area.
2) Layer materials: introduce wood, fabric, and stone in staggered heights to create tactile layering and depth.
3) Create subtle contrast: use varied textures within the same palette to achieve textural contrast without breaking unity.
Open-Plan Color Schemes That Calm and Connect
Choose calming color palettes that feel seamless across zones, so your open plan reads as one cohesive space.
Plan progressions between areas with gradual shifts in tone and finish, not abrupt contrasts, to preserve flow.
Focus on simple, purposeful accents that connect rooms without overwhelming them, and layer textures to add warmth and cohesion.
Calming Color Palettes
- Select a dominant neutral backbone, enriched with soft tones, to anchor furniture and large surfaces.
- Introduce gentle contrast through accent colors on textiles and accessories, keeping saturation modest.
- Tie zones with recurring hues in artwork and greenery, reinforcing flow without competing focal points.
This approach supports belonging, invites lingering, and empowers you to curate a calm, connected home.
Flowing Space Transitions
Flowing space shifts create a cohesive open plan by using a deliberate palette and consistent lighting to guide the eye from one zone to the next. You’ll map passage zones where color, texture, and ceiling height change subtly to ease movement between living, dining, and kitchen areas.
Choose a core neutral as your backbone, then layer with two to three supporting tones that echo throughout each zone. Keep edges softened with continuous materials—wood, stone, or tile—that run uninterrupted.
Introduce lighting that follows the path: pendants above the dining, linear fixtures along counters, and floor lamps to anchor seating. Natural flow emerges when contrasts are gentle, avoiding jarring shifts.
This deliberate, connected approach reinforces belonging and makes every space feel like one coherent home.
Acoustic Design to Minimize Sound Bridging
Acoustic design is essential for open-plan living because sound can travel unobstructed across large spaces. You’ll minimize noise transfer by combining practical strategies with thoughtful layout. Focus on core methods that reinforce boundaries without sacrificing openness.
- Soundproofing techniques: install resilient channels, solid core doors, and staggered studs at shared walls to reduce flanking paths. Then seal gaps with acoustic sealant.
- Acoustic treatment: place smart absorbers, ceiling clouds, and soft furnishings to absorb reflections. This helps preserve clarity without clutter.
- Zoning and surfaces: define zones with varied ceiling heights or rug masses. Use textiles and wood to modulate reverberation and create a sense of intimate space.
Hidden Storage That Keeps Open Plans Clean
Hidden storage is the backbone of clean open-plan living because you can conceal clutter without breaking the space’s flow. You design with purpose, not excess, so every container earns its keep.
Start with hidden compartments integrated into benches, coffee tables, and island skirts, where lightweight lids meet flush finishes. Concealed shelving behind sliding panels or push-to-open doors keeps daily essentials accessible yet out of sight.
Use uniform hardware and neutral interiors to maintain calm, cohesive lines. Build in pull-out bins for recyclables, a fold-down desk tucked beneath a console, and wall niches for seasonal items.
Label storage zones subtly to reinforce order without interrupting aesthetics. Regularly reassess, removing items that no longer serve your living rhythm.
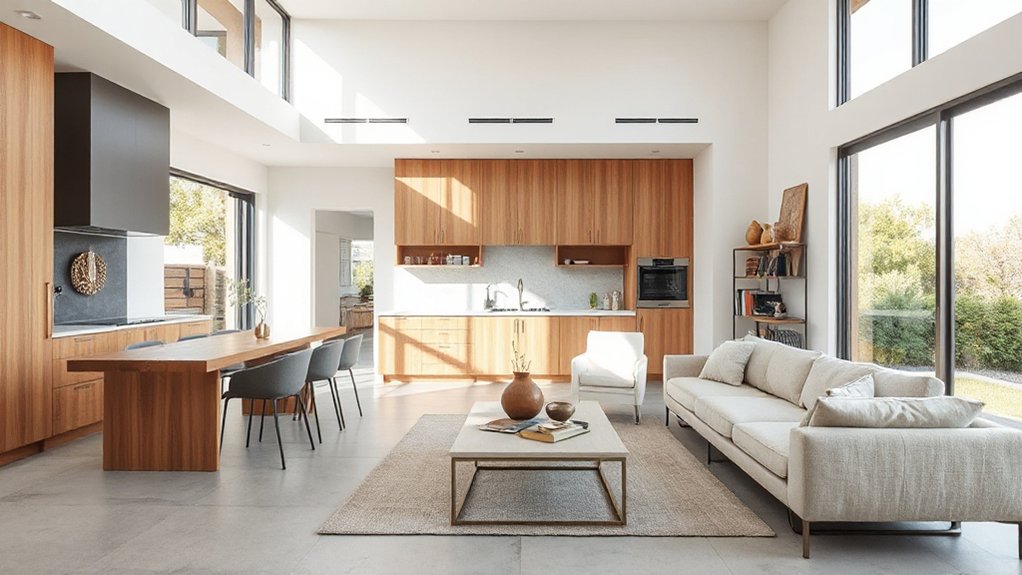
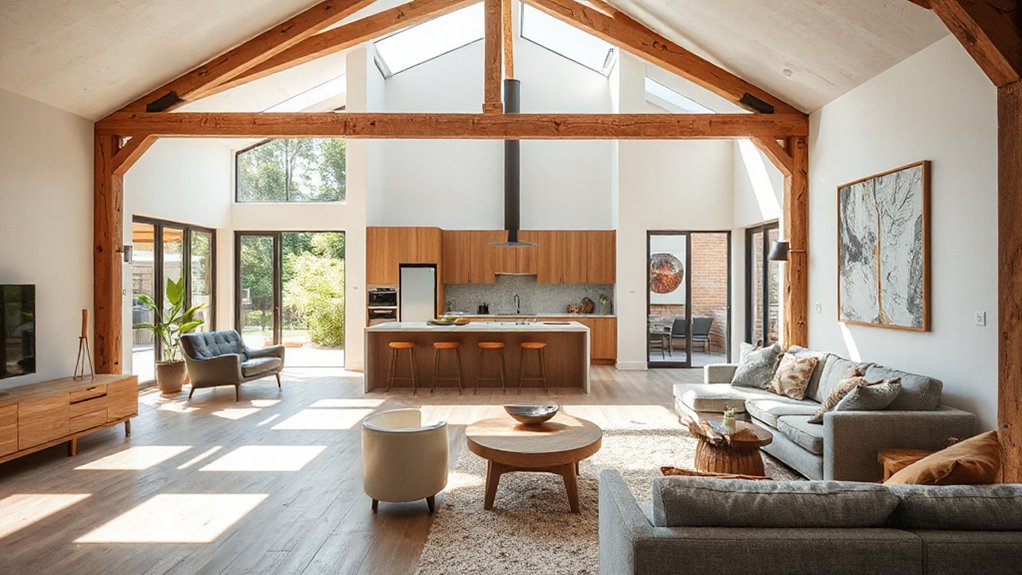
Open-Plan Kitchen Layouts That Anchor the Space
A kitchen island acts as the central anchor, defining your open plan while offering prep space, seating, and a natural division from living zones.
You should design the flow between zones so circulation feels intuitive, guiding traffic from cooking to dining to lounging without friction.
Pay attention to lighting and ambience, using layered layers of task, ambient, and accent light to keep the space warm, functional, and visually cohesive.
Kitchen Islands as Anchors
A kitchen island can serve as the central anchor of an open-plan layout, defining zones for cooking, prep, and social interaction while preserving sightlines across the space. You’ll optimize flow by choosing a size and shape that suits your room, and by integrating practical storage that minimizes clutter.
- Prioritize sturdy, easy-to-clean surfaces, and consider durable, sustainable materials that age gracefully.
- Plan lighting as a feature—creative lighting at the island enhances mood while keeping work zones brightly lit.
- Design with seating that invites conversation without crowding pathways, reinforcing a sense of belonging in the home. Use a cohesive palette and hidden appliances to sustain seamless sightlines, encouraging activity, connection, and efficient operation.
Flow Between Zones
Start with a clear main zone—often the kitchen—then mark passages with furniture arrangements that cue different uses: dining, lounging, or workspace. Maintain a low visual footprint by selecting compact storage and narrow countertops that don’t obstruct movement.
Use indoor plants strategically to soften edges and create atmosphere without interrupting lines of sight. Choose furniture that fits scale and rhythm, such as a slim console or bench that separates seating from prep areas.
Finally, test circulation paths; delete clutter to preserve flow while ensuring comfort and belonging throughout the open plan.
Lighting and Ambience
Lighting sets the tone for an open-plan kitchen and anchors the space by balancing function with mood. You’ll want a layered approach that blends task, ambient, and decorative lighting to suit different moments. Use dimmable options to shift mood and preserve energy efficiency, while keeping tasks clearly lit.
Mood lighting creates a welcoming ambience but stays practical enough for cooking and cleanup. Ambient atmosphere comes from soft, even illumination and color temperature that feels cohesive with living zones.
Plan with these priorities:
1) Install a central fixture for focal interest and rhythm.
2) Add under-cabinet strips to illuminate worktops without glare.
3) Incorporate wall sconces or floor lamps to soften corners and enhance social interaction.
This setup supports belonging, clarity, and seamless progression across zones.
Dining and Lounge Sightlines and Relationships
Are dining and lounge sightlines a black-and-white measure of space, or can you tune them to create a seamless, functional flow? You can absolutely shape relationships between zones by careful sightlines.
Prioritize furniture placement that maintains clear, unobstructed paths while guiding the eye through the open plan. Place seating to frame conversations without isolating meals from living areas, and keep focal points aligned—fireplace, view, or art—to reinforce visual connectivity.
Use rugs, low-profile consoles, and a consistent finish palette to unify tones without clutter. Consider vertical cues like shelf height and lighting to subtly connect spaces at eye level.
The goal is an intuitive, inclusive environment where every seat feels part of a cohesive whole.
Flexible Partitions and Screens for Smart Zoning
Flexible partitions and screens are your most adaptable tool for smart zoning in an open plan. You’ll balance openness with privacy by choosing modular screens and movable partitions that align with daily rhythms and social needs.
1) Position lightweight panels to define zones without visual clutter, then reuse them as your crowds shift.
2) Opt for modular screens with adjustable heights and integrated storage to reduce clutter while preserving flexibility.
3) Use soft materials and color cues to subtly signal function, improving belonging as spaces flow together rather than apart.
When planning, consider track systems, floor anchors, and ceiling mounting options to minimize disruption.
Maintenance should be simple: wipeable surfaces, modular components, and clear alignment guides keep everything usable.
Your open plan becomes responsive, welcoming, and cohesive through practical, well-chosen flexibility.
Smart Tech and Energy Efficiency in Open Plans
Smart tech and energy efficiency inherently complement modular zoning by giving you precise control over how spaces perform throughout the day. You’ll set lighting, climate, and acoustics to match activity, mood, and occupancy without wasting energy.
Choose a centralized hub to orchestrate devices, then tailor automations for open plans: dimmed lights during meals, cooler zones for active work areas, and warm ambience in living nooks.
Prioritize energy efficiency with high-performance insulation, LED systems, and programmable sensors that reduce consumption when spaces are unused. Opt for smart outlets and power strips to curb standby losses.
Use occupancy sensing to prevent overheating and overcooling, and integrate solar-ready systems where feasible. This approach reinforces belonging, making the open plan feel responsive, welcoming, and sustainably designed.
Smart tech and energy efficiency unite for everyday comfort.
Renovating Safely: Practical Steps and Minimizing Disruption
Renovating safely requires a clear plan, careful material choices, and disciplined project management to minimize disruption. You’ll work with a staged schedule, define zones, and protect the spaces your family uses daily.
- Identify hazards early: assess site-wide risks, flag electrical, asbestos, and moisture concerns, and document them for all trades.
- Equip the team: guarantee safety equipment is available, trained, and worn consistently—hard hats, goggles, masks, gloves, and hearing protection.
- Minimize disruption: isolate noisy tasks, plan dust control, and communicate daily timelines so everyone feels informed and included.
Maintaining and Adapting an Open Plan as Life Changes
As your needs shift, keep the plan flexible with zoning you can reconfigure, so spaces adapt without major disruption.
Choose adaptable storage and modular furniture that can reframe rooms while preserving flow, keeping clutter under control.
Maintain openness by incorporating subtle privacy options—screens, curtains, or movable partitions—so you can tune the balance between shared and personal space as life changes.
Flexible Space Zoning
Open-plan layouts aren’t static; as family needs shift—kids grow, work from home becomes the norm, or you entertain differently—zones must adapt without dramatic rebuilds. You’ll shape flexible zoning with practical tools that stay neat and cohesive.
1) Use multi functional furniture to define areas without walls—so you preserve flow while signaling intent.
2) Apply acoustic treatments at boundaries to keep conversations private and noise levels comfortable.
3) Employ subtle indicators like rugs, lighting, and color to cue distinct zones, enabling quick reconfigurations when life changes.
Focus on modular pieces, mountable screens, and movable storage so spaces adapt without friction. Prioritize seamless *progression*, so belonging remains intact as routines evolve—you’re creating a home that breathes with you, not against you.
Adaptable Storage Solutions
To keep an open plan flexible as life shifts, invest in adaptable storage that hides clutter while supporting reconfiguration. You’ll benefit from hidden compartments and modular furniture that mesh with daily routines, not against them.
Choose pieces with clean lines, soft-close mechanisms, and integrated cable management to keep surfaces calm and usable. Stackable units, collapsible benches, and lift-top coffee tables let you reweight zones without moving walls.
Install rails or tracks for adjustable shelving so you can shift storage height as needs evolve. Use dual-purpose units—wardrobes that double as room dividers, ottomans with hidden bins, beds with built-in drawers—to minimize visible clutter while preserving flow.
Prioritize durable finishes, easy cleaning, and accessibility, ensuring everyone can participate in reconfiguring spaces.
Privacy Within Openness
Even in an open-plan home, privacy isn’t a luxury—it’s a practical necessity that adapts as daily routines change. You’ll balance openness with subtle zones, ensuring comfort without sacrificing sociability. Start by defining flexible boundaries that can shift with life—screens, tall bookcases, and sliding panels act as privacy solutions without closing the space.
Consider acoustics; soft textures dampen sound, preserving conversation while reducing noise spill. Use intentional sightlines, so private moments stay private, yet the room remains inviting. Be mindful of openness challenges, and tailor routines to family life, guests, and work from home.
- Install movable screens or shelving to reconfigure zones
- Layer textiles and rugs to absorb sound and create intimate corners
- Schedule quiet zones with clear purpose and accessibility
Frequently Asked Questions
How Long Does a Typical Open-Plan Renovation Take?
A typical open-plan renovation takes several weeks to a few months, depending on scope. You’ll coordinate lighting design and furniture arrangement carefully, timing trades, and verifying finishes so your space feels cohesive, welcoming, and truly belonging to you.
Can I Remove Load-Bearing Walls Without a Pro?
Yes, you shouldn’t remove load-bearing walls without a pro. Get a structural assessment first, and prioritize DIY safety. You’ll gain confidence, but stubborn risks lurk—don’t skip permits, inspections, or professional guidance for lasting belonging.
What’s the Best Budget Split for Zones?
You should allocate roughly 40–60% of your budget to zones for living and dining, 20–30% to kitchen workflow, and 10–20% to flexible spaces; prioritize Furniture placement and Lighting design for cohesive, inviting flow.
How Should I Address Noise Between Zones?
Soundproofing strategies instantly curb noise between zones, giving you true zoning privacy. You’ll block chatter with mass, seal gaps, and decouple floors, ceilings, and doors, so every space feels connected yet calm and belonging.
Which Permits Are Required for Open-Plan Changes?
You need building permits and structural assessments before you start, ensuring compliance. You’ll submit plans, obtain approvals, and schedule inspections, confirming load-bearing changes are safe. This practical, belonging-focused approach keeps your open-plan vision regulated and secure.
Conclusion
Open-plan living is a smart, adaptable canvas—play to its strengths, but stay grounded in practicality. By zoning wisely, lighting for multiple moods, and shielding noise with smart partitions, you’ll create spaces that flow without chaos. Prioritize solid walls for structure, but treat others as flexible supports that can shift with your life. The result? a resilient, efficient home that grows with you, not against you, turning everyday routines into effortless, enjoyable rituals.