
To install energy-efficient windows in your home, start by defining your energy goals and budget, then assess current openings to identify gains. Understand glazing options, U-values, SHGC, and frame materials to select certified, low-leakage products suited to your climate. Hire a qualified installer, verify licenses and warranties, and follow manufacturer instructions for a tight, weatherproof fit. Plan airtight sealing, proper flashing, and post-install performance testing to confirm gains—and you’ll uncover more steps that matter as you proceed.
Identify Your Energy Savings Goals and Budget
To start, define what you want to achieve with energy-efficient windows: lower monthly energy bills, improved comfort, reduced drafts, and better insulation for peak seasons.
You’ll set clear energy savings goals and a budget anchored to measurable targets, such as a specific percentage reduction in heating and cooling loads.
Outline practicable milestones: payback period, installed R-values, and anticipated performance under seasonal variances.
Prioritize decisions that impact home insulation and overall comfort, not just upfront costs.
Perform or commission energy audits to quantify baseline performance and track improvements post-installation.
Align procurement with long-term value, including maintenance requirements and durability.
Document budget buffers for contingencies.
This focused approach keeps you financially disciplined while maximizing power and resilience.
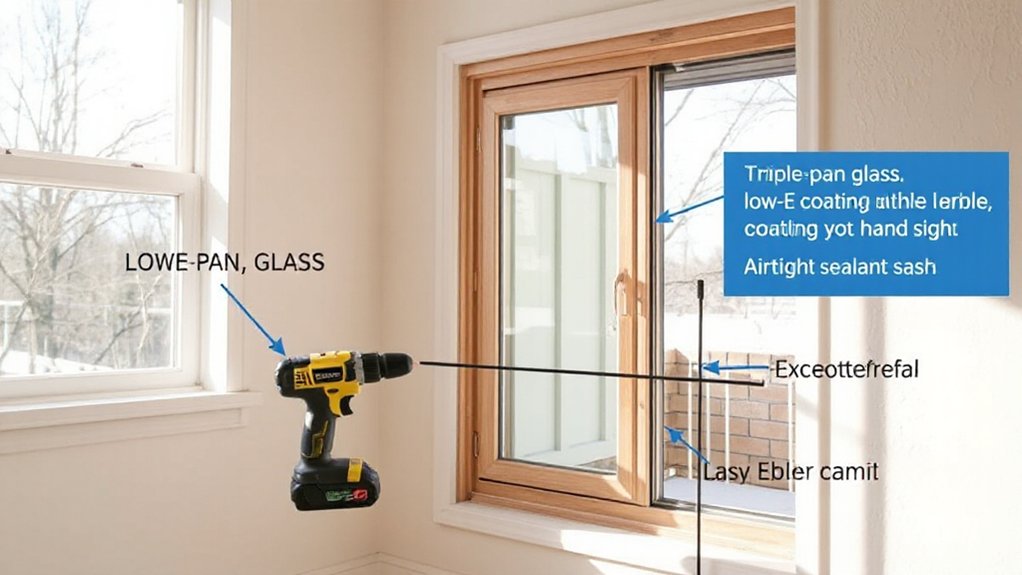
Understand Glazing, U-Values, and Window Frames
Glazing choices, U-values, and frame design directly shape how a window performs in real conditions. You’ll evaluate glazing options to balance heat gain, condensation control, and daylight.
Lower U-value significance means less heat flux, improving comfort and reducing energy bills; target assemblies that meet your climate and insulation goals. Frame materials and construction dictate air leakage, thermal bridging, and spacer performance, so prioritize multi-chamber profiles, reinforced corners, and quality gaskets.
Consider glass types: low-emissivity coatings, inert gas fills, and laminated or tempered variants for safety and performance. Recognize that glazing options also influence solar heat gain, glare, and visual comfort, while frames determine long-term durability.
In practice, specify assemblies with documented test results, compatible hardware, and ease of installation to ensure predictable, reliable performance.
Assess Your Current Windows for Gains
Evaluating your existing windows first requires a practical, data-driven approach: measure performance, identify flaws, and prioritize improvements that deliver the largest energy gains. You’ll inventory window styles present in the residence and map their impact on heat transfer, air leakage, and daylighting.
Next, catalog frame materials and condition—wood, vinyl, aluminum, or fiberglass—and assess deterioration, warping, or gaps that raise conduction or infiltration risks. Conduct a quick air-tightness check around sashes and frames, noting condensation patterns and glazing imperfections.
Compile a scoring rubric: low leakage, high operability, favorable U-values, and compatible hardware. Compare current performance against targeted gains to guide replacement or retrofit decisions.
This analysis necessarily focuses on where improvements yield measurable, material energy reductions without overhauling nonessential components.
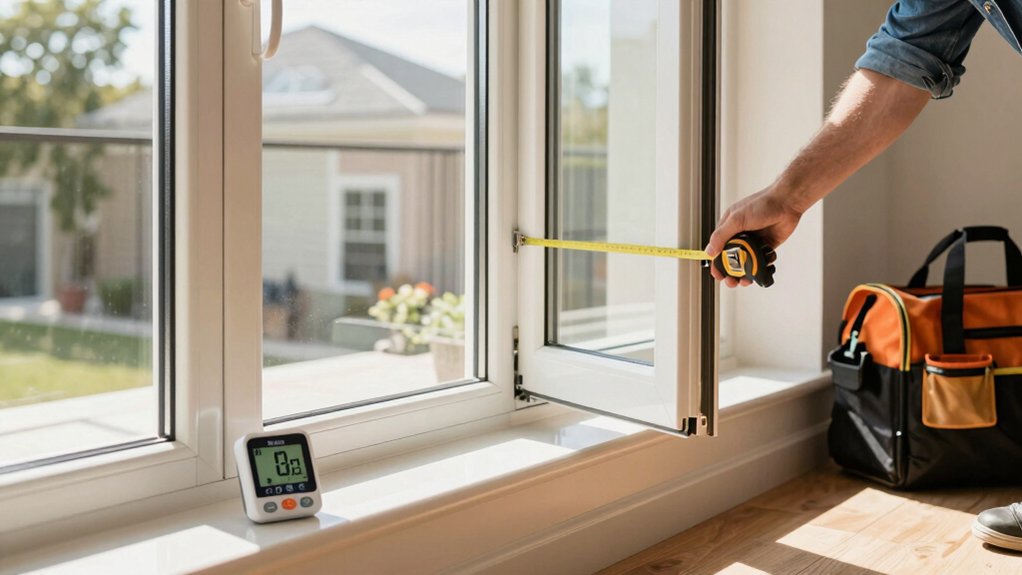
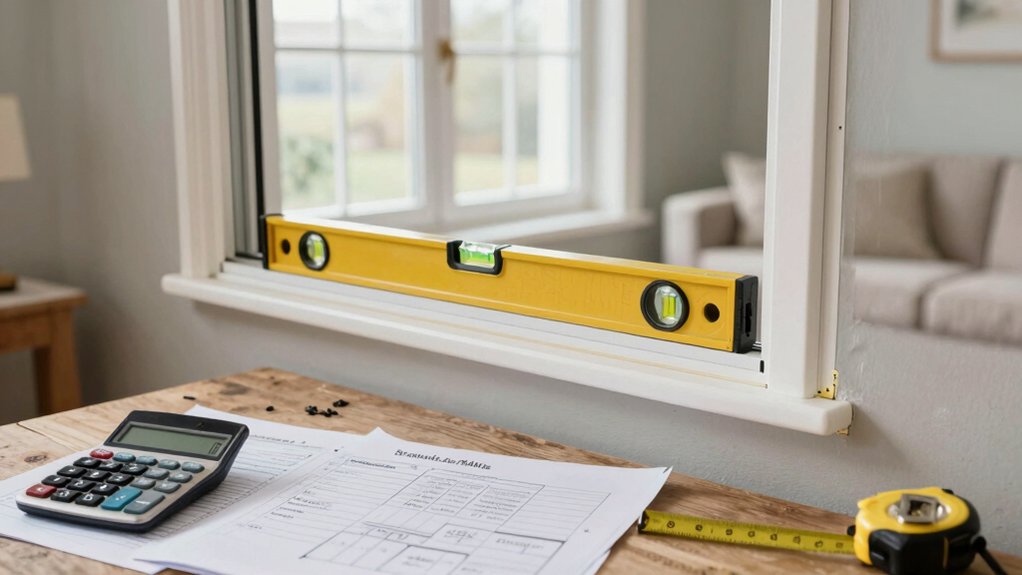
Measure Replacements Openings Accurately
To guarantee a perfect fit, you measure openings with tight tolerances and document each dimension on all sides.
Use precise, straight measurements for width, height, and depth, and account for any irregularities or deviations.
This establishes the exact cut size and confirms the window will seat squarely and seal properly.
Measure Accurate Openings
How do you guarantee a precise fit when installing replacements? Measure accurate openings with methodical discipline.
Start by verifying the rough opening with three measurements: width at top, middle, and bottom; height on left, center, and right. Record the smallest width and smallest height to define allowable tolerances.
Use a calibrated tape, not a ruler, and account for frame squareness by checking diagonals. Note any irregularities, plumb, level, and alignment issues, then decide if shimming or trimming is required before ordering.
Confirm clearances for flashing, drainage, and window treatments or exterior shading hardware. Document temperature, moisture, and seasonal effects that could shift dimensions.
Finalise measurements in a clean diagram, enabling precise, power-minded installation and performance from Day One.
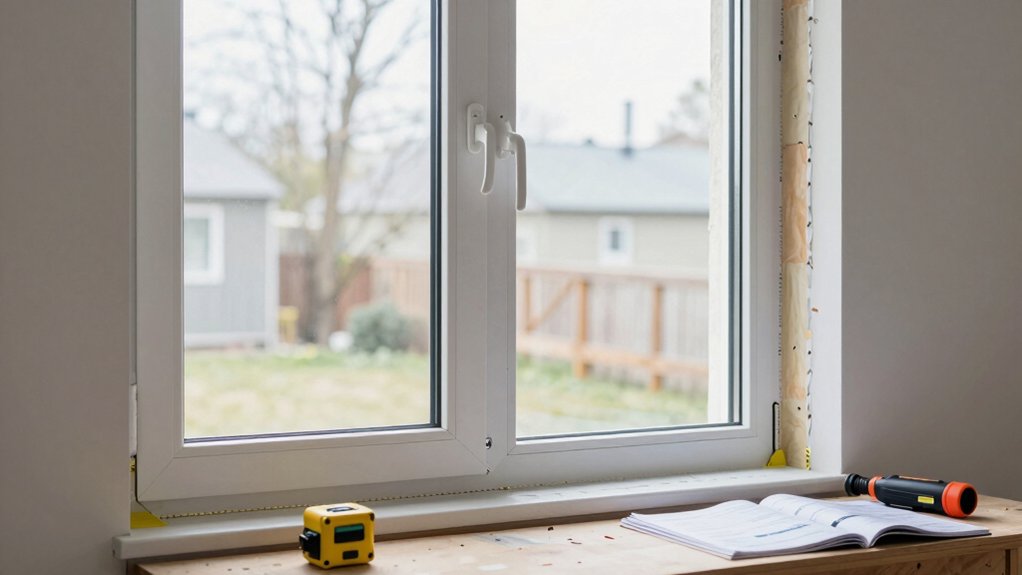
Cut to Fit Precisely
With accurate measurements in hand, you cut to fit precisely by translating those dimensions into the saw lines you’ll use for the openings. You’ll mark plumb, level, and square references, then create a clean cut plan that respects shims and tolerances.
Translate height, width, and depth into a single-cut strategy that preserves framing integrity and accommodates glazing beads. Confirm rough openings align with the window’s manufacturer specifications, adjusting for frame thickness and revealed reveals.
Plan for insulation and moisture control, including proper flashing and weep paths. Consider window tinting implications on sash travel and hardware clearance, and ensure decorative grids align with grid patterns without binding operation.
Finalize cut lists, verify compound angles, and proceed with confident, repeatable installations.
Compare Energy-Certified Window Options
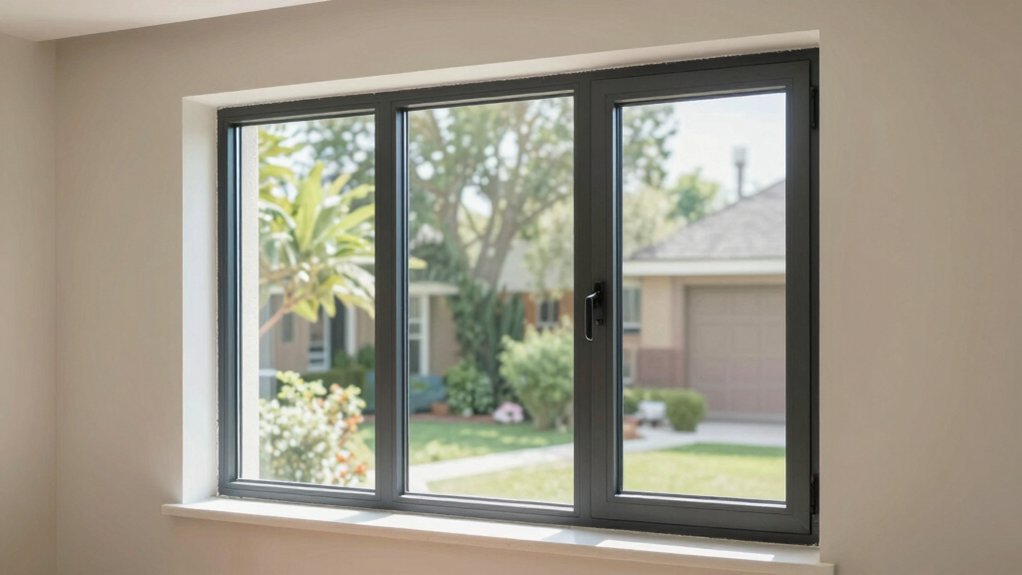
Energy-certified standards establish baseline performance you should expect from modern windows.
Compare performance measures such as U-factor, solar heat gain coefficient, and visible transmittance to determine suitability for your climate and design.
Use these metrics to weigh certification claims against real-world conditions and installation specifics.
Energy-Certified Standards
Another key consideration is how energy-certified standards guide you in comparing window options. These standards set objective thresholds for U-factors, solar heat gain coefficients, and air leakage, enabling you to rank performance without guessing.
You’ll want to map each product’s certified rating to your climate, home orientation, and comfort targets, then translate ratings into practical outcomes like seasonal heating load and cooling demand.
Focus on Energy Star or equivalent programs that align with local building codes, ensuring compliance and future resale value. Pay attention to label details rather than marketing claims, because the certified performance is what survives real-world conditions.
Energy efficient glazing and window frame materials drive those ratings, so compare glazing types, frame thermal breaks, and installation compatibility for maximum energy impact.
Window Performance Measures
To compare energy-certified window options effectively, start by aligning each product’s certified ratings with your climate, orientation, and lifestyle needs. You’ll evaluate U-factor, SHGC, and VT as core measures, then translate those numbers into real performance.
Compare air leakage ratings to gauge sequential drafts and long-term comfort, especially in extreme seasons. Consider window coatings for solar control without sacrificing daylight, and assess frame materials for durability, maintenance, and insulation value.
Frame materials influence thermal breaks, structural integrity, and life-cycle costs, so quantify expected payback. Examine certified lab tests for wind resistance and condensation resistance to ensure performance under load.
Finally, verify warranty scope and service support, prioritizing options that maintain efficiency across aging conditions rather than peak performance alone.
Estimate Costs and Set a Realistic Budget
Estimating costs and setting a realistic budget is essential before you order new windows. You’ll perform cost estimation by listing fenestration types, frame materials, glazing options, and required energy ratings. Translate every choice into a unit price, then apply multiplicative factors for installation, hardware, and trim.
Distinguish between upfront costs and long-term savings from reduced heating and cooling loads, so your budget reflects total ownership cost. Include contingency reserves for procurement delays, shipping, and supplier fluctuations.
Develop a clear budget planning document with line items, responsible owners, and review milestones. Prioritize energy-performance targets that align with climate and insulation goals, and verify that estimates account for rebates, tax incentives, and warranty terms.
Maintain conservative assumptions to prevent overcommitment while preserving power to complete the project.
Plan an Airtight, High-Performance Installation
Yes—planning an airtight, high-performance installation starts with detailing the assembly and sealing strategy before you cut a single piece. You establish target air infiltration, thermal bridges, and continuous insulation boundaries, then align fasteners, sealants, and flashing with code requirements.
Define the window installation sequence, including substrate prep, shim tolerances, and board- and frame-level compression. Specify weatherproofing techniques that guarantee gasket integrity, proper flashing heights, and drip-edge placement, reducing moisture ingress at all penetrations.
Map joint detailing for framing variances and window rough openings, and set testing checkpoints for air-blower tests and leak detection. Document material compatibility, curing times, and storage practices.
This plan keeps installation predictable, durable, and energy-efficient under real-world conditions.
Prepare Your Home and Protect Interiors During Install
You’ll set up a clean interior workspace, moving furniture and valuables away from work areas. Use drop cloths, edge protectors, and seal gaps to protect finishes and avoid dust infiltration.
Plan for post-install cleanup by outlining debris containment and disposal steps before work begins.
Prepare Interior Space
To prepare interior spaces for window installation, start by clearing work zones and protecting nearby surfaces. You’ll establish a clean baseline: remove movable furniture, seal vents, and lay continuous drop cloths to minimize dust migration.
Identify return air paths and close off adjacent rooms to preserve indoor air quality, using temporary seals where needed.
Plan lighting design considerations now, selecting glare-free fixtures and positioning to maintain task visibility during install without excessive energy use.
Verify that electrical outlets remain accessible for powered tools, and bundle cords to reduce trip hazards.
Maintain access to emergency exits and ensure floor coverings won’t trap moisture or debris.
Document room measurements and note any moisture spots, drafting, or temperature anomalies for precise material handling and future performance.
Protect During Work
Protecting your home during window installation is essential to prevent damage and contain dust and debris. Begin by establishing a controlled work zone with clear access paths and physical barriers to keep non-authorized areas out of the worksite.
You’ll install protective coverings on floors and furniture, then seal off doorways and adjacent rooms to contain debris. Use drop cloths, plastic sheeting, and taped edge protection for dust control.
For window openings, implement temporary clear shields and negative-pressure fans to minimize contamination, while maintaining safe egress.
Address aesthetics by planning for window tinting where applicable and selecting decorative grilles to match design intent without obstructing performance.
Maintain disciplined workflow, track tools, and regularly inspect containment integrity to ensure uninterrupted power and precision throughout the install.
Cleanup After Install
Cleanup After Install: Start by sealing off the work area and removing protective coverings in a controlled sequence to prevent recontamination. You methodically vacuum and wipe surfaces, then isolate dust-prone zones, minimizing cross-contamination to living spaces.
Inspect glazing and sashes for gaps, reseal as needed, and verify window sealing integrity before restoring airflow. Use high-efficiency filters on vacuums and dispose of waste in labeled bags to maintain containment.
Check for paint splatter, caulk remnants, or debris around weep slots, addressing each with targeted cleanups. Perform a final air-quality check and run the HVAC briefly to normalize conditions.
Document cleaning tips and sealant touch-ups for future maintenance. You finish with a clean interior, verified seals, and ready-to-use windows aligned to power-driven performance standards.
Hire a Qualified Installer and Verify Certifications
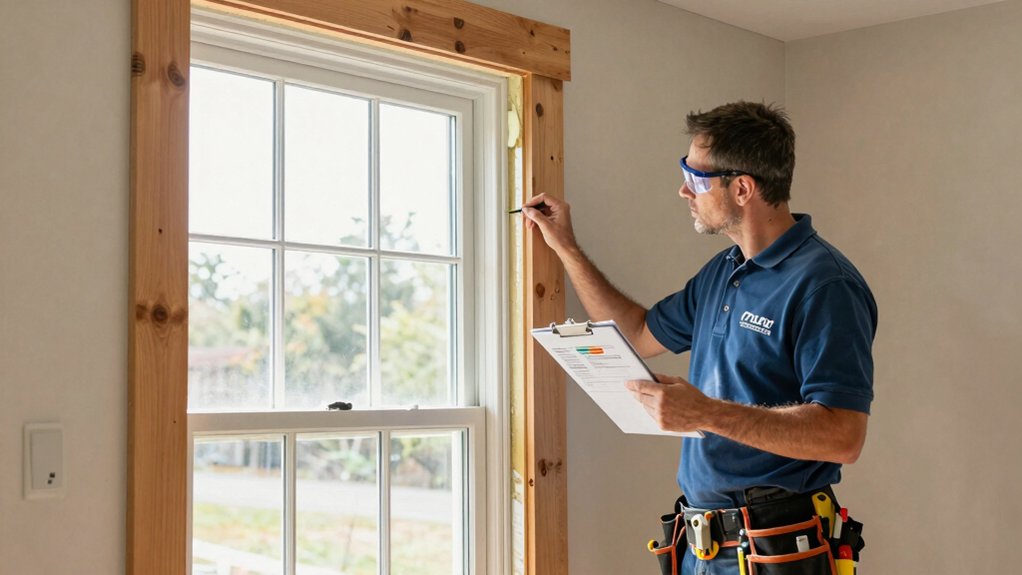
Choosing a qualified installer and verifying certifications is essential for solid performance and long-term reliability. You’ll assess credentials, licenses, and manufacturer approvals to ensure compatibility with energy-efficient windows.
Start with certification verification: confirm ongoing updates, required continuing education, and adherence to regional building codes.
Look for installer qualifications that match your project scope, including glazing techniques, flashing details, and weatherproofing methods that sustain performance under variable climates.
Verify installation practices against manufacturer installation manuals to avoid voided warranties.
Require written estimates, scope of work, and a clear timeline with milestones.
Check references from similar retrofit projects and inspect proof of insurance and bonded coverage.
Finally, document every step of the process, including material serials and warranty registrations, so future service remains streamlined and cost-effective.
Optimize Operation and Maintenance for Savings
To optimize operation and maintenance for savings, implement a proactive schedule that aligns with the window system’s design and local climate. You’ll perform regular window maintenance to prevent performance degradation, prioritizing seal integrity, glazing cleanliness, and hardware lubrication.
Establish seasonal checks that verify weatherstripping, drainage channels, and fasteners remain secure, minimizing air leaks and water intrusion. Integrate routine energy audits to benchmark performance, identify duct or framing heat transfer issues, and target corrective actions promptly. Document findings with timestamps, corrective actions, and cost estimates to track ROI.
Train occupants to report unusual drafts, condensation, or nuisance noises. Use data from audits to adjust thermostat setpoints and ventilation practices, sustaining efficiency gains. Maintain corrosion protection, monitor UV exposure impacts, and refresh caulking where needed.
Navigate Warranties, Rebates, and Long-Term Performance
When you install energy-efficient windows, understanding warranties, rebates, and long-term performance helps protect investments and maximize savings. You’ll review warranty options offered by manufacturers and installers, noting transferability, coverage scope, and claim procedures.
Compare typical coverage for glass, seals, frames, and hardware, and confirm effective dates and required maintenance steps to preserve enforcement. For rebates, identify rebate programs available in your region, eligibility criteria, and application timelines; map these to the products you install to ensure alignment.
Assess long-term performance indicators such as U-factor stability, condensation resistance, and skylight glare control, and set expectations for degradation over decades. Document all guarantees and incentive terms, and keep proofs of purchase, installation data, and periodic maintenance records accessible for audits or future resale.
Stay disciplined, demanding, and informed.
Evaluate After-Install Results and Performance Testing
Post-install performance testing should begin promptly after installation to confirm that windows meet expected energy, comfort, and operation metrics. You’ll run a tight battery of tests: thermals, air leakage, and ON/OFF solar gains at various times, plus operability checks for sash and hardware.
Use calibrated instruments to record U-values, SHGC, and infiltration rates, then compare against project specs and code requirements. Document deviations, isolate root causes, and implement targeted adjustments—seal gaps, recalibrate hardware, or replace weatherstripping—before final sign-off.
Assess window aesthetics as a measurable outcome, noting glare, finish consistency, and alignment. Factor historical preservation considerations into performance decisions, ensuring style compatibility and minimal intrusion.
Compile a concise report for stakeholders, outlining results, corrective actions, and maintenance recommendations.
Frequently Asked Questions
How Long Does a Typical Energy-Efficient Window Install Take?
Typically, you’ll complete a standard energy-efficient window install in 4–8 hours, depending on window styles and framing conditions, with quick inspections. Expect installation costs to reflect materials, labor, and precision, ensuring airtight sealing and long-term performance.
Will New Windows Reduce Noise From Outside?
Yes, new windows markedly reduce external noise. You’ll gain soundproofing benefits through laminated glass and insulated frames, delivering reliable external noise reduction while maintaining efficiency. You’ll notice crisper interiors and heightened focus throughout your space.
Are There Tax Credits or Rebates Available for Replacements?
Did you know 20–30% of home energy loss comes from windows? Yes, tax credits and rebate programs exist; you qualify for energy-efficient window replacements, reducing costs while upgrading performance. Check local, state, and federal incentives and apply accordingly.
What Maintenance Is Required for Energy-Efficient Windows?
You should perform regular maintenance: clean the glass with nonabrasive solutions, check seals and frames for gaps, inspect window hardware for smooth operation, schedule sealant inspection periodically, and address any moisture or drafts promptly as power users demand.
How Long Do Foam or Gas Fills Last in Windows?
A window is a time capsule; your foam or gas fill lasts about 10–20 years if you’re vigilant. Expect window lifespan to hinge on seal integrity, with gas fill durability declining as seals age and microleaks form.
Conclusion
Investing in energy-efficient windows pays off through lower monthly bills and improved comfort. By selecting low U-value glazing, proper frame materials, and professional installation, you minimize heat transfer and drafts. A single well‑matched upgrade can reduce cooling loads by up to 15–40% in some homes, depending on climate and orientation. Track performance with simple post-install checks—air leaks, glazing integrity, and operation smoothness—and document rebates or warranties to maximize long‑term value.