
Elevate your home’s curb appeal with window boxes that blend bold color, architectural cues, and layered textures. Start by matching box style to your façade, then choose materials and secure mounting for lasting impact. Use a cohesive color palette with 3 core tones and a grounding shade, and layer tall, mid, and trailing plants for depth. Opt drought-tolerant varieties for easy maintenance, and finish with framing, drainage, and seasonally fresh blooms. Want more tips to transform your look? Keep going.
Why Window Boxes Boost Curb Appeal
Window boxes instantly upgrade a home’s first impression, adding color, texture, and personality from the curb. You’ll see how they anchor your façade and guide the eye toward architectural details, creating instant cohesion with your property.
When you install thoughtfully chosen boxes, you nod to Historical architecture while staying fresh—mixing classic forms with modern planting. Consider color palettes that echo trim, shutters, or masonry to reinforce a confident, unified look.
Curb appeal trends favor layered plantings, fragrant herbs, and seasonal blooms that maintain visual interest year‑round. You’ll also appreciate practical aspects: durable materials, proper drainage, and secure mounting to withstand weather.
With intentional placement and sustainable choices, you cultivate a welcoming, belonging‑driven street presence that resonates with neighbors and visitors alike.
How to Pick the Right Box Style for Your Home
Choosing the right box style starts with your home’s architecture and the scale of your windows. You’ll want box shapes that echo architectural lines—rectangular for classic facades, curved accents for softer features.
Consider depth and width in proportion to window sill height, so the box reads as an extension, not a mismatch.
Material options matter: timber offers warmth, metal provides a modern edge, PVC stays low maintenance, and fiberglass balances strength with lightness.
Design considerations include drainage, mounting method, and soil depth to suit plant choices.
Think about the rhythm of repeated boxes along a facade and how trim details reinforce unity.
Prioritize cohesion with gutters, fascia, and doorways so your box boxes feel intentional, not incidental, and invite neighbors to linger.
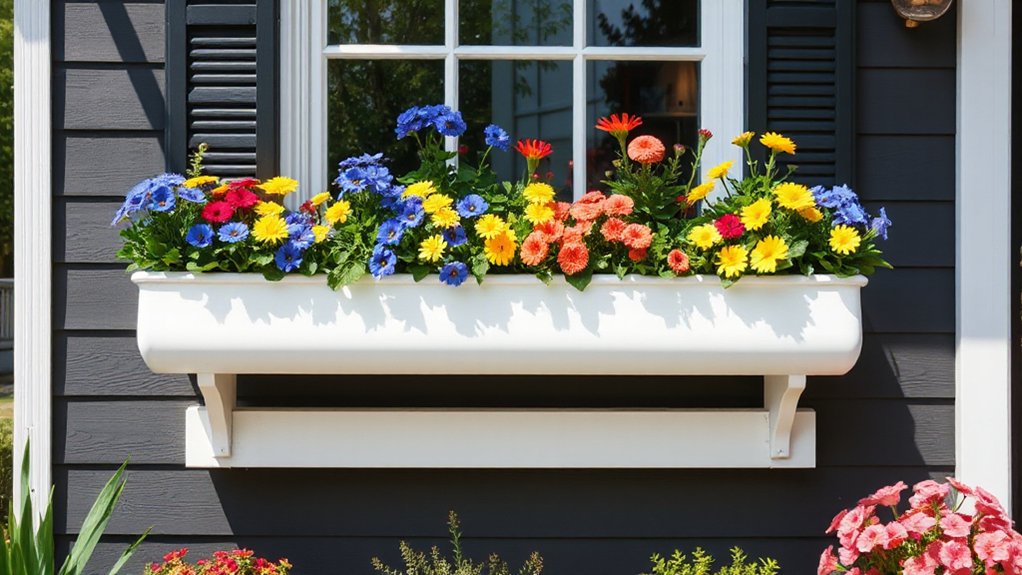
Choose Colors That Pop Without Clashing
Pair bold color pairings with neutral surroundings to make your window box stand out without clashing. Start with one vivid hue as the focal color and support it with a calmer neutral base.
Use accents to tie the palette together. Keep the eye moving—repeat the accent shade in foliage or blooms to anchor the look while you highlight the bold pairing.
Bold Color Pairings
Start with a dominant hue you love, then layer secondary tones that complement rather than compete. Prioritize color contrast to create focal points—bright accents against deep neutrals or muted bases against bold highlights.
Guarantee aesthetic harmony by aligning temperature (warm vs. cool) and intensity across foliage, blooms, and accents. Keep your palette cohesive: limit to three core colors plus one grounding shade.
Use textures and forms to reinforce the scheme without overwhelm. The result feels curated, cohesive, and welcoming—a bold statement that signals belonging and thoughtful care.
Accent Against Neutrals
Neutrals provide a calm stage for your color pops, so pick accents that stand out without competing with the backdrop. You’ll balance bold hues with softer neutrals, guiding the eye along the box’s architecture. Choose color combinations that feel intentional, not random, and test them in texture and light before committing.
Use texture layering to add depth: matte finishes paired with a glossy edge, or ribbed pots against smooth surfaces, helps each element read clearly. Keep the palette cohesive by repeating one or two core tones across foliage, blooms, and containers.
This approach invites belonging, inviting neighbors to notice your curb appeal with confidence. You’ll create a curated, lively vignette that stays elegant as seasons shift.
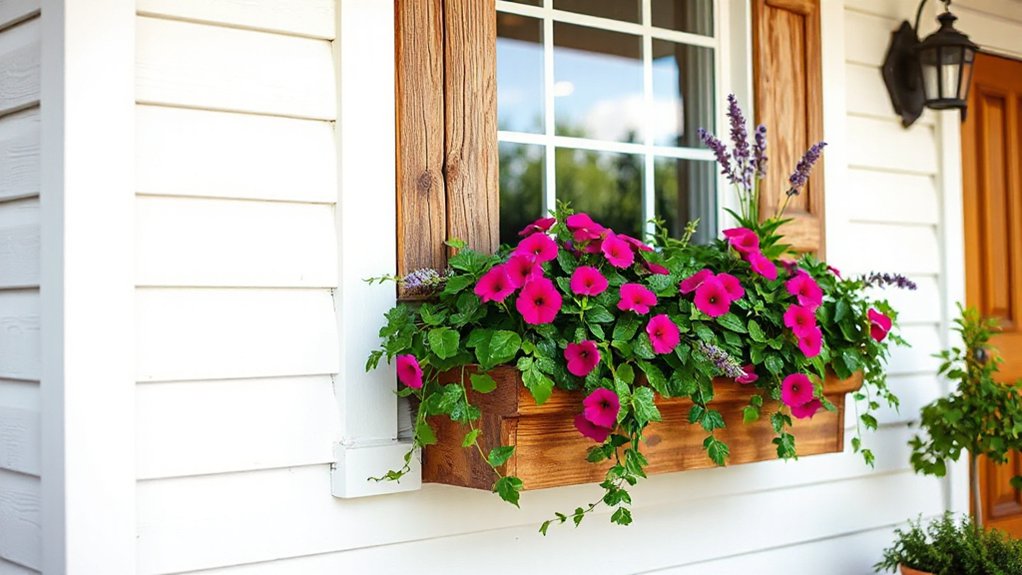
Layer Texture With Drought-Tolerant Plants
Layer texture comes alive when you mix layered foliage, architectural forms, and drought-friendly varieties.
Start with bold silhouettes, then add contrast in size and color to emphasize depth without overwatering.
Aim for a visual rhythm that blends color and form while keeping plant choices resilient and low-maintenance.
Layered Texture, Drought-Friendly
You can create instant depth and resilience by layering textures with drought-tolerant plants in your window box. Start with a tall, structural base—think ornamental grasses or rigid succulents—to anchor the arrangement.
Add mid-height shrubs or compact drought-tolerant perennials for volume and movement, then tuck in smaller foliage with varied leaf shapes for contrast. Use a mix of matte and glossy foliage to catch light differently throughout the day.
Place colorful focal points sparingly, selecting succulent arrangements for a tactile, waterwise accent. Group plants into discreet drifts to maintain cohesion and prevent crowding.
Choose a well-draining mix and water deeply only when the soil dries. This approach embodies xeriscape design and invites others to appreciate your thoughtful, low-maintenance curb appeal.
Color and Form Mixes
Color and form can elevate a window box by pairing bold silhouettes with leaf shapes and hues that play off each other. You’ll blend drought-tolerant textures to create a cohesive display, not a jumble.
Start with color schemes that repeat a base hue and a contrasting accent, then choose form styles that echo your box’s architecture. Succulents, grasses, and small flowering perennials offer varied textures while conserving water.
Place tall, architectural plants at the center or back to frame the view, with trailing or massed foliage at the front for softness. Use foliage color as your guide—greens, silvers, and blush tones read differently from afar.
Keep scale in mind so each plant complements the others, creating a confident, inviting curb appeal.
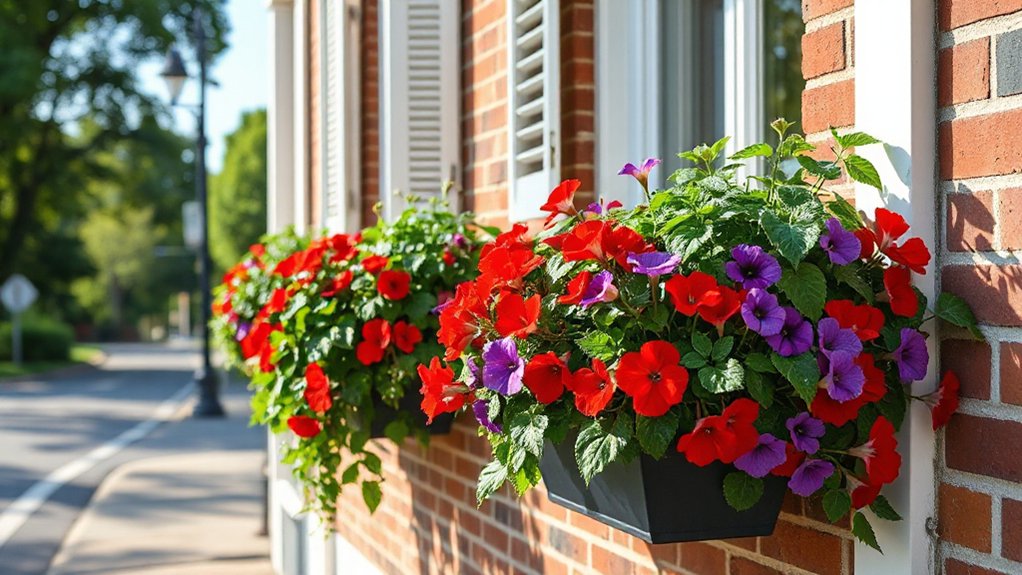
Plants That Thrive in Sunny Window Boxes
Sunny window boxes shine brightest with plants that crave bright light and quick growth. You’ll choose sturdy partners for sun, focusing on structural forms and color contrasts that read from curb to door.
Aim for eye-catching layering: tall verticals, mid-height fillers, and spilling trailers to soften edges. Succulent varieties bring waterwise texture and sculptural lines, while flowering options add seasonal pops without crowding.
Pair proven performers like sun-loving geraniums, sweet alyssum, marigolds, and trailing verbena with compact herbs for fragrance and utility.
Use well-draining soil and a rigid, reflective container to amplify light. Space evenly, rotate seasonal blooms, and seed in fall for spring longevity.
Your sunny box becomes a welcoming vignette—cohesive, vibrant, and unmistakably yours.
Shade-Friendly Box Plants for Low-Light Corners
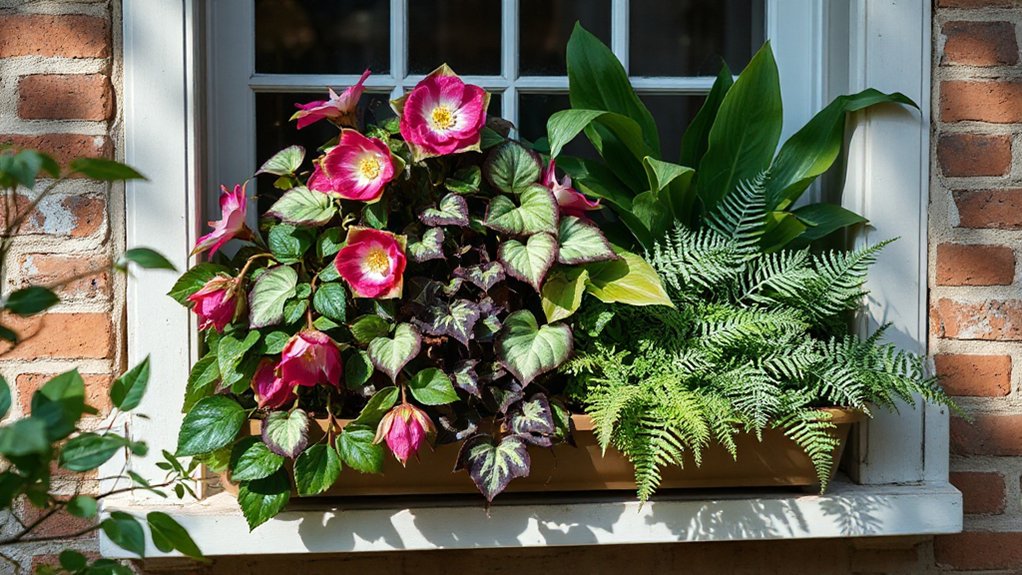
If your window box sits in low light, start with Low-Light Plant Picks that stay tidy and lush without fuss.
Consider Shade-Tolerant Box Ideas that fill vertical space and cast visual interest, even in a shaded corner.
Choose Moisture-Friendly Choices to keep soil even and plants thriving through drier spells and brief overwatering.
Low-Light Plant Picks
What shade-only corners crave are sturdy, slow-growing picks that thrive with minimal light and still look vibrant in a window box. You’ll choose low-maintenance options that beg to be touched and admired, not fussed over.
Start with compact ferns, a few textured Heuchera leaves, and soft, glossy ivy for structure. For color without sun, opt for shade-tolerant blooms like impatiens or begonias in restrained bursts.
Indoor succulents work well in dry pockets near the box edge, where they never demand much water, and they pair nicely with trailing ideas. Keep a simple watering schedule, so plants stay evenly hydrated.
For added depth, mix in hanging baskets above or beside to echo the cascade. This approach feels welcoming, belonging, and intentionally curated.
Shade-Tolerant Box Ideas
For shade-friendly window boxes, start with compact, low-maintenance staples that tolerate dim corners and still look polished from street level to the back wall. You’ll achieve cohesion with plants that thrive in low light containers and read as a single palette rather than a patchwork.
Choose varied textures and subtle color shifts to keep the display lively without overpowering the space. Aim for consistent growth habit so you don’t chase gaps as the season shifts.
- Shade tolerant plants that form mounds or low clumps for stability
- Variegated leaf textures to reflect soft light
- Slow-growing accents to minimize maintenance and ensure extended appeal
This approach feels inclusive and practical, inviting neighbors to linger and admire your calm, curated border.
Moisture-Friendly Choices
Then layer with slow-drying mulch to even humidity. Position plants so their roots never sit in pooled water; drill or adjust for natural drainage, and add a drainage mat to separate soil from the box base.
Integrate moisture barriers where the box meets exterior walls to minimize leaks and mold risk. Water thoughtfully—instead of daily floods, aim for even soil moisture and breathable potting mixes.
Finally, pair textures and foliage colors to create a cohesive, inviting corner that feels like home.
The Starter Kit: Planters, Soil, and Drainage
Getting your DIY window box started is easier when you’ve got the right starter kit: sturdy planters, just the right soil mix, and drainage that actually works. You’ll choose container material that supports weight without warping and adds visual punch. Then, tailor plant arrangement to the box’s shape and light.
For success, pair a breathable soil with a base layer of coarse grit for drainage, and guarantee holes are lined with saucers or mesh. Keep roots happy with a light, fast-draining mix; resist heavy substrates that bog plants down.
Your starter kit sets the stage for cohesion and curb appeal.
- Planter material and size alignment
- Soil blend and drainage strategy
- Plant arrangement that maximizes color and texture
Budget-Friendly Box Makeovers You Can Do Today
If you’re short on time or funds, you can transform your window boxes today with simple, high-impact upgrades: swap in inexpensive, lightweight containers, refresh the soil with a fast-draining mix, and add bold color with a few proven-performers.
You’ll see instant curb appeal when you pair window box materials that are sturdy yet lightweight with compact seasonal planting that thrives in your climate. Choose planters that echo your home’s style to create a cohesive vignette, then fill with quick-to-grow annuals or durable perennials for ongoing impact.
Keep maintenance minimal: mulch lightly, water consistently, and rotate plants as seasons shift. This approach invites community, confidence, and a welcoming, fresh-as-new look without heavy costs.
Seasonal planting anchors the palette and rhythm.
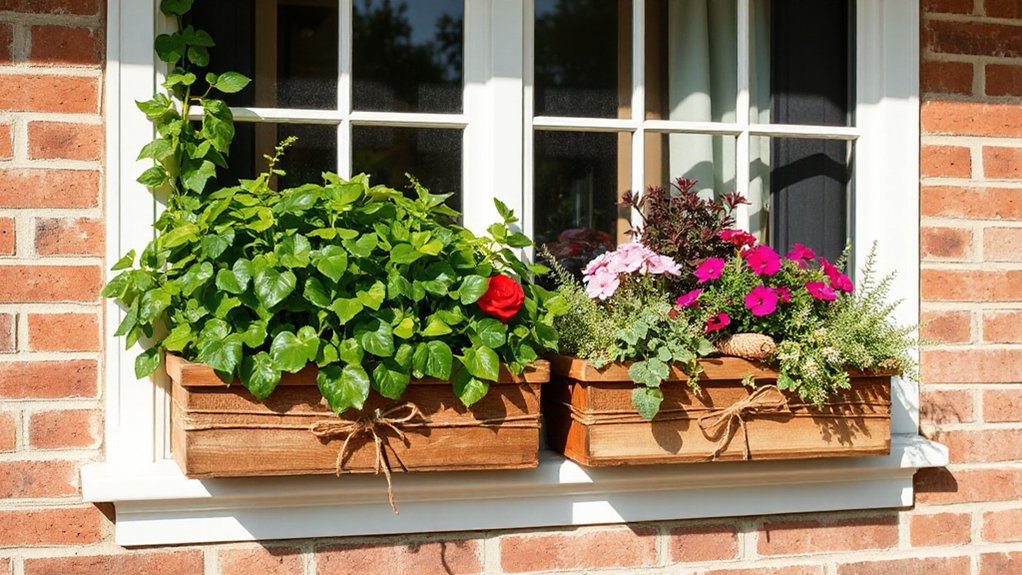
DIY Box Materials: Wood, Metal, and Upcycled Options

Wood, metal, and upcycled options give you a practical spectrum for window box construction, balancing weight, durability, and style. You’ll choose materials that fit your home’s vibe and your DIY pace, then tailor details like drainage and lining for longevity.
Think in layers: framing, box hull, and planting zone, each chosen for strength and curb appeal. Upcycled containers offer character and sustainable flair, while metal box designs provide sleek lines and weather-ready resilience.
- Upcycled containers for instant texture and story
- Metal box designs for modern, clean lines
- Lightweight, durable materials balanced with proper drainage
With these choices, you can craft a cohesive look, feel connected to your neighborhood, and enjoy a DIY project that resonates with belonging and pride.
Install and Position Window Boxes for Maximum Impact
Positioning window boxes properly starts with your eye for the baseline: align the boxes so the planting line sits just below the window sill, not above it. You’ll create instant cohesion by matching box height to window scale and choosing plant varieties with similar growth habits.
Plan your plant arrangement for seasonal rhythm: a trio of color, texture, and bloom timing keeps curb appeal fresh year-round.
Secure mounting techniques first, using wall studs or sturdy brackets rated for weight, then test with a dry-fit before planting.
Keep spacing even along the sill to avoid crowding; this enhances legibility and invites passersby to pause.
Finish with clean soil edges and a clear watering plan to maintain lasting, welcoming impact.
Vertical and Multi-Tier Window Box Setups
Vertical and multi-tier setups maximize outdoor space and curb appeal when you stack boxes with purpose. You’ll create visual depth and a lush rhythm by combining heights, textures, and colors in vertical gardens and within rail- and wall-mounted tiers.
Keep plants with similar light needs clustered to simplify care and boost success. Use durable brackets and trays, plus a cohesive color palette that ties the scene together.
- Layered silhouettes with trailing, upright, and compact varieties
- Bold focal plant at eye level to draw the eye upward
- Consistent spacing and edging for a clean, magazine-worthy finish
This approach feels welcoming and intentional, helping your home say you belong here, proudly showcasing practical, beautiful vertical gardens and multi-tier designs.
Seasonal Refreshes: Quick Updates Without Replacing Everything
Seasonal refreshes don’t require a full redo; small, thoughtful tweaks can refresh your vertical and multi-tier window boxes in minutes. You’ll notice instant impact by swapping a few seasonal plants for color shifts, texture variety, and focal points.
Plan with contrast in mind: pair bold foliage with delicate blooms, then cluster similar tones to guide the eye upward along the box. Use decorative container accents—think coordinating ribbons, small statues, or natural textures—to tie the look together without overwhelming the plants.
Rotate items where possible to preserve fresh growth and maximize sun exposure. Keep maintenance simple: prune back spent blooms, trim leggy stems, and refresh soil surface.
These quick updates create cohesive, inviting displays that feel intentional and welcoming to neighbors and guests alike.
Watering and Maintenance for Long-Lasting Boxes
Consistent watering and smart maintenance are the backbone of long-lasting window boxes. To keep colors vibrant and roots healthy, match soil composition to plant needs and monitor drainage. Use a sturdy mix with compost for nutrients, and coarse material for aeration, ensuring roots never sit in soggy soil.
Develop a simple watering frequency based on sun exposure and container size, not a rigid schedule. Check moisture at least twice weekly, adjusting after heat waves or rain.
- Choose a well-draining soil mix and refresh annually
- Water deeply, then let the surface dry slightly before the next sip
- Inspect for root crowding, drainage gaps, and compacted soil
With consistent care, you create a welcoming, cohesive display that stands up to seasons.
Personalize With Accessories and Finishes
Want to make your window box feel uniquely yours? Start by layering personalized details that reflect your style while staying cohesive with your home. Choose personalized accessories like rustic metal brackets, a petite watering can, or ceramic ornaments that echo your exterior textures.
Arrange plants around these pieces to create focal points and rhythm, keeping balance between greenery and décor. Opt for custom finishes on the box itself—weathered stain, matte sealant, or a subtle distressed paint—to protect wood and signal your intent.
Keep scale in mind: small boxes benefit from fewer, deliberate accents. Maintain a tidy, uncluttered look by limiting color clashes and arranging accessories at eye level. The result: a welcoming, intentional, and uniquely yours window box.
Quick Color Palettes That Match Your Exterior
Curious how to pick quick color palettes that harmonize with your exterior? You want palettes that feel intentional, not random. Focus on a base, a trim, and an accent that together create Color coordination and Visual harmony.
Start with a calm base from your siding or roofline, then choose a contrasting trim for definition, and add a pop color for flowers or accents.
- Base: eye-friendly neutrals or a shade pulled from your exterior
- Trim: crisp, light, or darker contrast to sharpen lines
- Accent: plant containers, flowers, or door hues for a cohesive highlight
Troubleshooting Common Window Box Problems
If your window box isn’t thriving, start with your watering routine and soil mix, because over- or under-watering shows up fastest in leaves and soil texture.
Check drainage and substrate—make sure there’s a clean, unobstructed path for water to escape and that the mix isn’t compacted. Swap in a lighter, well-draining blend if you notice soggy pockets or crusty surface.
We’ll tackle specifics next, focusing on watering troubleshooting tips and effective drainage and soil solutions to keep roots healthy and flowers bright.
Watering Troubleshooting Tips
Watering is the central fix for most window box problems, so start by diagnosing how your soil feels and how fast it dries. You’ll fine‑tune plant arrangement and adjust watering frequency to keep roots evenly hydrated without soggy rot. Consistency matters: abrupt changes stress plants and muddy the curb appeal you’re after.
- Check soil moisture daily during heatwaves, then water deeply until it runs from the drain holes.
- Group plants with similar water needs to simplify maintenance and boost visual harmony.
- Use a lightweight mulch or a top-dressing to slow evaporation and keep moisture even.
If leaves wilt before noon, water earlier; if soil stays damp, back off. Your box should look vibrant, balanced, and welcoming.
Drainage and Soil Solutions
Drainage and soil health determine how long roots stay hydrated and how quickly plants recover from heat. You’ll prevent soggy roots and brittle stems by pairing proper soil with smart drainage solutions.
Begin with a well-draining mix: compost, peat or coconut coir, perlite or vermiculite, and a sturdy planter liner.
Add soil amendments like balanced slow-release fertilizer and microlife-friendly compost to boost structure and nutrients.
Guarantee drainage holes are unobstructed and line the bottom with a thin landscape fabric to avoid soil loss while keeping water moving.
For hot weeks, mulch lightly and refresh soil annually to maintain aeration.
Monitor for pooling after watering, then adjust the mix or pot depth.
Consistent moisture, plus soil amendments, keeps color vibrant and roots healthy.
Before-and-After Window Box Inspiration Roundup
Seeing is believing: these before-and-after window box ideas show exactly how a few thoughtful edits—color swaps, planter heights, and soil improvements—transform a plain sill into a thriving focal point. You’ll notice how historical architecture gains depth with period-appropriate hues, while window security principles keep plants safely tucked in and out of reach.
This roundup pairs quick wins with durable layouts you can replicate, so your home feels both inviting and cohesive.
- Color-contrast palettes that honor era details
- Tiered planters for dimension without clutter
- Soil mixes and drainage tweaks that keep roots healthy
With expert guidance, you’ll feel connected to your home’s story, confident in design choices, and part of a welcoming community.
Frequently Asked Questions
How Tall Should a Window Box Be for Drainage?
A window box should be about 6 to 8 inches tall for proper drainage. You want a window box height that lets excess water drain freely, preventing root rot.
If your soil retains moisture, aim toward 8 inches; for drier soils, 6 inches works fine.
Make certain drainage holes and a tray prevent water damage.
Regularly check the drainage requirements and adjust soil mix to keep roots happy, while you feel confident and connected to your curb appeal.
Can I Install Window Boxes Without Drilling Into Siding?
Yes, you can install window boxes without drilling into siding. Use exterior adhesive brackets or tension-fit systems to avoid damage. Then secure with hidden screws into an internal frame.
Guarantee proper sealing and drainage, and keep siding protection intact by applying a thin, removable shield where brackets touch.
Align, level, and visualize the finished look with mulch, greenery, and color. Window box installation becomes clean, sturdy, and inviting, fostering a shared, welcoming curb appeal.
What Weekly Maintenance Schedule Is Ideal?
You should follow a simple weekly maintenance schedule: check moisture every day, water when a light touch on the soil feels dry, and avoid overwatering.
Watering schedule adapts with weather, so you’ll typically water 2–3 times this week during heat, less in cool temps.
For fertilization tips, apply a balanced liquid fertilizer every two weeks during peak growth.
Prune spent blooms to keep your window box looking fresh and inviting for neighbors to notice.
Are Lightweight Materials Durable in Windy Areas?
Like a tight-knit crew steering a ship through gusts, you’ll find lightweight materials can be durable if you choose wisely. Material weight boosts wind resistance when paired with proper brackets and secure mounting.
You’ll want thicker walls, vinyl or fiberglass over thin plastic, and heavier soil mixed with irrigation to keep the box grounded. Trust tested designs, anchor points, and wind-tested fasteners to stay together, even in stormy neighborhoods.
Which Fast-Growing Plants Suit Boxed Containers?
You’ll want fast-growing, compact options like sedum and calibrachoa, plus trailing verbena, because they fill spaces quickly in boxed containers.
Consider succulent varieties for sun-facing spots and perennial options to keep looks year after year.
Pair hardy grasses with compact phlox to add height, color, and texture.
Make sure good drainage, regular feeding, and sun exposure to thrive.
You’ll feel connected to your garden as it fills, vibrant and welcoming for neighbors and family alike.
Conclusion
You’ve got the know‑how to transform a plain window into real curb appeal. Pick a box that fits, plant drought‑tolerant textures, and choose colors that pop without clashing. Layer greens with flowers for depth, then add quick, personal touches—birdbaths, ribbons, or decorative brackets. If a plant falters, swap in a similar spiller. With these practical steps, your home will stand out—like a well‑tailored suit for your facade. Your curb appeal, blooming bright, is within reach.