
Outdoor lighting ideas for pathways start with layering: core path lights for edges, fill lights to soften contrasts, and accents to spotlight features. Choose warm 2700–3000K for safety and coziness, or cooler 3500–4300K for better color rendering. Use lanterns, bollards, and step lights to guide, with low-voltage, solar, or hybrid power for flexibility. Keep lines clean with minimalist fixtures, guarantee glare control, and weather-ready materials. Want practical tips that expand your options? You’ll find more as you continue.
Set the Scene: What Pathway Lighting Achieves
Pathway lighting sets the mood and guides every step after dark. You’ll see how a well-lit route improves safety, invites engagement, and frames outdoor spaces. This isn’t about floodlighting every inch; it’s about highlighting key features and easing passages from yard to doorway.
With purposeful placement, you create a cadence that directs footsteps without glare, so you feel protected and welcome. Use garden accents to add texture and personality—low-profile bollards, sculptural stakes, or recessed strips that complement your landscape.
Integrate lighting automation to maintain consistency, react to sunset, and minimize energy use. The result is a cohesive ambiance you can manage remotely, yet enjoy in the moment, fostering belonging among guests, family, and neighbors who appreciate thoughtful outdoor design.
Layer Pathway Lighting: Core, Fill, and Accent Rules
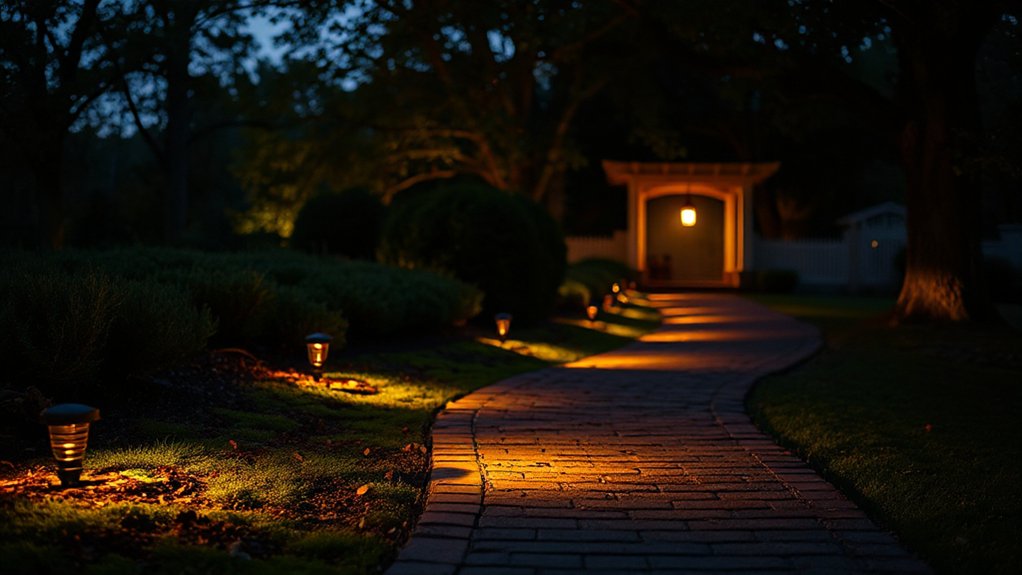
Layering driveway and walkway lighting hinges on three roles: core, fill, and accents. You establish the lighting hierarchy by placing a strong, low-profile core along the path to define edges and guarantee safety.
Fill lights sit closer to eye level, softening contrast and guiding your steps without glare.
Accent lights highlight architectural features, plantings, or textures, creating depth and interest.
Use layers consistently: keep core fixtures evenly spaced, fill fixtures slightly closer together, and reserve accents for focal points. The result is a clear, navigable route with a cohesive glow that feels welcoming.
Practice layering techniques: mix fixture types and heights to avoid flat illumination, while maintaining a unified aesthetic. Your pathways become inviting spaces that reflect thoughtful, intentional design.
Color Temperature for Pathways: Warm vs. Cool Explained
Choosing the right color temperature shapes how your pathway feels and reads at night. Warm temps highlight Safety and Comfort.
But cool temps boost Color Rendering and clarity for targets and steps. Start by balancing warmth perception with practical visibility to optimize both mood and safety.
Warmth Perception Range
Color temperature defines how warm or cool a light appears, and for pathways, it shapes how inviting and usable the area feels after sunset. When you assess warmth perception, you’re evaluating how you and others feel as you walk.
A lower color temperature (warm) typically reads as cozy and reassuring, helping strangers feel welcome and familiar with the route. Higher color temperature (cool) can boost alertness and visibility, which supports quick, confident navigation.
The key is consistency: match nearby light sources so perceived warmth stays steady along the path. Consider your surroundings, colors, and landscape textures, then choose a tone that harmonizes rather than clashes.
Color Rendering Impact
Understanding how color rendering interacts with warmth helps you pick the right shade for pathways. Color rendering affects how textures and colors appear under light, guiding you toward consistency with your surroundings.
When you choose warmer temperatures, you’ll notice more natural browns and greens, aiding color coordination along plantings and stones.
Cooler temps heighten contrasts, which can boost perceived cleanliness and structure, yet may feel harsher in intimate garden corners.
Balance is key: match lumen levels to activity, then adjust color temperature to suit mood and neighborhood style.
Practical lighting plans use a mix of sources to avoid flat looks, so you don’t overdo any one shade.
Use layered luminance, consistent beam spacing, and reflective surfaces to reinforce a welcoming, cohesive path.
Safety and Visibility
Warm lighting helps pathways feel safe, while cool lighting can sharpen visibility at night; choosing the right color temperature matters for perception, glare, and accuracy of textures. You’ll balance mood with function by matching temperature to landscape integration and aesthetic enhancement, so paths feel integrated rather than lit up. Practical guidance below:
- Pick warm temps (2700–3000K) for welcoming, residential areas and soft texture recognition.
- Use cooler temps (3500–4300K) for work zones, steps, and high-contrast surfaces requiring precise navigation.
- Consider CRI and glare-control to minimize eye strain and preserve ambience.
- Layer lighting with layers (path, accent, and downlighting) for depth, safety, and cohesive design.
This approach reinforces belonging, while keeping clarity, efficiency, and visual harmony at the forefront.
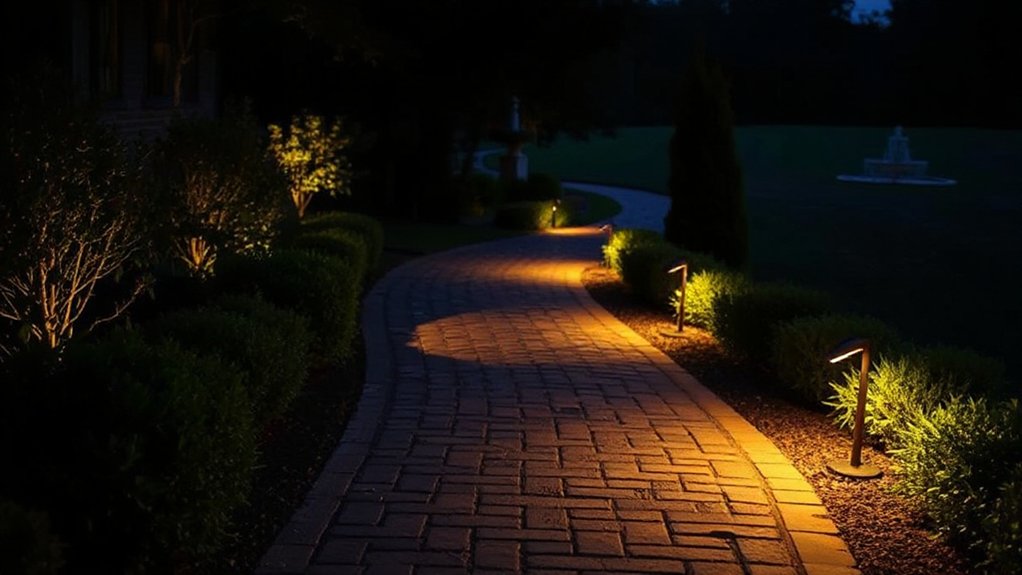
Choose Fixtures by Function: Lanterns, Bollards, and Step Lights
Lanterns guide with atmosphere and function, so pick lanterns by role—soft paths, entryways, or accents—based on the area you want illuminated.
Bollards provide steady guidance along walkways and curb lines, offering durable, mapped light without glare.
Step lights anchor safety and visibility, clearly marking thresholds while preserving landscape appeal.
Lanterns By Function
Choosing fixtures by function simplifies designing a pathway light scheme. Lanterns by function guide you to personality and practicality without overthinking placement. You’ll balance charm with safety, pairing lantern styles with the pace of your pathway and the mood you want to set.
When you consider lighting automation, you gain reliable timing and ambience that feels seamless and inviting. Here are practical options to guide your choice:
- Decorative lanterns that emphasize entryways and walkways
- Functional lanterns paired with dimming for soft evenings
- Weather-resistant finishes that age gracefully with your outdoor space
- Integrated controls that sync with sensors and seasonal needs
Bollards For Guidance
Bollards offer reliable guidance along paths, driving safety and clarity without overpowering the landscape. You’ll find them quietly assertive, marking routes with clean lines and low, accessible elevation.
Choose bollards that balance illumination with architectural fit, so they feel like a natural part of your outdoor space. When you design for bollards guidance, select a consistent height and spacing to create predictable cues—neighbors and guests read pathway markers at a glance, even from a distance.
Opt for warm, dimmable light to maintain a welcoming mood without glare. Materials should resist wear while harmonizing with surroundings; metal, stone, or composite finishes can reinforce your design story.
Use bollards as pathway markers to define edges, support safety, and invite exploration.
Step Lights Placement
Step lights should be chosen by function to guarantee safe, comfortable navigation along steps and shifts. You’ll improve pathway illumination by placing lights at tread edge height, avoiding glare, and ensuring even coverage on each step.
- Step lights placement tailored to stair density and handrail position
- Use low-profile fixtures that blend with materials yet deliver clear sightlines
- Align illumination with step edge for tactile guidance and safety
- Balance ambient glow with accent lighting to foster a welcoming sense of belonging
Lanterns and bollards can complement, but step lights stay primary for critical visibility. Maintain uniform spacing, test at dusk, and adjust for seasonal shadows.
This approach strengthens confidence while moving outdoors, supporting a cohesive, connected vibe. Your pathway illumination becomes practical, precise, and inclusive.
Power Options for Pathway Lighting: Solar, Low-Voltage, Hybrid
There are three solid options for powering pathway lighting: solar, low-voltage, and hybrid systems. Each choice has a place in landscape integration, so you can blend fixtures with your yard’s features while maintaining energy efficiency.
Solar lights are ideal for areas with abundant sun; they’re easy to install and require little maintenance. However, you’ll want to choose models with longer-lasting batteries for cloudy days.
Low-voltage systems offer reliable brightness and greater control, making them perfect for evenly lit paths that invite strolls after dusk.
Hybrid setups combine both sources, maximizing flexibility and resilience. Consider wiring, controller options, and weather exposure to optimize efficiency.
Whichever path you pick, align with your landscape’s aesthetic and your energy goals to foster a welcoming, sustainable environment.
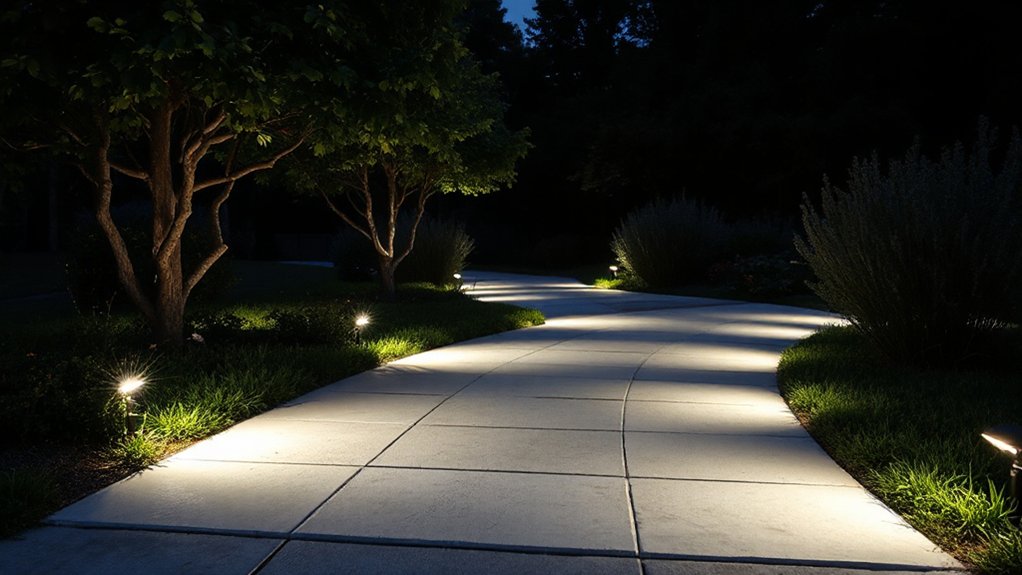
Safety Essentials for Pathways: Spacing, Brightness, Glare
To keep pathways safe after dark, focus on spacing, brightness, and glare control from the start. You’ll optimize safety and ambiance by aligning fixtures for even coverage, minimizing dark patches, and reducing glare for eye comfort.
Prioritize practical placement that enhances landscape aesthetics while supporting energy efficiency.
- Space fixtures to avoid dazzle and ensure clear sightlines
- Calibrate brightness to illuminate footpaths without overpowering surroundings
- Use shields or diffusers to curb glare and improve comfort
- Choose energy-efficient LEDs with appropriate color temperature for consistent tone
These choices reinforce belonging by creating welcoming routes, conserving resources, and preserving night skies.
Proper spacing and controlled brightness protect pedestrians and property while maintaining landscape aesthetics and energy efficiency throughout the property.
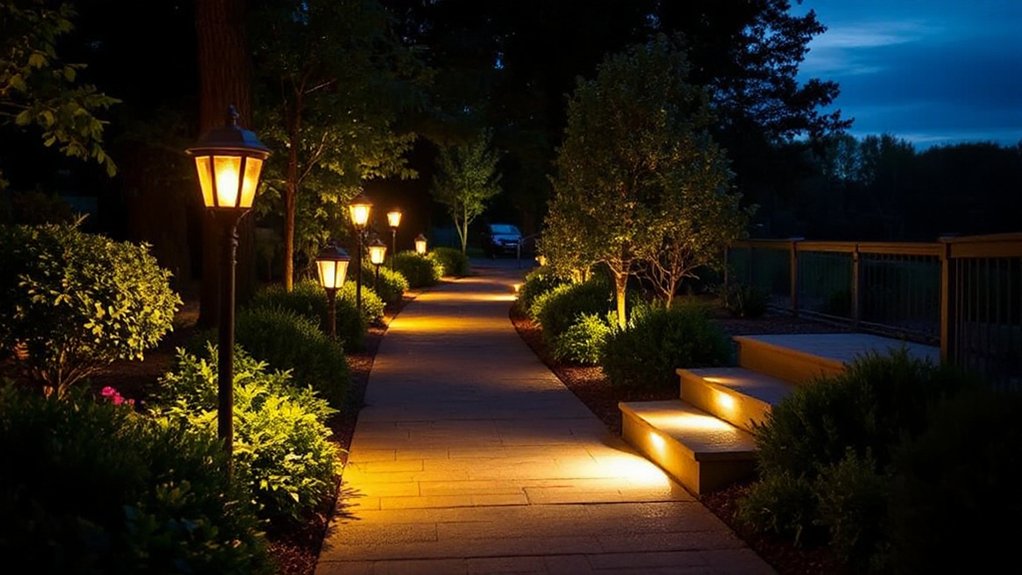
Minimalist Looks: Clean Lines and Hidden Edges
Minimalist lighting relies on clean lines and hidden edges to create a calm, uncluttered look. You’ll choose fixtures with straight profiles, recessed housings, and concealed mounting to emphasize form over ornament.
Align luminaires along pathways in tight, consistent spacing to reinforce rhythm without drawing attention to each light. This approach supports garden aesthetics by blending glow with surrounding textures, rather than competing with them.
You’ll appreciate how subtle shadows define edges, guiding travel while maintaining serenity after sunset.
Prioritize pathway maintenance: keep housings flush, trim vegetation that could obscure light, and verify level alignment so lines stay true.
With this method, you create an inviting, cohesive outdoor corridor that feels intentional and inclusive, inviting neighbors to linger and share.
Accent Gardens: Lighting Focal Points Without Overcrowding
Accent lighting can transform select garden features into focal points without crowding the scene. You’ll create inviting moments that feel intentional, not cluttered, by lighting key elements with restraint and smart angles. Focus on a few garden art pieces or striking landscape design accents, letting shadows add depth rather than noise.
Choose fixtures that blend with your style and highlight texture, color, and form. This approach strengthens structure, guides the eye, and reinforces a sense of belonging within your outdoor room.
- Highlight garden art with soft, warm light
- Use spike or ground-level fixtures to emphasize plant silhouettes
- Pair accents with subtle uplighting for dimension
- Integrate pathway lighting to braid focal points into the route
Weather, Seasons, and Durability: Outdoor Lighting Readiness
Weather-resilient design keeps your path lighting reliable year-round, so you’ll want fixtures rated for outdoor use and suitable for your climate.
Plan for seasonal needs, from winter wind to summer heat, and choose bulbs and seals that stand up to temperature swings.
Weather-Resistant Durability
- Look for IP ratings and UL approval to confirm protection against dust, water, and impacts.
- Favor sealed, gasketed housings and corrosion-resistant materials like bronze or powder-coated aluminum.
- Prioritize solar efficiency with low-profile, high-efficiency LEDs and smart dimming in cloudy seasons.
- Guarantee easy maintenance and replaceability to preserve aesthetic appeal while keeping path safety.
Choose weather-rated components, inspect seals seasonally, and avoid quick-fix décor that traps moisture. When you invest in durability, you gain steadier light, safer steps, and a more inviting outdoor space.
Seasonal Lighting Readiness
Plan for festivity with festive decorations that attach securely, yet come down smoothly after celebrations. Prioritize weatherproof seals and surge protection to reduce downtime during storms. Keep spare bulbs and gaskets on hand, labeling them for quick swaps.
Install dynamic lighting zones that adapt to longer nights and shorter ones, preserving energy while maintaining presence. With thoughtful maintenance, your path feels welcoming year-round.
Budget-Smart Upgrades: Practical Ways to Elevate Path Lighting
Budget-smart upgrades make path lighting affordable without sacrificing safety or curb appeal. You want a look that fits today’s landscaping trends while staying practical, so focus on proven, low-cost moves that feel intentional and welcoming.
- Choose energy efficient bulbs and dimmable options to cut costs and adapt mood without extra effort.
- Swap to durable, weatherproof fixtures mounted at eye level for even illumination and safer paths.
- Install solar-powered or low-voltage lighting to simplify wiring and reduce energy waste.
- Use warm, consistent color temperatures to create a cohesive, inviting atmosphere.
Frequently Asked Questions
How Far Apart Should Pathway Lights Be Installed?
Typically, place pathway lights every 8–12 feet to guide you safely, ensuring even coverage. This supports landscape design goals and energy efficiency, helping you feel confident and connected while optimizing efficiency and ambience for your outdoor space.
What Is the Best Color Temperature for Sidewalks?
Ever wonder which color temperature is best for sidewalks? Choose warm to neutral, about 2700–3500K, for comfortable visibility. Color temperature options matter; Lighting color schemes should align with your space, creating welcoming, cohesive pathways you’ll love.
Can I Mix Solar and Low-Voltage Fixtures Safely?
Yes, you can mix solar and low-voltage fixtures, but prioritize solar compatibility and safety considerations, guarantee compatible wiring and controllers, and maintain uniform grounding. You’ll feel confident and secure knowing your pathway lighting is practical, cohesive, and safe.
How Do I Prevent Light Glare on Steps?
To prevent glare on steps, you’ll adjust angles and use shielded, low-intensity fixtures; aim for even step illumination and add glare reduction barriers if needed. You’ll feel confident and belong when lighting feels safe and unobtrusive.
What Maintenance Helps Extend Pathway Lighting Life?
Lighting fixtures last longer with regular cleaning and bulb checks; replace worn seals promptly to prevent moisture. You’ll extend life by scheduling seasonal maintenance tips, inspecting connections, and cleaning lenses—keeping your pathway glow reliable and welcoming for everyone.
Conclusion
You can turn a plain path into a lit invitation. Think of light as a guiding thread, weaving safety and mood into every step. With the right balance of core, fill, and accents, your walkway becomes a stage for evenings, not just a route. Choose fixtures that fit, power options you trust, and weather-ready durability. Budget-smart tweaks add up fast. Stay practical, stay focused, and let thoughtfully placed glow lead visitors home.