
Installing Luxury Vinyl Plank (LVP) correctly starts with solid subfloor prep and moisture testing. You’ll choose planks with the right wear layer and backing for traffic, lay out patterns, and determine whether floating or glued installation fits your space. Then you’ll align, cut, and fit with expansion gaps, install suitable underlayment, and add alternatives. Maintenance matters too—clean regularly and monitor seams for wear. Master these steps, and you’ll achieve durable, stylish results that stand the test of time. There’s more to come.
Why LVP Is the Best Floor Upgrade for Most Homes
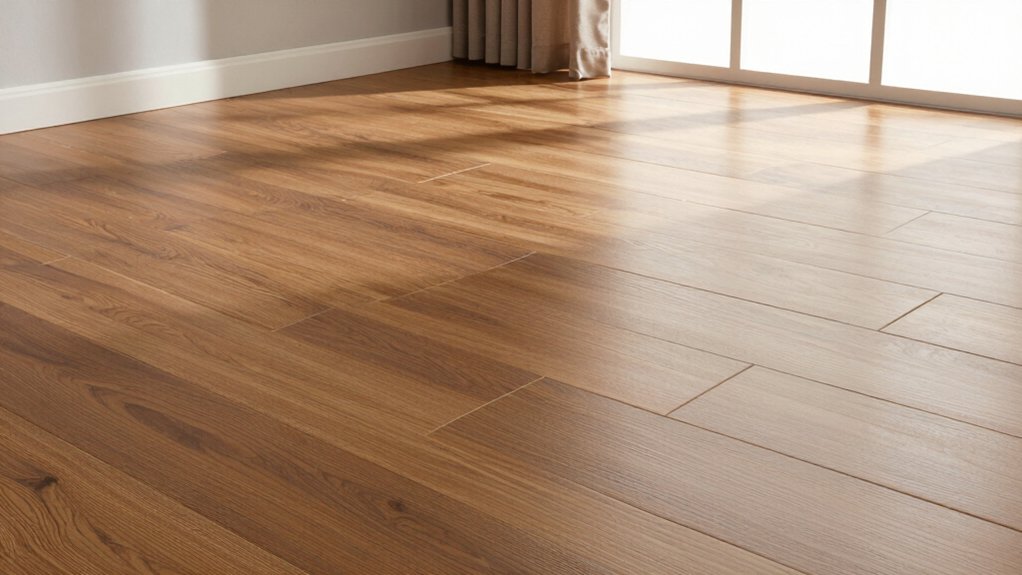
LVP offers a durable, cost-effective flooring solution that suits most homes, making it the practical upgrade choice for many renovators. You’ll appreciate its balanced performance: robust wear layers, precise installation, and quick turnover that minimizes disruption.
This option blends aesthetic versatility with controlled moisture resistance, reducing warp risk in kitchens and baths. Eco friendly options exist, aligning with responsible, long-term updates, while maintaining color and texture fidelity that helps you feel grounded in your space.
Pet friendly features add resilience for households with claws and accidents, backed by stain resistance and easy cleaning. You gain consistent, professional results without sacrificing comfort or warmth underfoot.
How to Choose the Right LVP: Planks, Backing, and Wear Layer
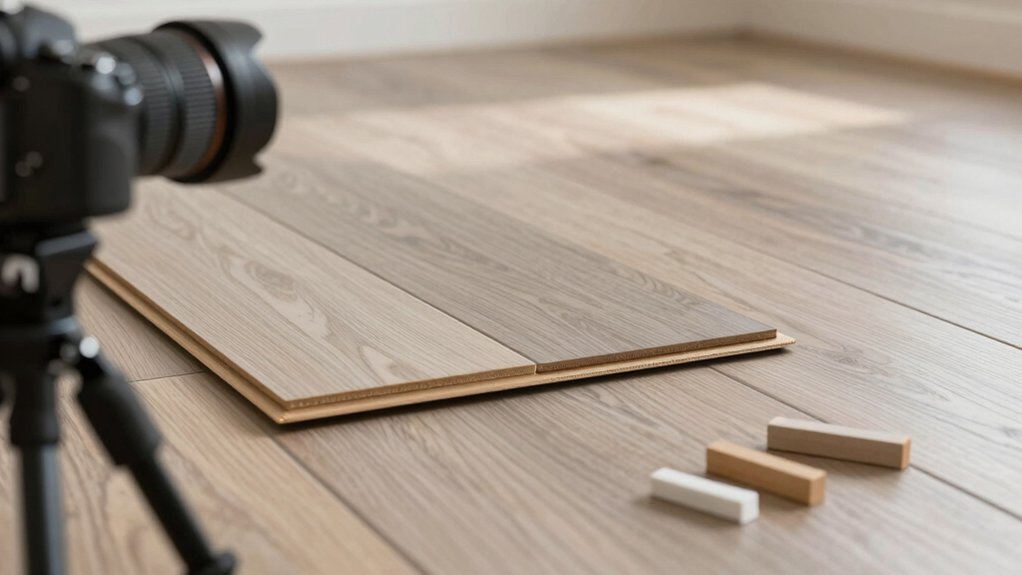
When selecting the right luxury vinyl plank (LVP), focus on three core elements: plank design, backing, and wear layer. You’ll evaluate plank design for pattern options and color coordination that align with your space’s vibe and existing furniture.
Backings matter for dimensional stability, moisture resistance, and sound comfort, so match your subfloor conditions and foot traffic to a compatible backing system.
The wear layer defines durability; thicker layers resist scratches and dents in high-traffic zones, while thinner options suit lighter areas.
Consider edge detail and texture as part of the design language, then verify color coordinates across samples under varied lighting.
Prep Like a Pro: Subfloors, Moisture Testing, and Tools You Need
You’ll start with a solid subfloor and dependable moisture checks, because a stable base prevents gaps and telegraphing under LVP. Use professional-grade moisture tests and surface prep techniques to guarantee compatibility with concrete or wood substrates.
Select the right tools to verify flatness, fastenings, and tolerances. This readiness sets the stage for a durable install and minimizes call-backs down the line.
Subfloor Preparation
A solid subfloor is the foundation of a durable luxury vinyl plank installation, so assess and address any defects before laying planks. Begin with a firm inspection for cracks, gouges, or softness, and plan repairs accordingly.
Confirm a dry, clean surface by removing debris and high spots that could telegraph through the veneer. Subfloor leveling is essential; fill low spots with an appropriate patch-compound and verify flatness within tolerance using a straightedge or laser tool.
For uneven concrete, grind high areas only after confirming moisture readiness for the next step. Choose adhesive options that match your substrate and LVP product, applying per manufacturer guidance.
Maintain a stable, breathable surface, and avoid introducing moisture or contamination that could compromise adhesion or longevity.
Moisture Testing Essentials
Moisture testing is essential before laying luxury vinyl plank flooring to prevent setup failures and long-term defects. You’ll verify subfloor conditions with a scientific mindset, ensuring compatibility with moisture barriers and controlling humidity levels to maximize adhesive performance and plank stability.
1) Assess substrate moisture: use appropriate tests (CM, calcium chloride, or RH probes) per manufacturer specs, and compare results to product guidelines.
2) Verify humidity levels: target ambient and substrate moisture within the recommended range to minimize expansion, contraction, and edge gaps.
3) Plan remediation: if readings exceed limits, implement moisture barriers, patch or replace compromised areas, and re-test before installation.
Document results, maintain consistent procedures, and respect environmental controls to ensure a durable, precise LVP installation.
Floating vs. Glued LVP: Which Installation Fits Your Space?
Floating LVP is installed without adhesive, allowing panels to click or float over a subfloor. Glued LVP, by contrast, is adhered directly to the substrate for a more permanent, stable floor. You’ll choose between these options based on space, subfloor conditions, and traffic.
Floating installs excel in rooms with minor movement or moisture considerations, enabling easier repairs and expansion gaps that accommodate seasonal shifts. Glued installations deliver maximum rigidity and sound reduction, making them ideal for high-traffic areas or where long-term permanence matters.
Consider design aesthetics as well—floating options often showcase seamless patterns, while glued installations emphasize precise alignment and minimal panel shifting. Eco-friendly materials and manufacturing processes can also influence your choice, since some options prioritize low-VOC finishes and recycled cores.
Install LVP Step by Step: Layout, Underlayment, and Finishing Touches
Begin with precise layout planning to guarantee straight running lines and proper stagger patterns. Then confirm room measurements align with your chosen plank width.
Your underlayment choice should balance sound control, moisture protection, and compatibility with the subfloor and LVP. So select the product and thickness that match site conditions.
This briefing sets the stage for exact layout execution and underlayment installation before you proceed to finishing touches.
Layout Preparation
Before laying out the room, measure and map the space to guide cut lines and seam placement. You’ll create a consistent starting line, minimize waste, and guarantee alignment with doorways and fixtures. Plan for expansion gaps along walls, and premark staggered joints to suit your pattern. Consider how area rugs and wall colors influence visual rhythm, then map sightlines to avoid abrupt seams at high-traffic zones.
- Align planks from a reference wall and verify room width for precise cuts.
- Mark staggered joints to achieve a balanced, professional look across the layout.
- Flag obstruction clearances and temporary works to keep the workflow efficient and safe.
Underlayment Choice
Choosing the right underlayment sets the foundation for comfort, sound, and moisture control once you start laying LVP. You’ll evaluate thickness, density, and compatibility with your substrate to prevent telegraphing and movement.
For sound privacy, prioritize soundproofing options that match your space’s needs and your HVAC profile, aiming for a balance between impact noise reduction and footfall comfort.
Guarantee seamless moisture protection with a vapor barrier where required, and confirm the underlayment can be installed flat without seams that trap dirt.
Eco-friendly materials are increasingly available, including recycled fibers and low-VOC backings, without sacrificing performance.
Finally, verify compatibility with installed underlayment if you plan radiant heat; follow manufacturer guidelines to maintain warranty coverage.
Master Cutting and Joints for Seamless Panels
Master cutting and joints are the backbone of seamless luxury vinyl plank panels. You approach cuts with precision, aligning joints to minimize seams and maximize stability across the field. Use accurate measuring, tight scribing, and clean edges to guarantee panels interlock smoothly. Maintain consistent gaps for expansion, and stagger joints to reduce pattern repetition.
- Mark cut lines carefully, then verify against the layout to prevent misfits.
- Use a sharp utility knife and straight edge for clean, square cuts; test-fit before permanent placement.
- Align joints tightly, compressing planks during installation to hide seams and improve rigidity.
Keep subfloor leveling and surface cleanliness in check to support mold prevention and long-term performance.
Troubleshooting Common LVP Issues Before They Start

Even with meticulous prep, LVP issues can arise if you don’t anticipate them before installation. You’ll head off problems by verifying substrate flatness, moisture, and acclimation.
Check for more than 3/16 inch variation over 10 feet and test moisture content per ASTM standards. Address high spots with leveling compound and low spots with patching.
Inspect underlayment compatibility, seams alignment, and plank orientation to avoid gaps and telegraphing. Preselect patterns and adhesives or click-lock systems that suit your space, ensuring compatibility with pet friendly options and eco friendly materials when applicable.
Schedule acclimation for 48 hours in the installation area, not in a controlled closet, to prevent post-install shifts. Document all settings, and keep protective measures ready to minimize future repairs.
Finishing, Transitions, and Long-Term Maintenance for Lasting Beauty
After installing LVP, finishing details and proper progression protect the floor’s appearance and performance. You’ll guarantee longevity by choosing compatible edge finishing and transition strips, and by maintaining consistent moisture control and cleaning habits.
Edge finishing prevents grout or debris intrusion at boundaries, while transition strips accommodate expansion gaps without tripping hazards. Follow these key steps:
- Install edge finishing and transition strips per manufacturer specs to guarantee a seamless, safe perimeter.
- Schedule long-term maintenance with regular moisture-aware cleaning, avoiding excess water and abrasive cleaners.
- Inspect high-traffic seams annually for wear, replacing damaged components promptly to preserve uniformity and resale value.
Frequently Asked Questions
Can LVP Be Installed Over Existing Flooring Without Removal?
Yes, you can, but you must assess floor prep and subfloor compatibility first. If the existing floor is solid and smooth, you can proceed; otherwise, resolve unevenness, moisture, and contaminants before continuing, or risk adhesion failure and squeaks.
How Do I Flash and Seal Around Irregular Corners?
To flash and seal around irregular corners, you install corner flashing over the seam, then seal irregular edges with a compatible sealant. Guarantee a tight bend, smooth shifts, and inspect for gaps to maintain water resistance and durability.
Is Underlayment Required for All LVP Installations?
Underlayment isn’t always required for LVP; it depends on product specs and subfloor. You’ll guarantee proper subfloor preparation, and install a moisture barrier where needed to prevent moisture transfer and maintain long-term flooring performance.
What’s the Best Method for Cutting LVP Tips and Splines?
Cutting LVP tips and splines requires precise cutting tools and proper spline techniques. You’ll improve accuracy by scoring with a sharp utility knife, then using a fine-tooth saw for rebates. Fact: 87% trust correct cuts for seamless installs.
How Often Should LVP Be Resealed or Waxed?
You should reseal or wax LVP sparingly, typically every 1–2 years, depending on wear. Maintain Cleaning frequency to prevent buildup, and use Protective coatings only as recommended by the manufacturer to preserve slip resistance and beauty.