
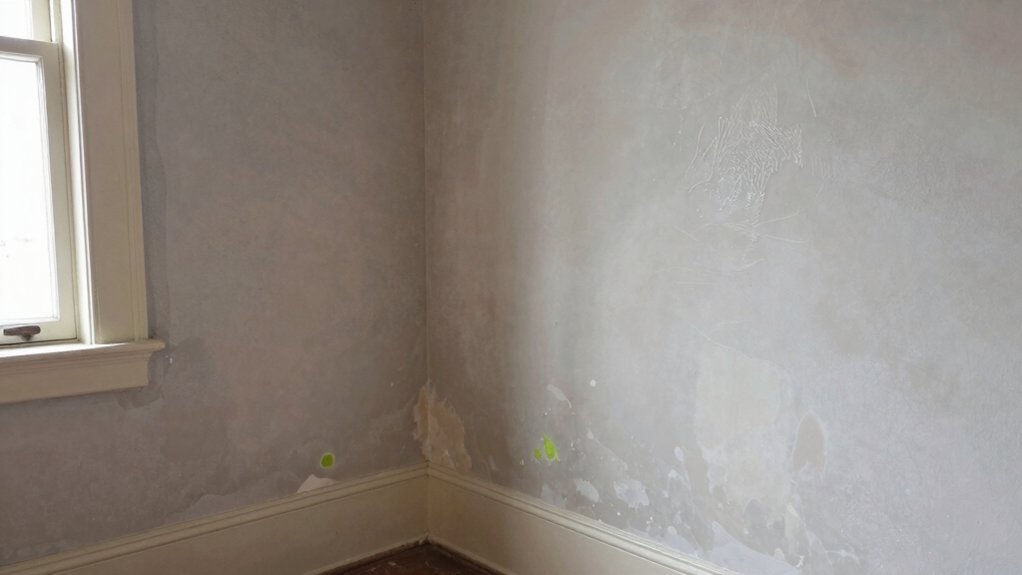
Damp walls reveal themselves fast. Look for stains, peeling or bubbling paint, soft patches, and musty odors. You’ll notice texture changes, warped or bulging panels, and cracks around seams or corners. Check for efflorescence along grout and baseboards, plus hidden moisture suggested by persistent dampness after ventilation. Use a moisture meter to map readings and monitor patterns over time. Stop leaks and dry the area, then seal, insulate, and ventilate. If issues persist, you’ll uncover more—and you’ll want more guidance.
Spotting Damp Walls: Early Interior Signs to Check
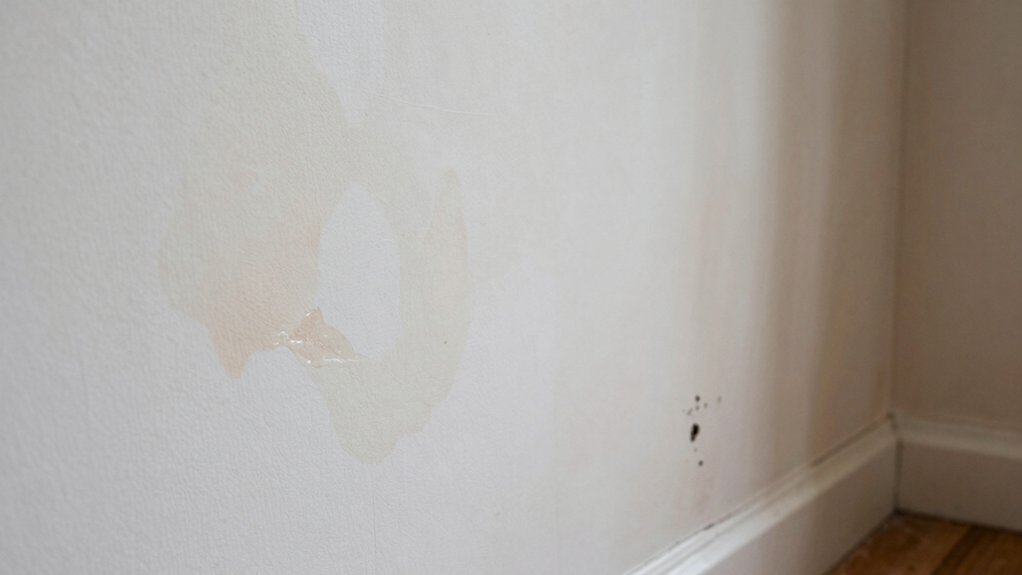
Spotting damp walls starts with paying attention to subtle cues near seams, corners, and high-humidity zones. You notice changes in wall texture as surfaces feel different to the touch, and you spot small patches that weren’t there before. Paint peeling becomes a reliable indicator when expansion and moisture push against coatings, causing edges to lift or curl.
Look for brownish or white efflorescence along grout lines and at baseboards, which signals moisture intrusion. Listen for faint, persistent sounds—dripping or settling—that accompany visible signs. Your approach is practical: document affected areas, compare over time, and prioritize safety by avoiding compromised electrical spots.
This awareness builds belonging, empowering you to address issues promptly with clear, actionable steps and professional guidance when needed.
What Causes Damp and Humidity Build-Up
Damp and humidity build-up typically stems from a combination of moisture sources and inadequate ventilation. You’ll notice it when warm air meets cool surfaces, condensing on walls, windows, or ceilings.
Common humidity sources include cooking, showering, drying clothes indoors, and leaking pipes, all introducing moisture that your space struggles to exhaust. In poorly vented rooms, moisture lingers, promoting mold and musty odors.
Exterior issues, like poor drainage or faulty flashing, let water intrude and raise indoor humidity levels. Proper balance matters: you need air exchange, moisture control, and insulation that keeps surfaces warmer to reduce condensation.
Focus on damp prevention by addressing leaks, using exhaust fans, and maintaining consistent humidity levels. When humidity remains high despite efforts, reassess ventilation design and source control.
Detecting Water Damage on Paint, Wallpaper, and Panels
Look for visible stains and surface texture clues on painted, wallpapered, or panel surfaces. Stains indicate moisture wicking through layers.
Surface texture changes—softening, bubbling, peeling, or crisp edges—hint at ongoing damage. Noting these signs early helps you assess extent and plan targeted corrective steps.
Visible Stains Clues
Water stains are your first clue that moisture has touched paint, wallpaper, or panels. When you spot discoloration, you’re seeing the visible evidence of a leak or high humidity. Color change signals the water’s presence, while subtle shifts in gloss or matte areas warn you moisture is lingering.
Odor detection matters too; a musty scent confirms hidden dampness behind the surface.
- Look for uneven tones and ring-like halos around joints
- Note bubbling, cracking, or peeling where moisture concentrates
- Test for damp patches that persist after surface dries
Address these stains promptly to prevent further damage. Early action preserves color integrity, supports paint adhesion, and reduces long-term repair needs.
You belong here in maintaining a healthy, stable living space by responding to visible stains with decisive, informed steps.
Surface Texture Clues
Surface texture clues reveal moisture issues when you inspect paint, wallpaper, and panels up close. You’ll notice texture patterns that break evenly across surfaces, signaling hidden dampness behind coatings. Look for subtle ridges, waviness, or pinholes that don’t align with intended design.
Surface irregularities often accompany peeling edges, curling, or cracking that isn’t caused by normal wear. On painted walls, run your hand slowly to feel softness or sponginess beneath a glossy finish, which suggests moisture intrusion.
Wallpaper may show lifting seams, bubbling, or a cloudy appearance where moisture has weakened the adhesive. Panels can exhibit swelling or texture changes beneath veneer.
Trust these texture cues as early warnings, then investigate further and address moisture sources promptly to protect belongings and structure.
Assessing Extent: When Are You Looking at Hidden Moisture?
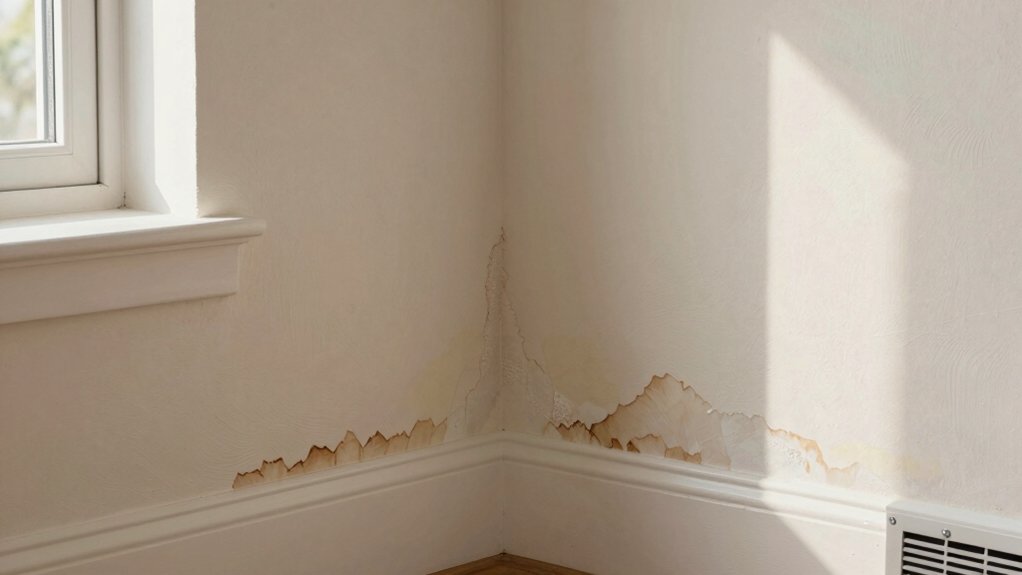
Hidden moisture often hides in plain sight, and you can’t rely on surface changes alone to gauge the full extent. You’re evaluating more than walls you see—the unseen damp can creep behind siding, under flooring, and in studs.
You’ll want to map patterns over time, note persistent musty scents, and trust subtle temperature shifts as clues.
- Track changes across rooms and seasons to reveal hidden moisture
- Correlate humidity spikes with any staining or peeling paint
- Plan targeted moisture control before sealing or repairing
Effective humidity control matters before you seal up areas, and choosing the right waterproofing methods prevents further spread.
You’ll build lasting peace of mind by identifying hidden moisture early and addressing its source rather than chasing symptoms. Your approach should be precise, proactive, and aligned with home comfort.
Moisture Testing 101: Tools, Methods, and Safe Practices
To test for moisture accurately, you’ll use a mix of tools and proven methods that reveal present and hidden damp without guesswork.
Start with moisture meters to gauge substrate wetness, then confirm with humidity sensors that track ambient conditions over time.
Use non-penetrating meters on walls to map hotspots, and consider pin-type probes for deeper readings where legal.
Document readings at multiple locations and times to spot patterns, not one-off spikes.
Practice safe testing by wearing gloves, sealing floors, and ventilating the area to reduce airborne irritants.
Interpret results with a baseline for your space, so you can compare future measurements.
This approach builds confidence, belonging, and a clear path to repair, without unnecessary drama.
Structural Clues: Framing, Studs, and Rot to Watch For
When you’re evaluating water damage, start with the structural clues: inspect framing, studs, and any signs of rot. You’ll spot trouble fast if you check for warped beams, loosened joints, and staining that hints at hidden leaks. Focus on the integrity of the shell, not just surface marks, because framing inspection reveals where moisture has weakened the structure.
Look for wood rot indicators: crumbly edges, powdery dust, or a musty odor that accompanies compromised timber. Addressing these early protects your home and your sense of belonging in a safe space.
- Framing inspection cues: warped, separated, or soft timber
- Stud indicators: liftable plates, hollow sounds, or split joints
- Wood rot signs: discoloration, grain collapse, and mold-friendly moisture pockets
Stop the Source: Containment Before Repairs
Stop the source of the moisture first, then contain what’s already spread. You act fast by identifying the origin and stopping flow at the point of entry. This is containment in action: isolate affected areas, seal off rooms, and prevent cross-contamination to dry zones.
Your aim is steady containment strategies that limit damage while you plan next steps. Document moisture readings and track where water travels so you can trace back to the source using clear, actionable steps. Prioritize source elimination, removing leaks, repairing penetrations, and shutting off water to affected circuits if needed.
Communicate with family or team to ensure everyone understands boundaries and safety. When the source is contained, you can proceed with confidence to dry and assess without reopening fresh leaks.
Repair Pathways: Minor Fixes to Major Overhauls
You’ll start with minor fixes that stop small leaks, dry affected areas, and restore function quickly. If those hold, you can plan a major overhaul that replaces damaged materials, redesigns vulnerable sections, and safeguards against future floods.
Either path hinges on evaluating damage early and choosing fixes that balance effort, cost, and long-term reliability.
Minor Fixes Overview
Minor fixes can mitigate water damage and prevent escalation. You don’t need a full overhaul to protect your space; small, targeted steps keep walls healthy and neighbors confident you’re handling it responsibly.
- Spot and repair leaks promptly
- Dry and repaint to prevent paint peeling and mold growth
- Monitor humidity and address condensation
These moves preserve your sense of belonging, showing you’re in control and part of a proactive community. Quick action reduces moisture pockets, stops staining, and supports lasting comfort.
You’ll notice steadier indoor air, fewer odors, and clearer surfaces as you seal gaps, vent properly, and maintain consistent temperatures. By embracing minor fixes, you demonstrate care for your home and your fellow residents, preserving value and trust while you plan for stronger repairs only when truly needed.
Major Overhaul Pathways
Major overhaul pathways build on the momentum of minor fixes by outlining decisive, scalable actions for substantial water-damage recovery. You move from patching leaks to rethinking the system, prioritizing long-lasting outcomes.
Begin with thorough assessment, documenting damage, moisture levels, and hidden rot to guide critical choices. Implement high‑efficiency thermal insulation to reduce future condensation and energy waste, then seal penetrations to prevent recurring intrusion.
Remove mold contamination safely, using proven remediation techniques and protective gear, and verify results with moisture readings. Upgrade ventilation to ensure consistent air exchange, mitigating damp environments that foster growth.
Restore structure with moisture‑resistant materials and proper fastenings, and re‑test once completed. Establish a preventive routine, maintain dryness, and schedule follow‑ups to safeguard your space and community.
When to Call a Pro: Decision Criteria and Timing
If you notice persistent leaks, mold growth, or standing water that doesn’t dry within 24–48 hours, call a pro. Knowing when to escalate protects your home, wallet, and peace of mind. A professional evaluation quickly identifies hidden damage, potential structural risks, and moisture behind walls.
Timing matters: delaying can worsen costs and health hazards. Use clear decision criteria to decide on next steps, then act decisively to preserve value and comfort.
- Persistent staining or odor despite DIY fixes
- Visible actual leaks with ongoing moisture readings
- Moisture returns after temporary fixes, signaling deeper issues
Professional evaluation guides repair timing, avoiding premature or excessive work. If tests confirm substantial damage, schedule remediation promptly to minimize disruption and ensure lasting results. You belong in a safer, drier home.
Frequently Asked Questions
Can Mold Exposure Occur Without Visible Water Damage?
Yes, mold growth can occur without visible water damage by hiding behind walls or under floors due to hidden leaks. Regular checks catch moisture, mold growth early, and protect you from health risks and costly repairs.
How Long Does Water Damage Take to Become Permanent?
Water damage becomes permanent once it deeply penetrates structural materials; timing varies, but you should act quickly. Conduct a timing assessment, monitor damage progression, and address leaks promptly to minimize lasting effects and protect your space.
Are There Safe DIY Mold Remediation Steps I Can Take?
Mold prevention matters; you can’t ignore it. For safe DIY cleaning tips, start with ventilation, gloves, and a mask, then scrub nonporous surfaces with detergent. If present beyond scope, call a pro—don’t risk your health.
What Insurance Coverage Covers Water Damage Repairs?
You’ll typically rely on your homeowner’s insurance for water damage repairs, but claims depend on policy, facts, and coverage limits. Insurance claims may cover sudden losses, while Coverage limitations can exclude gradual or preventative fixes.
How Can I Prevent Future Moisture Problems After Repairs?
Did you know 60% of homeowners see fewer moisture issues after improving ventilation? You should pursue ventilation improvements and moisture barriers, then maintain active airflow, fix leaks promptly, and schedule regular inspections to prevent future moisture problems after repairs.