
Find the Leak: Corners, Drain, or Valve?
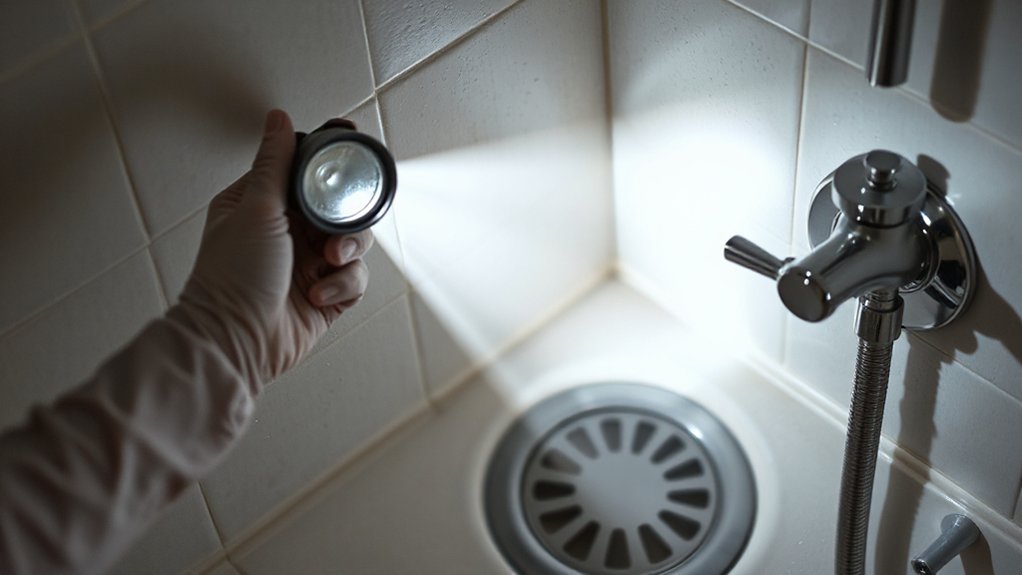
Before you reach for sealant or tools, you need to pinpoint where the water’s actually escaping, because a leaking corner fix won’t help a failing drain or a loose valve. Start with simple leak detection methods: dry the shower, then run it for two minutes and watch the silicone lines at corners and tray edges for beads forming. Next, plug the drain, fill the tray to a shallow level, and mark the waterline with masking tape; if the level drops, suspect the waste or tray seal. Finally, check the valve area: run the shower with the head pointing into a bucket so spray can’t hit joints, and look for drips around the trim. If you’ve got a gauge, do Water pressure testing to spot unusual fluctuations.
Rule Out a Plumbing Leak Behind the Wall
Before you blame the tiles or sealant, you need to rule out a plumbing leak behind the wall. Check around the shower valve area and feel the adjacent wall (including the room next door) for damp patches, staining, or a musty smell. Then test for supply line leaks by turning the shower off, drying everything, and watching for fresh moisture around the valve or pipework access points.
Check Shower Valve Area
Although most shower leaks come from failed silicone or grout, you should also check the shower valve area to rule out a plumbing leak hidden behind the wall. Start with simple Leak detection: dry the tiles around the control, then run the shower and watch for fresh water tracking from behind the backplate. If you’ve got a mixer, remove the handle and trim (usually a grub screw/Allen key) and check the Shower valve for drips around the spindle, cartridge, or compression nuts. Tighten fittings gently with the right spanner and support the pipework to avoid twisting. Replace worn O-rings or cartridges if you see seepage. Turn off the isolating valves or stopcock before touching anything, and use PTFE tape only where appropriate.
Inspect Adjacent Wall Dampness
If the tiles look sound but you’re still seeing moisture, check the wall on the other side of the shower to rule out a hidden pipe leak. In UK homes this is often a bedroom, landing, or airing cupboard wall. Run your hand along the skirting and mid-wall for coolness, softness, or bubbling paint, and look for dark patches that widen after showering.
Use a torch at a low angle to spot raised plaster and salt marks. Check around sockets (turn power off at the consumer unit first) and sniff for a musty smell. Note whether damp sits low and spreads sideways, which suggests moisture migration through plaster rather than a tile surface issue. If the wall feels cold and persists, saturated wall insulation can hold water and keep the area damp.
Test Supply Line Leaks
Where’s the water really coming from—your shower sealant, or a pressurised supply pipe leaking behind the wall? To rule out a supply leak, stop using the shower, then shut off the isolating valves to the hot and cold feeds (often under the basin, airing cupboard, or near the cylinder/boiler). Dry the area and mark the damp edge with pencil. Leave it 6–12 hours. If staining still spreads with the feeds off, you’re dealing with trapped moisture or a waste leak, not supply. Next, open the valves and run cold only, then hot only, watching for rapid damp growth—higher Water pressure makes this obvious. Listen for hissing and feel for warmth on the wall. Check Pipe insulation gaps that let condensation mimic leaks too.
Regrout to Stop Leaking Shower Grout Lines
When water seeps through cracked or powdery grout lines, regrouting is often the quickest way to stop a shower leak without disturbing the tiles. First, rake out the loose grout with a grout saw or oscillating tool, keeping the blade centred to protect the tile edges and tile color. Vacuum dust, then wipe with a damp cloth and let everything dry fully. Mix fresh grout to a peanut-butter consistency and press it firmly into joints using a rubber float, working diagonally. Sponge off haze lightly after it firms up, then polish with a dry microfibre cloth. Seal the grout once cured, following UK product timings. Good prep extends grout lifespan and reduces repeat leaks.
Recaulk Shower Corners and Tile-to-Pan Joints
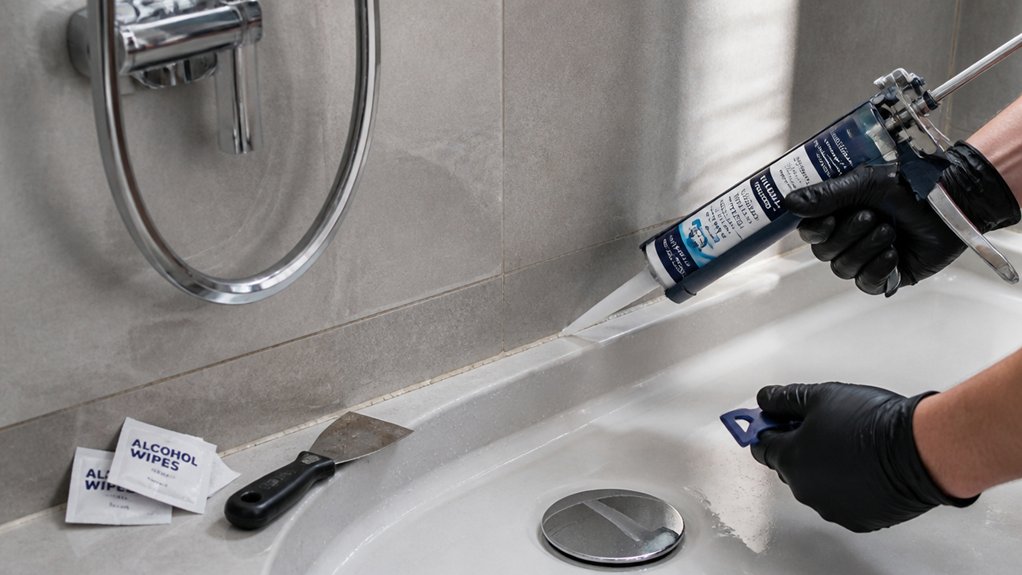
Although grout fills the flat joints, the corners and the tile-to-shower-tray (tile-to-pan) seam rely on flexible sealant, so split or mouldy silicone there can let water track behind the tiles and straight into the wall or floor. Cut out all old silicone with a sharp knife and a scraper, then wipe with methylated spirits to remove soap film. Dry the area fully; run a fan heater nearby if needed. Mask both sides with painter’s tape for a neat bead. For Caulk application, use a sanitary, mould-resistant silicone (common in UK DIY sheds), cut the nozzle at 45°, and gun a continuous line into corners and along the tray edge. Smooth with a wet finger or profiling tool, peel tape, and leave 24 hours for mold prevention.
Seal the Shower Drain Flange From the Top
If water’s escaping around the drain even after you’ve recaulked the tray edge, the drain flange seal has probably failed and you can often sort it from the top without lifting tiles. Pull the Shower drain grate with a screwdriver, then remove any hair trap. Clean the flange and tray recess thoroughly: scrape old silicone, wipe with white spirit, then dry. Check the waste isn’t loose; nip it up gently if it’s a compression type. For Flange sealing, run a thin bead of sanitary silicone around the visible flange-to-tray joint, not into the waste opening. Smooth with a wet finger or profiling tool so water can’t sit. Refit the grate, leave 24 hours, then test with a bucketful. Watch underneath if possible.
Stop Leaks Behind the Shower Valve Trim Plate
Because the valve trim plate (escutcheon) hides the pipework penetration, a failed seal behind it can let shower spray run straight into the wall and show up as damp staining or drips elsewhere. Turn off the isolating valves (or stopcock), then pull off the temperature/flow handle and undo the retaining screws. Ease the plate forward and check the foam gasket; if it’s split or missing, replace it. If there’s no gasket, run a neat bead of sanitary silicone around the plate’s rear edge, leaving a 10mm gap at the bottom for drainage. Refit and tighten evenly. Then run the shower at normal Water pressure, with the Shower curtain kept clear, and watch for seepage around the plate.
Patch Hairline Tile and Grout Cracks Causing Leaks
Start by finding where the hairline cracks run through the tile or grout, paying close attention to corners, grout joints, and around fittings where movement’s common. Clean and dry the area, then seal the crack with a suitable bathroom-grade grout repair or clear sanitary silicone so water can’t track behind the tiles. Finish by running the shower and checking the adjacent wall and floor for any fresh damp patches to confirm the leak’s stopped.
Locate Hairline Crack Sources
Even when the tiles look sound at a glance, hairline cracks in grout lines, corners, or around the shower valve can let water track behind the surface and show up as a “mystery” leak. Start with Hairline crack identification: dry the area, then run a torch at a low angle to highlight fine lines and pinholes. Mark suspect spots with masking tape.
Next, do crack source analysis. Check movement points first: internal corners, the tray-to-wall joint, and where the mixer/risers meet tile. Lightly press tiles and listen for hollow notes that suggest flexing. Look for rust staining, dark grout, or limescale trails that point to a path. If you’ve got access, inspect the ceiling below for damp patches aligning with those marks.
Seal Tile And Grout
Once you’ve taped up the suspect hairline cracks and pinpointed the likely water path, seal them straight away to stop moisture getting behind the tiles. Clean the area with sugar soap, rinse, then dry fully (use a hairdryer on low if needed). For cracks in grout lines, rake out any loose material with a grout saw, vacuum dust, then press in flexible, mould-resistant grout or a grout repair paste. Tool it smooth with a damp finger and wipe haze with a microfibre cloth. For cracks through tile faces or corners, use a quality sanitary silicone (UK bathroom grade) and gun in a thin bead, then profile it neatly. Finish with a penetrating grout sealer to improve Grout durability and support ongoing Tile maintenance too.
Verify Leak Repair
A proper check now saves you chasing the same shower leak again next week. Let sealant cure fully (check the tube; often 24 hours) before testing. Tape kitchen roll along grout lines, corners, and around the valve plate, then run the shower for five minutes at normal water pressure. Switch between hot and cold, then blast full flow for another minute to stress hairline cracks you’ve patched.
Turn the shower off and wait ten minutes; slow seepage shows later. Inspect the paper for damp spots and look for darkening grout. If it’s wet near fittings, confirm fixture compatibility: loose backplates, mismatched seals, or a non-standard UK thread can weep. Re-caulk and retest.
Seal Grout to Reduce Absorption and Future Leaks
Because grout is porous, it can soak up water and channel it behind your tiles, so sealing it is one of the simplest UK-friendly ways to cut absorption and prevent future leaks without lifting a single tile. Start by letting the shower dry fully, then clean joints with a non-oily bathroom cleaner and a stiff nylon brush; rinse and allow to dry again. For Grout sealing, choose a penetrating, water-based sealer suited to cement grout (widely available at Screwfix, Wickes, or B&Q). Mask silicone edges with low-tack tape, then apply sealer with a small brush or applicator bottle, working one square metre at a time. Wipe excess off tile faces before it hazes. Apply a second coat if the first soaks in fast for Absorption reduction. Let it cure per label.
Test Your Repair: Spray Test and 24-Hour Check
After you’ve resealed silicone or grout, you need to prove the leak’s stopped before you put everything back into daily use. Start with a spray test: fit the shower head back on, set it to a steady pattern, and run it for 5–10 minutes. Keep Water pressure at your normal setting, not full blast, so you’re testing real conditions. Direct water at corners, the valve plate, and the tray-to-wall joint.
Next, do a 24-hour check. Dry everything, then tape kitchen roll along suspect seams and around the base outside the cubicle. Don’t use the shower. After a day, inspect for damp patches, curling tape, or staining. If it’s dry, your Shower maintenance is on track.
Frequently Asked Questions
Will Homeowners Insurance Cover Damage From a Leaking Shower?
Homeowners insurance might cover leaking shower damage if it’s sudden and accidental, but it won’t cover gradual wear or poor maintenance. You’ll need clear evidence for insurance claims, and you should prioritise leak prevention to reduce excess.
How Much Does a Tileless Shower Leak Repair Usually Cost?
You’ll usually pay £200–£800 for a tileless shower leak repair in the UK, depending on access and labour. Expect Tile repair for trims or panels, plus Waterproofing solutions like resealing, membranes, and tests.
What Tools Do I Need to Fix a Shower Leak Without Removing Tiles?
Like a detective’s torch in a dark loft, you’ll need a torch, moisture meter, mirror, and dye tablets for shower leak diagnosis; plus scraper, caulking gun, masking tape, alcohol wipes, and waterproof sealants, gloves.
How Long Should I Wait Before Using the Shower After Repairs?
You should wait 24 hours after silicone or tile sealing, and 48 hours after shower waterproofing or grout repairs. Follow the product’s UK label: cooler bathrooms slow curing. Don’t run extractor until tack-free.
When Should I Call a Plumber Instead of Attempting a DIY Repair?
Call a plumber when leaks spread like foxes in a henhouse: you can’t track them safely. If you smell gas, see damp ceilings, low pressure, or mould, prioritise DIY safety and book a Plumbing inspection.
Conclusion
You’ve tracked the leak and tackled it at the source—grout, caulk, drain flange, or valve trim—without lifting a single tile. Now test it like you mean it: spray the suspect areas methodically, then leave the shower unused for 24 hours and check the ceiling below or the adjacent wall for damp. Seal the grout to slow absorption. Fixing a shower is like fixing trust: small gaps matter, but so does follow‑through.