
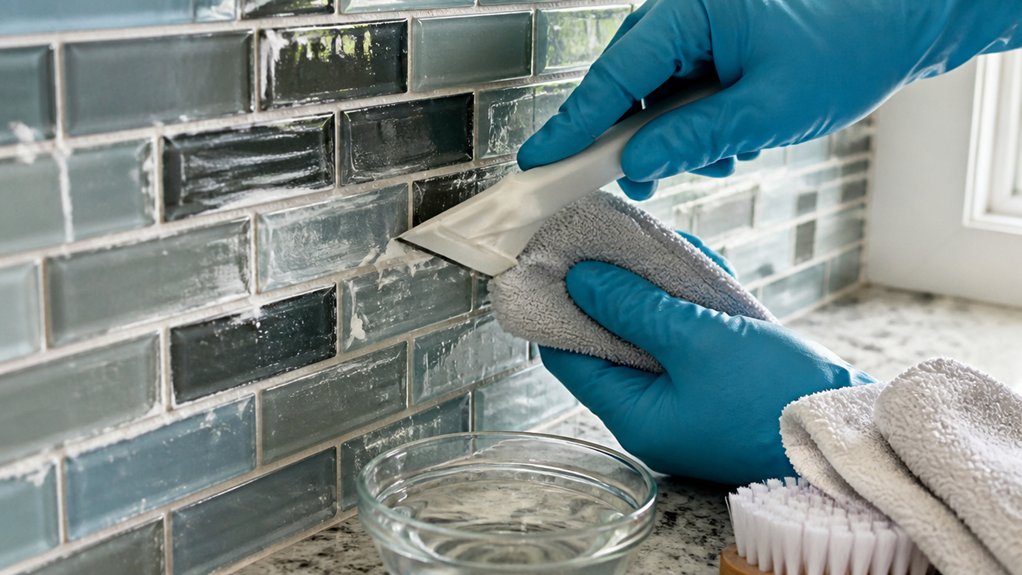
Identify Grout Haze vs. Dried Grout Chunks
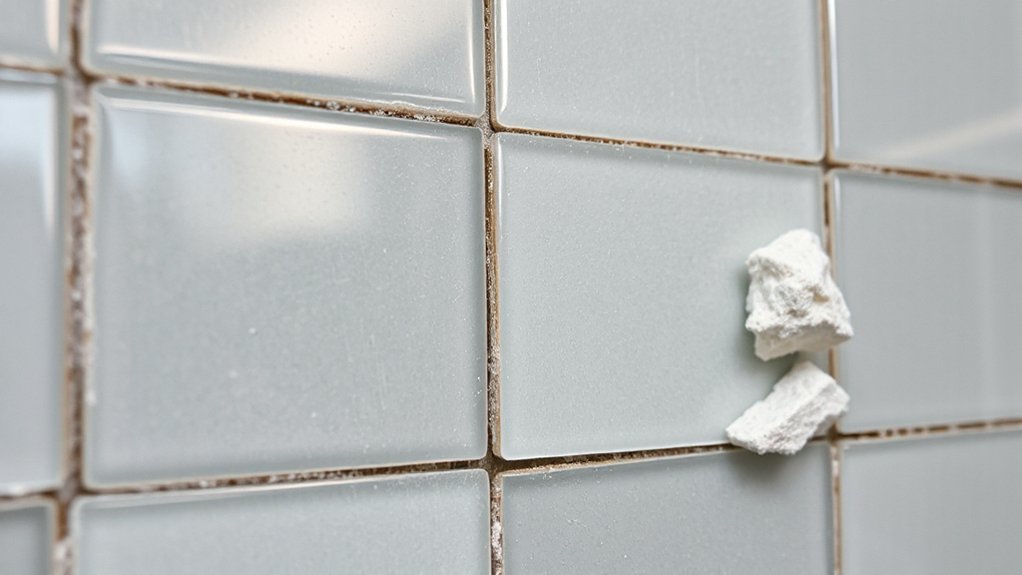
Although both can look like a cloudy film at first glance, grout haze and dried grout chunks behave very differently on glass tile. You’ll confirm haze when the surface feels smooth, the clouding lightens with a damp microfibre wipe, and you can’t catch an edge with a fingernail. You’ll identify chunks when you see raised ridges, feel grit, and the deposit resists light wiping. Use Grout color differentiation: haze usually tints the tile evenly, matching the grout tone, while chunks show distinct flecks or thicker bands. Run a Surface porosity comparison in your head: glass is non-porous, so true haze sits on top, whereas chunks often bridge joints and bond mechanically. Check under raking light to map affected areas accurately.
Supplies to Remove Grout From Glass Tile
Once you’ve confirmed whether you’re dealing with a smooth grout haze or raised, hardened deposits, gather the right kit so you can remove it from glass without scratching or etching. Use nitrile gloves, safety specs, and a FFP2 mask for fine dust. Keep microfibre cloths, non-scratch nylon pads, and wooden or plastic scrapers (no metal) to protect polished edges. Have a pH-neutral cleaner, plus a proprietary cement-residue remover suitable for glass; check UK SDS sheets and dilution ratios. Add a small detailing brush for corners and silicone lines, and a spray bottle for controlled application. Keep masking tape to shield aluminium trims. Finally, set aside colour matching grout for repairs and a grout sealing product for post-clean protection.
Start With Warm Water and a Soft Cloth
Start by soaking the dried grout with warm water to soften it without stressing the glass tile surface. Wipe gently with a soft cloth, keeping even pressure and working in small sections to prevent scratching. Repeat the wet-and-wipe cycle until the glass clears and no residue remains.
Soak Grout With Warm Water
Before you reach for scrapers or chemical cleaners, soak the dried grout with warm water to soften it without risking scratches on the glass tile. Fill a spray bottle or bowl with warm (not boiling) water, around 40–50°C, and apply it directly to the grout haze and any lumps. Keep the surface damp for 5–10 minutes, reapplying as it cools, so capillary action penetrates the cement binder. Work in small sections to prevent premature drying, especially with underfloor heating or low indoor humidity. If you’re dealing with dark grout colour, extend the dwell time slightly to loosen pigment-heavy residue. Adapt your approach to tile texture: smooth glass needs light saturation only, while lightly textured glass benefits from longer soaking for better release.
Wipe Gently With Cloth
After the warm-water soak has softened the grout haze, wipe the area with a clean, non-abrasive microfibre cloth dampened in warm water. Work in straight strokes, not circles, so you don’t drag grit across the glass surface. Keep pressure light and consistent, and fold the cloth frequently to expose a fresh face.
Use appropriate Protective gear: nitrile gloves protect your skin from alkaline residue, and safety glasses reduce splash risk. Assemble your Cleaning tools before you start: two microfibre cloths, a bucket of warm water, and a soft sponge for edges. Rinse the cloth in the bucket often, then wring until just damp; excess water can leach grout fines into joints. Finish by blotting with a dry microfibre cloth to lift moisture and residue.
Repeat Until Glass Clears
Once you’ve made a first pass with warm water and a soft microfibre cloth, repeat the soak-and-wipe cycle until the glass reads clear under raking light. Keep the cloth damp, not dripping, and refresh the water as soon as it turns cloudy to avoid redepositing fines. Work in small sections, wipe in straight strokes, then buff dry immediately to spot remaining haze. If a dull film persists, switch to a clean cloth and a pH‑neutral cleaner; don’t escalate to abrasives that can mark coated glass.
Continue until the tile face shows uniform clarity with no halos at edges. When you’re satisfied, carry out Glass polishing with a lint-free pad, then allow full drying before Tile sealing to prevent trapped moisture and future grout staining.
Soften Stubborn Dried Grout on Glass Tile
Although dried grout can feel bonded to glass, you can usually soften it enough to lift safely by combining controlled moisture, mild acidity, and time. Mist the grout with warm water, then lay a damp microfibre cloth over it for 10–15 minutes to rehydrate the cement matrix without flooding edges. For stubborn patches, apply a 1:4 solution of white vinegar to water using a spray bottle; keep it off natural stone trims. Let it dwell 3–5 minutes, then re-wet and repeat rather than scrubbing hard. Use a plastic scraper or nylon pad to test loosened areas, working in small sections and rinsing with clean water between cycles. Once softened, plan sealing techniques and cleaning schedules to reduce future curing residue.
Wipe Grout Haze Off Glass Safely
Where do you start when grout haze turns clean glass tile dull? Begin with a dry microfibre cloth and light, circular passes to lift the powdery film without scratching. Switch to a barely damp cloth (clean water only) and wring it hard; you want moisture, not drips, so you don’t re-wet joints. Work in 1m² sections, rinse the cloth frequently, and buff immediately with a second dry cloth to prevent streaks. Use a plastic scraper at a low angle for any specks, never metal. Keep the room ventilated and check your progress under a torch held sideways. Once the tiles are clear and fully dry, proceed with grout sealing as specified by the manufacturer. These tile cleaning tips minimise marking and protect edges.
Use Vinegar on Cement Grout (Only If Safe)
If water and gentle buffing still leave a stubborn cement-based haze on glass tile, you can step up to a weak white-vinegar solution—but only after you’ve confirmed it’s safe for your grout and any adjacent stone. Check the grout is cement-based, fully cured, and not colour-sensitive; vinegar can etch limestone, marble, and some metals.
For Vinegar safety, dilute to roughly 1:10 vinegar to water. Dampen (don’t soak) a microfibre cloth, then wipe a small test patch for 30–60 seconds. Rinse immediately with clean water and dry. If the haze lifts without dulling joints or damaging sealant, repeat in short passes, refreshing rinse water often. Cement compatibility improves when you minimise dwell time and avoid scrubbing abrasives. Stop if you see whitening, pitting, or joint softening.
Pick a Glass-Safe Grout Haze Remover
Once you’ve ruled out vinegar (or it’s not shifting the haze), switch to a purpose-made grout haze remover labelled safe for glass and cement-based grout, and cross-check it won’t attack any nearby natural stone or metal trims. In the UK, look for products compliant with manufacturer guidance for mosaics and polished glass, and avoid aggressive acids unless the label explicitly permits it.
Read the SDS and confirm suitability for cementitious grout, not epoxy. Do a small test patch on an offcut or inconspicuous area to ensure no etching, clouding, or colour shift. Keep dwell time tight, use the stated dilution, and rinse thoroughly with clean water to prevent residue. Note how it affects grout color so your colour matching stays accurate before sealing or touch-ups later.
Gently Scrape Off Stubborn Grout Spots
When grout haze remover won’t shift the last spots, you’ll need controlled mechanical removal. Use a plastic scraper held at a shallow angle, applying light, even pressure so you don’t score the glass. Protect the surface by keeping it damp and working from the tile edge towards the grout line, wiping away debris between passes.
Use Plastic Scraper
Although a plastic scraper won’t dissolve grout, it gives you controlled mechanical leverage to lift dried residue from glass tile without scratching the surface. Start by inspecting the grout colour and the tile texture so you can see where haze ends and solid ridges begin.
Hold the scraper at a shallow 20–30° angle and push with steady, even pressure, working from the centre of the spot towards the joint. Keep strokes short to avoid riding up onto grout lines. If the deposit resists, lightly score the edge of the lump, then re-scrape to shear it off in thin layers. Wipe the blade frequently so you don’t drag grit across the tile. Repeat until you feel smooth glass under the scraper and the surface looks uniformly clear.
Protect Glass Surface
If you need to tackle stubborn grout spots, protect the glass first by reducing friction and preventing point-loading that can chip edges or leave fine scratches. Mist the tile with warm water plus a pH-neutral Glass cleaning solution, then lay a damp microfibre over the area for two minutes to soften residue. Keep a plastic scraper nearly flat (15–20°) and push in short strokes, working from the centre out so you don’t lever against the grout line. Use masking tape along tile edges and trim to shield vulnerable arrises. Re-wet frequently; dry scraping increases abrasion. Stop if you see haze and switch to a nylon pad with light pressure. Once clean, rinse, dry, and proceed with Grout sealing to minimise future adhesion.
Prevent Grout Haze on Glass Tile Next Time
To prevent grout haze on glass tile next time, control both your grout application and your wash-down timing so residue never cures on the surface. Mix grout to the manufacturer’s ratio, then spread in small bays and hold your float at 45° to minimise smearing. For Grout color matching, dry-lay samples and check under your task lighting before you commit, because cleaning later can shift tone.
Start your first wipe as soon as joints firm up: use a damp (not wet) sponge, rinse often, and keep diagonals to the joints. Follow with a microfibre buff once the face dulls. Avoid over-washing, which drags fines onto the glass. When fully cured, consider sealing glass grout if specified for your grout type.
Frequently Asked Questions
What Should I Do if Grout Remover Damages the Glass Tile Surface?
Stop using the grout remover, rinse thoroughly, and neutralise per manufacturer guidance. You’ll assess etching, then polish with cerium oxide or replace tiles. Prioritise Grout remover safety; adjust Glass tile cleaning to pH-neutral products.
Can I Remove Dried Grout From Glass Tile Without Scratching Iridescent Finishes?
Yes, you can—treat it like polishing a lens. Use pH-neutral Cleaning solutions, warm water, and a microfibre cloth; apply gentle Scrubbing techniques with a plastic scraper. Test first, rinse, and dry.
How Long Should Grout Cure Before I Attempt Haze Removal on Glass Tile?
You should remove grout haze after 24–48 hours’ cure, once joints firm up but haven’t fully hardened. You’ll avoid damage, then proceed with Tile polishing. Delay Grout sealing until 7 days, per manufacturer.
Will Grout Residue Affect the Adhesion of Silicone Caulk Around Glass Tile Edges?
Yes, grout residue can reduce silicone adhesion at glass tile edges by blocking contact and trapping moisture. You should clean to bare glass, let it dry fully, then apply primer if specified, and tool immediately.
Should I Reseal Grout After Cleaning Dried Grout off Glass Tile?
Yes—you should reseal, like fitting a raincoat before a downpour. Prioritise Sealing importance to maintain Grout durability. After cleaning, let grout dry fully, then apply a UK-approved penetrating sealer evenly; cure per label.
Conclusion
Once you’ve lifted the haze and chipped away dried grout, your glass tile should read like a clear window, not a fogged mirror. You’ve worked methodically: start mild, escalate safely, and keep acids for cement grout only when the manufacturer allows. Rinse, dry, and inspect under raking light so you don’t miss ghosting. Next time, treat grout like wet concrete on a windscreen: wipe early, change water often, and seal success.