
When you’re poking a hole in the roof, think of it like adding a new eye to the space—steady, measured, precise. You’ll need to assess structure, headroom, and code limits, then pick window styles that fit the attic’s light and airflow goals. Placement matters for view and usability, and proper flashing, insulation, and moisture control are non-negotiables. Plan your budget and permits, then follow safe installation steps that protect the roof and interior. The next part shows you how to get there.
Assessing Your Attic Space and Window Goals
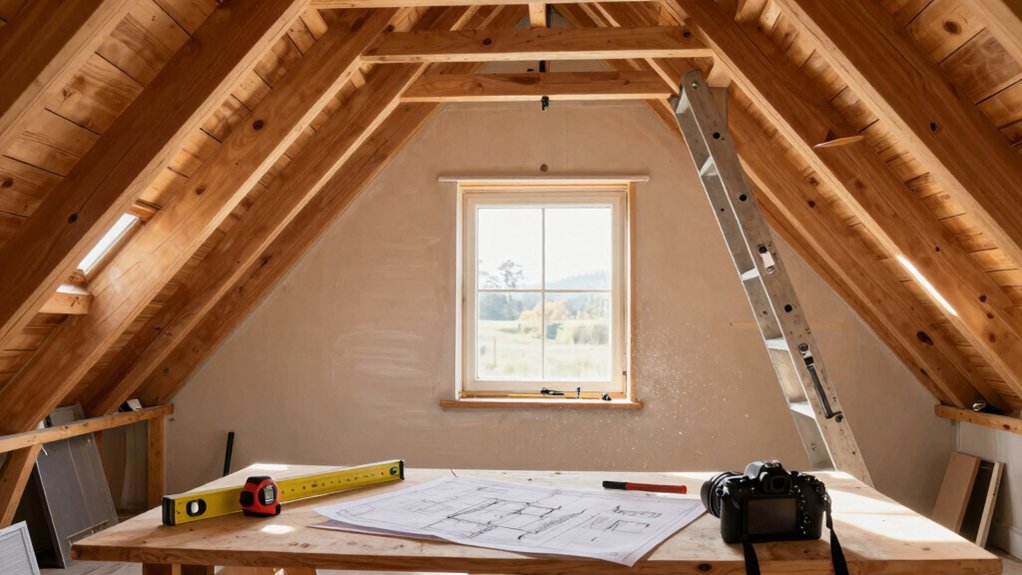
Evaluating your attic space and window goals starts with a precise measurement and clear objective. You’ll map usable floor area, ceiling height, rafter or joist layout, and eave thickness to determine install feasibility. Record current lighting, ventilation, and thermal performance, then define target illumination, egress, and views.
Assess existing structure for load capacity, roof pitch, and potential obstructions like ducts or wiring. Prioritize ventilation strategies that prevent moisture buildup—consider natural cross-ventilation, exhaust pathways, and fan placement.
Align goals with historic preservation when relevant; choose approaches that respect original materials and visual character while enabling modern performance. Establish constraints, such as budget, zoning, and daylight hours, to guide window sizing, orientation, and operability.
Document decisions for a concise, actionable plan.
Choosing the Right Window Style for an Attic
Consider how window style options—from fixed to operable—affect ventilation, light, and maintenance in your attic space.
Check roofline compatibility to guarantee seamless integration with existing rafters and insulation.
Prioritize doors and hoppers if egress or adjustable ventilation is needed, balancing energy efficiency with accessibility.
Window Style Options
Choosing the right window style for an attic hinges on light, ventilation, energy efficiency, and headroom. In this section, you evaluate common styles by mounting method, sightlines, and operation.
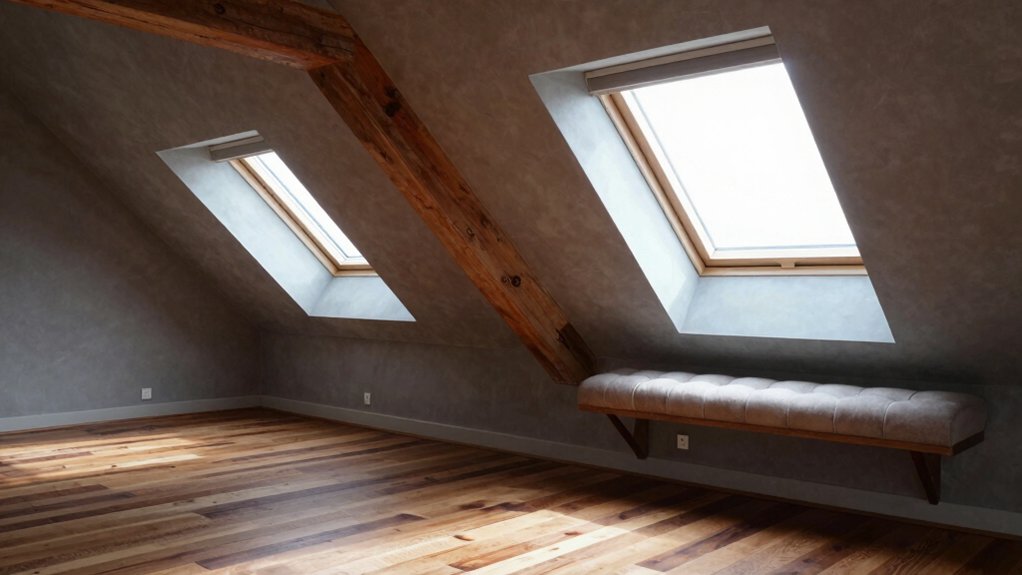
Observing that dormers introduce usable wall space, you’ll compare casement, fixed, and double-hung options for airflow and natural light control. Tilt-in and projecting designs simplify cleaning and accessibility in tight ceilings, while skylights maximize illumination but vary in insulation.
Consider curb versus roof-flash mounting for water management and thermal performance. When selecting, integrate practical constraints: headroom clearance, interior finish, and ease of operation.
Plan for window treatments and window security to satisfy privacy, glare reduction, and protection without compromising daylight. Balance cost, installation complexity, and performance to finalize the style choice.
Roofline Compatibility
Roofline compatibility guides window choice by matching framing geometry, headroom, and water management to the attic’s slope and bearing surfaces. You evaluate roof pitch, eave line, and dormer presence to determine workable openings without compromising structure.
Align sill height with usable floor space and ensure flashing integrates with roofing material to prevent leaks. Choose window styles that fit slope geometry: fixed or casement units for tight beamed spaces, or small egress options where code permits.
Consider solar shading to minimize heat gain while preserving daylight, avoiding glare on pitched surfaces. Historical preservation concerns may restrict finish colors, muntin patterns, or window materials.
Verify bearing conditions and insulation continuity at the rough opening, then seal perimeter gaps to sustain energy performance. Select units that simplify maintenance and withstand attic temperature swings.
Determining Size, Placement, and Headroom
When sizing and placing a dormer, start by establishing the available headroom and the intended use of the space. You’ll determine minimum skylight height, ceiling slope, and knee-wall clearance to avoid cramped motion paths.
Assess roof structure, load paths, and the dormer’s impact on exterior lines to maintain character and code compliance.
For dormer design, balance window size with operability, aiming for maximum light while preserving headroom above the sill. Plan window placement to optimize view, egress, and interior circulation; align openings with existing floor framing to simplify flashing and sheathing integration.
Consider racket-free clearance for furniture and usable storage without blocking light.
Document daylight calculations, rough openings, and flashing details to guide construction and ensure consistent results.
Insulation, Ventilation, and Moisture Management
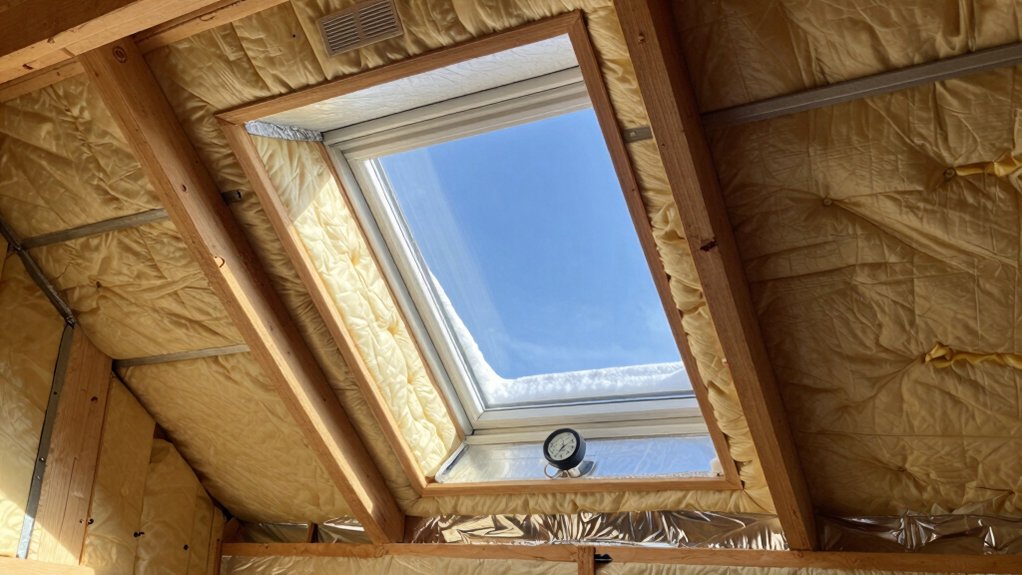
Insulation, ventilation, and moisture management are critical for an attic conversion because proper detailing prevents heat loss, condensation, and mold. You’ll optimize insulation around new windows and gaps, using continuous spray foam or mineral wool to reduce thermal bridges.
Choose exterior sill details that shed water and resist air leakage, then seal with gasketed trim to maintain continuity. Ventilate effectively with a balanced approach: add soffit and ridge vents or an in-line powered vent tied to a humidistat, ensuring fresh air without drafts.
Moisture control hinges on a vapor barrier placed on the warm side of assemblies and proper roof/attic flashing to stop leaks. Prioritize window placement for daylight and cross-ventilation while preserving energy efficiency.
Budgeting, Codes, and Permits
Budgeting basics set your scope, timeline, and contingencies for adding a window in an attic room. You’ll need to identify material and labor costs, permit fees, and potential upgrade needs to meet codes.
We’ll cover permit requirements, codes compliance, and how to forecast costs to keep the project on track.
Budgeting Basics
Planning your attic window project starts with a solid budgeting, codes, and permits approach. You’ll allocate costs for framing, insulation, cooling, and potential structural reinforcement, then add contingencies for unexpected expenses. Establish a baseline budget you can adjust as plans evolve, and track variances to stay on target.
Codes determine required egress, insulation R-values, and fire stops; confirm local standards early to avoid redesigns. Permits aren’t the focus here, but you should know whether your jurisdiction requires inspections at rough-in and finish stages.
Consider window treatments to satisfy glare control and energy performance without overbuilding. Include security considerations, such as locking mechanisms and impact-resistant glass if applicable to climate and occupancy.
Finalize a phased spending plan with clear milestones to minimize delays.
Permit Requirements
Permits determine when and how you can legally proceed, so confirm requirements before any framing or window work begins. You’ll identify the permit scope early: structural alterations, egress, fire-rating, and energy performance.
Check if attic access, ventilation, and insulation meet current expectations, especially around skylights or egress sizes. Review how window energy efficiency standards affect framing, flashing, and glazing choices, and document any recommended blower-door tests or insulation criteria.
Engage with your local building department about permit fees, review timelines, and required inspections for rough framing, weatherproofing, and final occupancy.
Be aware that historical building codes might apply to older homes, influencing allowable dimensions, methods, and materials.
Maintain precise records, plan amendments promptly, and schedule inspections to avoid delays.
Codes Compliance
To stay compliant and on schedule, you’ll align budgeting with codes and permits from the start, so you don’t derail the project later. In this phase, you’ll map required permits, inspections, and permitting timelines to the attic window project.
Verify egress, daylighting, fire-rated assemblies, and ceiling/roof penetrations against local energy, fire, and structural codes. Prepare ventilation strategies that meet fresh-air and moisture-control standards without compromising thermal performance.
Document historical code variations that may affect retrofit allowances, especially in older homes or historic districts. Coordinate with an architect or building official to confirm compliance paths early, and keep records of amendments or variances.
Budget contingencies for unexpected code reviews, revisions, or delay-driven costs to protect the schedule.
Installation Steps and Safe Practices
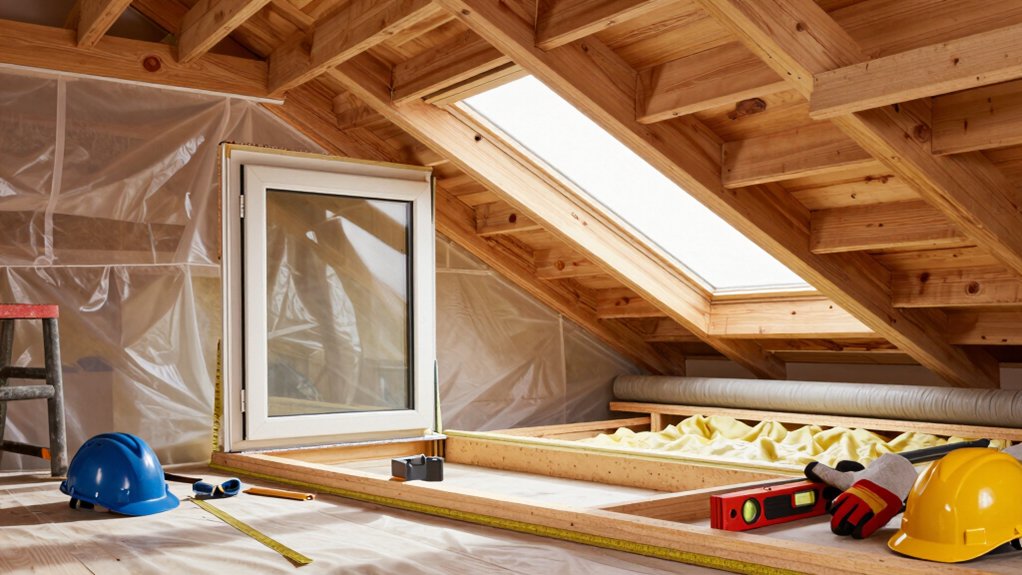
Before you start, assess the attic space for structural readiness and headroom, then verify that the exterior wall can support a vented window unit.
Begin by locating a framed opening that aligns with framing members and maintains load paths. Cut the opening with a sawzall or circular saw, using protective guards, and clean the edges to prevent splintering.
Install a properly sized lintel and weatherproof flashing, ensuring a continuous seal against moisture.
Fit the window with a trench-style sill pan and shims for plumb alignment.
Seal joints with high-quality, exterior-grade caulk, and install flashing in a back-drafted configuration to shed water.
Address window security and historical preservation concerns by using compliant hardware and preserving original mullions where feasible.
Verify ventilation, insulation, and smoke/CO2 detectors after installation.
Finishing Touches, Aesthetics, and Performance
Finishing touches set the final tone and performance of the attic window, so plan them alongside framing and flashing to avoid rework. You’ll optimize light control and energy by selecting window treatments before sealing reveals. Choose treatments that don’t obstruct airflow or prevent proper drainage, and confirm hardware won’t contact insulation.
Decorative trim adds a clean perimeter, concealing gaps and improving curb appeal without compromising seal integrity. Guarantee trim thickness won’t bind sash movement or impede operation from interior access. Match colors and textures to the room’s thermal performance and moisture exposure, avoiding coatings that peel in high humidity.
Validate that exterior trim drains correctly and that interior joints remain airtight. Document fasteners, caulking, and sealant types for long-term maintenance.
Frequently Asked Questions
How Long Does a Typical Attic Window Installation Take?
A typical attic window installation takes about half a day to a full day, depending on roof type and opening size. You’ll guarantee ventilation options and note natural light benefits while you complete precise, practical, technical steps.
Can I Install Windows Myself or Need a Pro?
Yes, you can DIY installation, but risks exist; for safety and code compliance, professional installation is often wiser. You’ll weigh measurements and permits for DIY installation against pro-grade seals, framing, and warranty coverage. Choose based on skill and complexity.
Do Attic Windows Require Emergency Egress Compliance?
Do attic windows require emergency egress compliance? Yes—emergency egress is often mandated by building codes; assess local requirements, guarantee operable size, and label clear exits. You must verify opening dimensions, hardware, and proper exit routing for safety.
What Maintenance Does Attic Glazing Require Over Years?
You’ll inspect seals and hardware annually to guarantee ventilation needs are met, lubricate tracks, and replace worn glazing components as needed; monitor condensation and UV damage, and clean glass to preserve glazing durability and overall efficiency.
How Will Soundproofing Differ With Attic Windows?
Soundproofing differs with attic windows by addressing flutter, gaps, and pane resonance. You’ll tackle soundproofing challenges through airtight insulation considerations, laminated glazing, and frame seals, ensuring continuous insulation and reduced flanking paths for steady, quieter performance.
Conclusion
To conclude, you can confidently add attic windows by verifying roof structure, choosing the right style, and planning placement for light and ventilation. Guarantee proper flashing, sealing, and insulation around the frame, then finish with trim for durability. One compelling stat: properly installed attic windows can boost resale value by up to 8–10% and cut heating costs by 5–15% when combined with airtight detailing. Prioritize safety, moisture control, and code compliance for long-term performance.