
Pick the Best Tool for Wall-Tight Copper Cuts
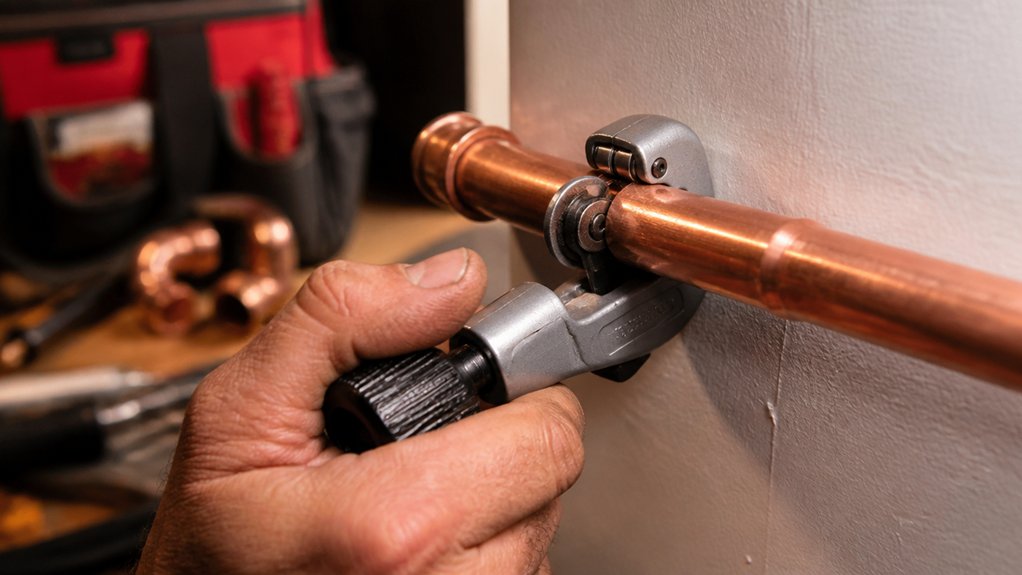
When you’re cutting copper pipe tight to a wall, the tool you choose decides whether you’ll get a clean, square cut without nicking drywall, studs, or nearby wiring. Start by measuring clearance: if you’ve got full swing room, use a standard tubing cutter for best Cutting precision. If clearance is minimal, switch to a close-quarters cutter; its compact frame and short handle keep the wheel aligned without prying on the pipe. For extremely tight gaps, choose a right-angle attachment or a mini cutter with a ratcheting knob. Avoid hacksaws unless you can control blade drift and deburr aggressively. Inspect the cutter’s wheel and rollers; worn parts reduce Cutting precision and Tool durability. Prefer hardened wheels and solid bearings.
Shut Off Water, Drain the Line, and Shield the Wall
Shut off the main water valve feeding the line, then confirm flow has stopped at the nearest fixture. Open a low-point faucet to drain the remaining water and relieve pressure so your cut doesn’t spray. Before you cut, shield the wall with a heat-resistant pad or thin sheet metal to protect drywall, paint, and nearby wiring from sparks and tool contact.
Shut Off Main Valve
Before you cut anything, kill the water at the main shutoff valve, then open the nearest faucet (and a low-point drain if you have one) to bleed pressure and fully drain the line. Locate the Main valve where the service line enters the house, or at the meter box. Turn it clockwise until it stops; don’t force it if it’s stuck—use penetrating oil and a wrench on the stem nut, or call a plumber to avoid snapping it. Confirm water shutdown by checking that flow at the faucet drops to zero. If you’re in a multi-unit building, notify occupants and verify you’ve got the correct riser. Tag the valve so nobody reopens it while you’re working.
Drain Remaining Water
How do you keep a “dry” copper line from dumping water the moment you cut it? After shutting the main valve, open the highest faucet in the home to break vacuum, then open the lowest fixture to drain the run. Flush toilets and open nearby hot and cold taps until flow stops and sputtering turns to air. If you’ve got a water heater on the line, shut its supply and crack a hot tap to relieve pressure.
Next, place a bucket and towel under the work area, then loosen a nearby union or cap to bleed trapped pockets. Wrap Pipe insulation around the pipe behind your cut point to reduce vibration and drips. Add temporary Wall reinforcement (a clamped backing block) to stabilize the stub while you work.
Protect Wall Surfaces
A clean, close-to-the-wall copper cut starts with protecting the surrounding surfaces from heat, sparks, and slip damage. Shut off the nearest supply valve, then open the fixture to confirm pressure is gone. Drain the line fully so water doesn’t wick into a torch flame or spray when you score the pipe.
For Wall protection, clear combustibles and wipe the wall area dry. Apply Surface shielding by sliding a thin metal heat shield or soldering pad behind the pipe; if access is tight, tape a scrap of sheet metal to the wall. Cover painted drywall with a damp fire-resistant cloth, keeping it off the cut line. Clamp the pipe to prevent tool chatter, and keep a spray bottle or extinguisher within reach. Recheck for dripping before cutting.
Mark a Square Cut Close to the Wall
Measure from the wall to your required cut point and mark the copper with a fine-tip marker, keeping your hands clear of sharp edges. Wrap a pipe wraparound guide (or a tight strip of paper) around the tube and align its edge to your mark so it meets evenly. Trace the guide all the way around to create a square cut line you can follow accurately in tight clearance.
Measure And Mark Line
Before you make any cut, set a clear, square reference line so the cutter tracks straight and the fitting seals properly. Shut off water, drain the line, and confirm the pipe won’t shift. Measure the required cut length from the wall using a tape or rule; take the reading twice for measurement accuracy. If the pipe end is out-of-round or burred, deburr lightly so your mark sits flat. Use reliable marking techniques: hold a fine-tip permanent marker or scribe steady and rotate your wrist to place a consistent line around the pipe as far as access allows. Keep the mark perpendicular to the pipe axis by referencing the pipe’s length, not the wall. Recheck the dimension before moving on.
Use Wraparound Guide
With your cut length confirmed and a reference mark in place, square that line up using a wraparound guide so the cutter won’t wander as you work tight to the wall. Slip the guide around the copper and align its edge to your mark. Pull it snug and verify it sits flat without twisting; a skewed guide yields an angled cut. Trace the guide’s edge with a fine marker to create a full, square circumference line you can see from the limited wall-side angle. If Pipe insulation blocks access, slice it back neatly and keep it clear of the line. Protect nearby drywall and any Wall reinforcement plates with a thin shim or scrap metal while you mark. Recheck alignment before moving to the cutter.
Use a Close-Quarters Tubing Cutter (Best Option)
Although space is tight at the stub-out, a close-quarters tubing cutter gives you the cleanest, safest cut because its compact head can clamp onto copper with minimal clearance. Shut off water, drain the line, and verify the pipe’s cool and empty. Pull back Pipe insulation and wipe the tube dry so grit won’t score the wheel and trigger Copper corrosion later. Seat the cutter square to the pipe, tighten the knob until the wheel just bites, then rotate around the tube. After every full turn, tighten a quarter-turn; don’t crank, or you’ll oval the pipe. Keep the tool parallel to the wall to avoid nicking drywall. Once separated, deburr the inside and outside with a reamer, then wipe clean before fitting. Replace insulation afterward.
Use an Oscillating Tool When a Cutter Won’t Fit
When a close-quarters cutter still can’t clamp onto the stub-out, switch to an oscillating multi-tool with a bi‑metal or carbide metal-cutting blade to slice the copper flush without prying on the wall. Shut off water, relieve pressure, and verify the line’s dry. Pull back Copper pipe insulation or shield it with a thin metal plate to prevent melting. Mark your cut line and brace the pipe with locking pliers so vibration doesn’t crack fittings in the wall. Wear eye protection and gloves, then run the tool at medium speed and let the blade do the work. Keep the shoe flat to control depth and avoid nicking drywall or studs. If you see green crust or pitting, stop—pipe corrosion may weaken the tube and change your plan.
Ream, Deburr, and Clean the Copper Pipe
After you’ve made the cut, ream and deburr the pipe immediately so the sharp inside lip doesn’t restrict flow or shred O‑rings and solder. Put on gloves and eye protection, then use a reaming tool or the cutter’s built‑in reamer to remove the internal ridge with light, even pressure. Next, deburr the outside edge with a file or abrasive pad until you feel no burrs. Wipe away copper dust so it can’t contaminate valves or fixtures. Clean the pipe end and the first inch of exterior with emery cloth to bright metal, then wipe with a dry, lint‑free rag. Keep the area dry for corrosion prevention, and replace any damaged pipe insulation near the wall before you close up. Recheck for sharp edges.
Choose a Fitting for Tight Spaces (Solder, Compression, Push-Fit)
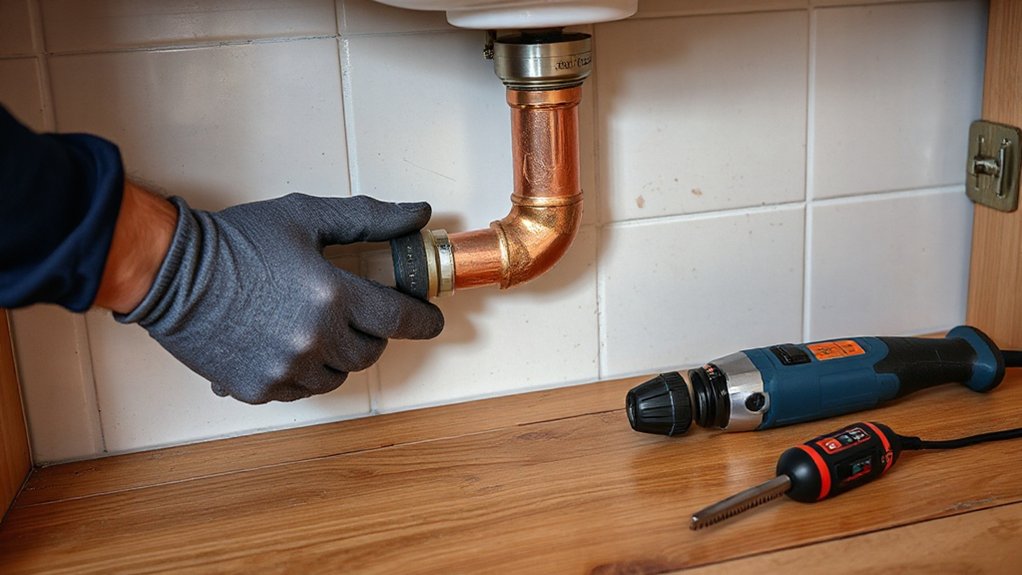
Before you commit to reconnecting the line, pick a fitting that matches the clearance at the wall and the tools you can safely use in that spot. First, verify fitting compatibility: confirm copper size (type L/M), outside diameter, and whether you’re joining copper-to-copper or copper-to-valve threads.
If you can shield combustibles and get a torch tip in, choose solder. Apply flux, heat the fitting—not the solder—and keep a spray bottle and fire cloth ready. If flame is unsafe, use a compression coupling: slide nut and ferrule on, seat the pipe fully, then tighten with two wrenches to prevent twisting. For fastest, no-heat work, use a push-fit coupling. Mark insertion depth, push to the stop, and tug-test. Follow manufacturer installation techniques.
Frequently Asked Questions
Can I Cut Copper Pipe Close to a Wall Without Shutting off Water?
No, you shouldn’t cut copper pipe near a wall without shutting off water. Shut supply, drain line, verify zero pressure. Make sure wall clearance, remove pipe insulation, use mini cutter, catch drips, deburr, cap temporarily.
How Do I Locate Studs or Hidden Wiring Before Cutting Near the Wall?
Like a sextant in a server room, you’ll scan first: run a stud finder vertically and horizontally, mark edges. Then sweep an electrical detector for live wires. Verify with a small pilot hole, then proceed.
What’s the Safest Way to Cut Copper Pipe if It’s Painted or Corroded?
Strip loose paint with Paint removal methods, then wire-brush and apply corrosion treatment. Shut water off, drain, and verify no pressure. Use a tubing cutter, tighten gradually, and wear eye protection and gloves.
Can I Reuse the Cut-Off Section of Copper Pipe for Another Repair?
Yes, you can reuse it, even if you think it’s too short. Remove paint/corrosion, inspect for dents, deburr ends with Cutting tools, sanitize, measure for proper fit, then sleeve and apply Pipe insulation after testing.
Do I Need a Permit to Modify Copper Plumbing Inside a Wall?
You often do: check local Permitting requirements and plumbing regulations before opening the wall. Call your building department, confirm scope, pull a permit if required, schedule inspections, and pressure-test before closing.
Conclusion
You’ve picked your tool, shut off and drained the line, shielded the wall, and marked a square cut—now finish strong. Cut with a close-quarters tubing cutter when you can; when you can’t, switch to an oscillating tool and control the blade depth. Ream and deburr the end so fittings seat fully. Clean the copper before joining. Measure twice, cut once: your tight-space solder, compression, or push-fit connection will seal safely.