
Tools, Blades, and Safety Gear for Travertine
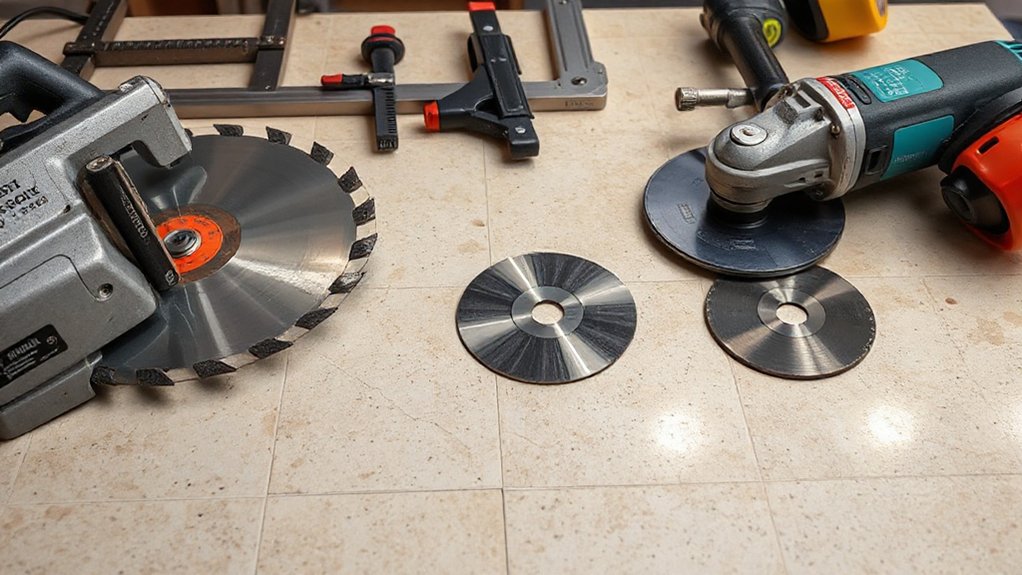
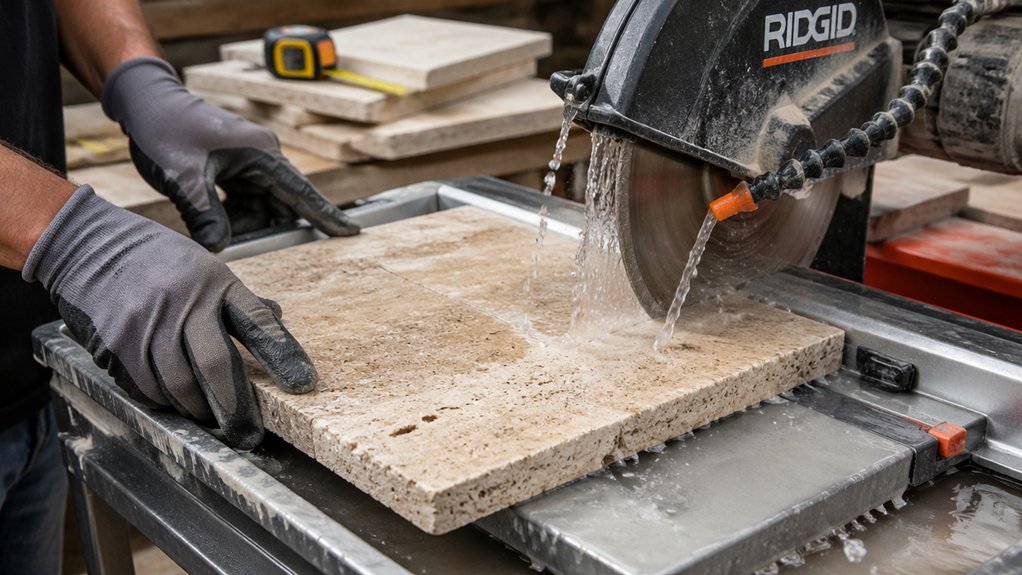
Before you make a single cut, you’ll need the right tools, travertine-rated blades, and PPE because this porous stone chips easily and produces hazardous silica-laden dust when dry-cut. Use a wet saw with a continuous-rim diamond blade labeled for natural stone; keep the pump primed and the table square. For small notches, use a variable-speed angle grinder with a 4–5 in. diamond blade and a shroud connected to a HEPA vacuum. Follow OSHA silica controls and wear ANSI Z87.1 eye protection, N95/P100 respirator, hearing protection, and cut-resistant gloves. Add traveling tips: pack blades in rigid cases and keep cords coiled. For tile storage, keep tiles flat, padded, and dry to prevent cracking.
Measure and Mark Travertine Tile Cut Lines
Before you cut, you’ll verify the travertine tile’s actual length, width, and thickness with a calibrated tape or calipers, since nominal sizes can vary. You’ll transfer those verified dimensions to the tile face and mark the cut line with a fine pencil or carbide scribe against a straightedge to maintain true alignment. You’ll confirm the mark’s position and squareness with a speed square or framing square so the cut meets layout tolerances.
Verify Tile Dimensions
Although travertine tiles often measure close to their nominal size, you should verify actual dimensions and lay out cut lines from fixed reference points to keep joints and edges within spec. Pull tiles from multiple boxes and measure length, width, and thickness with calipers or a steel rule; record min/max to identify lot variation. Check squareness by comparing diagonals and using a machinist square on two adjacent edges. Confirm allowable tolerances against your layout requirements and recommended grout-joint width. If you’re mixing Tile color, confirm that size variation doesn’t telegraph in raking light along edges. Adjust your takeoffs for installation patterns (running bond, diagonal, modular) because pattern shifts amplify small size errors at walls, niches, and progressions. Re-verify after sealing or back-buttering changes thickness too.
Mark Cut Lines Precisely
Once you’ve confirmed actual tile dimensions, transfer your layout to each travertine piece using fixed reference faces and a fine, non-bleeding marker or 0.5 mm mechanical pencil so the cut line reflects finished joint width, not nominal size. Use a machinist square or straightedge; don’t trust tile edges that may be tumbled or out-of-square. Reference from the factory edge when possible, and mark the waste side with an “X” to prevent mirrored cuts. For tile layout planning, include grout-joint width, movement joints, and perimeter gaps before you mark. When working Decorative patterns, dry-lay and number tiles, then mark orientation arrows to preserve veining and pattern continuity. Scribe irregular walls with a compass, transferring offsets directly to the tile. Double-check diagonals before cutting.
Straight Cuts in Travertine With a Wet Saw
Set up your wet saw on a stable, level surface, verify the diamond blade is rated for stone, and fill the reservoir so the pump delivers a continuous water stream to both sides of the blade. Align your mark to the blade’s kerf using the fence or miter guide, then feed the travertine steadily with light, even pressure to prevent chipping and blade deflection. Keep your hands clear of the blade path, maintain full water flow throughout the cut, and support the offcut so it doesn’t bind at the end.
Wet Saw Setup
Before you make the first straight cut in travertine, configure the wet saw so the blade runs true and the tile stays fully supported from start to finish. Set the saw on a rigid, level stand, then verify the tray slides without play. Install a continuous-rim diamond blade rated for stone, confirm arbor size, and tighten the flange to spec. Square the fence and miter guide to the blade using a machinist square; lock adjustments. Fill the reservoir with clean water and confirm the pump delivers steady flow to both blade faces. Align rollers and extensions so large-format pieces don’t tip. If you’re matching tile design trends inspired by travel destinations, keep setup repeatable: record fence settings, blade type, and water level, then recheck before each run.
Straight Cut Technique
With the wet saw running true and delivering consistent water to the blade, you can focus on making a straight cut that stays square and chip-free. Mark your cut line with a fine pencil, then align it to the saw’s fence or miter guide and lock the guide. Start the cut with the tile face up, keeping both hands flat and clear of the blade path. Feed the travertine at a steady rate; don’t force it, or you’ll deflect the blade and spall edges. Maintain full contact against the fence to control squareness. As you exit the cut, reduce feed pressure to prevent breakout. Dress sharp edges with a rub stone, then apply Tile sealant before grout application to minimize staining and pinholing.
L-Cuts, Holes, and Curves in Travertine Tile
Although straight cuts handle most layouts, you’ll need specialty cuts for outlets, plumbing penetrations, and rounded profiles in travertine. For L cut techniques, mark both legs with a square, then drill a 1/4-inch relief hole at the inside corner to prevent cracking. Make two plunge cuts to the hole with a continuous-rim diamond blade on a wet saw, keeping the face up to control breakout; stop short, then finish to the relief. For holes, use a diamond core bit with water, start at a 30° angle to establish a kerf, then level out and maintain steady RPM and light feed. For curve shaping methods, score the radius line, make closely spaced kerf cuts to the waste, then grind smooth with a diamond cup wheel.
Small Trims and Fit Checks With Tile Nippers
After you’ve made L-cuts, holes, or rough curves, you’ll usually still need to shave a few millimeters for tight joints at corners, scribe lines, and trim profiles, and tile nippers handle that kind of controlled material removal on travertine. Mark the final line, then do dry fit checks before each nibble. Hold the tile fully supported, keep the nipper jaws perpendicular to the face, and remove small bites from the waste side only. Work from the edge toward the mark so you don’t lever into voids. For corner fitting, alternate nips from both directions to prevent a split running past the layout line. On a Decorative border, maintain consistent reveal by checking against adjacent pieces and spacers. Stop when the piece seats without force.
Smooth, Bevel, and Seal Cut Travertine Edges
Once you’ve dialed in the fit, finish every fresh cut by smoothing, setting a controlled bevel, and sealing the exposed pores so the edge meets installation tolerances and doesn’t telegraph chips or darken from grout and moisture. Start Edge finishing with a rub stone or diamond hand pad: 60/80 grit to true saw marks, then 120/200 to refine. Hold the pad square to maintain a straight arris, then introduce a consistent 1/32–1/16 in micro-bevel on exposed edges for handling and grout joint alignment. For surface polishing on honed material, step through 400 grit until sheen matches the factory face; stop short on tumbled finishes to preserve texture. Vacuum dust, wipe with clean water, let dry, then apply a penetrating stone sealer to the cut edge only.
Prevent Chipping and Cracking While Cutting Travertine
Because travertine is porous and naturally veined, it’ll chip at the face or crack along weak lines if you let the blade tear the surface, flex the tile, or run the cut too dry. Use a continuous-rim diamond blade rated for stone, dress it before critical cuts, and keep water flow steady to control heat and slurry. Support the tile fully on the saw cart; don’t cantilever corners, and reduce feed rate at vein gradations. Mark with low-tack tape and cut through the tape to stabilize the surface. Score light passes first, then complete the cut to limit breakout. For holes, drill from both sides with a diamond core bit. After cutting, perform Travertine polishing to remove microchips that can telegraph through tile installation techniques.
Frequently Asked Questions
Can Travertine Be Cut Dry Without a Wet Saw?
Yes, you can cut travertine dry, but you’ll generate silica dust, so you must use a HEPA vacuum and respirator. Choose Cutting tools like a diamond blade grinder. Finish with Sealing options.
How Do I Match the Vein Pattern Across Adjacent Travertine Tiles?
Like lining up wood grain on a cabinet, you’ll dry-lay tiles and rotate them until vein matching flows seamlessly. Maintain consistent tile alignment using spacers, reference lines, and a mock-up; I matched 12 tiles in 20 minutes.
Should I Fill Travertine Pores Before Cutting and Installing?
Yes—you should do Sealing pores before cutting and installing if you’ll grout sanded or use epoxy; it prevents staining and chipping. For Surface preparation, use a penetrating sealer, follow cure times, then cut/handle.
What Grout Joint Width Works Best for Travertine Tile?
You’ll get best results with 1/8″ joints for rectified travertine; use 3/16″ for tumbled or varied edges. Match Grout color options carefully, and follow sealing techniques before grouting to control staining, per specs.
How Do I Cut Travertine Tile Around Heated Floor Sensors or Wires?
Locate sensors/wires, mark offsets, and cut travertine with a wet saw plus diamond blade; use nippers for notches. Dry-fit, maintain clearance, avoid nicking wires, and follow Sealing travertine and Stone maintenance standards.
Conclusion
When you cut travertine, you’ll get cleaner results by treating every pass as a controlled material removal operation, not a “quick trim.” Keep your wet saw fed with steady water, maintain blade alignment, and verify your marks before committing. For L-cuts and penetrations, you’re simply creating relief paths to avoid unpleasant surprises. Dry-fit often, nibble small adjustments, then dress edges with a rubbing stone and seal exposed pores. That’s how you keep breakage politely off the agenda.