
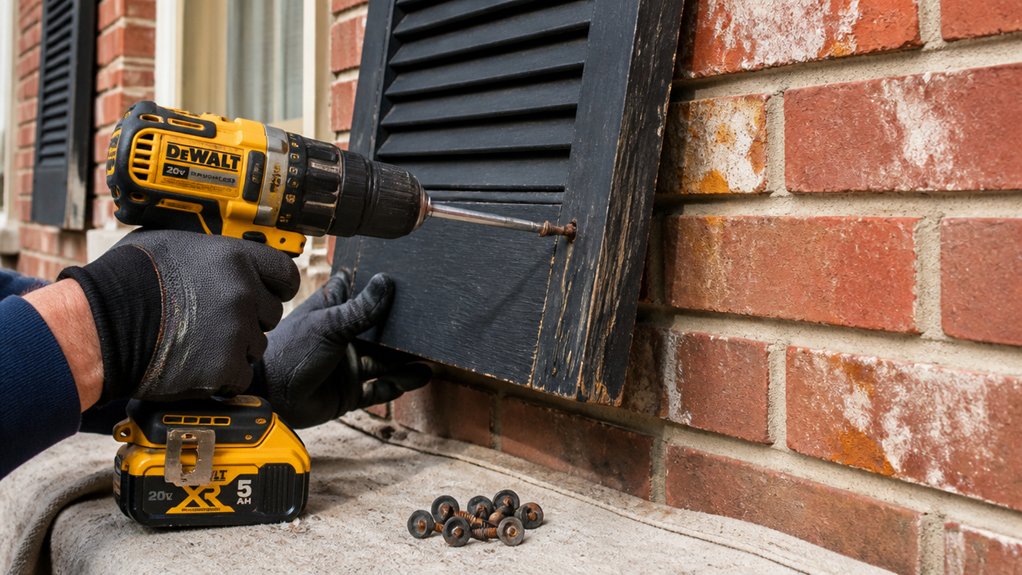
Identify How Your Shutters Are Fastened to Brick
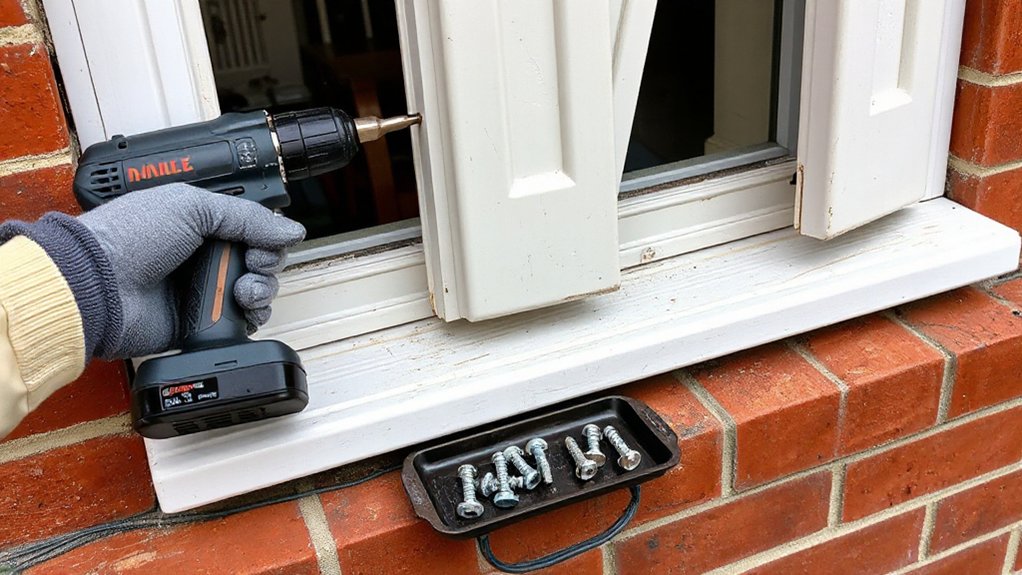
Before you try to pry anything loose, take a minute to confirm exactly what’s holding your shutters to the brick, because the fastener type determines the safest removal method. Look for plastic shutter loks: they sit flush, often with a small center pin, and expand inside the brick. Check for masonry screws or lag shields: you’ll see a screw head in a countersunk shutter hole or under a cap. On older homes, you might find hinges, pintles, or strap hardware anchored into mortar joints. Note whether fasteners go into brick faces or mortar, since brick compatibility affects cracking risk and patching options. Match your approach to the shutter design, because hollow vinyl, composite, and wood hide fasteners differently. Work from stable footing and protect eyes.
Tools to Remove Shutters From Brick Safely
Once you’ve identified the fastener type, gather the right tools so you can pull the shutters without cracking brick or stripping hardware. Wear safety glasses and cut-resistant gloves, and keep a stable ladder handy. For shutter screws, use a correctly sized bit driver or impact driver with clutch control to prevent cam-out. For lag bolts, grab a ratchet and socket set. If you’re dealing with shutter spikes or plugs, use a flat pry bar, end-cutting pliers, and a small putty knife to lift gently without gouging. Keep a utility knife for scoring paint lines and a brush to clear mortar dust from heads. A magnet tray helps you save hardware for Shutter maintenance and reinstall Decorative accents.
Prep and Protect Brick, Trim, and Siding
Although removing shutters looks straightforward, you’ll avoid chipped brick and dented trim by protecting the work area first. Lay a drop cloth to catch fasteners and prevent scratches on siding, then tape cardboard or thin plywood over nearby window trim and corners. Brush off grit from the brick face and mortar joints so tools don’t grind debris into the surface.
Inspect the shutters and surrounding caulk lines; score any paint bridges with a utility knife to keep trim from splintering. If you’re dealing with Decorative fixtures, cover them with painter’s tape and a rag to prevent dents. Wear gloves, eye protection, and a dust mask when working over masonry. Keep a small vacuum handy to control brick dust as part of routine Exterior maintenance.
Remove Shutters From Brick With Shutter Locks
Next, you’ll identify the shutter lock type holding the shutter to the brick so you can choose the right tool and avoid cracking the masonry. Wear eye protection and gloves, then carefully release each lock by compressing or prying it free without twisting against the brick. Once the locks let go, pull the shutter straight out and set it down so you don’t bend the slats or chip the edge.
Identify Shutter Lock Type
Before you start prying on anything, confirm you’re dealing with shutter locks (also called shutter pins) rather than screws, because the removal method—and the risk of cracking brick or snapping the fastener—changes fast. Look at the fastener head: shutter locks typically show a smooth, round cap or small button, not a Phillips, square, or Torx drive. Check along the shutter’s side rails near the top and bottom; many Shutter design layouts use four pins aligned with the mounting holes. Press lightly on the cap—if it flexes and rebounds, you’re likely seeing expanding Lock mechanisms seated in a wall plug. Also inspect the brick face for a plastic sleeve or collar around the pin. Wear eye protection and gloves while you inspect.
Release Locks And Remove
Now that you’ve confirmed those fasteners are shutter locks (not screws), you can release the expanding barbs and pull the shutter without chipping the brick. Put on safety glasses and gloves, then slip a thin putty knife behind the shutter near each lock to protect the masonry face.
Use needle-nose pliers or a shutter lock removal tool to grip the lock’s center pin. Pull the pin straight out 1/4–1/2 inch to collapse the barbs. If it won’t move, wiggle gently while keeping the tool aligned with the hole so you don’t enlarge it. Work one lock at a time, supporting the shutter so it doesn’t snap based on its Shutter design. Once all locks release, lift the shutter away. Check Brick compatibility before reusing holes or installing new anchors.
Remove Shutters From Brick With Masonry Screws
Start by finding each masonry screw anchor head along the shutter’s edge, then clear paint or debris so your driver seats fully. Support the shutter with one hand and back out the screws slowly with the correct bit so you don’t strip the heads or chip the brick. Once the shutter’s off, patch the holes with exterior-grade filler and seal them to keep water out.
Locate Masonry Screw Anchors
Although the shutter panel may look like it’s held on with simple screws, you’ll need to locate the masonry screw anchors set into the brick so you don’t chip the face or strip the fasteners during removal. Start by wiping dust off the screw heads and surrounding brick, then use a flashlight at a low angle to spot the anchor collar or sleeve seated in the mortar joint or brick face. Check each mounting point, since installers sometimes mix Masonry screw anchors with different lengths or reuse old holes. Identify Shutter lock types too: plastic locks can hide fasteners behind caps or small plugs. Use a thin pick to lift caps gently, and don’t pry against brick edges. If you see cracking or spalling, stop and reassess.
Back Out Screws Safely
With the masonry screw anchors identified and any caps or plugs removed, you can back out the fasteners without tearing up the brick face. Put on safety glasses and gloves, then support the shutter so it can’t swing and chip mortar. Use the correct driver bit (often Phillips or hex) seated fully to prevent cam-out. Set your drill/driver to low speed and reverse, applying steady, straight pressure. If a screw binds, stop and work it back and forth in short turns; don’t force it or you’ll strip the head. For stubborn screws, add a drop of penetrating oil and wait a few minutes. Keep screws organized for shutter maintenance and reinstallation of decorative elements. Inspect each hole as the screw exits.
Patch And Seal Holes
Once the shutters come down, how do you keep those masonry-screw holes from wicking water into the brick and mortar? Start by brushing out dust with a stiff nylon brush, then blow debris clear while wearing eye protection and a dust mask. If the hole is deep or crumbly, ream it gently with a masonry bit by hand, not a drill, to avoid spalling the Brick texture. Mist the hole lightly, then pack it with color-matched exterior mortar repair or brick patch, pressing from the back out to eliminate voids. Tool it flush, following surrounding joints and your Shutter design footprint. After curing, apply a paintable exterior masonry sealant over the patch edge to shed water. Inspect after the first rain.
Remove Plastic Anchors From Brick (Without Chips)
Before you try to yank plastic anchors out of brick, take a minute to control the force you’re about to put on the face of the masonry. For brick surface protection, tape a thin putty knife or shim beside the anchor so pry tools can’t bite the brick. Put on safety glasses and gloves, then cut the anchor flange flush with a utility knife if it’s proud. Thread a screw two turns into the anchor, grab the screw head with locking pliers, and pull straight out while wiggling gently. If it resists, push the anchor slightly inward with a punch to collapse the ribs, then retry. Work slowly; sudden twists chip edges. Vacuum dust and inspect the hole before you move on to repairs. This plastic anchor removal method minimizes spalling.
Fix Spinning, Stuck, or Broken Shutter Fasteners
Although shutter fasteners look simple, they can turn into a headache when the head spins, the threads seize, or the stem snaps off in the brick. Start by identifying Fastener types: screw-in plugs, shutter-loks, or masonry screws. Wear safety glasses and gloves, then brush grit from the recess so your bit seats fully. If a fastener spins, press the shutter tight to the wall and pull outward while backing it out; wedge a thin putty knife behind the head for tension. If it’s stuck, tap the head lightly, add penetrating oil, wait, then try slow, steady torque with a hand driver, not an impact. For snapped stems, grip the exposed shank with locking pliers and rotate out. Document locations for Shutter maintenance later.
Patch Brick Holes After Removing Shutters (Blend In)
After you’ve pulled the shutters and hardware, patch the leftover brick holes right away so water can’t wick into the masonry and freeze-thaw damage doesn’t start. Put on gloves and eye protection, then brush out dust with a stiff nylon brush and vacuum; a clean hole bonds better. Lightly mist the brick so it won’t suck moisture from the patch. For Historic preservation, use a compatible mortar repair mix (not silicone caulk) and match the original joint hardness. Pack the hole in lifts with a pointing trowel, then tool it flush to the surrounding mortar joint, not the brick face. Wipe smears immediately with a damp sponge. For Aesthetic repair, tint the mix or blend fine sand so the patch disappears once cured fully.
Frequently Asked Questions
How Much Does Professional Shutter Removal From Brick Typically Cost?
You’ll typically pay $150–$400 for professional shutter removal from brick, though Shutter removal costs rise with height and anchors. Expect professional service fees plus patching/caulk. You should confirm ladder safety, disposal, and wall repairs.
Can I Remove Shutters in Winter Without Damaging the Brick?
Yes, you can, but plan carefully. For seasonal removal, pick a mild, dry day. Weather considerations: avoid freeze-thaw cycles, warm fasteners gently, use proper bits, and seal holes immediately to protect brick.
Do I Need a Permit or HOA Approval to Remove Exterior Shutters?
Like a painter choosing a blank canvas, you might need HOA approval or a permit. Check bylaws, city codes, and Historical preservation rules. Document Aesthetic considerations, confirm property lines, and keep records to avoid fines.
Should I Replace Shutters or Leave the Brick Bare After Removal?
Replace shutters if your windows look visually unbalanced without them; otherwise, leave brick bare and patch anchors neatly. Consider Shutter restoration to save costs, or explore Aesthetic alternatives like trim or awnings. Seal holes, check moisture.
How Do I Clean Rust Stains Left by Old Shutter Hardware?
You’ll clean rust stains by applying an oxalic-acid rust removal gel, scrubbing with a nylon brush, then rinsing thoroughly. Wear gloves and goggles, protect nearby plants, and finish with hardware cleaning using vinegar, then dry fast.
Conclusion
You’ve treated those shutters like old gatekeepers on a brick castle: useful once, stubborn at the end. Now you’ve identified the fasteners, protected the wall, and backed everything out with steady pressure and the right bit. You’ve pulled anchors without prying, handled spinners and broken heads, and patched holes to blend in. Keep gloves and eye protection on, control your tools, and leave the “stone” stronger than you found it.