
For home wood repairs, start with a versatile filler for small flaws, cracks, and cosmetic surface issues, and keep epoxy or epoxy putty on hand for larger voids or load-bearing areas. Use a compatible wood glue for joints, plus quick-drying sealants to guard against moisture. Finish with thin, uniform coats and stain-matching techniques to keep color true. Choose budget-friendly options for minor fixes, professional-grade for structural work, and you’ll handle most repairs smoothly—there’s more to optimize here.
Identify the Best Materials for Common Wood Repairs
To fix most wood issues effectively, start with versatile, reliable materials: wood filler for small cracks and holes, cold or warm weather–resistant putties, and RTV or epoxy for larger voids or structural gaps.
You’ll choose wood filler for tight seams, then sand flush so grain stays clean. For weather swings, grab putties that resist cracking and shrinkage.
When gaps threaten structure, RTV or epoxy delivers lasting bonds and load-bearing capacity. Consider the wood grain direction and plan your repair to preserve strength and appearance.
Use a finish-matching approach: tint fillers to mimic color, apply thin coats, and sand between passes. Finish matching ensures repairs disappear, not stand out, leaving a seamless, durable surface.
Your precision work yields professional, lasting results.
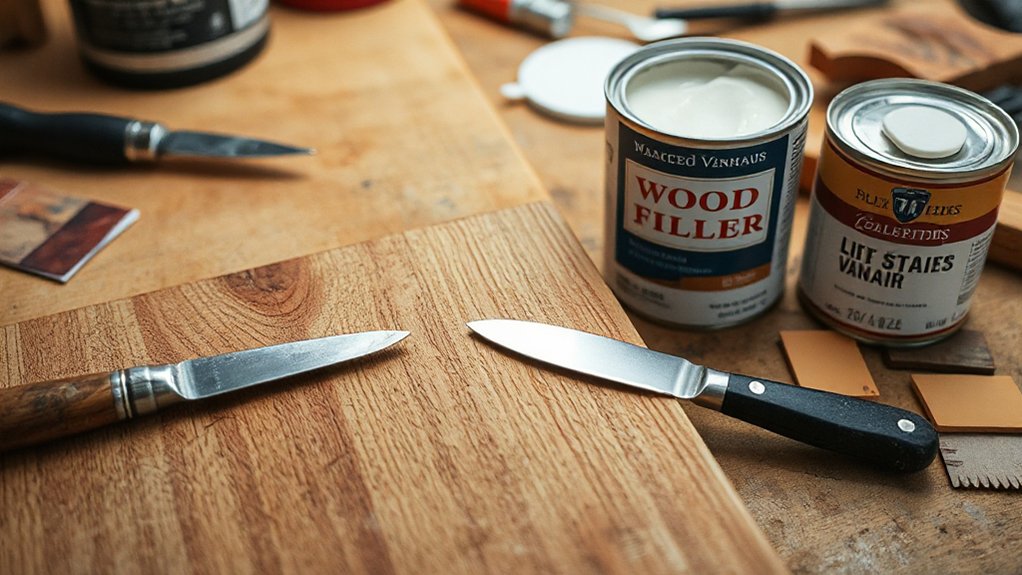
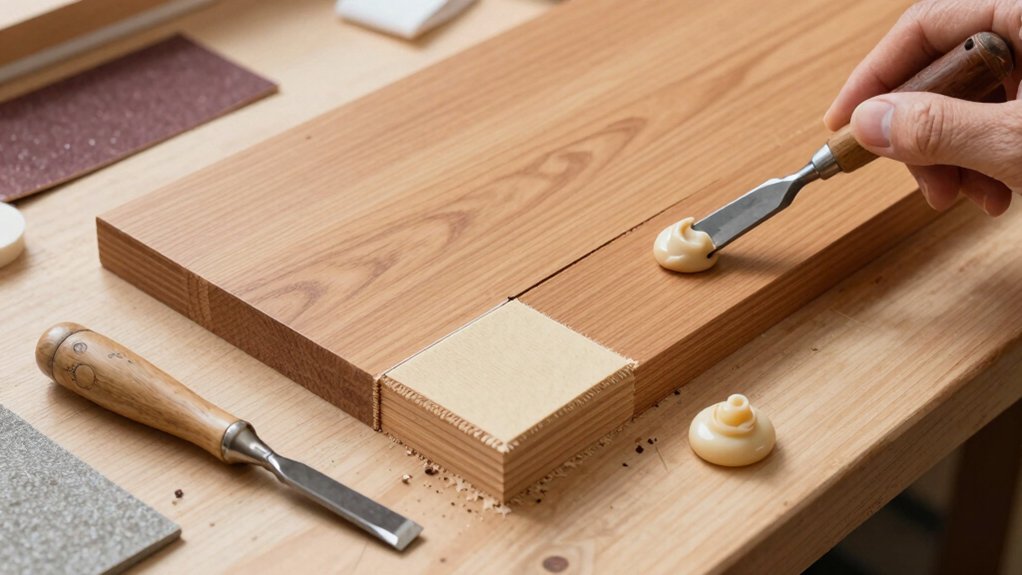
Wood Filler vs Epoxy Putty: When to Use Each
When you’re choosing between wood filler and epoxy putty, the decision hinges on the hole or crack’s size, location, and required strength.
For small surface flaws or minor cosmetic repairs, use wood filler; it sands smooth and accepts stain or paint well, delivering a clean repair without added toughness.
If you need structural integrity, moisture resistance, or fill in deeper voids, choose epoxy putty. Epoxy putty bonds harder, expands to fill gaps, and resists cracking under stress, making it ideal for load-bearing repairs or outdoor projects.
Apply wood filler with a flexible blade and finish after curing.
For epoxy putty, knead until uniform, press firmly into the void, then shape before it cures.
In short, match the product to the repair’s demands: wood filler for cosmetic, epoxy putty for strength.
Choosing the Right Wood Glue for Joints and Repairs
Choosing the right wood glue starts with understanding bond strength, drying time, and surface prep.
You’ll match your joint type to bond strength factors, time your work with drying variations, and prep surfaces to maximize grip.
Start with clean, dry wood and follow manufacturer guidelines to keep repairs lasting.
Bond Strength Factors
Bond strength hinges on how you select and apply the adhesive, because the right glue must match the joint, surface prep, and load. You control strength by choosing a formula suited to wood grain orientation, whether you’re laminating, doweling, or edge-joining.
Match saturation to the joint: too much glue creates squeeze-out, too little leaves gaps. Prepare surfaces cleanly and uniformly, then clamp firmly to maintain pressure during cure.
Consider moisture control; wood with high moisture swells, while dry stock can crack under stress. Temperature and cure time matter—follow manufacturer guidance for best bond development.
For mortise and tenon or panel bonding, select an adhesive with gap-filling capability if surfaces are uneven.
Prioritize consistency, repeatable results, and a strong, durable joint you can trust.
Drying Time Variations
Drying time is a key factor in ensuring a strong, bubble-free joint. When you choose wood glue, you must consider cure rate, open time, and final strength.
Drying time varies with wood species, ambient humidity, and temperature, so you’ll control results by managing conditions. For fast repairs, pick quick-set formulas that still achieve complete bond development, and don’t skimp on clamping.
If you’re consolidating larger joints, allow longer clamps and extend cure according to the label. You’ll optimize performance by coordinating moisture control, environmental conditions, and application thickness.
Track your wood drying progress, and recheck joints before handling. Inconsistent curing causes weak bonds, gaps, and failures.
Master drying variations, and you’ll achieve reliable, durable repairs.
Surface Prep Essentials
Before you apply any adhesive, prep the surface thoroughly: remove oil, dirt, and old glue, then scrub and dry the area so the bond can form cleanly.
When choosing wood glue for joints and repairs, consider wood grain orientation and the expected stress. For tight joints, use a gap-filling formula that bonds well to varying grain patterns without creating brittle seams.
For structural repairs, select a stronger polymer with high shear strength and a longer open time to allow precise alignment.
Always moisture control ahead of bonding; moisture dampens glue, weakens cure, and promotes failure.
Sand lightly for grip, wipe away dust, and clamp firmly until cured.
Opt for a brand with proven impact resistance to ensure enduring, professional results.
Repairing Dents in Veneer and Solid Wood
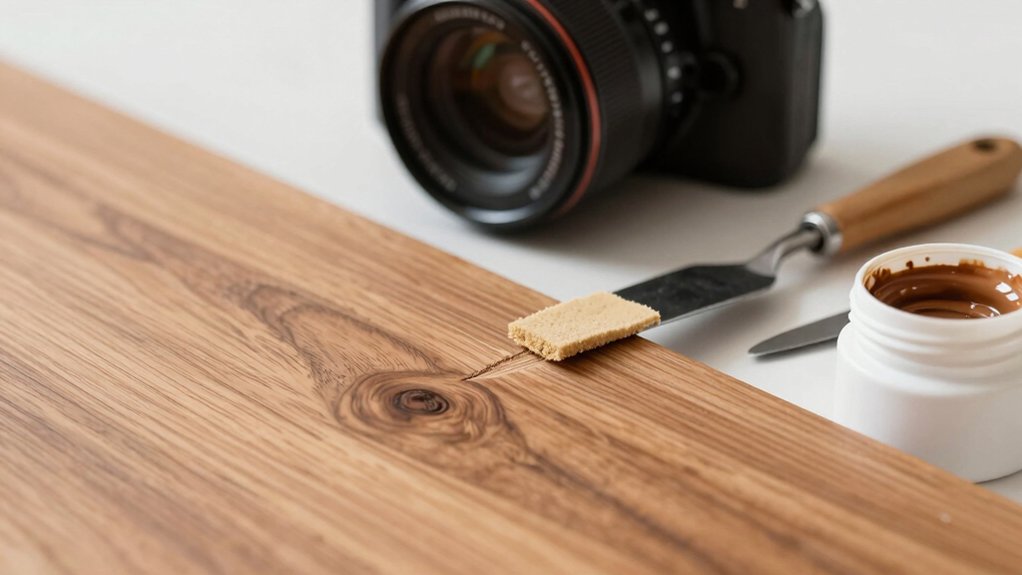
To fix dents in veneer and solid wood, start by evaluating the damage and selecting the right repair method: heat and moisture for shallow dents, fillers or veneer patches for deeper indentations, and careful planing or sanding when needed.
You measure the dent’s depth, inspect the wood grain direction, and decide whether a steam method or filler will deliver the tightest match. Use wood grain-aware techniques to prevent raised fibers or finish inconsistencies.
When using heat, apply minimal moisture and test on a hidden area first; for fillers, choose a tone that matches the surrounding finish and feather the edges. After repair, sand flush and apply finish so finish matching remains seamless and durable.
This approach delivers professional, lasting results with confident precision.
Fixing Cracks in Trim and Panels
Before you repair cracks in trim and panels, start with prep: clean the area, remove loose material, and dry it thoroughly.
Then choose your filling material based on flexibility, surface type, and finish, so the repair holds up and blends with nearby wood.
Finish with the right sealant or topcoat and test for color match, texture, and adhesion to guarantee a seamless result.
Prep Before Repair
Prep before you repair is all about ensuring the crack, seam, or split in trim and panels is rated for a solid, long-lasting fix. You start by inspecting the surrounding wood for stability and moisture, since soft spots betray deeper issues. Remove loose paint or finish to expose the true surface, then clean with alcohol or a mild solvent to reduce dust and debris. Dry thoroughly before any patching.
Match wood grain orientation and plan for finish consistency across repaired areas, so your work remains seamless. Choose a compatible filler that sands flush and accepts stain or paint without lifting. Finally, test a small area to confirm adhesion, then proceed with a tight, clean repair that respects strength, durability, and the desired final look.
Selecting Filling Material
When selecting a filling material for cracks in trim and panels, choose a product that matches the wood type, finish, and expected flex. You want a material that bonds deeply, sands smoothly, and resists future movement.
Assess grain patterning to ensure the filler follows natural lines, avoiding obvious ridges or blotchy patches. For high-traffic areas or humid environments, prioritize moisture resistance without sacrificing workability.
Epoxy fills provide strength, but may require long cure times; wood-fillers with hardeners offer better density for trim edges.
In general, test a small swatch first, then apply with a narrow spatula, leveling flush. Consider stainable or paintable options to align color, sheen, and abrasion resistance with the surrounding surface.
Select wisely, then fix with confidence.
Finishing After Fixes
After you’ve filled and leveled the crack, seal the repair with a compatible finish to defend against moisture and wear. You choose a finish that suits the substrate and the repair material, then apply in thin, uniform coats.
Test color first on a hidden spot to ensure wood grain and tone stay cohesive. For trim and panels, select a finish that resists scuffs and UV fade while preserving clarity.
If you’re matching a stain, perform stain matching after sealing to avoid blotchiness. Lightly sand between coats for a smooth surface, removing dust thoroughly.
Recoat until the repair blends with surrounding wood. When complete, wipe away any excess and cure fully before reusing the piece.
Your space looks unified, durable, and intentionally refined.
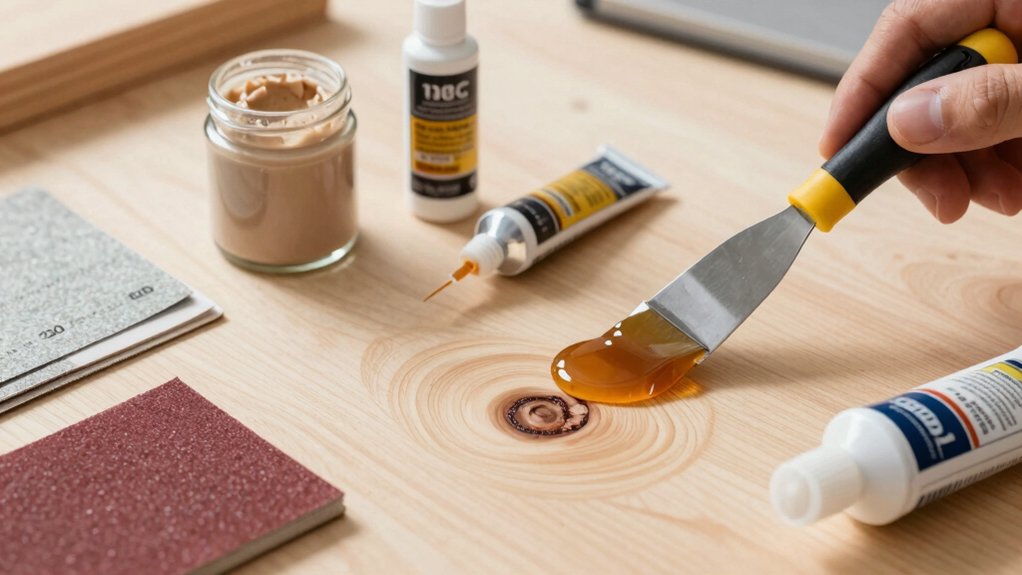
Filling Holes and Voids: Shellac Putty, Wood Filler, and Mixes
Filling holes and voids correctly is essential to a smooth, durable finish, and choosing between shellac putty, wood filler, or a mix depends on the wood type, stain expectations, and the size of the repair.
You’ll select shellac putty for quick fills in softwoods or when you need fast settling, then press it into the grain and wipe flush.
For larger voids, wood filler offers stronger binding and easier sanding, especially when you want a consistent finish matching across panels.
A mix of wood filler with shellac or solvent-based binding can tailor hardness and stain response.
Always test on a scrap to confirm wood grain appearance and finish matching before full application.
Use sensible, thin coats and allow full cure for best results.
Finishing Step: Sanding, Sealing, and Matching Sheen
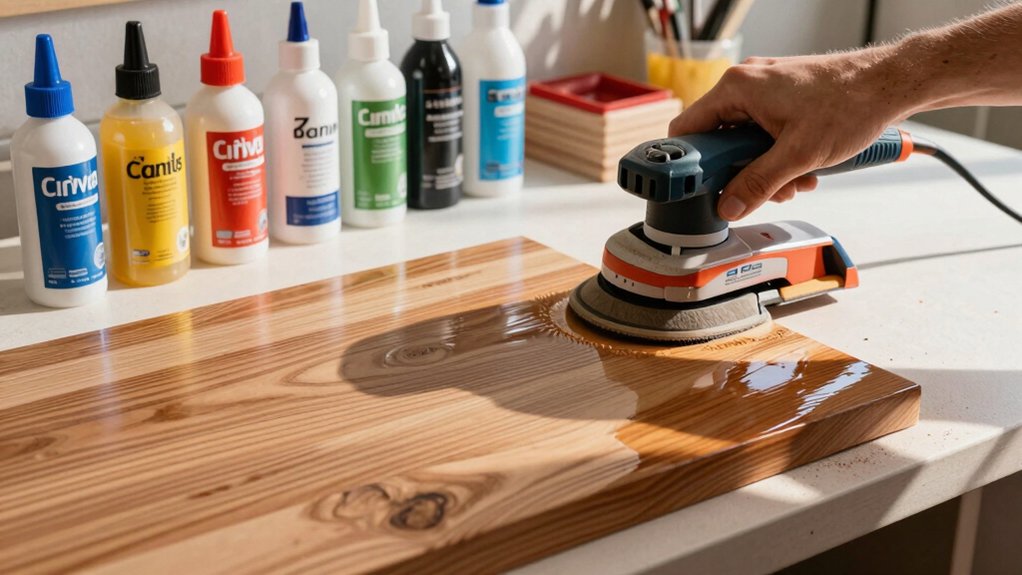
To finish strong, you’ll sand evenly, seal to lock in color and grain, and tune sheen to your target look. In this finishing step, you command control over grain matching and stain compatibility, ensuring a cohesive, professional result.
Start with a progressive sanding sequence to remove raised fibers without rounding edges. Use a quality sanding pad and light, even strokes, then wipe away dust completely.
Apply a sealer that matches your stain and wood type, building a uniform base to prevent blotching. When you assess sheen, choose a finish that fits the room’s lighting and traffic.
Test on a scrap to confirm color shift and grain depth before full release. Finish strong: flawless texture, durable protection, and a look that communicates power and precision.
Must-Have Quick-Repair Tools for DIY Wood Fixes
Whether you tackle quick furniture tweaks or minor repairs on trim and panels, a focused toolbox can save you time and frustration. For quick fixes, stock each kit with a multi-tool knife, a rigid putty knife, fine-grit sandpaper, and a miniature-detail brush.
Add a quick-drying wood glue, a squeeze clamp, and a small, accurate spirit level to ensure straight, confident results. Include pre-mixed wood filler that matches common tones for seamless blends, plus color-mixing compounds to nail the wood grain look.
Keep a stain-compatible touch-up pen and a finish-compatible wipe for finish matching. Don’t overlook a labeled assortment of sanding sponges and a microfiber cloth. With the right tools, you command precise repairs and flawless finish matching.
Budget vs Professional-Grade: What Pays Off for Wood Repairs
Choosing between budget and professional-grade wood repair products comes down to value and outcome. You’ll decide based on the task, not hype.
For small, cosmetic fixes, budget options can deliver acceptable results without draining your budget. For structural or long-term results, professional-grade products often outperform, offering stronger bonds, longer lifespans, and better resistance to shifting conditions.
When you consider wood treatment, pay attention to substrate compatibility and ease of application, not just price. Moisture control is critical: you’ll want sealants and fillers that form durable barriers, prevent recurrence, and fit your climate.
Invest in reliable brands, follow instructions, and test in an inconspicuous area. In many cases, the payoff is faster, cleaner repairs with fewer call-backs and better overall project value.
Common Wood-Repair Mistakes and How to Avoid Them
Common wood-repair mistakes cost time and money, so addressing them up front saves you back-to-back callbacks. You’ll avoid wasted effort by planning before you sand, fill, or stain. Don’t skip surface prep: clean, clamp, and dry the area to prevent repaints and cracked patches.
Use filler that matches wood grain and density; mismatches scream amateur. When you choose products, align fix type with the flaw—rot needs wood hardener, cracks need filler that won’t shrink. Test stain matching on a hidden edge to avoid color drift.
Apply thin, even coats rather than heavy layers, and let each cure fully. Never rush sanding or masking; precision protects value. Finally, document your product choices and technique for future touch-ups, ensuring consistent wood grain and stain matching across projects.
Frequently Asked Questions
How Long Do Wood Repair Products Typically Last?
Wood repair products typically last years, depending on use and environment. Expect 2–5 years for indoors, 5–10 outdoors with proper sealing. You’ll maximize wood longevity and repair durability by following manufacturer instructions and performing regular maintenance.
Can You Repaint Over Filled Surfaces Without Sanding?
Yes, you can repaint over filled surfaces without sanding, but proper surface preparation matters. Clean, dry, and prime first; use compatible filler and paint. Painting over fillers requires thorough curing, feathered edges, and a quality topcoat for durability.
Are Water-Based Fillers Stronger Than Solvent-Based Ones?
Water-based fillers aren’t stronger than solvent-based ones; they’re faster, lower odor, and sand smoother. You’ll notice better filler adhesion with proper surface prep, but wood expansion still challenges long-term stability, so choose filler type by project and environment.
How to Test Color Match on Dark Woods?
Match color by testing on scrap or hidden edge, then compare in daylight. Use wood stain matching, color blending techniques, and adjust with thin coats. You’ll sharpen accuracy, overpower color shifts, and finish with seamless, durable results.
Do Repairs Affect Warranty on Furniture or Floors?
Yes, repairs can affect warranties, so you should act decisively and read policy details. If you DIY, you may void Furniture warranties and Floor coverage; consult the manufacturer, document fixes, and keep receipts to protect coverage.
Conclusion
In short, choose materials that match your wood type and flaw: wood filler or epoxy for fills, the right wood glue for joints, and a compatible finish for a seamless look. Use veneers and solid wood repair techniques that suit denting and cracking, then sand, seal, and blend sheen. Have quick-repair tools ready, weigh budget against results, and avoid common mistakes by planning before you repair. Stick to proven products and you’ll be back to full strength—no surprises down the line. Melt away concerns, like butter.