
Identify Paint Type and Ceiling Finish
Before you scrape or wipe anything, you’ll need to confirm both the paint type and the ceiling’s finish because each combination reacts differently to water, solvents, and abrasion. Set up stable access sized for your Ceiling height, and wear goggles and a P100 or N95 respirator to control dust. Identify paint type: dampen a cotton swab with denatured alcohol and rub an inconspicuous spot; color transfer suggests latex, while no transfer suggests oil or cured enamel. Next, check for specialty coatings (stain-blockers, primers) by noting sheen changes and hardness. Identify ceiling finish: inspect with a flashlight for texture (popcorn, orange peel) versus smooth drywall, and note any soft, chalky, or friable areas. Record Paint color and sheen for later matching.
Choose the Safest Removal Method (Quick Guide)
Now that you’ve confirmed whether the paint is latex or oil and whether the ceiling is smooth or textured, pick the least aggressive method that will lift the paint without damaging the finish. First, start with a damp microfiber wipe for fresh latex smears. If it resists, switch to warm water with a drop of dish soap, then wipe and dry.
Next, for cured latex on smooth paint, use a plastic scraper at a low angle; stop if you hit the base coat and plan on color matching touch-up. For oil-based drips, use a small amount of mineral spirits on a cloth, ventilate, and avoid soaking seams.
For textured ceilings, don’t scrape; use targeted softening and blotting. Adjust your method to ceiling height: work from stable, rated access, keep two hands free.
Prep the Room and Protect Surfaces
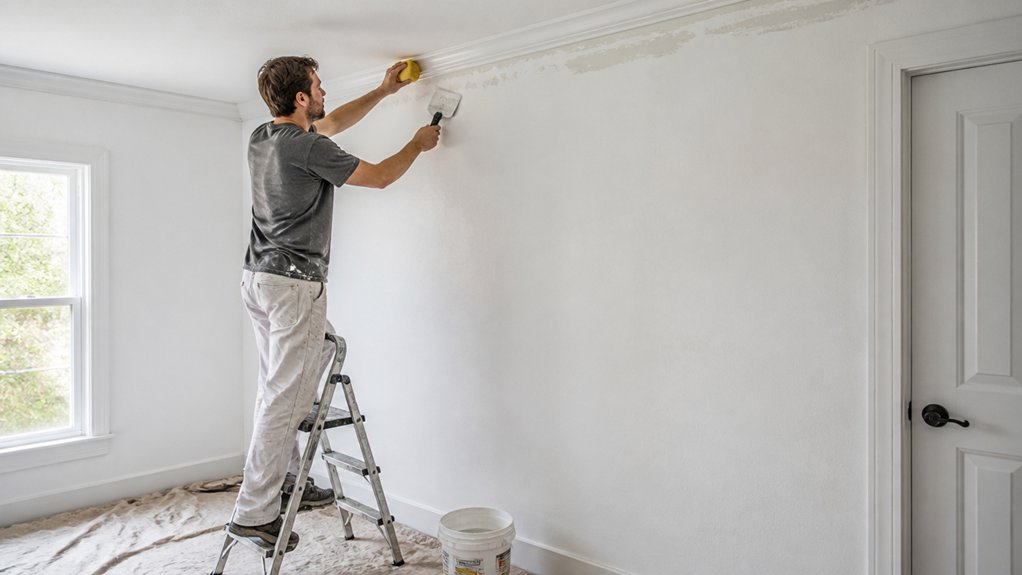
Where do most ceiling paint-removal jobs go wrong? You skip prep, then drip, track, and breathe debris. Start by clearing furniture or pushing it to the center and covering it with plastic sheeting. Lay rosin paper or a canvas drop cloth wall-to-wall; tape seams and edges so nothing shifts underfoot. Improve Room lighting with bright, angled work lights to reveal smears and thin spots. Measure Ceiling height and choose a stable platform: a rated step ladder for standard rooms or a scaffold for high ceilings; lock spreaders and keep feet on level flooring. Mask trim, vents, and fixtures with painter’s tape and plastic. Turn off power at the breaker, cover electrical boxes, and wear eye protection and a respirator.
Wipe Off Wet Latex Paint Fast
With the room protected and your ladder set, tackle wet latex paint immediately—fresh drips lift cleanly, but they’ll bond fast as they start to skin over. Put on safety glasses and nitrile gloves, and keep three points of contact on the ladder. Dampen a clean microfiber cloth with warm water; wring it until it’s barely moist to prevent ceiling saturation. Blot the drip, don’t smear it, working from the outside edge inward. Switch to a fresh cloth section often so you don’t redeposit pigment and compromise Color matching. For textured ceilings, use a damp sponge and light dabbing to preserve paint durability. If water alone lags, add one drop of mild dish soap, then wipe with plain water. Dry immediately.
Remove Dried Latex Paint From Ceilings
Although dried latex paint feels stubborn, you can usually lift it without gouging the ceiling if you soften it first and work in controlled passes. Put on safety glasses, gloves, and a dust mask, then cover floors and shut off HVAC to limit dust. Mist the spot with warm water and a drop of dish soap, or apply Eco friendly removers labeled for latex; let it dwell 5–10 minutes. Use a plastic putty knife at a low angle and scrape lightly from the edge inward. Wipe residue with a damp microfiber cloth, rinse, and dry. If texture lifts, stop and switch to gentle rubbing with a nylon pad. After removal, sand lightly, then prime and repaint for Color matching.
Remove Oil-Based Paint From Ceilings Safely
Because oil-based paint cures into a hard, solvent-resistant film, you’ll get safer, cleaner results by ventilating well, protecting the room, and dissolving the paint in thin layers instead of scraping aggressively. Shut off ignition sources, open windows, and run a fan exhausting outward. Wear nitrile gloves, goggles, and an organic-vapor respirator. Tape plastic to walls and cover floors with a drop cloth.
Test a small spot: apply mineral spirits with a cotton pad for 30–60 seconds, then wipe; repeat until the edge softens. For stubborn paint, use a gel paint remover rated for overhead use, keeping dwell time per label. Neutralize and wash with mild detergent, then rinse and dry. Prime before repainting for Color matching and Paint durability.
Clean Paint Specks on Textured or Popcorn Ceilings
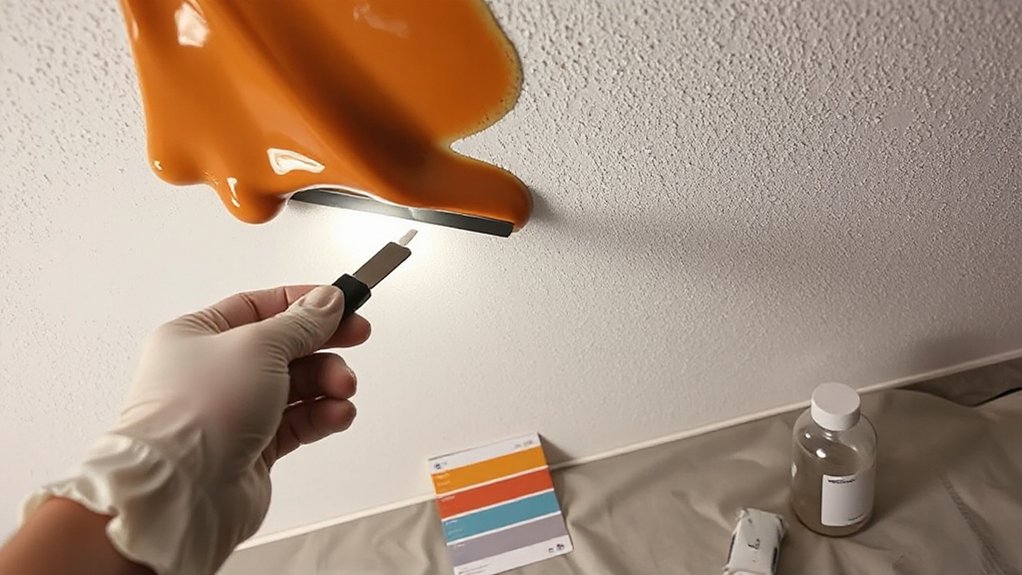
After you’ve handled tougher oil-based spots, treat textured or popcorn ceilings more gently so you don’t shear off the raised pattern or release dust. Put on goggles, a respirator, and gloves, and lay a drop cloth. Test a hidden area first to confirm Ceiling color won’t lighten and Paint durability won’t suffer. Use a soft, dry artist’s brush or microfiber mitt to flick loose specks without pressing. For stuck water-based dots, dampen a cotton swab with warm water plus a drop of dish soap, then dab—don’t rub. Blot immediately with a dry cloth. If residue remains, touch it with isopropyl alcohol on a swab for two seconds, then blot. Stop if texture softens, and let the area air-dry fully.
Remove Roller Splatter and Spray Overspray
When roller splatter or spray mist dries on a ceiling, you’ll get the cleanest results by working from the mildest method upward and keeping moisture tightly controlled. Put on goggles and a respirator, then lay plastic and tape walls. Use a bright work light to map overspray.
Start dry: gently scrape dots with a plastic putty knife held nearly flat. For thin haze, rub with a clean microfiber cloth or a white non-scratch pad, testing first to protect ceiling textures. If paint lifts, stop and feather edges to avoid burnishing. Vacuum dust immediately with a brush attachment. If you expose bare substrate, plan quick spot-priming and Color matching to blend. Re-check under raking light and repeat only where needed, in small sections.
Use Gentle Solvents (Denatured Alcohol, Citrus)
If dry methods won’t budge the film, step up to gentle solvents like denatured alcohol (best for fresh latex) or a citrus-based remover (often better for tacky residue), and keep the application tightly controlled. Put on nitrile gloves, eye protection, and ventilate the room; that’s basic solvent safety. Dampen a microfiber cloth or cotton swab—don’t spray overhead. Test in a hidden corner for 30–60 seconds. For alcohol, blot and wipe in short strokes, rotating to a clean area to prevent smearing. For citrus remover, apply a pea-size amount, wait per label, then lift with a plastic putty knife or cloth. Rinse the spot with mild soap and water, then dry to stop solvent action. Repeat only as needed for paint removal.
Repair Scuffs, Peeling Paint, and Damaged Texture
After you’ve removed the stray paint, put on safety glasses and a dust mask, then inspect the ceiling under bright light to mark scuffs, scratches, and any lifting edges. Lightly sand scuffs smooth, vacuum the dust, and spot-prime exposed drywall or stained areas so your repair bonds and won’t flash. For peeling paint and damaged texture, scrape only what’s loose, skim with joint compound, re-texture to match, and let it dry fully before priming and repainting.
Fix Scuffs And Scratches
Although most ceiling paint smears wipe off with the right solvent, scuffs, peeled spots, and torn texture need repair so you don’t expose drywall paper or leave a visible “halo” after touch-up. First, kill power to the room, wear eye protection, and lay a drop cloth. Under raking light, circle scuffs and scratches with painter’s tape. Lightly sand only the raised edges with 220-grit on a pole sander; don’t burn through to paper. Vacuum dust, then wipe with a barely damp microfiber and let it dry. Spot-prime any raw or fuzzy areas with a stain-blocking primer. Match Ceiling color and Paint sheen by testing a small, feathered sample. Apply paint with a mini-roller, blending outward to hide edges.
Patch Peeling And Texture
Before you repaint, stabilize any peeling paint and rebuild the ceiling’s texture so the repair doesn’t telegraph through the finish. Wear goggles, a respirator, and gloves; set a drop cloth. Scrape loose edges with a putty knife, then feather sand with 120–150 grit. If you spot Ceiling mold, stop and treat with a labeled fungicidal cleaner, dry fully, and fix the moisture source. Vacuum dust, then seal the area with a stain-blocking primer to lock down remaining edges.
Skim damaged spots with lightweight joint compound, keeping coats thin. Let dry, sand smooth, and re-prime. Recreate texture using spray texture or a damp sponge, matching pattern and thickness. Finish with paint color matching: test a small swatch, then apply two light coats.
Frequently Asked Questions
How Much Does Professional Ceiling Paint Removal Typically Cost?
You’ll typically pay $2–$6 per sq ft ($200–$900 per room), depending on coating type and prep. Compare DIY methods, address environmental concerns, confirm containment, lead testing, ventilation, PPE, and approved disposal.
Can Paint Removal Trigger Asbestos Risks in Older Popcorn Ceilings?
Yes—paint removal can release fibers, increasing Asbestos risk if your popcorn ceiling predates 1980. Don’t assume it’s safe: 1) stop disturbing it, 2) test, 3) wet-scrape/contain, 4) hire certified abatement.
Will Removing Paint Affect My Ceiling’s Fire Rating or Building Code Compliance?
Yes—removing paint can affect your ceiling’s fire safety and building standards if you expose or damage rated layers. 1) Confirm assembly rating. 2) Use approved methods. 3) Repair per manufacturer. 4) Document inspections.
How Long Should I Wait Before Repainting After Using Solvents?
Wait 24–48 hours before repainting; verify paint drying time by ensuring the surface feels dry and odor-free. Follow solvent safety precautions: ventilate continuously, measure humidity, and test a small patch. Don’t trap fumes.
What Personal Protective Equipment Is Recommended for Ceiling Paint Removal?
OSHA reports eye injuries cause about 1,000 lost-workday cases daily. Wear protective gear: goggles, N95/P100 respirator, nitrile gloves, coveralls, and hat. Follow safety precautions: ventilate, test fit, seal cuffs, change filters.
Conclusion
You’ve tested the theory: the less aggressive your first move, the less ceiling you’ll lose. Confirm paint type, then start with water and a microfiber cloth for wet latex. For dried spots, lift with a plastic scraper, then wipe with denatured alcohol or citrus solvent—ventilate, wear gloves, and keep flames away. On textured ceilings, dab; don’t rub. If paint or texture scuffs, feather-sand, patch, and touch up to finish.