
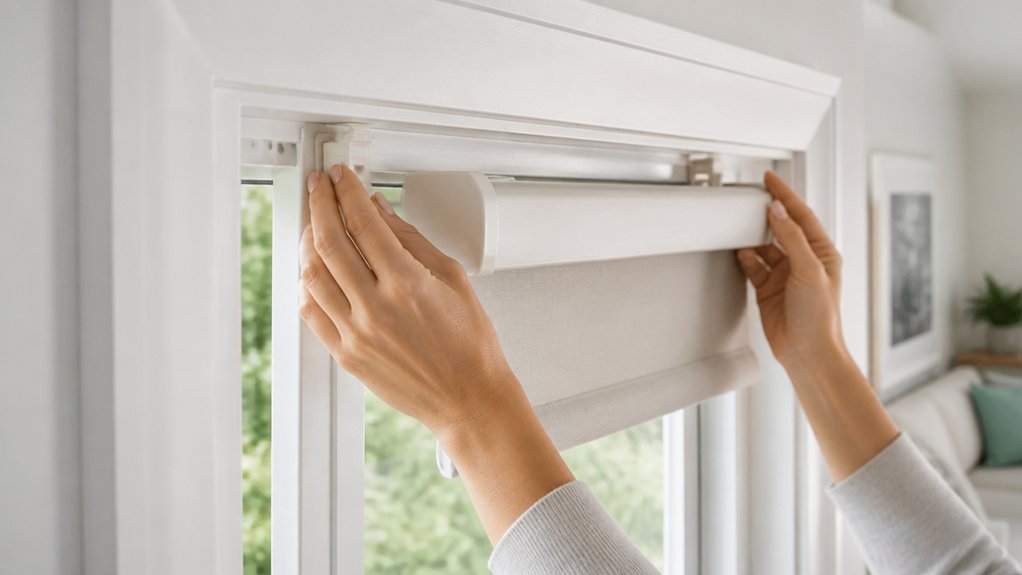
Choose a No-Drill Mounting Method (Adhesive, Clip, Tension)
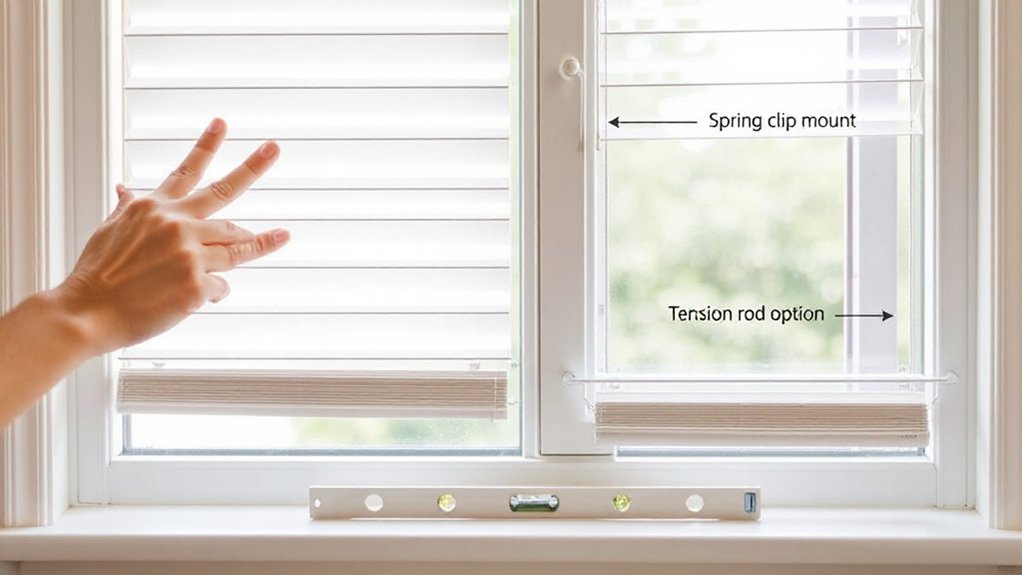
Before you fit anything, you’ll need to choose a no-drill fixing system that matches your window type and the blind’s headrail weight. Use pressure-sensitive adhesive pads for lightweight roller or pleated blinds; confirm the pad’s shear-load rating and allow full cure time in typical UK indoor humidity. Choose clip-on brackets for uPVC frames where you can engage the glazing bead without fasteners; check clip throat depth and gasket compression so you don’t distort seals. Select a tension rod for recess mounting when you’ve got sound, square reveals; set preload carefully to avoid slip and paint damage. Fabric selection affects mass and sail area, so size fixings accordingly. For cleaning tips, avoid solvent sprays on adhesives and wipe brackets with a damp microfibre cloth.
Pick No-Drill Blinds That Match Your Window Type
Although most no-drill systems look universal, you’ll get a safer, neater fit if you match the blind type to your window construction—uPVC casements with a glazing bead suit clip-on Perfect Fit–style frames, deep timber recesses often take a tension rod or friction-fit pleated blind, and aluminium frames usually need high-spec adhesive brackets with a proven shear rating. Check the opening function too: tilt-and-turn sashes need low-profile hardware so the handle clears, while sliding patio doors suit slim cassette rollers to avoid fouling. In kitchens and bathrooms, choose moisture-stable Material choices such as PVC, faux-wood, or coated aluminium, and specify wipe-clean fabrics. For living spaces, prioritise blackout linings or solar screen openness factors. Finally, lock in Color options that match your uPVC foil, paint, or existing architrave for a factory-fitted look.
Measure for No-Drill Blinds (Inside vs Outside)
Next, you’ll measure up for a no-drill fit, and your method changes depending on whether you’re using an inside mount within the window reveal or an outside mount over the architrave. For an inside mount, you’ll take width and drop measurements at multiple points inside the recess and use the tightest figures to guarantee the blind seats square. For an outside mount, you’ll measure the full area you want covered, add appropriate overlap for light control and privacy, and confirm there’s clearance from handles and trickle vents.
Inside Mount Measurement Steps
If you’re fitting no-drill blinds as an inside mount, you must measure the window recess precisely because the bracket system relies on a tight, square opening rather than fixings. Use a steel tape, measure in millimetres, and record width at the top, middle, and bottom between the window frame jambs; use the smallest figure. Next, measure drop on the left, centre, and right from the recess head to the sill; again, take the smallest. Check squareness by comparing diagonals; if they differ, expect light gaps and choose tolerant blind styles. Confirm recess depth: allow clearance for the headrail, brackets, and any handles. Finally, note obstructions such as trickle vents or glazing beads before ordering.
Outside Mount Measurement Steps
When you choose an outside mount for no-drill blinds, you measure the area the blind will *cover* on the wall or architrave rather than the recess itself. Start by marking the desired overlap: typically 50–75mm beyond each side to reduce light bleed, and 75–100mm above the frame to clear the opening arc and brackets. Use a steel tape and measure the total width across your marks at top, middle, and bottom; take the largest figure. Next, measure the drop from your top mark to where you want the blind to finish (sill, apron, or below), then add any manufacturer’s headrail allowance. Confirm you’ve got a flat fixing face for adhesive pads. This window treatment also frames Decorative accents cleanly.
Tools and Supplies for a No-Drill Install
You’ll need a basic no-drill kit: tape measure, spirit level, pencil, cleaning wipes (IPA), and a sharp utility knife for trimming pads. Choose fixings that match your frame substrate—Command-style adhesive strips, high-bond VHB tape, or clip-on/pressure-fit brackets for uPVC windows—then check the safe working load and cure time. Prep the surface properly and you’ll get a secure bond without compromising plasterboard, tile, or window beading.
Essential No-Drill Tools
Before you fit no-drill blinds, assemble the right kit to guarantee a secure, level installation on typical UK uPVC or timber frames. Start with a 2m tape measure and a steel rule for accurate recess and drop checks across different window frame styles. Use a torpedo spirit level (or laser level) to verify plumb and prevent skewed headrails. A soft pencil and low-tack masking tape let you mark reference lines without marring decorative finishes. Keep a plastic scraper and microfibre cloth to remove grime and silicone residue from glazing beads and frame returns. Needle-nose pliers help seat brackets and tension clips cleanly. Finish with sharp scissors or a craft knife for trimming safety cords, spacers, and packaging. Include a step stool.
Adhesives And Mounting Options
With your measuring and levelling kit ready, focus next on how you’ll actually fix the blind to the frame without putting a screw into uPVC or timber. Start with no-drill clip brackets that clamp onto the sash; they’re ideal for most UK tilt-and-turn and standard casements. For recessed installs, use high-bond acrylic foam tape or VHB pads on degreased, dry surfaces; apply firm pressure and allow full cure time before loading the headrail. If you need a removable option, choose Command-style hook-and-loop strips, but keep within the stated weight rating. Pair mounts with the right headrail profile and consider fabric selection, as heavier blackout rollers demand stronger bonding. Follow safety precautions: ventilate when using solvent wipes, and check child-safe cord tensioners.
Install Blinds With Adhesive Brackets (Step-by-Step)
Although many no-drill systems look flimsy, adhesive mounting brackets can securely carry lightweight roller, pleated, or Venetian blinds when you prep the surface properly and align the fixings to the window reveal. Choose Material options rated for uPVC, painted timber, or aluminium frames; avoid porous plaster. Clean the mounting zones with isopropyl alcohol, dry fully, then mark bracket centres with a spirit level and pencil. Apply the pads, press each bracket hard for 30–60 seconds, and respect the manufacturer’s cure time (often 24 hours) before loading. Clip the headrail into place, check end-stop engagement, and cycle the blind to confirm smooth travel. Follow Safety precautions: keep cords tensioned and out of children’s reach, and don’t exceed stated weight limits.
Install Blinds With a Tension Rod (Best Use Cases)
Where you’ve got a snug window reveal and you can’t (or won’t) put a screw into the frame, a tension rod gives you a genuinely solid no-drill fixing by loading spring pressure between the jambs. It’s best for lightweight blinds and voiles in uPVC, timber, or painted masonry reveals, especially in rentals where you must avoid permanent fixings. Measure the inside width precisely, then set the rod 2–3 mm wider for preload; seat it level so the blind hangs square and doesn’t creep. Use rubber end caps to increase friction and protect gloss paint. Avoid deep recesses with uneven plaster, bay windows, or heavy lined curtains. You’ll still get Custom window treatments and clean aesthetic enhancements without compromising the frame.
Install Blinds With Clip Brackets (No Holes)
If you’ve got uPVC casement windows and need a true no-drill fit, clip brackets let you mount a roller, Venetian, or pleated blind directly onto the frame by clamping or snapping into the existing bead/reveal without putting a single hole in the profile. Measure the visible glass and check the bead depth, then choose the correct bracket set for your system (often 18–24 mm). Degrease the frame with IPA, present the bracket to the top bead, and snap or clamp it home so it sits square. Slide the headrail or cassette into the clips until it locks. This method keeps sightlines tight, protects warranties, and suits modern Blind design where neat tolerances matter across UK Window treatments.
Stop Slipping: and Remove No-Drill Blinds Cleanly
Once you’ve clipped or taped a no-drill blind in place, you need to control creep and protect the uPVC finish when it’s time to take it down. To stop slipping, degrease the window frame with isopropyl alcohol, then re-seat brackets square to the sash so the load path stays vertical. Add anti-slip pads or a thin EPDM strip where the clamp meets the rebate, and keep tensioned cords neutral to prevent racking. For sunlight control, set the blind level; a tilted headrail migrates under vibration.
To remove cleanly, support the headrail, release the clamp cam, and peel tapes back at 180° with slow, even force. Warm adhesive with a hairdryer, then wipe residue using citrus remover and rinse. Avoid scrapers.
Frequently Asked Questions
Will No-Drill Blinds Damage Paint or Drywall When Removed?
No, you typically won’t cause paint damage or need drywall repair if you remove them correctly. You’ll risk peeling emulsion from poorly prepped plasterboard. Use low-tack adhesive pads, warm gently, and peel slowly.
Do No-Drill Blinds Work on Metal or Vinyl Window Frames?
Yes, you can fit no-drill blinds on Metal frames and most uPVC with good Vinyl compatibility, provided the surface is flat and clean. You’ll need correct bracket geometry and rated adhesive/magnetic fixings for UK temperatures.
How Much Weight Can Adhesive Brackets Safely Support?
Adhesive brackets typically support 1–3kg safely; heavy-duty types can reach 5kg if adhesive strength suits the substrate. You’ll reduce weight capacity with painted vinyl or cold metal. Always follow UK manufacturer load ratings.
Can I Install No-Drill Blinds on Textured or Uneven Surfaces?
Yes, but you’ll need a flat adhesion zone. In the UK, 70% of adhesive failures stem from poor surface prep. Textured surfaces and Uneven mounting demand filler, sanding, primer, and rated pads. Otherwise, don’t.
Are No-Drill Blinds Safe for Homes With Children and Pets?
Yes, you can use no-drill blinds safely if you follow Child safety and Pet safety guidance. Choose cordless or breakaway systems, secure brackets to sound uPVC frames, and check EN 13120 compliance in UK homes regularly.
Conclusion
You’ve just fitted blinds without a single pilot hole—yet they’ll look like you’ve had a fitter in. The irony is that the “temporary” adhesive brackets, clip mounts, or tension rod can feel more secure than drilling into plasterboard and hoping you’ve hit a stud. If you measured inside/outside reveal correctly and degreased uPVC or painted frames, you’ll get a clean, compliant finish—no dust, no wall plugs, no landlord panic. And removal? Surprisingly civilised.