
Plan a tiny-space lighting system by mapping zones—porch, seating, pathways—and layering ambient, task, and accent light. Use warm and cool temperatures strategically to shape mood, while dimmable fixtures keep versatility high. Place lights along railings, edges, and corners to define space without glare; add string lights to visually extend height. Choose weatherproof, energy-efficient LEDs or solar options for DIY ease. Keep a simple maintenance plan and smart controls handy; you’ll uncover more practical tips as you continue.
Plan Tiny-Space Lighting: Foundational Criteria
When planning tiny-space lighting, start with foundational criteria that keep the setup practical and scalable. You’ll map zones first, then layer light sources to avoid glare and shadows.
Prioritize energy efficiency, durability, and ease of maintenance, because dependable gear supports long-term belonging in your space. Choose fixtures that protect against weather while blending with your style, ensuring consistent performance year after year.
Plan electrical access and control methods that simplify adjustments as your needs shift. Consider lighting aesthetics from the start—how you’ll balance uplight, task light, and ambiance to support daily rituals and social moments.
Account for color contrasts: bright accents against deeper tones help define boundaries and create visual interest. Keep a simple layout, and document ratings, placements, and dimming capabilities for future tweaks.
Warm vs Cool: Choosing Color Temperature for Small Patios
Choosing color temperature for small patios comes down to how you want the space to feel and how you use it. When you pick warm versus cool, you shape mood lighting and daily routines.
Warm light (lower Kelvin) invites coziness, conversation, and evenings you’ll linger in. It complements wood, brick, and soft textures, making spaces feel intimate.
Cool light (higher Kelvin) enhances clarity, helps with morning routines, and suits compact areas that double as work nooks or dining corners.
For versatility, mix temperatures strategically: a warm base for dining or lounging, with cooler accents near entrances or task areas.
Aim for balanced brightness, avoiding glare. Color temperature isn’t just aesthetics—it guides behavior, comfort, and belonging in your small patio sanctuary.
Layer Lighting: Ambient, Task, and Accent in Tight Areas
Layering lighting in tight spaces isn’t optional—it’s essential. In small patios, you balance ambient, task, and accent to avoid flatness and glare.
Start with ambient light that washes the area evenly without overpowering the space. Then add task lighting where you cook, read, or prep, using focused beams you can dim.
Finally, layer in accents to highlight textures, plants, or architectural edges, creating depth and warmth. Choose fixture styles that complement your vibe—sleek sconces, recessed cans, or portable lanterns—so the setup feels cohesive rather than cluttered.
Mind color contrast: warm ambient tones pair with cooler task lights for readability and mood. Use dimmers and placement to maintain flow, avoid shadows, and keep the area welcoming for all.
Your small space should feel bright, personal, and connected.
Smart Placement: Railings, Ledges, and Corners
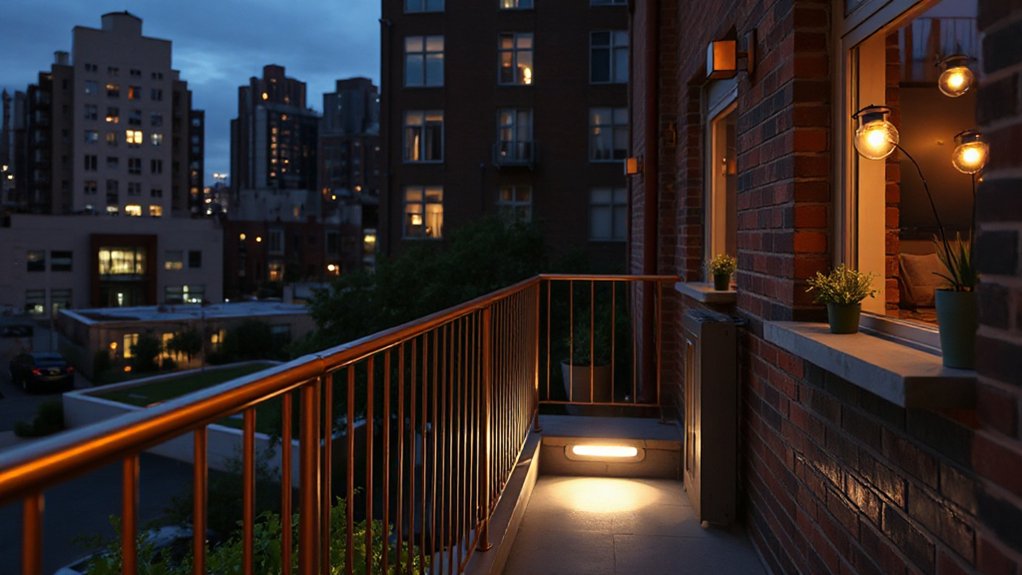
Railings, ledges, and corners shape how your small outdoor space reads from a distance and up close, so place lighting where it can guide without glare. You’ll want fixtures that echo the lines you already notice, not shout over them.
Prioritize placement along railings to create a visual path and on ledges to illuminate key edges without spillover. In corners, tuck low-profile luminaires to avoid dark silhouettes while preserving sightlines.
Color contrast matters: choose fixtures that stand out just enough against surrounding surfaces to read as deliberate design. Check fixture durability for exterior wear—weather seals, powder coating, and impact resistance matter when you’re sharing these spaces after dark.
Practical, reliable lighting builds belonging, not fuss, so pick purposefully, install confidently, and adjust as your evenings unfold.
String Lighting to Alter Perceived Height and Width
String lights can visually stretch a space by guiding the eye along vertical lines to heighten a small area.
Use strings in layered patterns to create a wider feel while the glow pools at different elevations.
Plan your setup with a clear blueprint for layered glow to optimize perceived height and width.
Height Perceived Through Lines
When you hang string lighting across a space, you can trick the eye into perceiving height or width by running the lines in specific directions and at strategic angles.
For height, keep lines angled upward toward a focal point or a high anchor, creating a diagonal pull that draws gaze upward and elongates the room. Shorter spans above eye level can reinforce vertical lift, while evenly spaced bulbs emphasize vertical rhythm, aiding line perception.
Avoid static, gridlike layouts; variety in angle prevents a flat feel. Consistency in fixture height matters: too low collapses perceived height. Choose warm, uniform bulbs to maintain cohesion.
This approach builds a sense of belonging, guiding guests to experience the space as taller and more inviting, without clutter or confusion. Perceived height is your measurable goal.
Width Illusion With Strings
Hang a tight grid or a shallow V pattern above seating and walkways to widen the feel without adding fixtures. Keep strings close to a single plane for a clean, deliberate effect; misaligned or scattered placements can collapse the illusion.
Choose warm, consistent temperatures to unify the scene, letting the glow read as one continuous ribbon rather than separate points. This technique is about intention and scale: string illusion creates a welcoming, inclusive atmosphere where you and guests feel grounded, connected, and oriented within the space.
Blueprints For Layered Glow
To transform a small outdoor area, layer string lighting at multiple heights and angles, then guide the eye with deliberate overlaps and spacing. Your goal is a balanced glow that visually expands space and adds intimacy.
Start with a low baseline along seating areas to anchor presence, then add mid-level crossings to suggest height variation. Use higher strands to draw the eye upward, making ceilings feel taller.
Maintain clear color contrast between lights and surroundings to sharpen perception of depth. Choose fixture styles that complement your outdoor aesthetic, from vintage bulbs to modern panels, ensuring consistent color temperature for cohesion.
Mind the spacing: tight clusters create intimacy, wider gaps imply airiness. Test at dusk, adjust as needed, and enjoy a layered glow that feels intentional and welcoming.
Solar vs Wired: Power Options for Zero-Wiring Setups
Solar-powered options are ideal for zero-wiring setups, but wired solutions still matter for reliability and scale. When you weigh power sources, think about your space’s sun exposure, water exposure, and maintenance needs.
Solar lights shine with minimal setup and ongoing simplicity, yet you’ll want robust wiring options for timed scenes or longer runs in shaded corners. Consider mixed configurations: solar where handy, wired for key pathways or ambient uplighting.
Battery storage can extend performance, but compare charge cycles and lifespan to avoid frequent replacements. For versatility, select fixtures with universal mounting and weatherproof seals.
Prioritize efficiency, durable LEDs, and sensible placement to reduce energy use while maintaining a cohesive glow. Your goal is seamless, inviting illumination that feels effortless and inclusive.
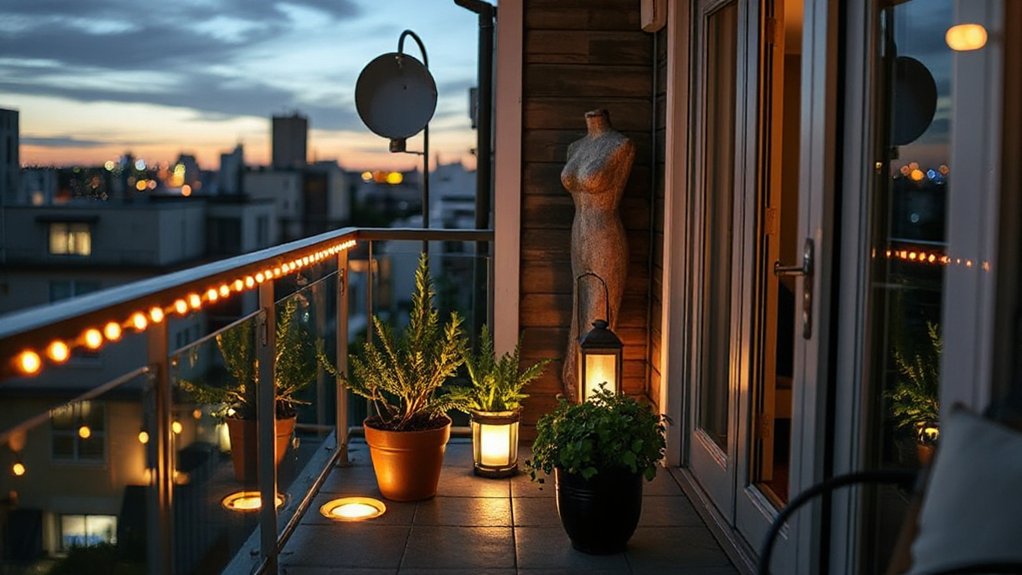
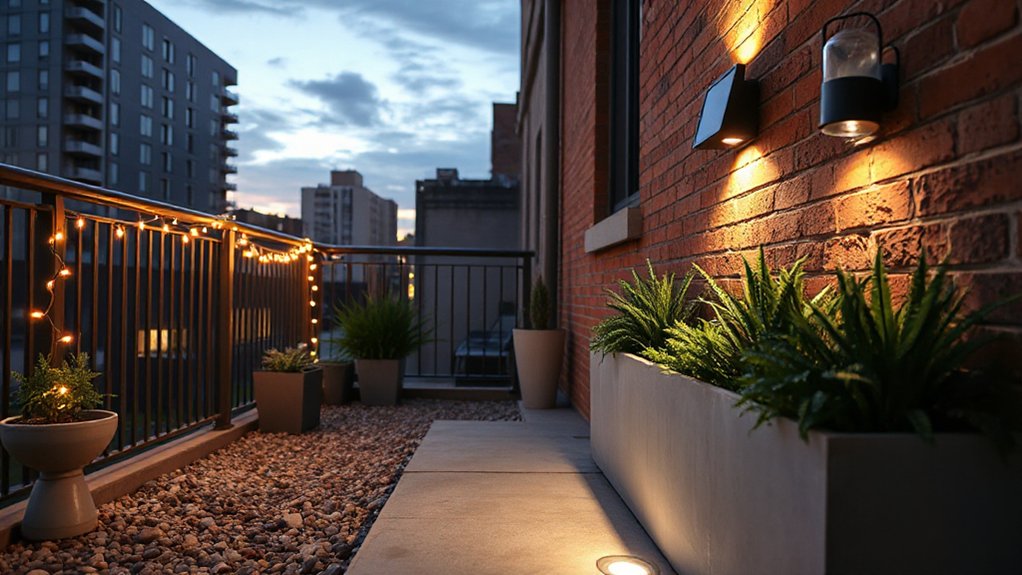
Balcony Solutions: Wall-Mounted and Ceiling-Hung Fixtures
Wall-mounted fixtures boost balcony aesthetics by pairing compact silhouettes with focused uplighting and ambient wall washes.
Ceiling-hung options add vertical flexibility, casting even illumination without crowding railings or furniture.
Prioritize weather-resistant materials and seals to keep both wall-mounted and ceiling-hung setups durable in outdoor conditions.
Wall-Mounted Aesthetics
Ever wondered how wall-mounted lighting can transform a compact balcony? You’ll gain defining wall accents that bring texture and depth, while keeping sightlines clean. Choose fixtures that complement your space’s mood and scale, then tune lighting contrasts to highlight plants, seating, and artwork without glare.
Practically, install at eye level to invite conversation and avoid harsh shadows.
- Choose slim, unobtrusive wall sconces that map to your balcony’s edges for subtle definition.
- Pair warm and cool tones to create layered lighting contrasts around seating zones.
- Add adjustable beam angles to direct light toward focal features, not neighbors’ windows.
- Use dimmers to modulate intensity, preserving ambiance and energy efficiency.
Wall accents unify style and function, making your balcony feel larger and more belonging.
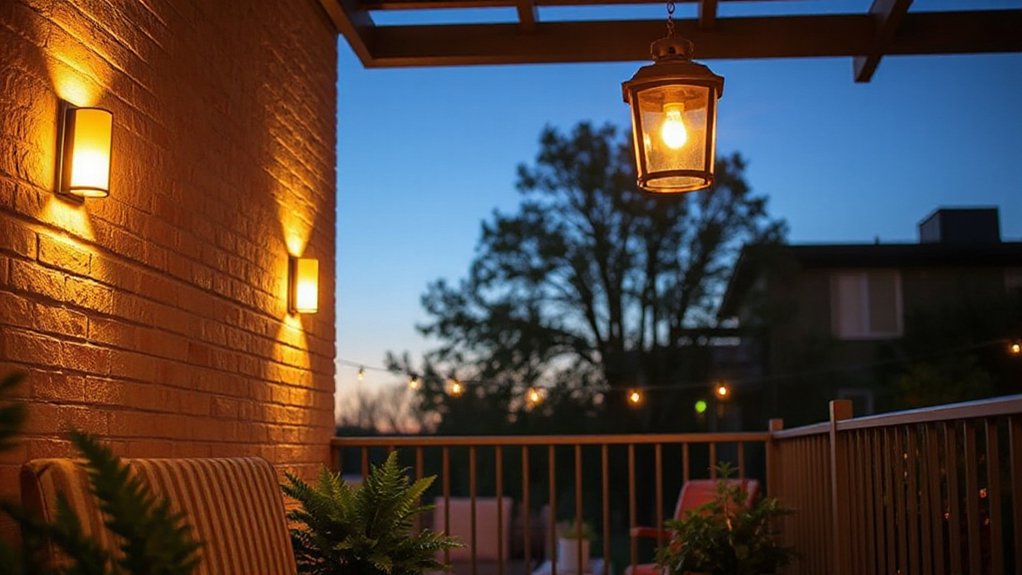
Ceiling-Hung Versatility
Ceiling-hung fixtures bring overhead versatility to small balconies, letting you shape light without crowding walls or floor space. You gain flexible zoning: hang clusters here, single pendants there, adjusting brightness as seasons shift.
In regard to ceiling design, choose fixtures with operators you can dim or pattern for ambience, so your space feels curated rather than cluttered. Opt for lightweight forms that sway gently in a breeze, preserving balance and safety.
Hanging ornaments add character without consuming surface area, reinforcing a sense of belonging through thoughtful detail. Use ceiling-hung options to define zones—dining, lounging, or reading—while keeping sightlines open.
Pair with weathered metals or warm whites to complement your balcony’s personality and create a cohesive, inviting exterior room.
Weather-Resistant Essentials
When choosing balcony lighting that endures the elements, prioritize fixtures rated for outdoor use and designed to resist moisture, heat, and corrosion. Weatherproof fixtures and durable bulbs keep your space inviting year-round, with minimal maintenance.
- Wall-mounted units with sealed casings prevent moisture intrusion while providing even glow.
- Ceiling-hung fixtures use corrosion-resistant metals and gaskets to stay reliable in humidity.
- Integrated LED options reduce heat output and extend bulb life, saving energy.
- Weatherproof plugs and seals matter; pair with outdoor-rated cords for safe, simple installs.
Safe and Chic: Path and Step Lighting Without Clutter
Path and step lighting can elevate safety and style without adding clutter. You’ll want low-profile options that blend with existing surfaces, not shout for attention. Start with subtle path lights along walkways to guide feet and deter trips, using warm, diffused light for a welcoming glow.
Choose decorative fixtures that complement your exterior and require minimal maintenance, such as integrated LED steps or recessed risers. Prioritize pathway safety with evenly spaced illumination, avoiding harsh hotspots.
If you install step lights, keep wiring concealed and accessible for quick fixes. Select durable materials rated for outdoors, and consider solar as a backup for occasional use.
Aim for a cohesive lighting layer—path, step, and ambient—to create belonging and security without clutter.
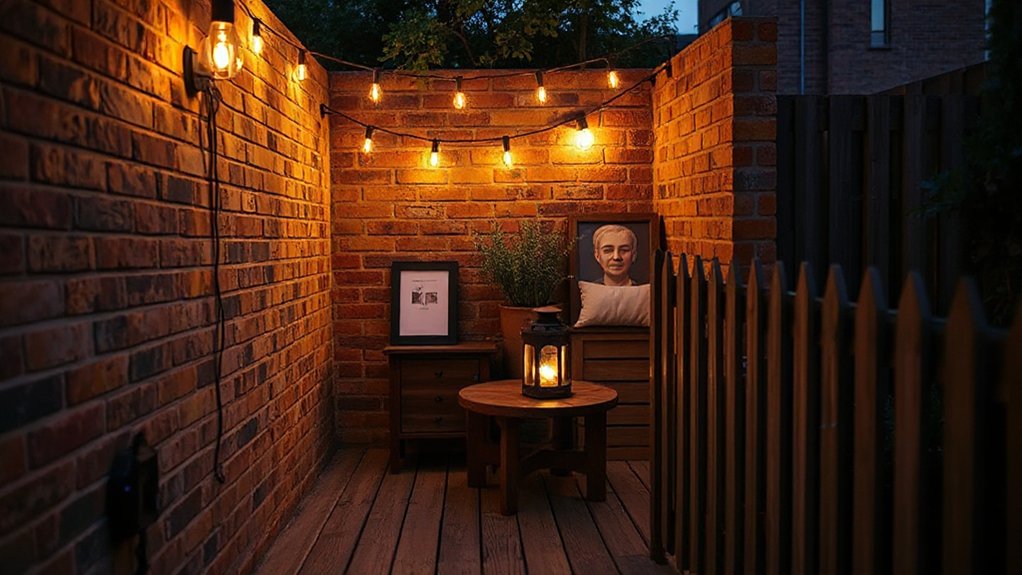
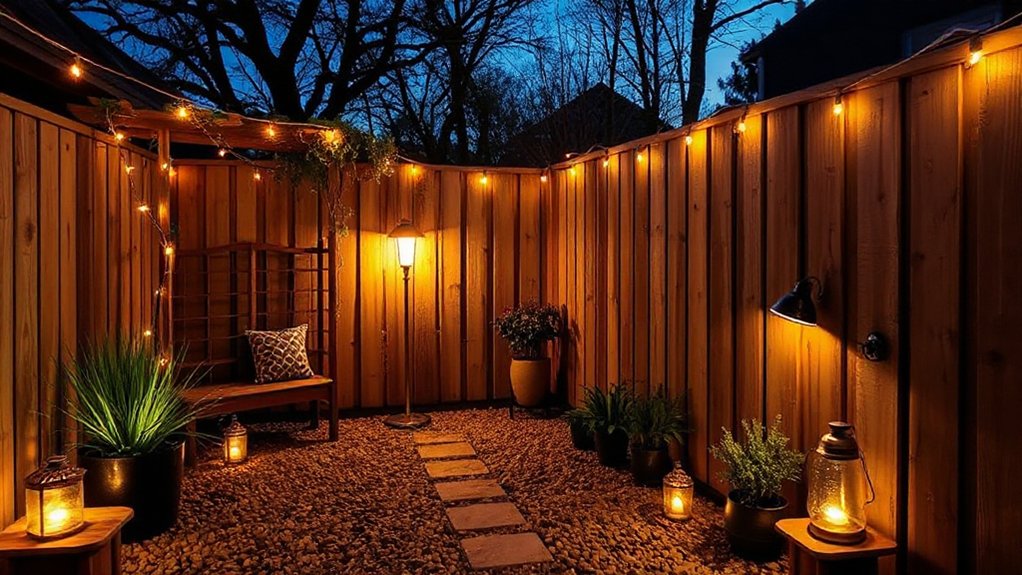
Brick and Greenery: Solar Lanterns and Decorative Lamps
Brick and greenery set the scene for solar lighting that feels both organic and low-maintenance. You’ll blend brick textures with leafy pockets, creating inviting pockets of glow that welcome guests without overpowering the space.
- Choose solar lanterns that echo vintage fixtures for timeless charm and zero wiring.
- Ground lanterns among planters to highlight seasonal accents like blooms or autumn foliage.
- Mount decorative lamps near seating to extend evening comfort without adding clutter.
- Use warm white LEDs to keep the space cohesive and welcoming for gatherings.
This approach gives you practical, confident light that belongs in the moment. You’ll enjoy ease, durability, and a curated look that feels like home, not décor drama.
Seasonal accents shift with the year, keeping the setup fresh and inviting.
Subtle Ground Glow: Low-Profile Ground Lighting
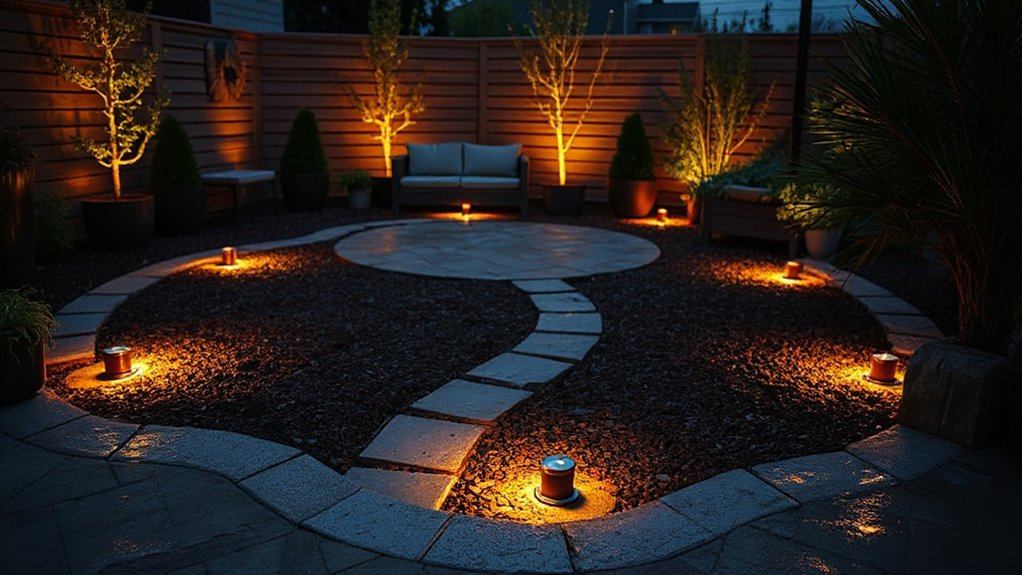
Subtle ground glow delivers low-profile illumination that blends with the landscape while guiding foot traffic. You’ll install compact fixtures along paths and edges to create a seamless glow, not harsh hotspots.
Choose low-profile housings that sit just above soil or mulch to minimize glare and maximize harmony with your plantings. Focus on even ground coverage so shadows don’t interrupt movement, and position lights to illuminate steps, corners, and passages without overpowering the night.
Material finishes should resist weather and stay unobtrusive in color. Adjust lighting intensity to preserve ambiance while ensuring safety; too bright a glow can feel clinical, too dim can be unsafe.
Regularly check wiring, clean fixtures, and reaim as your landscape matures for consistent, welcoming light.
Space Through Texture: Color and Material Interplay
Color and material interplay shapes perception in small outdoor spaces. You shape atmosphere by pairing textures and finishes that feel inviting and cohesive.
When you mix rough and smooth surfaces, you create texture contrast that guides the eye and highlights architecture. Choose materials with similar undertones to achieve material harmony, so light reads cleanly rather than chaotic.
Strategic contrasts in color and texture can expand or define zones without crowding.
1) Pair a matte stone with a polished metal for subtle reflection and visual depth
2) Use wood and concrete in complementary tones to balance warmth and restraint
3) Illuminate grainy textures to emphasize tactile interest without glare
4) Consider fabric and hardscape hues that echo indoors for a cohesive, belonging feel
Mood Control: Dimmers and Smart Systems
Dimming for ambiance lets you tailor mood without changing fixtures, so you can switch from bright task lighting to warm, intimate glow with a simple adjustment.
Smart controls with zones empower you to light different areas independently—porch, seating, pathways—without wasting energy.
Start by pairing dimmers and smart hubs to create scenes that match the moment, from morning coffee to evening entertaining.
Dimming For Ambiance
Smart lighting that adapts to your mood and tasks makes small outdoor spaces feel larger and more usable, so start with a dimmer at the core. You’ll control atmosphere without clutter, using gradual changes that feel natural, not flashy. Dimmed layers help define space, highlight textures, and improve comfort after sunset. Focus on reliable brightness shifts and steady color rendering for true hues around your seating and entry.
- Adjust to task needs: dining, lounging, and pathway lighting with smooth progressions.
- Use warm-to-neutral tones to preserve color contrast and improve ambiance.
- Prioritize fixture durability and protection against the elements in every choice.
- Pair dimmers with consistent beam spread to avoid harsh hotspots while maintaining depth.
Smart Controls With Zones
In small spaces, zone lighting makes every corner feel intentional, and you’ll stay in sync with gatherings or quiet evenings.
With dimmers and smart systems, you adjust brightness to match activity, control remotely, and automate sequences for entryways or patio moments.
Group scenes simplify adjustments for dining, entertaining, or late-night strolls, while motion sensors gently illuminate stair starts and paths.
This approach preserves ambience without overpowering the space, reinforcing a sense of belonging for you and guests.
Choose reliable smart controls that integrate with your preferred ecosystem, and enjoy consistent, comfortable lighting that adapts to your routine.
Seasonal Refresh: Quick Ideas to Update Lighting
Seasonal refreshes can dramatically elevate small-space lighting with minimal effort. You’ll update the vibe by swapping a few fixtures, choosing bulbs with warmer tones, and weaving in decorative accents that reflect the season. Quick changes keep your space feeling fresh and welcoming, without a full overhaul.
- Swap to dimmable, warm-LED bulbs and adjust brightness for seasonal ambiance.
- Add a single decorative lantern or string lights around a focal plant or seating area.
- Introduce a compact outdoor rug light or floor candle holder for cozy shadows.
- Rotate small statues or planters as seasonal accents that cast interesting silhouettes.
These simple tweaks foster belonging, practicality, and a refined look, while preserving outdoor comfort and usability.
Weather and Power Realities for Small Outdoor Rooms
Weather and power are practical constraints you’ll want to address early in small outdoor rooms: weatherproofing matters, and reliable power access defines what lighting you can run and how you’ll deploy it.
In every setup, start with weather considerations—protect fixtures, seal connections, and choose damp-rated components suited to your climate.
For power sourcing, map outlets and controller placement, then select low-voltage or solar options to minimize trenching and extension cords.
Opt for weatherproof LED fixtures with proper IP ratings and quick-connects for simple maintenance.
Plan scenes that adapt to seasonal shifts: use timers, smart plugs, or battery packs to reduce energy waste while keeping spaces inviting.
Prioritize reliability, safety, and ease of use so you feel grounded and connected outdoors.
Budget-Smart Picks With Big Impact
With weatherproofing and power laid out, you can focus on big effect without big spend. You’ll maximize curb appeal and cozy vibes by choosing budget-smart, durable options that still feel intentional.
- LED pathway bulbs in a single, warm color temperature for Color Harmony and long life
- Solar stake lights with warm, dimmable glow to boost safety without wiring
- Cast-iron or powder-coated lanterns for timeless texture and Energy Efficiency
- String lights with energy-saving modes, placed to emphasize focal plants and seating
Aim for consistency in finish and light color to unite small spaces. Prioritize Energy Efficiency and durable materials, so you enjoy great lighting without frequent replacements.
You belong here, enjoying thoughtful, affordable ambiance that elevates your outdoor room.
Weekend-Friendly Setups You Can Install Yourself
Weekend-ready setups don’t require a pro or specialized tools. You’ll find DIY-ready lighting ideas that are simple to install and instantly upgrade small spaces.
We’ll cover easy weekend installations and practical, ready-to-use lighting options you can implement today.
Easy Weekend Installations
Setting up outdoor lighting this weekend is doable, even if you’re starting from scratch. You’ll want simple, sturdy options that surface-level tasks can handle. Think low voltage, plug-in, or solar for an approachable start.
As you light paths and seating, you’ll notice how garden furniture and plant arrangements frame the glow and invite gathering.
- Map your zones: porch, seating nook, and walkway, then pick warm temperatures and dimmable controls.
- Use solar lanterns along the path, then add a couple of plug-in sconces for focused highlights.
- Clip-on fixtures at eye level for safety and charm; avoid harsh glare.
- Wind down with soft uplights on plants, blending architecture with nature.
This setup feels right for belonging and easy, weekend-ready results.
DIY-Ready Lighting Ideas
If you’re aiming for DIY-Ready lighting, start with simple, weekend-friendly setups you can install without pro help. You’ll gain confidence by choosing low-risk options like plug-in string lights, battery LEDs, and solar-powered path lamps.
Position lights to highlight focal areas and create safe navigation between garden furniture and plant arrangements. Favor warm, neutral tones to foster a welcoming vibe that invites neighbors and guests to linger.
Keep cords hidden, use outdoor-rated adapters, and test layouts before wiring. Use timers or smart plugs to automate evenings without extra effort.
Maintain a cohesive look by mirroring metal, wood, or rope accents across fixtures. With practical planning, you’ll achieve inviting ambiance that enhances small spaces and strengthens community shareable moments.
Safety Tips for Wiring, Mounting, and Moisture
To protect people and property, follow strict safety practices when wiring, mounting, and protecting outdoor lights. You’ll prioritize electrical safety and moisture protection to prevent shocks and outages. Keep connections dry, use weatherproof boxes, and seal with-rated gaskets.
1) Plan for proper clearance and support, choosing materials rated for outdoors and secure mounting points.
2) Use grounded, GFCI-protected circuits and weatherproof enclosures; never bypass safety features.
3) Install protective conduits or conduit covers to shield wiring from moisture and physical damage.
4) Inspect regularly for corrosion, loose screws, and water intrusion after storms, addressing issues promptly to maintain safe, reliable lighting.
Real-Life Layouts You Can Copy Today
Here are real-life layouts you can copy today to maximize a small outdoor space. You’ll find practical tricks for arranging lighting, seating, and pathways in tight areas.
These examples cover small-nook planning, efficient lighting quirks, and quick, effective setups you can implement now.
Real-Life Layouts To Copy
Real-life layouts offer practical inspiration you can replicate in your own small space. You’ll see how compact zones feel larger when lighting guides traffic and highlights focal points like garden sculptures and water features. Use simple, repeatable patterns so you can mix and match later.
Here are four copyable layouts you can adapt tonight:
1) Linear light path along a narrow patio, with a single focal sculpture and a small water feature at the end.
2) Corner vignette combining a bench, low garden sculpture, and uplighting to draw surveys from passersby.
3) Perimeter glow: soft wash around planters, plus string lights over seating for evening conversations.
4) Tiered planters with embedded step lights, guiding movement toward a fountain as a welcoming cue.
Small-Space Lighting Tricks
Use adjustable spotlights to highlight Garden art without overpowering the scene, and aim low for subtle shadows that feel intimate. Choose compact string lighting wrapped around railings or trellises to soften edges without crowding the area.
Dimmed, warm LEDs create a welcoming mood, encouraging you to linger and belong. For wildlife-friendly nights, blend lighting with natural dark periods and avoid bright, light-polluting beams.
Balanced layers—ambient, task, accent—make every corner feel intentional, safe, and beautifully integrated into your Wildlife habitat.
Outdoor Nook Planning Solutions
Even if your outdoor nook is compact, you can copy these real-life layouts tonight and transform the space fast. You’ll shape a welcoming corner by prioritizing function, flow, and a sense of belonging.
- Cozy convo zone: place two chairs with a small table, then add a low-profile planter for subtle greenery.
- Vertical vignette: mount wall planters or use a trellis with climbing plants to save floor space while adding plant arrangements.
- All-in-one credenza: integrate storage, lighting, and a slim outdoor surface for drinks and decor.
- Flexible seating: opt for modular furniture that reconfigures for gatherings or solo relaxing.
Outdoor furniture and plant arrangements tie the scene together, creating an inviting, practical nook you’ll love.
Quick Design, Install, and Maintain Checklist
A quick, practical design, install, and maintenance checklist helps you move from idea to lit space without backtracking. Start with goals: determine zones, brightness, and ambiance, then map fixtures to paths and seating.
Choose durable, weatherproof lighting with energy efficiency in mind, and note power sources, timing, and control options.
During design, verify codes and setbacks, and plan for future upgrades.
Install in stages: rough-in wiring, fixture mounting, and final alignment, testing all switches, sensors, and timers.
Maintain by recording maintenance tasks and schedules, cleaning lenses, replacing bulbs, and checking seals quarterly.
Keep spare parts on hand and document any changes.
This approach fosters lighting maintenance discipline and a sense of belonging, ensuring a safe, inviting small-space glow that adapts with your outdoor life.
Frequently Asked Questions
How to Reuse Existing Fixtures for New Small-Space Layouts?
Yes, you can reuse existing fittings by analyzing best sightlines, swapping bulbs, and matching scales. You’ll achieve cohesive lighting with vintage fixtures and Creative upcycling, preserving charm while modernizing function, so you feel rooted and confidently stylish.
What Micro-Wixtures Ensure Even Lighting in Tight Corners?
You’ll love the irony, but here’s the truth: choose micro wattage fixtures for Corner illumination that evenly light tight nooks, using strategic placements. You’ll feel included as you optimize, avoiding glare while mastering practical, authoritative, concise lighting.
Can You Combine Solar and Wired Lighting Safely in One Setup?
Yes, you can combine solar and wired lighting safely in one setup, but plan carefully. Guarantee proper solar wiring, protect junctions, and address safety considerations with grounding, weatherproof enclosures, and certified components for a cohesive, secure system you trust.
Which IP Rating Matters Most for Balcony Weather?
IP rating IP65 matters most for balcony weather. You’ll want weatherproof fixtures that tolerate spray from rain and mist. With 1-in-4 balconies experiencing moisture issues, choose weatherproof fixtures to guarantee steady balcony illumination and lasting comfort.
How to Budget for Seasonal Lighting Updates?
You can budget by estimating costs, prioritizing essentials, and setting aside a monthly reserve for seasonal updates. Use cost effective solutions and track returns. Stay aligned with Seasonal lighting trends so your space feels belonging and refreshed.
Conclusion
You’ve got the framework to transform tiny outdoor spaces into livable rooms. Prioritize safe wiring and sturdy mounting, then layer ambient, task, and accent lighting to sculpt the space. Pick warm temperatures for cozy areas and cooler tones for edges or tasks, and use railings, ledges, and corners to guide the eye. String lights shift perspective; practice quick, weekend-friendly setups. Think of your patio as a stage—lighting is the quiet, confident lead that makes everything shine.