
To refresh a bathroom on a budget, start with quick, high-impact upgrades you can tackle now. Swap hardware for an instant lift, regrout and recaulk to restore a clean seal, and paint an accent wall for drama. Improve airflow with a better vent and moisture-safe finishes, then deep-clean to banish grime. Add smart storage and inexpensive decor to reduce clutter. With a clear plan and timeline, you’ll finish faster than you think—plus you’ll uncover more budget-smart tips as you go.
Identify Your Budget-Friendly Bathroom Refresh Goals
Before you start shopping or swinging a hammer, define clear, budget-friendly goals for your bathroom refresh. You’ll map what matters most: comfort, function, and style that fits your space and budget.
Set a total cap, then break it into categories like fixtures, storage, and finishes, keeping a small buffer for surprises.
Prioritize changes with big impact and low cost, such as painting walls, updating hardware, or swapping towels and rugs to refresh the feel.
Seek Eco friendly fixtures where possible to reduce ongoing costs and environmental impact, and plan for vintage accents that add character without heavy expense.
Write your goals down, revisit them weekly, and adjust only when a measured improvement is clear and affordable.
Belonging grows when choices reflect your practical, shared space.
Assess Quick-Win Potential Before You Start
Start by surveying your bathroom for quick-win upgrades that deliver the biggest payoff with minimal disruption. You’ll identify tasks that save time, money, or energy, helping you move confidently from idea to action.
Prioritize energy efficiency upgrades, like low-flow fixtures or LED lighting, that cut utility costs without major renovation.
Check safety improvements first—grab bars in the shower, non-slip mats, proper ventilation, and secure storage—to reduce accidents and boost everyday comfort.
Rate potential changes by impact, cost, and ease, then group items into fast wins versus longer projects.
Keep standards simple and familiar so you feel you belong in the process, not overwhelmed by decisions.
Document quick wins you’ll implement this week, and schedule second-phase ideas for sustainable progress.
Set a Realistic Budget and Schedule
Budget planning isn’t about perfection; it’s about predictable costs and contingencies. Identify must-haves versus nice-to-haves, and set a realistic wiggle room for materials, delivery delays, and hidden fixes.
Create a simple spreadsheet that tracks estimated vs. actual spend and time, so you stay in control.
Schedule management means you lock in logical sequences—demolition, prep, paint, fixtures—without backtracking. Build in buffer days for setbacks.
Communicate timelines with household members to reduce friction.
With disciplined budgeting and scheduling, you’ll finish on time, within budget, and feel a confident sense of belonging in your refreshed bathroom.
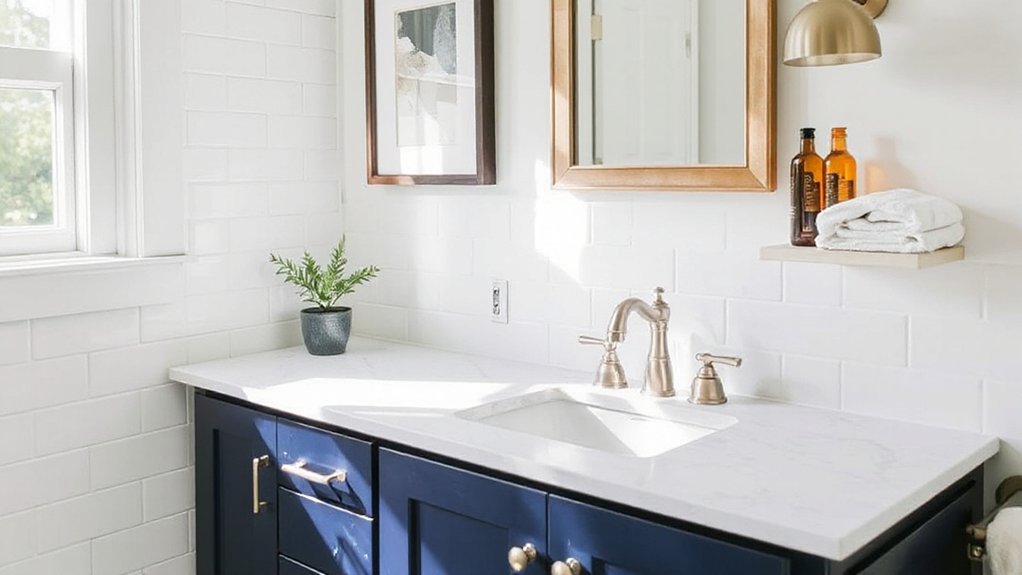
Swap Hardware for an Instant Lift
Swapping hardware is one of the quickest, most impactful upgrades you can make. You’ll see an instant lift by swapping knobs, pulls, and faucet handles with minimal effort.
Choose finishes that harmonize with your existing tiles and vanity to create a cohesive look without a full remodel. If you want a touch of character, lean into vintage fixtures—they bring patina, charm, and a sense of history that feels welcoming.
For a modern twist, mix in artistic accents like sculpted lever handles or matte-black drawer pulls to anchor the space. Measure carefully, tighten securely, and test their operation before you finish.
With thoughtful hardware choices, your bathroom reads polished, purposeful, and distinctly yours—without breaking the bank.
Refresh Caulk and Grout for a Clean Look
Start by cleaning up any margins and edges so the lines look sharp.
Then address Clean Caulk Edges, Replace Grout Lines, and Seal For Longevity to keep water out and stains away.
This sets a solid foundation for a bathroom that stays fresh longer.
Clean Caulk Edges
If you’ve noticed gaps or mildew along shower and sink edges, refresh the caulk to restore a clean, watertight seal. You’ll improve edge sealing by choosing mold-resistant caulk, removing old material, and applying a smooth bead that adheres fully to corners and tile.
Clean edges keep grout healthy and prevent water intrusion, so you avoid bigger fixes later. Maintain a steady hand, work in small sections, and wipe away excess before it cures. This is caulk maintenance that pays off with a neater, more confident bathroom.
- Use a mildew-resistant caulk and a quality caulking gun for consistent spacing
- Cut the nozzle at a 45-degree angle for a controlled bead
- Smooth with a damp finger or edging tool to seal evenly
Replace Grout Lines
Replacing grout lines cleanly refreshes the whole area and helps prevent future water damage. You’ll start by removing old grout with a grout saw or multi-tool, keeping surrounding tiles intact. Vacuum the joints, then wipe with a damp cloth to remove dust.
Mix new grout to the manufacturer’s instructions, choosing a color that matches your tile for a cohesive look, or opt for a subtle color that hides future wear—color matching matters. Press grout firmly into joints, then strike the surface with a damp sponge to remove excess.
After curing, seal the grout to protect against moisture; grout sealing dramatically extends life and ease of cleaning. Finish by wiping tiles once more, ensuring a uniform, fresh, and belonging-filled bathroom.
Seal For Longevity
A refreshed seal and grout finish keeps water out and your bathroom looking tidy, so you’ll want to refresh caulk and grout after replacing them or when you notice gaps and discoloration. When you seal, choose silicone or acrylic caulk rated for bathrooms and apply a clean, continuous bead. Smooth with a damp finger or tool to prevent ridges that trap grime.
Allow proper curing time, then wipe away excess sealant for a clean line. This action boosts seal longevity and reinforces waterproof barriers, helping your bathroom feel cared for and secure.
- Inspect corners and joints quarterly to catch gaps early
- Match caulk color to grout for a seamless look
- Maintain a damp, spotless surface before resealing
Brighten the Space With a New Shower Curtain and Towels
A fresh shower curtain and coordinated towel sets instantly brighten your bathroom without a full remodel.
Choose a curtain that reflects your space and pick towels that pull the look together for a cohesive feel.
This simple swap sets a clean, polished tone and guides future decor choices.
Fresh Shower Curtain
Brighten the room quickly by swapping in a fresh shower curtain and matching towels. A new Shower curtain instantly changes the mood, especially when you choose a fabric upgrade that fits your bathroom’s vibe.
Pick a material that’s durable and easy to wipe clean, then coordinate color or pattern with existing hardware for a cohesive look. This small change speeds up the feel of the space without a big investment, and you’ll notice the difference in morning routines.
- Choose a shower curtain with a tight weave or vinyl-backed fabric for longevity
- Match towels to the curtain’s tone for a unified, welcoming vibe
- Prioritize easy-care options to keep routines efficient and enjoyable
Coordinated Towels Sets
If you’re updating your bathroom, coordinated towel sets are your fastest win after a fresh curtain. Choose a core color that echoes the shower curtain and wall tile, then pick two or three towels in slightly lighter or darker shades for depth. This simple color coordination creates a cohesive look without clutter.
Prioritize towel organization by designating a dedicated shelf or basket for each set, so replacement and laundry are quick and predictable. Fold towels uniformly or roll them for a tidy display that signals intentionality and belonging.
Opt for midweight cotton blends that dry efficiently and resist fading, ensuring longevity. Keep extras in a labeled bin to maintain order.
With coordinated towels, you reinforce a calm, welcoming bathroom you can be proud of.
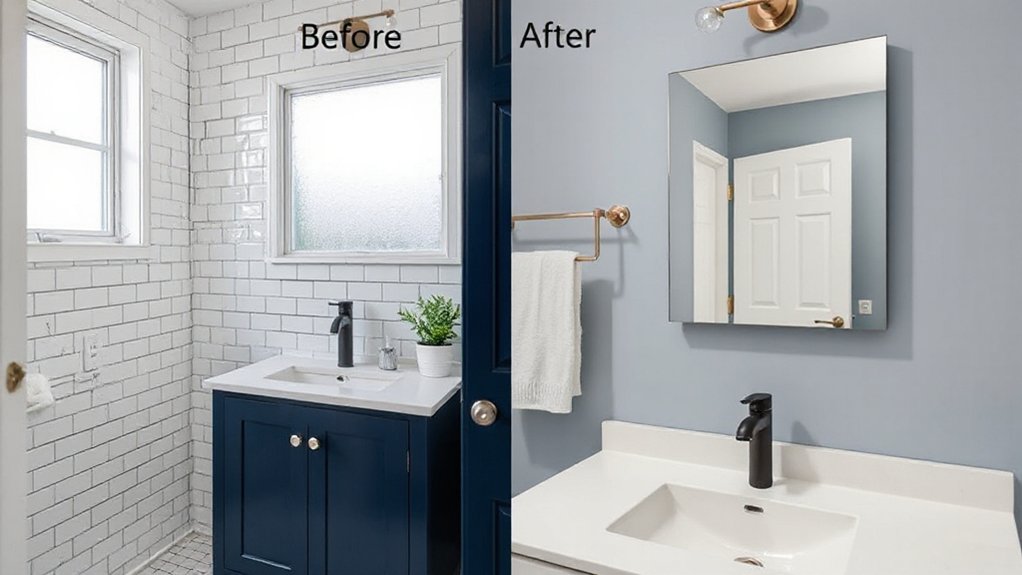
Update Mirrors and Lighting on a Budget
Updating mirrors and lighting on a budget is a smart, high-impact move that refreshes your bathroom without key costs. You’ll revitalize the space by choosing affordable updates that feel intentional and cohesive.
Start with mirrors that reflect light and space, like a framed or frameless option, and pair them with lighting that improves task visibility. If you crave character, incorporate vintage frames or retro silhouettes to anchor the design.
Use pendant lamps to create ambient layers without clutter. Keep color, finish, and scale in harmony with existing fixtures, so the room reads polished, not busy.
- Choose budget-friendly mirrors that maximize light
- Add pendant lamps to create warm, layered illumination
- Integrate vintage frames for a timeless touch
Refinish Tiles With a Budget-Friendly Facelift

You can achieve a budget-friendly tile facelift by exploring practical makeover options and choosing methods that fit your space and timeline.
We’ll cover affordable refinishing methods, plus essential surface prep and sealing steps to maximize durability.
Start with a clear plan for prep, product choice, and a sealing routine to guarantee a lasting, refreshed look.
Budget-Friendly Tile Makeover
Tackling a tile refresh on a budget is doable, and refinishing existing tiles can deliver a fresh look without a full remodel. You’ll transform the space with minimal disruption, keeping the core layout intact while adding personality through color, shine, and texture. Focus on two elements: Vintage fixtures and Ceramic patterns to create cohesion and charm.
Prepare surfaces thoroughly, choose a durable coating, and apply with steady, even strokes to avoid misses. Light-colored glosses brighten small baths, while bold ceramic patterns add character without a full renovation.
- Choose a color that complements existing fixtures for a cohesive feel
- Use a high-quality coating designed for bathroom tiles and moisture
- Plan accent tiles or borders to echo vintage style without overdoing it
Methods for Refinishing Tiles
If you want a fresh tile look without a full remodel, refinishing is your best bet: you’ll refresh surfaces, expand options, and cut costs with a single weekend project. In this method, you apply a durable enamel or epoxy coating to tile, creating a renewed finish without removal.
Prep matters, but you won’t overhaul plumbing or tiles themselves. Choose a shade that harmonizes with vintage fixtures to preserve character while modernizing. For bathrooms with busy patterns, a solid color can simplify feel and make spaces appear larger.
Prioritize low-odor formulas for tight rooms and minimal downtime. If you’re dealing with wallpaper removal around the area, address that before coating to avoid trapped moisture.
Wipe spills promptly and cure according to instructions to maximize longevity.
Surface Prep and Sealing Steps
After choosing a refinishing approach, start with thorough surface prep and sealing to guarantee the new finish bonds properly. You’ll focus on surface preparation first, removing soap scum, grime, and loose glaze so adhesion isn’t compromised. Use a deglosser or mild prep cleaner, then rinse and dry completely.
When sealing, select sealing techniques that suit your tile and grout—etch if required, or apply a bonding primer for porous grout lines. Mask adjacent areas to prevent overspray, and test a small area before full application. Maintain steady, even strokes and follow full cure times.
Your effort pays off with a durable, budget-friendly facelift you can trust.
- Surface preparation sets the foundation for lasting results
- Use appropriate sealing techniques for grout and tile
- Allow full cure time before use
Upgrade Fixtures Without Replumbing
Upgrading fixtures without replumbing is easier than you might think. You can swap out faucets, showerheads, and hardware with minimal disruption by choosing compatible, low-profile models that fit existing holes and valve bodies. Look for universal cartridge compatibility and flexible supply lines to simplify installation.
Vintage fixtures can add character without heavy plumbing work, especially if you preserve mounting locations and trim. When selecting, prioritize eco-friendly options—water-saving aerators, leak-tested finishes, and long-lasting materials—to reduce maintenance and waste.
Keep color and finish cohesive with your existing style to avoid a patchy look. Measure carefully, shut off water, and use a simple tightening routine rather than aggressive adjustments.
With deliberate choices, you refresh the space confidently and affordably.
Add Smart Storage to Reduce Clutter
With smart storage, you’ll keep the refreshed bath clutter-free while maximizing the space you already have. Clever organizers simplify daily routines, making what you need easy to grab and put away. Choose modular bins, over-the-door shelves, and hidden drawers to suit your layout.
Prioritize vertical space, install toe-kick drawers, and use stackable containers to reduce visual clutter. Label items for quick returns, so everyone in the house contributes to clutter reduction.
Incorporate pull-out trays in cabinets for easy access to essentials, and use mirrored cabinets to double as storage and light sources. By designing intent into storage, you’ll enjoy a calmer, more connected bathroom environment that supports belonging and everyday success.
- Maximize vertical storage with shelves and hooks
- Use clear, labeled containers for quick finds
- Integrate hidden compartments for tidy essentials
Clean and Refresh Grout Lines With Simple Techniques
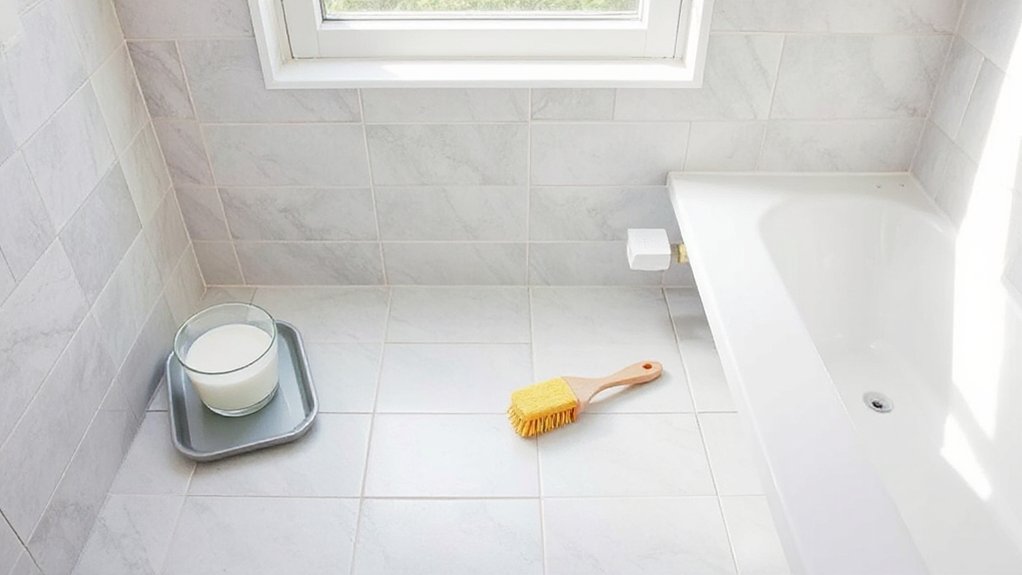
Grout is tiny but mighty in your bath: keep it clean and it instantly brightens the space. You’ll start by dry-brushing loose debris, then scrub with a stiff bristle brush and a baking soda-vinegar paste.
For stubborn stains, apply a hydrogen peroxide paste or a commercial grout cleaner, and rinse well. After drying, seal the lines to protect against moisture; grout sealing prevents stains and extends life.
For continuous mold prevention, wipe down tiles after showers and air out the room to reduce humidity. Maintain your results by re-cleaning quarterly and reapplying sealant as directed.
Use a breathable, mold-resistant grout sealer for best protection, and choose products labeled for bathroom use. Your refreshed grout elevates cleanliness, comfort, and confidence in every corner.
Harmonize Grout Color for a Cohesive Look
Match the grout tone to the overall palette, so the lines don’t clash with tiles or fixtures. If your tile color is light, opt for a lighter grout.
For bold tiles, a mid-range grout keeps balance without stealing the spotlight. Prioritize cohesion over contrast to create a seamless, room-wide look.
Match Grout Tone
Choosing a grout tone that blends with your tiles creates a cohesive, polished look—so skip stark contrasts and aim for harmony. When you pick grout color, prioritize tile matching over bold statements. A matching or near-identical grout fades lines, making the space feel larger and calmer.
For textured or patterned tiles, choose a grout shade that appears continuous across surfaces to reduce visual clutter. Always test three samples on-site before committing, and view them at different times of day.
- Compare grout shades under bathroom lighting
- Consider a slightly lighter or darker shade for depth
- Seal and maintain grout to preserve color and prevent staining
This approach keeps your bathroom feeling unified and welcoming, while delivering practical, lasting results.
Consider Tile Color
When selecting tile colors, aim for a cohesive base that guides your grout choice. You’ll create a unified bathroom by prioritizing tiles that read as a single surface, then using grout to define depth.
Consider color contrast between tile and grout; a subtle contrast keeps the space calm, while a bolder choice can add personality without clashing with fixtures. If you lean toward more intricate tile patterns, keep grout restrained to avoid busy lines stealing the show.
For simpler layouts, a slightly darker grout can add depth and help imperfections fade away. Remember: tile patterns should feel intentional, not random—consistency nurtures belonging.
In practical terms, test samples in both daylight and artificial light to verify your chosen color holds up.
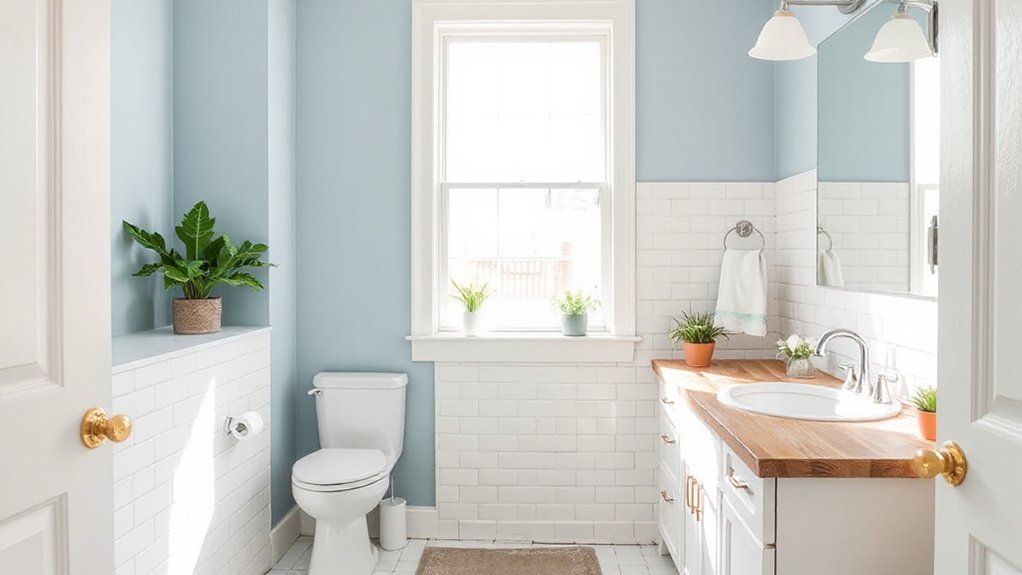
Paint an Accent Wall Safely (If You Want Drama)
An accent wall can dramatically refresh a room, but safety comes first. You can achieve drama without mess or regret by planning and using the right materials. Choose bold colors if your bathroom has good lighting and a clean, uncluttered backdrop. Prep surfaces, protect floors, and ventilate—this isn’t optional, it’s practical.
- Wear a mask, goggles, and gloves to handle primer and paint safely.
- Use high-quality bathroom paint with mold resistance and easy-clean surfaces.
- Tape edges precisely and remove drips before they dry.
Keep the focus on one wall for impact, and pair bold colors with neutral fixtures. By prioritizing prep, ventilation, and durable products, you’ll enjoy a striking accent wall that lasts.
Accent wall done right feels welcoming and intentional.
Improve Airflow and Moisture Control on a Dime
If you want real relief from damp bathrooms without a big budget, start with airflow and moisture control strategies that work. First, upgrade or install basic Bathroom ventilation—aim for a fan that moves at least 50 CFM per square meter of room. Run it during showers and for 15 minutes after.
Next, seal moisture pathways with simple Moisture barriers around tiles, thresholds, and seams to reduce creeping humidity. Improve ceiling venting if you notice condensation on corners. Use towel bars and hooks away from walls to avoid trapped damp air.
Choose moisture-tolerant paint and sealant in high-humidity zones. Finally, open a window when possible and maintain fan filters for consistent performance.
Consistency beats cost; small, deliberate upgrades accumulate.
Deep-Clean Strategies That Feel Like a Renovation
Deep-clean to feel like a renovation starts with a ruthless surface audit and a plan you can actually follow. You map high-traffic zones, note grime pockets, and decide where a deep pass will make the biggest impact. Then you execute with purpose, using eco friendly materials and proven methods that respect your space and budget.
This approach echoes historical renovations in spirit—smart, targeted, and lasting—without the disruption of a full gut. You’ll finish with apartments and homes that feel refreshed, organized, and welcoming, while keeping waste low and results high.
- Targeted cleaning zones first, then seal with a calm, decisive wipe-down
- Use eco friendly materials for every step, from cleaners to cloths
- Document progress like a renovation log for accountability
Quick Decor Wins: Accessories That Pop
Want a quick uplift? You can transform the vibe with a few strategic decor wins. Start with decorative accents that echo your color schemes—think a matching soap dish, a sculpted tray, or a textured rug in your palette. Choose pieces with clean lines and durable finishes to keep maintenance low.
Layer accessories at different heights: a wall-mounted mirror, a small plant, and neatly arranged toiletries create depth without clutter. Swap towels and a shower curtain to reinforce your chosen color schemes for instant cohesion.
Use subtle metallics or matte black hardware to add contrast and polish. Keep surfaces clear, so accents feel purposeful, not busy. This approach gives you belonging and a refreshed bathroom day after day.
Frequently Asked Questions
Can You Refresh a Bathroom Without Professional Help?
Yes, you can refresh a bathroom yourself. Do basic DIY plumbing safely, replace fixtures, repaint, and seal. Choose budget lighting, add mirrors to open space, and organize storage for a polished, welcoming, belonging-filled result.
Which Low-Cost Upgrades Yield the Biggest Impact?
First, small decor wins big: you’ll boost impact with decorative accents and lighting enhancements. You save money and feel proud, as you refresh calmly, thinking, “hit the mark,” and you belong while upgrading your bathroom on a budget.
How Long Does a Quick Bathroom Refresh Take?
A quick bathroom refresh takes a few hours to a day, depending on scope. You’ll swap out Bathroom accessories, complete Vanity upgrades, and finish with simple touches that make you feel welcome and confident in your space.
Are There Moisture-Friendly Paint Options?
Misty, yes—moisture resistant paint exists for bathrooms, and you should pair it with proper bathroom ventilation. You’ll prevent peeling and mold by sealing gaps, using exhaust fans, and choosing a finish like satin or semi-gloss.
How to Maintain Refreshed Features on a Budget?
You maintain refreshed features on a budget by choosing DIY plumbing tweaks and eco friendly fixtures, then schedule simple, routine checks; you stay organized, reuse what works, and invest in durable, cost-effective updates that fit your home’s belonging spirit.
Conclusion
You’ve got this: a bathroom refresh that feels fresh, not expensive. By prioritizing quick wins, you’ll squeeze big impact from small changes, fast. Swap hardware, reseal with clean grout, and add a pop of paint to transform the space in hours, not weeks. Keep airflow in check, and deep-clean like a pro to reveal a showroom shine. If you stay disciplined to budget and schedule, your low-cost upgrade will outshine expectations—it’s practically transformative. You’ll wonder why you waited so long.