
To add a durable, stylish paver patio, start by planning its size, traffic flow, and sightlines from key entries and views. Choose materials with proven durability, slip resistance, and weather performance, then pick a pattern—herringbone or basketweave add grip and visual interest. Prepare the subbase properly, install edge restraints, and set joints to shed water. Plan drainage to daylight, and finish with lighting, clean edges, and cohesive borders. Master these steps and you’ll access a welcoming outdoor room that stands the test of time.
Plan Your Paver Patio: Materials, Patterns, and Drainage
When planning a paver patio, start by defining its purpose, size, and traffic patterns to guide material selection and layout. You’ll balance function with flow, ensuring pathways connect entry doors to seating and garden views.
Consider how garden furniture will sit within sightlines, access, and shade, so placement feels intuitive, not crowded. Map drainage early, avoiding puddles near doorways and under seat zones.
Choose patterns that emphasize durability and ease of maintenance, while aligning with your home’s architecture. Plan for plant integration: edge beds, containers, and vertical greenery that soften hard edges without crowding paths.
Reserve space for utilities and future changes, such as added lighting or an herb strip. A thoughtful plan yields a welcoming, cohesive outdoor living area.
Choose the Right Paver Materials for Durability and Style
Consider how material durability varies across options like concrete, brick, and natural stone, and how that affects long-term performance and maintenance.
Pair durability with style by evaluating color, texture, and layout potential to achieve a cohesive look.
Start with a practical comparison of expected lifespan, required upkeep, and how each option fits your climate and foot traffic.
Material Durability Range
Choosing the right paver materials hinges on durability and daily use. You’ll compare paver material types by testing strength, slip resistance, and long‑term wear, then map them to your yard’s traffic.
Your durability range guides installation decisions, maintenance needs, and budget expectations, so you pick confidently and avoid regret.
- Feel secure underfoot, knowing your choice resists cracking and shifting
- Expect seasonal wear with minimal resealing or replacement
- Appreciate consistent color and texture despite weather
- Value a material that ages gracefully, maintaining curb appeal
Consider load patterns, foot traffic, and exposure to sun or freeze–thaw cycles to refine your pick.
With a grounded approach to durability range, you’ll achieve lasting performance and a welcoming, belonging‑oriented outdoor space.
Style and Aesthetic Options
Style and aesthetics aren’t afterthoughts—they’re integral to durability and function. When choosing paver materials, consider color schemes that complement your home’s exterior and landscape. Opt for neutral bases for broad compatibility, then introduce a bold trim or accent shade to define zones and guide foot traffic.
Concrete, brick, and natural stone each offer distinct textures; select based on maintenance, weather, and foot comfort. For durability, match paver hardness to expected wear and climate, and plan for a tight, well-drained base to prevent shifting.
Then weave decorative accents into the patio edge or seating areas—insets, borders, or a mosaic insert can unify the yard’s vibe. Finally, visualize lifelong use: furniture, plants, and lighting that feel intentional and welcoming.
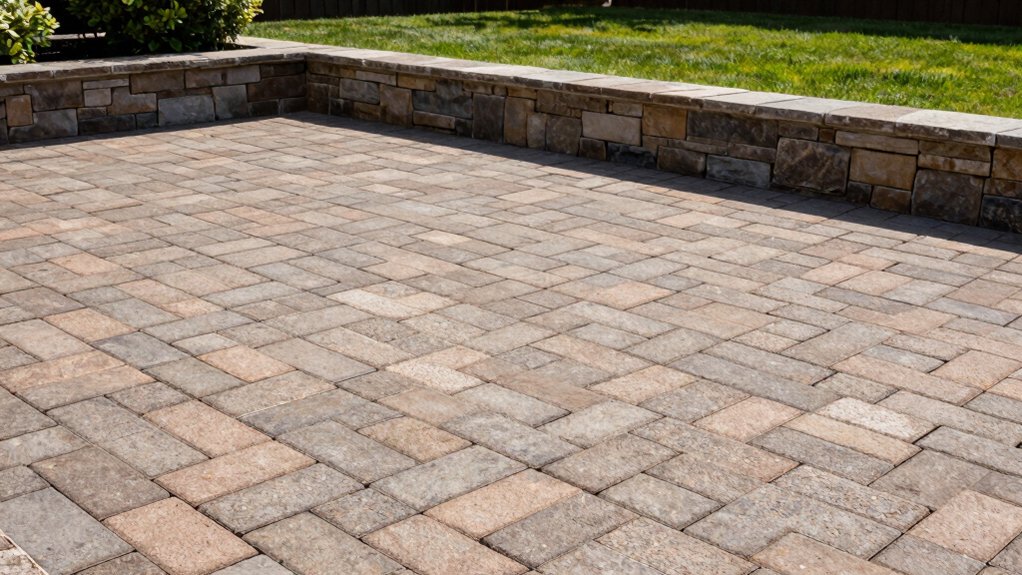
Pattern Options: From Herringbone to Basketweave
Pattern options set the tone and performance of your hardscape, so choosing between herringbone, basketweave, and related patterns isn’t just aesthetic—it affects footing, movement, and installation time.
You’ll feel confident when you understand decorative patterns and pattern versatility, then pick a layout that fits your space and routine.
- Enhances grip underfoot, reducing slips during wet seasons
- Guides traffic naturally, creating intuitive pathways
- Balances visual weight with proportion for small or large patios
- Reflects your style while simplifying future maintenance
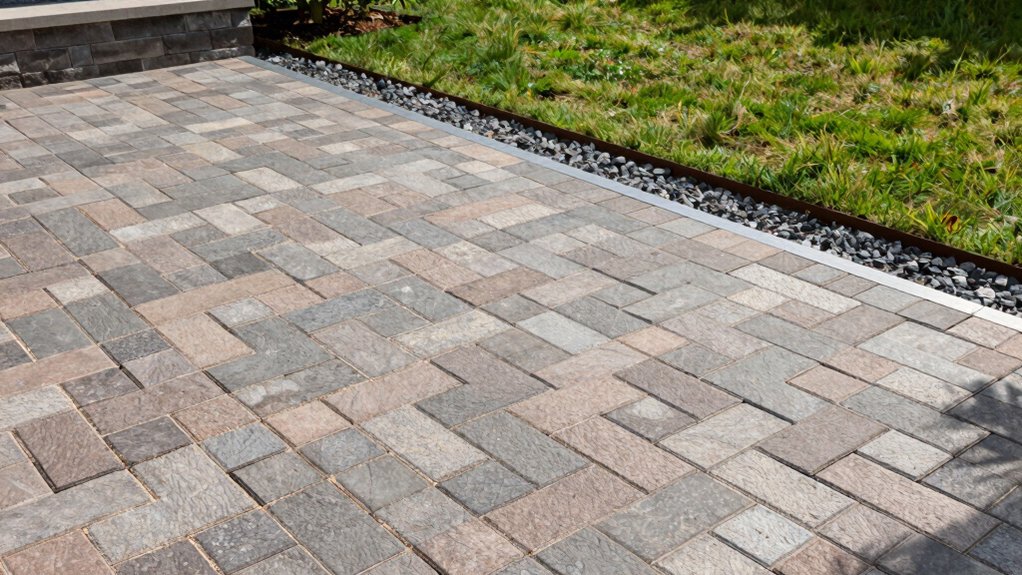
Drainage and Subbase: Preparing for Longevity
Proper drainage and a solid subbase are the foundation of a durable patio, so you’ll want a plan that channels water away efficiently and supports the load over time. You’ll assess soil conditions first, removing organics and loosening compacted layers to improve infiltration.
Achieve consistent soil compaction with a mechanical plate compactor, avoiding over- or under-compaction that can cause settling.
Design a gradient that promotes water drainage away from structures and toward daylight, using a well-graded aggregate base and proper edge restraints.
Alongside grading, install a layer of filter fabric and ensure joints shed water rather than trap it.
Regular inspections during installation help you spot voids or erosion early, protecting your investment and inviting others to join your shared, resilient outdoor space.
Layout That Works: Sizing Your Patio for Flow
Sizing your patio for flow starts with a clear footprint that fits how you’ll move through the space. You’ll design dimensions that support natural paths, access to doors, and sightlines to comfort zones.
Prioritize symmetrical zones for seating and tasks, so circulation feels intentional rather than crowded. Choose a scale that accommodates your typical gatherings and daily routines without crowding existing landscape features.
- seating options that invite conversation and easy traffic between areas
- clear sightlines to entrances, plants, and focal points
- privacy screens positioned to create intimate corners without closing you off
- progressions between patio and yard surfaces that feel seamless
A precise footprint yields functional, welcoming outdoor rooms you’ll love returning to day after day.
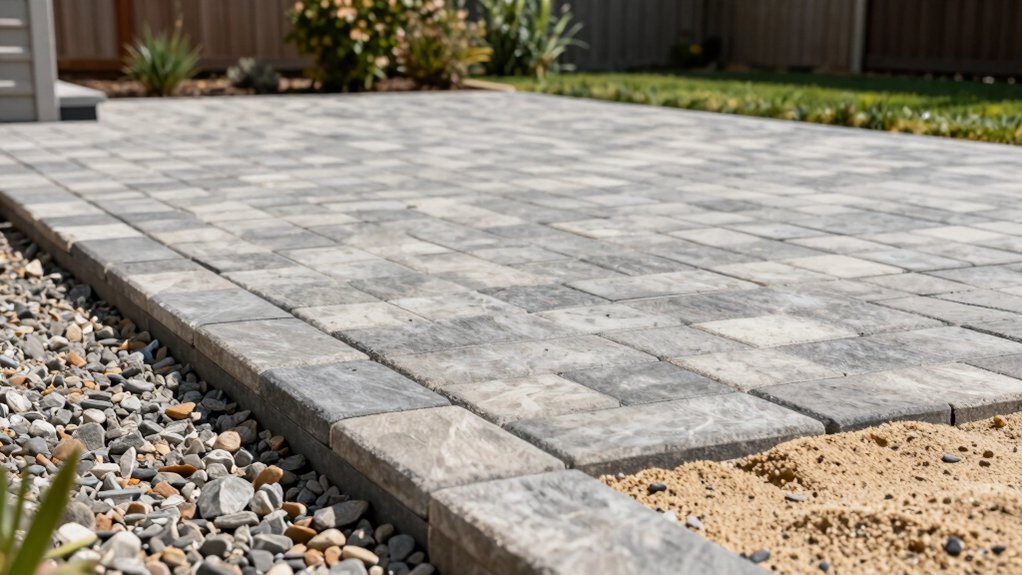
Step-by-Step Installation Basics for Do-It-Yourselfers
To start, you’ll prep the site to exacting standards—clear the area, verify level soil, and set a stable base.
Then you’ll lay the pavers with precise alignment, proper edge support, and even spacing to make certain strength and drainage.
This foundation stage matters most for long-lasting results, so follow the steps carefully and keep measurements consistent.
Prepping the Site
Prepping the site starts with a clear plan and clean measurements. You’ll establish boundary lines, grade for drainage, and confirm utility clearances before any tools touch soil.
Focus on soil preparation to support footing and base stability, then implement weed prevention strategies to keep future growth in check. Measure multiple times, mark edges, and align with your desired patio orientation for comfort and flow.
- Define edges and slope for water runoff, ensuring a level base
- Remove topsoil, test moisture, and compact in layers for solid support
- Amend the subgrade with appropriate material to improve stability
- Apply weed barrier and clean, precise landscape fabric beneath the base
This method keeps you on track, invites confidence, and reinforces belonging through careful, practical prep.
Laying the Pavers
With the site ready, you’re set to lay the pavers in a clean, step-by-step sequence. Begin by dry-fitting a full course along the layout, then move to setting bed joints with precise, feather-light taps. Maintain consistent joint widths using spacers or snap lines, and stagger paver patterns to enhance strength and visual interest.
Check for levelness frequently; use a maul or rubber hammer to settle high spots without shifting alignment. Cut pavers near edges with a wet saw for clean, true faces, saving fabric and reducing waste.
Install edge treatments first or last depending on your border system, ensuring stability for the entire patio. Finally, sweep clean sand into joints, compact, and re-sweep to lock the surface. You’ll finish with a confident, cohesive meadow of pavers.
Maintenance for Longevity: Cleaning, Sealing, and Winter Care

Maintenance for longevity starts with a straightforward routine: clean, seal, and protect. You’ll keep your paver patio durable by mastering periodic care, not panic. Focus on consistency and clear steps to support plant integration and pest prevention.
- Clean surfaces with a stiff broom and gentle soap, removing debris and staining without harming joints.
- Seal every 2–3 years, choosing a breathable sealant to resist soaking, salt, and weather.
- Address winter care: remove snow with a plastic shovel, avoid de-icing salts, and protect edges.
- Inspect regularly for shifting, cracks, or weeds, treating issues early to sustain long-term beauty.
This disciplined approach strengthens belonging, keeps joints tight, and preserves your outdoor sanctuary.
Budgeting for a Paver Patio: Costs, Savings, and Value
After setting up a durable maintenance plan, you can approach budgeting for a paver patio with clarity and confidence. You’ll begin with clear goals, balancing function and curb appeal while keeping long-term value in sight.
Budget considerations should center on upfront material costs, labor, and permit or site prep where applicable. Compare options—concrete, clay, and natural stone—by durability, maintenance, and resale impact, then align choices with your climate and soil.
Plan for contingencies—surprises during excavation or drainage work—but avoid overfunding permanent features that limit flexibility. Favor a phased approach if needed, spreading costs without sacrificing quality.
Track estimates against a realistic timeline, and document each decision for future resale value. By prioritizing efficiency and quality, you optimize overall value and belonging in your outdoor space.
Finishing Touches: Lighting, Edges, and Curb Appeal
Smart finishing touches can dramatically elevate a paver patio, tying lighting, edges, and curb appeal into a cohesive, functional outdoor room. You’ll create a welcoming rhythm by selecting lighting that blends safety with ambiance, shaping edges that define spaces, and curbing oversized feel with clean lines. Your choices knit the patio to the home and garden, inviting gatherings and daily calm.
Use garden furniture thoughtfully arranged to encourage conversation, while outdoor art adds personality without clutter. Small details—flush drains, stepped borders, and subtle textures—boost durability and charm.
- Subtle path lighting that guides guests without glare
- Clean-edged borders that visually enlarge the space
- Strategic seating groups centered on views and airflow
- Complementary garden furniture and outdoor art for belonging
Frequently Asked Questions
How Long Does a Typical Paver Patio Project Take From Start to Finish?
Typically, plan 3–7 days for a standard paver patio, depending on size and site prep; you’ll finalize paver design and material selection early, then see steady progress as crew framing, base, and laying proceed with expert precision.
Can I Install a Paver Patio Over Existing Concrete or Soil?
Yes, you can, but prep varies: over concrete you’ll need a strong base and edging; over soil, add compacted subbase. For paver installation, guarantee proper soil preparation, drainage, and compaction to achieve lasting, snug fits.
What Maintenance Routine Extends the Life of Paver Patios?
Like a trusted shield, you maintain paver patios by routine weed control and seasonal sealing, keeping joints clean, surfaces protected, and moisture in check, so you stay confident, connected, and part of a well-kept outdoor community.
Are Permeable Pavers Worth the Extra Cost for Drainage?
Yes, permeable pavers are worth it for drainage. You gain better stormwater management, reducing runoff and puddling, while using permeable materials that blend with landscapes. You’ll feel confident committing to sustainable, community-friendly outdoor improvements.
How Do I Handle Paver Patio Warranties and Contractor Guarantees?
Warranty coverage varies; you’ll want written guarantees detailing workmanship, materials, and duration, plus clear exclusions. Check contractor reputation, request references, and confirm transferability. Read contracts closely, and insist on insurance, lien waivers, and prompt service commitments.