

To get a long-lasting deck finish, start with a clean, dry surface and lightly sand any rough spots. Pick a stain type that fits your climate and exposure, test colors on an inconspicuous area, and choose the right base—waterborne or oil—based on your maintenance tolerance. Apply in thin, even coats with the grain, sealing edges and avoiding pooling. Watch drying times, recoat when recommended, and maintain with annual washing. Soon you’ll master a durable, natural look—and you’ll want to keep going.
Finish a Deck to Protect It Long-Term
To protect your deck long-term, choose a high-quality stain or sealer suited to your climate and wood type, and apply it after cleaning and drying the surface. You’ll boost Deck durability by selecting products designed for outdoor exposure and UV resistance, then follow label directions for coverage and recoat intervals.
When applying, keep a consistent system: work with the grain, maintain a wet edge, and avoid pooling. The right Stain color enhances natural grain while offering protection, so opt for a shade that complements your home and surroundings.
Temperature matters—stick to manufacturer guidelines for application and cure times. Inspect boards for cracks or gaps before staining, and address any issues promptly to preserve long-term integrity.
Regular maintenance builds belonging, confidence, and lasting outdoor comfort.
Prep the Deck: Clean, Sand, and Pick the Right Weather Window
Before you start staining, clean the deck thoroughly to remove dirt, mildew, and debris. Then rinse and dry the surface completely.
Make certain the wood is dry to the touch before you proceed, or the stain won’t absorb evenly.
Pick a weather window with several consecutive dry days and moderate temperatures, so you can complete both cleaning and staining without interruptions.
Clean Deck Thoroughly
Clear a deck thoroughly before staining. Start with a wide, stiff broom to remove loose debris, then wash surfaces with a deck cleaner or mild detergent. Scrub in the direction of the grain, paying attention to railings, spindles, and grooves where dirt hides.
Rinse thoroughly with a hose, ensuring no soap residue remains, which can inhibit adhesion. Let the wood dry completely, ideally 24 to 48 hours, before any test area is considered.
Inspect for mildew or dark stains; treat these spots with a bleach solution or specialized cleaner, following label instructions. Remove standing water and allow all joints to dry.
This careful cleaning supports deck maintenance and contributes to stain longevity, giving you a uniform, lasting finish you can be proud of.
Dry Surface Properly
Once you’ve cleaned the surface, let the deck dry completely before staining; check the wood with a moisture meter or a quick test by pressing a few dry spots with your thumb—if the wood feels cool or damp, wait longer. You should aim for uniform dryness across boards and joints to prevent future blotching.
Inspect for lingering dust, sap, or mildew; remove these before proceeding, as they affect adhesion. Consider deck texture when choosing tools—a smooth surface accepts stain evenly, while a rough texture may require a bit more product and extra brushing.
With dryness confirmed, select a compatible stain color and apply in thin, even coats, maintaining consistent strokes along the grain to achieve a durable, long-lasting finish that feels like belonging.
Weather Window Timing
Choosing the right weather window is essential for a durable deck finish: you’ll want a period of dry, moderate conditions with no rain in the forecast for at least 24 to 48 hours after cleaning and sanding.
- Plan around seasonal considerations to avoid temperature extremes that hinder drying and cure.
- Check the weather forecast for a stretch of clear days and nights, not just dry daytime hours.
- Schedule staining after a dry, wind-stable period to prevent rapid moisture loss or dew buildup.
- Build in a contingency day in case a surprise shower arrives.
With this approach, you’ll finish confidently, knowing your finish seals in evenly and lasts, while you feel aligned with the season and a reliable forecast.
Choose Your Deck Stain: Types, Pigments, and Bases
So you’ll want to understand the three core choices for deck stain—types, pigments, and bases—before you pick a product. The right type defines performance: clear, semi-transparent, or solid coatings each balance color, protection, and application ease.
Pigments control hue depth and UV shielding, influencing wear patterns and deck aesthetics over time.
Bases—waterborne or oil-based—drive drying, odor, cleanup, and film flexibility. Match these to your climate, foot traffic, and maintenance readiness, then select a formula that supports stain longevity without compromising look.
For a cohesive, inviting deck, prioritize a product engineered for substrate compatibility and weather exposure. You’ll gain predictable results, fewer touch-ups, and a finished space that feels like home, not a temporary stain project.
Test Color and Absorption Before Staining
Before you commit stain to all surfaces, test color and absorption on an inconspicuous area and in the same light and weather conditions as your project. This step confirms how the finish reads on your wood and how it soaks in, preventing surprises after application. You’ll learn whether the deck planks darken, redden, or stay true, and whether the grain pops or lies flat.
Use a small sample panel to compare shades, noting depth and undertone. Consistency across boards matters for a cohesive look that invites belonging. After testing, document results and choose a color with predictable absorption.
- Confirm Test color results under actual sun and humidity
- Check whether absorption is uniform across boards
- Compare multiple stains for depth and warmth
- Favor a shade that enhances natural grain, not hides it
Tools and Materials for a Smooth, Even Finish
You’ll start with a clear Tools Selection Guide to choose the right brushes, rollers, and sanders for a smooth, even finish.
Then follow Surface Preparation Steps to make certain the deck is clean, dry, and properly sanded before you apply stain.
Finally, use Practical Application Equipment Tips to optimize coverage and minimize lap marks, drips, and streaks.
Tools Selection Guide
Choosing the right tools and materials is essential for a smooth, even deck finish. You’ll feel confident when you know you’re choosing the right setup for consistent results. Focus on balance between coverage, control, and durability, then select tools that align with your pace and space.
- Brush selection: pick natural or synthetic bristles based on stain type and deck texture.
- Stain applicators: choose rollers, pads, or brushes that match boards’ profiles for even staining.
- Extension handles: reach without bending, preserving your posture and precision.
- Cleaning gear: have a scraper, brush, and mild cleaner for upkeep between coats.
Your toolkit should foster belonging—tools you trust, outings that stay on schedule, and a finish you’re proud to show off.
Surface Preparation Steps
To get a smooth, even deck finish, start with a thorough surface prep using the right tools and materials. Begin by cleaning the surface to remove dirt, mold, and old finishes, then let it dry completely.
Inspect for raised grains, loose boards, or nails, and address them before you proceed. Gather proper tools: a stiff-bristled brush, a long-handled deck scrubber, a power washer at low pressure, sanding block or orbital sander, and 80–120 grit paper.
Materials include a mildew remover, wood brightener, primer if needed, and a high-quality stain compatible with your deck type. Sand lightly between coats to achieve even absorption.
This preparation supports deck aesthetics and stain durability, ensuring lifelong enjoyment and a confident, belonging-minded finish.
Application Equipment Tips
When you apply a stain or finish, choose tools that deliver consistent coverage and minimal streaking. Your goal is a smooth, even surface with minimal rework, so select gear that fits your deck’s size and grain.
Prioritize comfort, control, and durability to finish with confidence.
- Brush techniques: use long, feathered strokes and keep bristles loaded evenly to avoid lap marks.
- Roller selection: choose microfibre or nap length tailored to your deck texture for uniform absorption.
- Applicator grip: ergonomic handles reduce fatigue during extended sessions.
- Maintenance: clean promptly, store properly, and replace worn parts to preserve performance and finish quality.
Step-by-Step: Apply Stain for Uniform Coverage
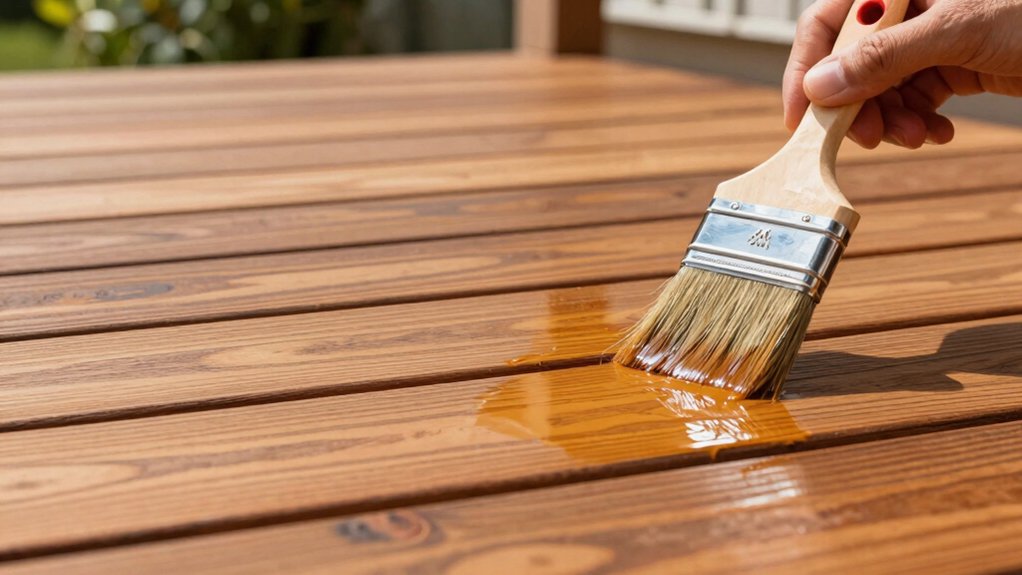
After you’ve prepped the deck, apply stain in a single, steady pass to achieve uniform coverage. Begin at one end, maintaining a consistent pace to avoid lap marks. Use long, overlapping strokes to blend edges and keep a wet edge at all times.
Work in small sections, never overloading your brush or roller, which helps control color pooling and coat thickness. Pay attention to color mixing as you go; apply thin coats if needed to reach the desired hue without creating blotches.
Monitor stain opacity across boards, rotating grip and angle to match grain direction. Wipe excess quickly to prevent shiny puddles. Finish each section before moving on, ensuring seamless progression and a professional, cohesive look that invites continued care and belonging.
Common Staining Mistakes and How to Avoid Drips
Common staining mistakes often show up quickly: runs, blotches, and uneven color. You can prevent drips and ensure a smooth finish by planning your approach, using proper tools, and working in shade.
- Prep thoroughly: clean, scrub, and remove old finish before you start.
- Test color in a hidden spot to avoid color fading surprises.
- Work in manageable sections with a consistent overlap.
- Wipe excess promptly to reduce stain blotching and highlight drips.
Avoid rushing, keep a steady pace, and don’t overwork the wood; this preserves a uniform look. If color fading appears, adjust your technique and follow manufacturer guidance.
With careful application, you’ll build a cohesive deck that feels welcoming and part of your outdoor family space, avoiding dripping mistakes that undermine durability.
Drying, Recoat Windows, and Ongoing Maintenance
Once the stain has absorbed and you’ve checked for even color, monitor drying times closely, keep the surface free of foot traffic, and plan for a recoat window that matches the product’s guidance.
After drying, inspect for uniform tone and edge bleed; modest color variation is normal but look for deck discoloration that signals uneven absorption. Maintain ventilation and avoid sealing too soon; rain or dew can compromise the finish, so schedule recoat intervals within the manufacturer’s recommendations.
Clean tools promptly to prevent cured material on surfaces.
Ongoing maintenance includes annual washing, inspecting for stain peeling, and addressing worn boards promptly to preserve protection. Create a simple routine: document dates, conditions, and touch-up needs, and reapply as needed to sustain a cohesive, long‑lasting appearance.
Troubleshooting Stubborn Boards and Environmental Challenges
Stubborn boards and environmental quirks can complicate staining, but with targeted checks you can keep absorption even and finish intact. You’ll identify stubborn boards, verify moisture, and apply fixes without guessing.
When a board resists, consider board replacement to ensure uniformity and avoid patchy results. Address environmental protection by masking nearby plants and shielding from sudden rain or sun—timing matters as much as technique.
Test a small area first, then proceed with steady, controlled coats. These steps safeguard color depth and longevity, while preserving community trust in your work.
- Inspect moisture and surface evenness before every coat
- Replace stubborn boards to maintain consistent absorption
- Shield from weather shifts for durable results
- Prioritize environmental protection for a responsible finish
Frequently Asked Questions
How Long Before Foot Traffic Can Return After Staining?
It typically takes 24 to 72 hours before foot traffic can return, depending on temperature and humidity. You’ll know the stain is dry when it’s tack-free, and the surface feels solid as you apply light, steady pressure.
Can Deck Stain Be Applied in Direct Sunlight?
Yes, you can apply deck stain in direct sunlight, but guarantee UV protection and proper surface preparation. You’ll get even absorption, avoid streaks, and enjoy a longer-lasting finish when you work confidently with precise prep and timing.
Is a Clear Sealer Better Than Tinted Stain for Longevity?
Clear sealer isn’t inherently better long-term; a tinted stain often wins durability, color options, and uniform wear. You’ll appreciate easier maintenance with proper application techniques, sealing edges, and choosing UV-stable formulations for lasting, cohesive deck color.
How Often Should You Re-Stain a Heavily Exposed Deck?
You should re-stain a heavily exposed deck every 1 to 3 years, depending on wear. Emphasize deck maintenance, choose stain color choices that help hide sun fade, and maintain protection without neglecting surface prep.
Do Oil- and Water-Based Stains Mix Safely?
Did you know 75% of staining failures come from incompatible products? You should avoid mixing oil- and water-based stains; they aren’t compatible. For stain compatibility, don’t mix; instead, choose one type and test first.