
Refresh your bathroom without replacing fixtures by upgrading what you already have. Start with planning: set goals, budget, and constraints, then choose durable, low-maintenance materials and finishes. Clean and repair grout, reseal where needed, and prep surfaces so new textures stick. Update on a budget with refreshed hardware, clever storage, and styling tweaks like layered lighting and coordinated textiles. Consider flooring or tile substitutes to avoid demolition. If you want more, you’ll discover even more ways to optimize space and style.
Refresh Your Bathroom in a Weekend: Budget-Smart Makeover Plan
If you’re revitalizing a bathroom in a weekend, you can pull off a budget-smart makeover with careful planning and simple changes. Start with a clear plan: list priorities, set a realistic budget, and map a step-by-step timeline.
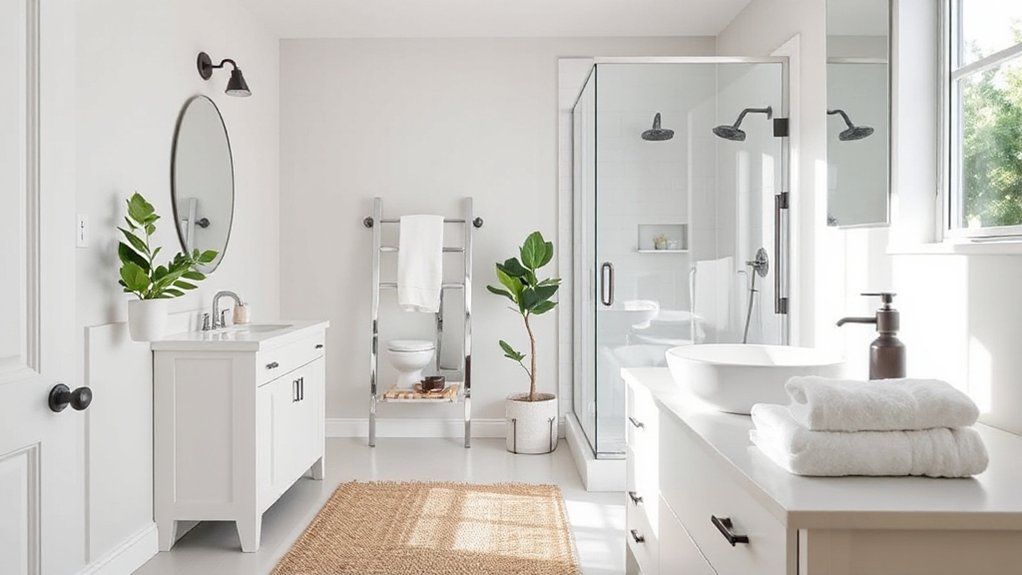
Focus on impactful updates like fresh bathroom decor accents—new towels, mats, and a cohesive color scheme—that transform the space without costly fixtures. Repaint walls in a moisture-resistant shade, and swap outdated hardware for a unified look.
For plumbing upgrades, target non-invasive fixes: seal leaks, replace plumbing seals, and install easy-fit valve caps if needed. Keep surfaces clean and protected during the process to avoid damage.
This practical approach delivers a refreshed vibe, comfort, and a sense of belonging in your updated bathroom.
Assess Your Space: Goals, Budget, and Constraints
Set clear goals for what you want from your bathroom refresh, and translate them into a realistic budget and timeline.
Identify constraints—plumbing, electrical, layout, and existing fixtures—so you can prioritize changes that fit.
Keep your plan focused on achievable improvements that align with both your budget and your space.
Set Clear Goals
Before you pick a plan, assess your space, goals, budget, and constraints. Set clear goals that reflect how you’ll use the bathroom daily and what you value most—durability, ease of cleaning, or a brighter feel.
Translate those aims into concrete outcomes: target lighting, storage improvements, and surface refreshes.
Use space assessment to map key benchmarks, like minimum counter space and accessible storage, so every choice supports function.
Prioritize actions that deliver the biggest impact with minimal disruption, and align them with your overall budget.
Document your goals in a simple checklist, then review it as you compare options.
Clear goals keep decisions focused, reduce back-and-forth, and create a shared sense of belonging as you refresh together.
Budget and Constraints
You’ll map priorities against costs, so you know where to invest and where to compromise. Do a quick cost analysis to forecast materials, labor, and contingency—this is where aiming for a realistic range rather than a single figure is important.
Identify constraints early: wall reconfigurations, water supply lines, or venting that could restrict layout changes.
Consider sourcing options for durability and price, noting lead times and return policies—this is where material sourcing matters most.
Align choices with your goals and comfort level, then communicate clearly with contractors or suppliers.
Clear budgeting and constraint awareness keep your project on track and foster a shared sense of belonging.
Plan the Makeover: Color Schemes and Materials
Choosing a refreshed look starts with a clear color plan and reliable materials. You’ll map a cohesive palette that sets the mood, using color psychology to pick hues that feel calm, clean, and welcoming.
Focus on two or three main shades for walls, cabinetry, and towels, then add contrast with accent pieces.
When selecting materials, prioritize durability and water resistance, especially for countertops, vanity tops, and flooring. Look for low-maintenance finishes that resist staining and scratching, and consider slip resistance for floors.
Align textures with the space’s scale—matte or satin surfaces read as modern and help hide minor imperfections.
Document your choices in a simple board or list, ensuring every element reinforces the overall vibe and stays within budget.
You’ll gain confidence, consistency, and a space that truly belongs to you.
Clean, Repair, and Prep: Grout, Sealant, and Surfaces
You’ll first assess grout condition and sealant readiness, identifying where renewal or resealing will make the biggest impact.
From there, choose proven grout renewal techniques and surface-prep steps that minimize mess and maximize longevity.
Then implement a clean, methodical process to restore tiles, edges, and seams with durable results.
Grout Renewal Techniques
Grout renewal focuses on cleaning, repairing, and prepping grout, sealant, and surrounding surfaces so your bathroom looks fresh without replacing fixtures. You’ll start with grout cleaning techniques to remove grime and mildew, then assess cracks or missing sections.
For repairs, choose epoxy or cement-based grout patching, matching color and texture to the existing lines for a seamless finish. Prep by scrubbing joints, drying thoroughly, and protecting nearby tiles.
When selecting grout color options, consider lighter shades to brighten, or mid-tones for balance with tile, ensuring uniformity across surfaces.
Seal the grout after repairs to protect against moisture and staining, using a breathable sealant compatible with your grout type. This method keeps your space cohesive, refreshed, and inviting.
Sealant Surface Prep
After cleaning and repairing grout, you’ll prep the surface for sealant by ensuring it’s completely dry, dust-free, and free of soap residues.
For sealant surface prep, focus on a clean, stable base that won’t trap moisture or grime. Inspect corners and edges for hairline damage and repair as needed before sealing.
Remove any leftover cleaner residues with a damp cloth, then air-dry thoroughly.
Lightly abrade glossy areas to improve adhesion, then wipe away dust.
Choose a compatible sealant and apply only after the surface feels dry to the touch.
Use preparation techniques that emphasize a uniform, smooth finish.
Proper prep minimizes peeling, extends seal life, and reinforces a cohesive bathroom look that reinforces belonging and care.
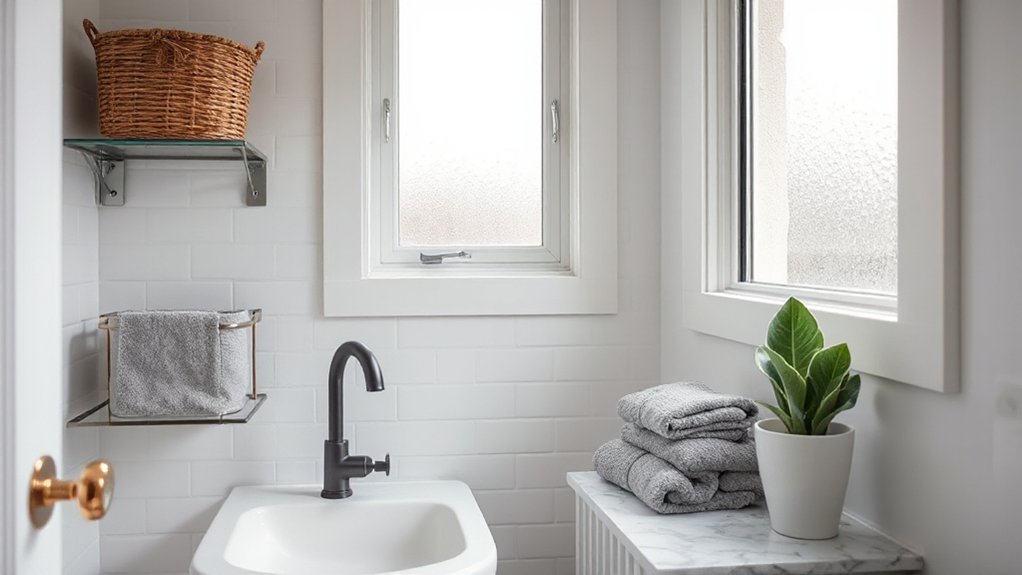
Update Hardware on a Budget: Cabinets, Faucets, and Accessories
Updating the hardware in a bathroom on a budget is a smart, high-impact move. You’ll refresh cabinets, faucets, and accessories without a full remodel, keeping the budget intact while boosting cohesion and feel of belonging.
- Choose universal finishes to mix and match
- Measure mounting points before buying
- Prioritize high-usage pieces for durable hardware
- Use inexpensive update kits for a cohesive look
- Brand-aligned accessories create a unified vibe
Hardware upgrades can unify style without replacing plumbing or cabinets. Focus on metal finishes, drawer pulls, robe hooks, and faucet aerators that align with your existing décor.
Budget friendly fixtures don’t mean cheap; they mean smart choices, lasting updates, and a polished outcome. You’ll gain a refreshed space that reads coordinated, welcoming, and thoughtfully put together.
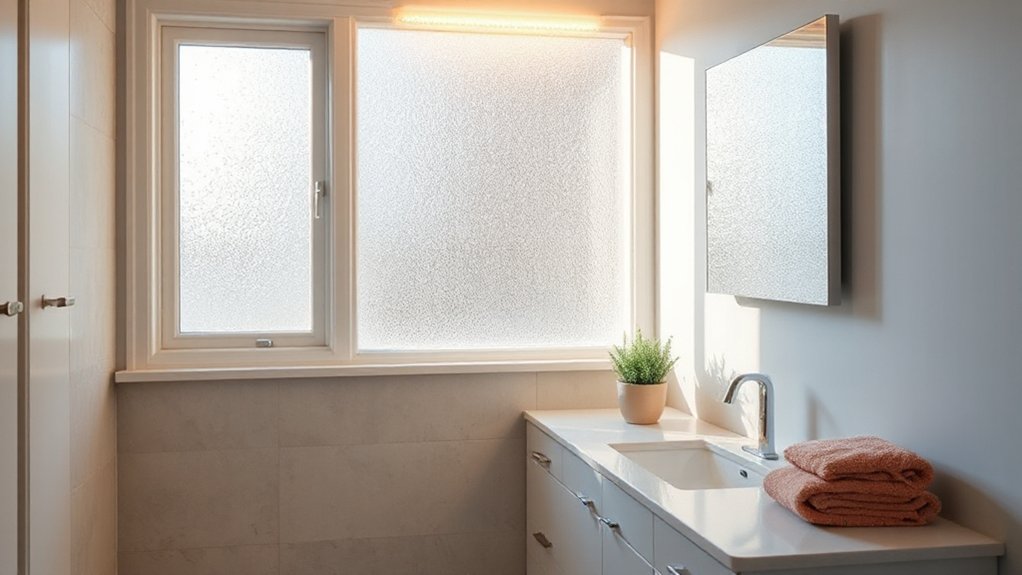
Lighting for Mood and Function: Quick Fixes That Brighten a Room
Lighting isn’t an afterthought when you’ve refreshed hardware on a budget; it ties everything together and sets the mood you want.
You’ll achieve better lighting ambiance by layering light sources: a bright ceiling task light, softer vanity glow, and a couple of adjustable accents. Choose fixtures with dimmable bulbs to adapt for mornings or evenings.
Position lighting to avoid harsh shadows—place task light at eye level by the mirror, and aim ambient light across the room rather than into your eyes. Fixture placement matters: avoid cluttered sightlines, keep cables tucked, and use wall sconces on either side of the mirror for balanced, flattering illumination.
Reassess after a week, tweak intensity, and enjoy a brighter, calmer bathroom.
Clever Storage: Organization Hacks Without Demolition
Hidden storage hacks and wall-shelf organizers let you reclaim counter space without a remodel. Start by selecting slim, wall-mounted shelves and labeled bins to keep detergents and towels reachable but tidy.
Consider hidden corners or over-the-door options to maximize every inch without demolition.
Hidden Storage Hacks
Hidden storage can transform a compact bathroom without a single demo. You’ll uncover smart, accessible options that feel built-in, not gimmicks, so you belong in a space that works with you. Think hidden compartments and sleek storage solutions that keep essentials within reach but out of sight.
- Use dual-purpose furniture to hide daily items without crowding
- Create recessed niches in existing cabinetry for compact odds and ends
- Install magnetic strips or hooks inside cabinet doors for small tools
- Drawer organizers maximize every inch of deep drawers
- Incorporate tiered trays and nested bins to group cosmetics and meds
These moves are practical and intentional, delivering calm, tidy routines. You’ll save time, reduce clutter, and enjoy a bathroom that mirrors your organized, connected lifestyle.
Wall-Shelf Organizers
Group like items by zone—toiletries, towels, and cosmetics—so you can grab what you need fast. Add decorative accents and wall art on surrounding surfaces to soften the metal and wood, creating a cohesive, lived-in feel.
Use baskets or labeled bins for small items, and stage a daily “reset” routine to maintain order. With purposefully placed shelves, you’ll enjoy a cleaner counter, easier access, and a bathroom that feels thoughtfully designed and welcoming.
Mirror and Visual Tricks: Change the Room’s Perception
Mirrors and smart placement can instantly alter a bathroom’s feel, making it appear larger and brighter. You’ll leverage reflections and color cues to shape perception without replacing fixtures. Focus on mirror positioning, light sources, and contrast to guide the eye and boost confidence in the space.
Use mirror illusions to multiply space, and consider subtle color shifts that influence mood and task ease. Your goal is a cohesive, welcoming vibe that invites you to linger.
- Position mirrors opposite windows to double natural light without glare
- Choose frames and surrounds that echo bathroom hardware for unity
- Lean into soft, cool tones to enhance perceived depth
- Use towel bars and hooks as vertical accents for height
- Balance bright surfaces with a single, warm accent color
Flooring and Tile Substitutes for Bathrooms (No Demolition)
Flooring and tile substitutes can refresh a bathroom without major demolition or upheaval. You can switch looks with minimal downtime, selecting options that pair well with existing fixtures. Start by evaluating your current substrate and moisture exposure, then choose products designed for wet spaces.
Eco friendly alternatives include recycled-content vinyl, cork, and porcelain-look laminates that resist water while staying durable. If you want a bold statement, consider Artistic tile options—numerous sizes, patterns, and finishes that create cohesion with your walls and vanity.
Peel-and-stick tiles provide reversible updates, while decorative vinyl planks offer warmth underfoot. For grout lines, choose low-maintenance, stain-resistant selections and seal where required.
Prioritize non-slip textures and color schemes that foster a welcoming, cohesive bathroom you’ll love returning to.
Soft Furnishings and Textures: Towels, Rugs, and Accessories

Soft furnishings can transform a bathroom without costly renovations. You’ll feel instantly cohesive when you choose towels, rugs, and accessories that share textile textures and decorative accents.
Prioritize high-quality cottons or blends that stay soft wash after wash, and match stack heights with rug placement for visual balance.
Layer textures—smooth towels with a looped bath mat, a woven basket, and a fabric shower curtain—to add depth without clutter.
Opt for a cohesive color story to create a sense of belonging and calm. Subtle metallic or matte accents can elevate the space without mechanical changes.
- Choose a unifying palette to bind textiles and metal accents
- Mix textures for tactile richness
- Match towel and rug heights for rhythm
- Introduce decorative accents with purpose
- Prioritize durability and easy care
Preserve and Protect: Waterproofing and Maintenance Tips
Waterproofing and ongoing maintenance protect your refreshed bath from water damage and wear. You’ll keep surfaces durable by sealing joints, grout lines, and connections with quality products, then inspecting them regularly.
Embrace waterproofing essentials like proper underlayment, vapor barriers, and caulk that stays flexible over time.
Establish simple maintenance routines: wipe down damp areas, re-seal high-traffic zones as needed, and replace worn seals before leaks appear.
Plan monthly checks for caulk integrity and grout cleanliness, then address issues promptly to prevent bigger repairs.
Store care tips in a small, visible checklist so everyone knows the routine.
With consistent upkeep, you preserve the bath’s look and function, reinforcing a sense of belonging and pride in your refreshed space.
Weekend Projects With Big Payoff and Final Checks
Weekend projects deliver big payoffs when you target high-impact tweaks that spark a refreshed feel without a full remodel. You’ll gain momentum by choosing practical tasks that others notice, then you’ll finish with confidence after final checks.
Focus on bathroom ventilation and mold prevention to protect your space while enhancing comfort and air quality. Stay organized, measure twice, and test results to guarantee lasting results. These small, deliberate actions create a sense of belonging as you lead your home’s upkeep with care and precision.
- Improve bathroom ventilation with a properly sized exhaust fan and clear ducting
- Seal gaps around doors and windows to reduce humidity leaks
- Clean and replace caulk to prevent mold-friendly leaks
- Refinish a dated vanity with a quick, durable coat
- Schedule a final check for moisture hotspots and airflow balance
Frequently Asked Questions
Can Paint Damage Bond With Existing Tile or Fixtures?
Yes, paint can adhere to tile or fixtures, but bond depends on proper prep and compatibility. Start by cleaning and sanding surfaces, then use a high-adhesion primer and a paint formulated for bathrooms.
Check fixture compatibility with the chosen paint and apply a sealant over high-moisture areas. Make certain ventilation and cure times are respected.
With careful steps, you’ll gain solid Paint adhesion and durable results that feel like a cohesive, belonging-focused upgrade.
How Can I Refresh Grout Without Regrouting Entirely?
You can refresh grout without regrouting by focusing on grout cleaning and color sealing. Start with a thorough grout cleaning to remove mold, mildew, and grime.
Then apply a color seal to restore uniformity and protect against future staining. For best results, choose a color that matches your tile or contrasts subtly for a refreshed look.
Maintain with regular cleaning, and reapply color seal every few years as needed. You’ll feel the space instantly brighter and more cohesive.
Can Wallpaper Be Bathroom-Safe and Moisture-Resistant?
Can wallpaper be bathroom-safe and moisture-resistant? Yes, if you choose purpose-built options. Look for vinyl or solid-core wallpapers with rated moisture resistance, and apply with moisture-resistant coatings or sealing primers.
Wallpaper durability improves when you use a vinyl-coated surface and tile-friendly cementitious primers. Use moisture resistant coatings on seams and edges. This helps you feel you belong, knowing your stylish space stands up to humidity without compromising performance.
Are Peel-And-Stick Floor Options Durable in Bathrooms?
Peel-and-stick floor options can be durable in bathrooms if you choose high-quality products and prep correctly.
For reliable peel and stick durability, guarantee smooth, dry surfaces, use a primer if recommended, and seal edges with matching caulk.
Look for moisture-rated vinyl or laminate options designed for bathrooms.
This choice fits you if you want a budget-friendly update that feels cohesive with the rest of your space, offering practical, easy maintenance and confident bathroom floor options.
What Budget-Friendly Moisture Barriers Protect New Finishes?
You should use moisture resistant paint and affordable sealing solutions to protect new finishes.
For a practical barrier, apply a quality primer, then two coats of moisture resistant paint on walls, plus a waterproof sealant on seams and corners.
Add affordable caulking around fixtures and baseboards.
Maintain by checking for gaps quarterly and re-sealing when needed.
This approach helps you feel secure and part of a smart, budget-conscious community.
Conclusion
You’ll finish a bathroom makeover in a weekend and swear nothing changed at all—until you step back and notice the gleam, the grout that actually repelled grime, and the plush towels you swore you’d skip. It’s amazing how a few smart upgrades can fool the eye into thinking you hired a pro. So yes, you did it yourself, and yes, the DIY budget somehow looks like a showroom. Congratulations—don’t tell anyone how easy it was.